Torsion Bar Adjustment

Getting a more personalized or stock look with a Torsion Bar Adjustment

One of the unique features of a classic Mopar is the front torsion bar used in place of the commonly used coil spring front suspension. The torsion bars have an adjuster which allows control of the front end ride height without replacing any parts.

In the past, on my first Challenger (1971), I needed to increase  my tire clearance when I changed from the stock 70 series tires on skinny 14 inch wheels to F-60’s on 15×10 inch mags.

Check out the size of those mags and tires on my first car. No doubt needed to crank up that fender clearance! Taken in 1981 by my friend Mike Avery in San Diego, while we were in the Navy,

Check out the size of those mags and tires on my first car. No doubt needed to crank up that fender clearance! Taken in 1981 by my friend Mike Avery in San Diego, while we were in the Navy,

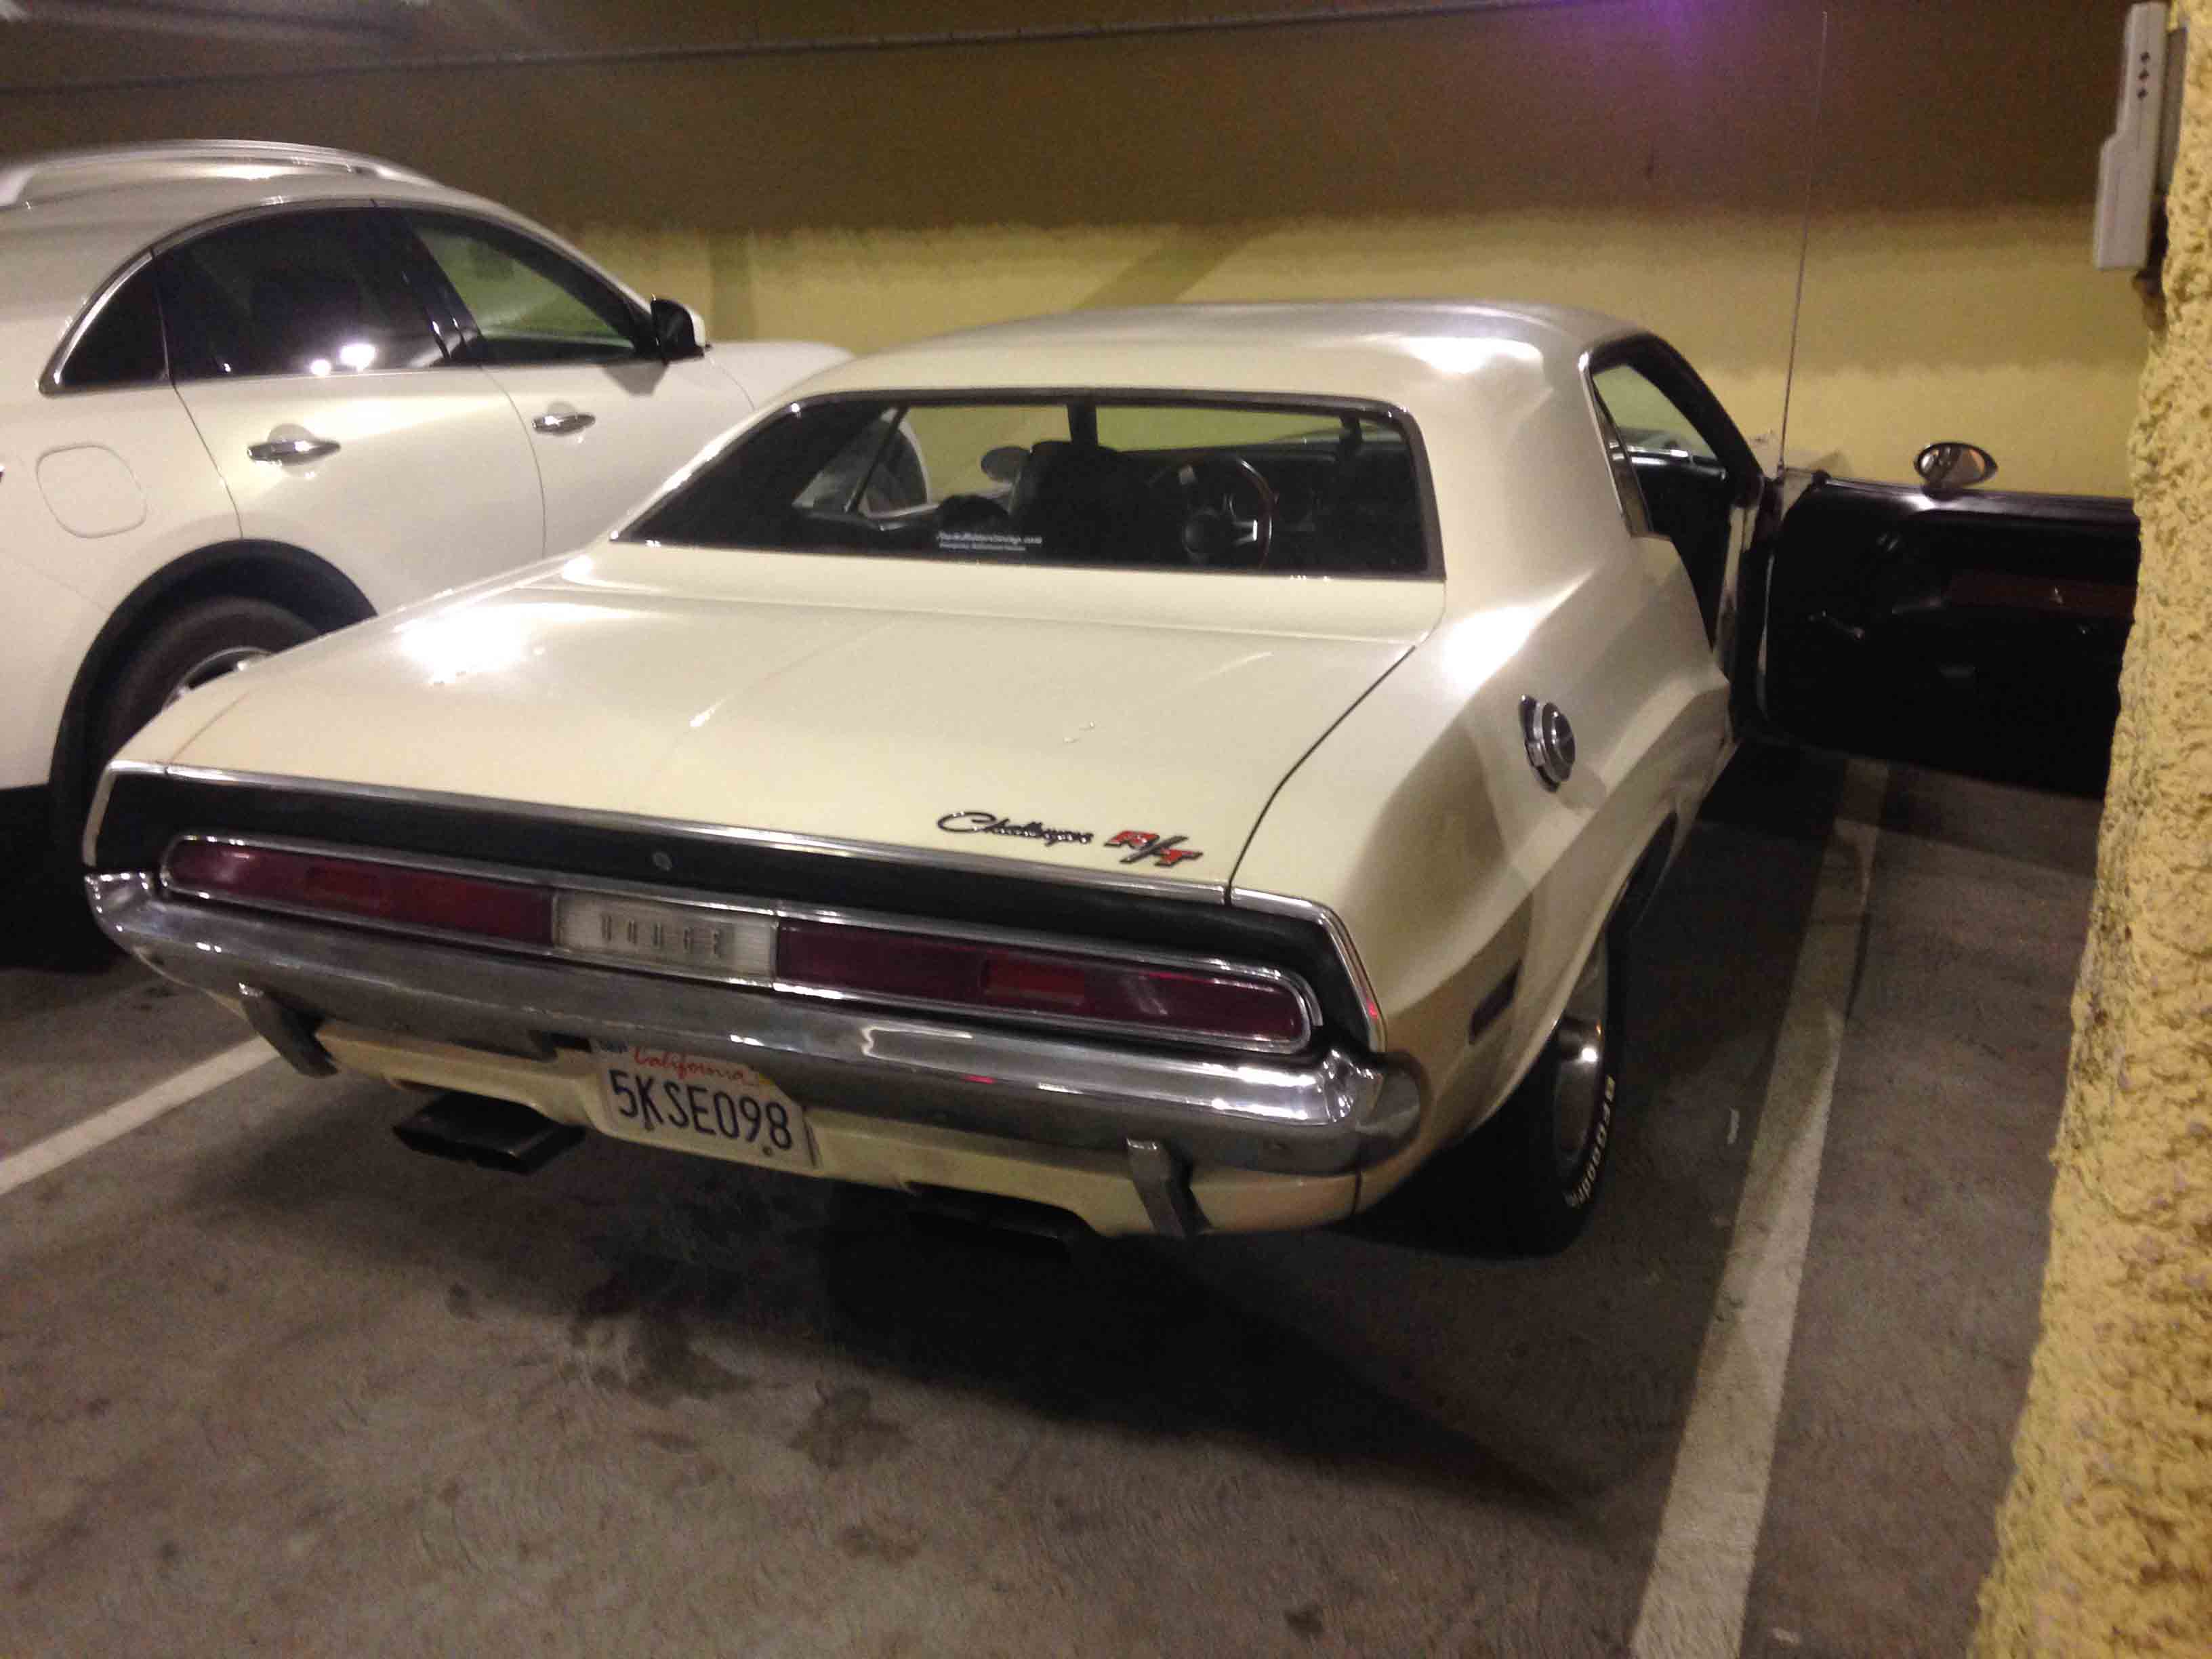
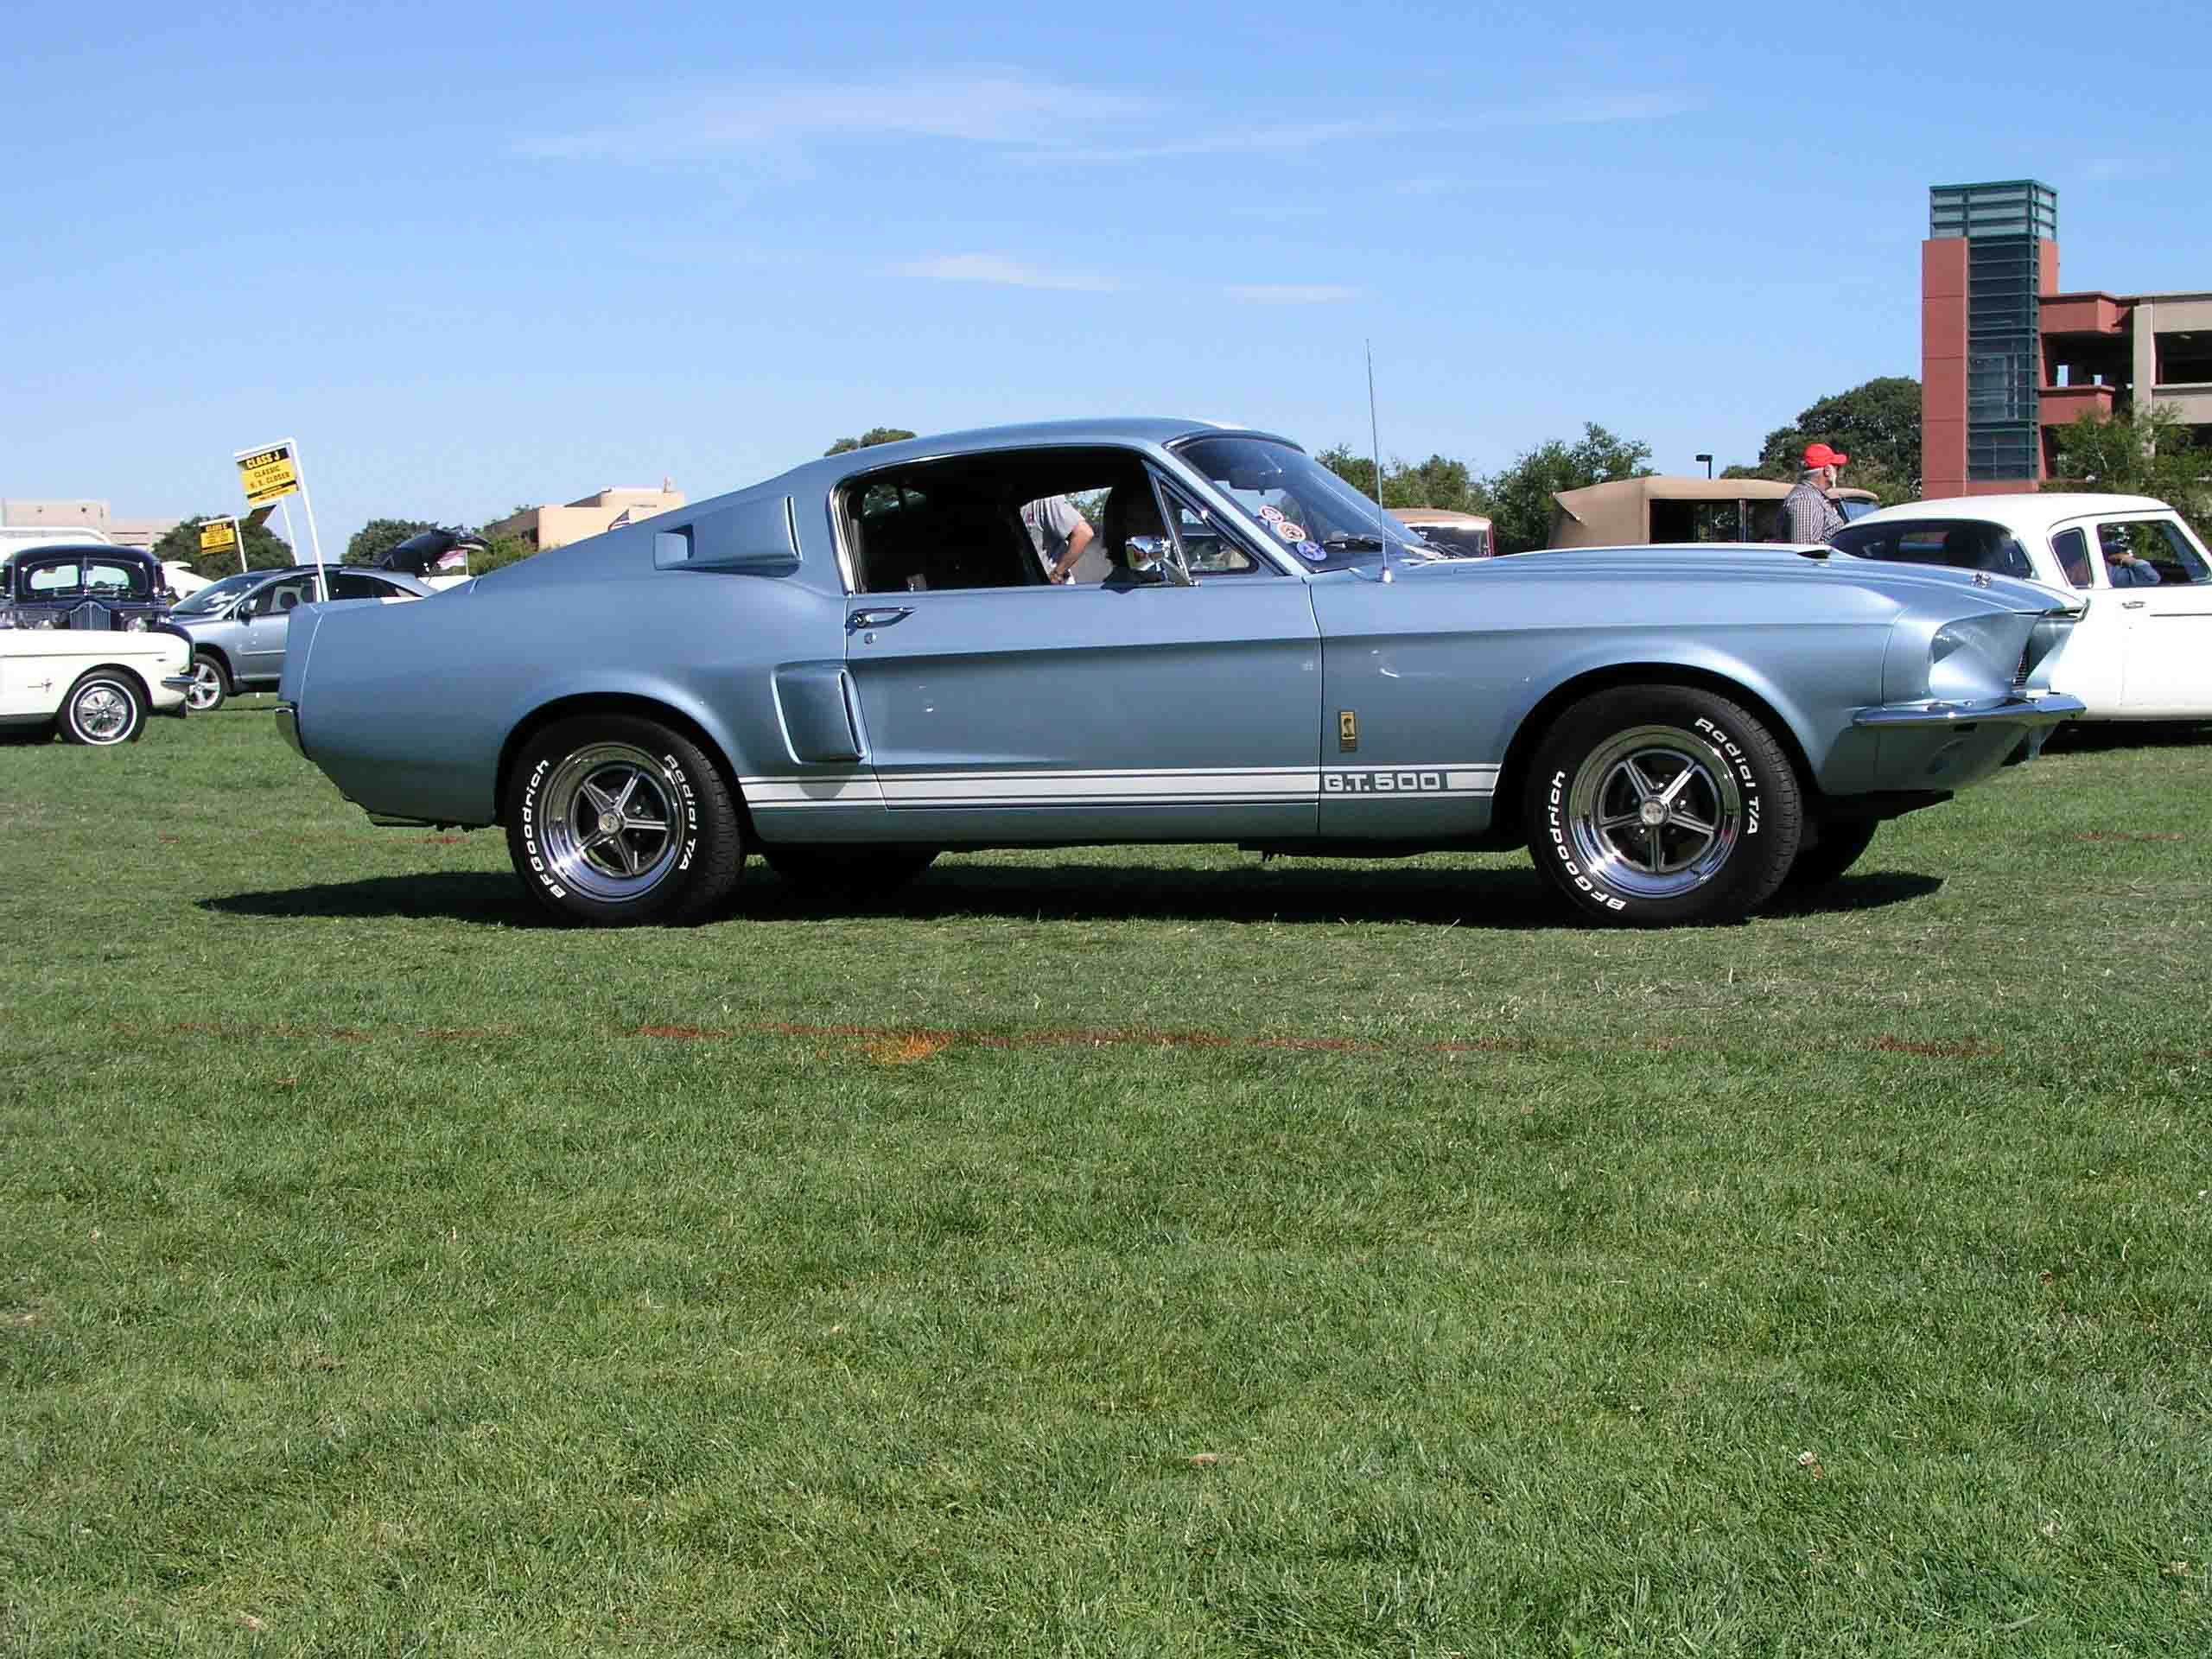
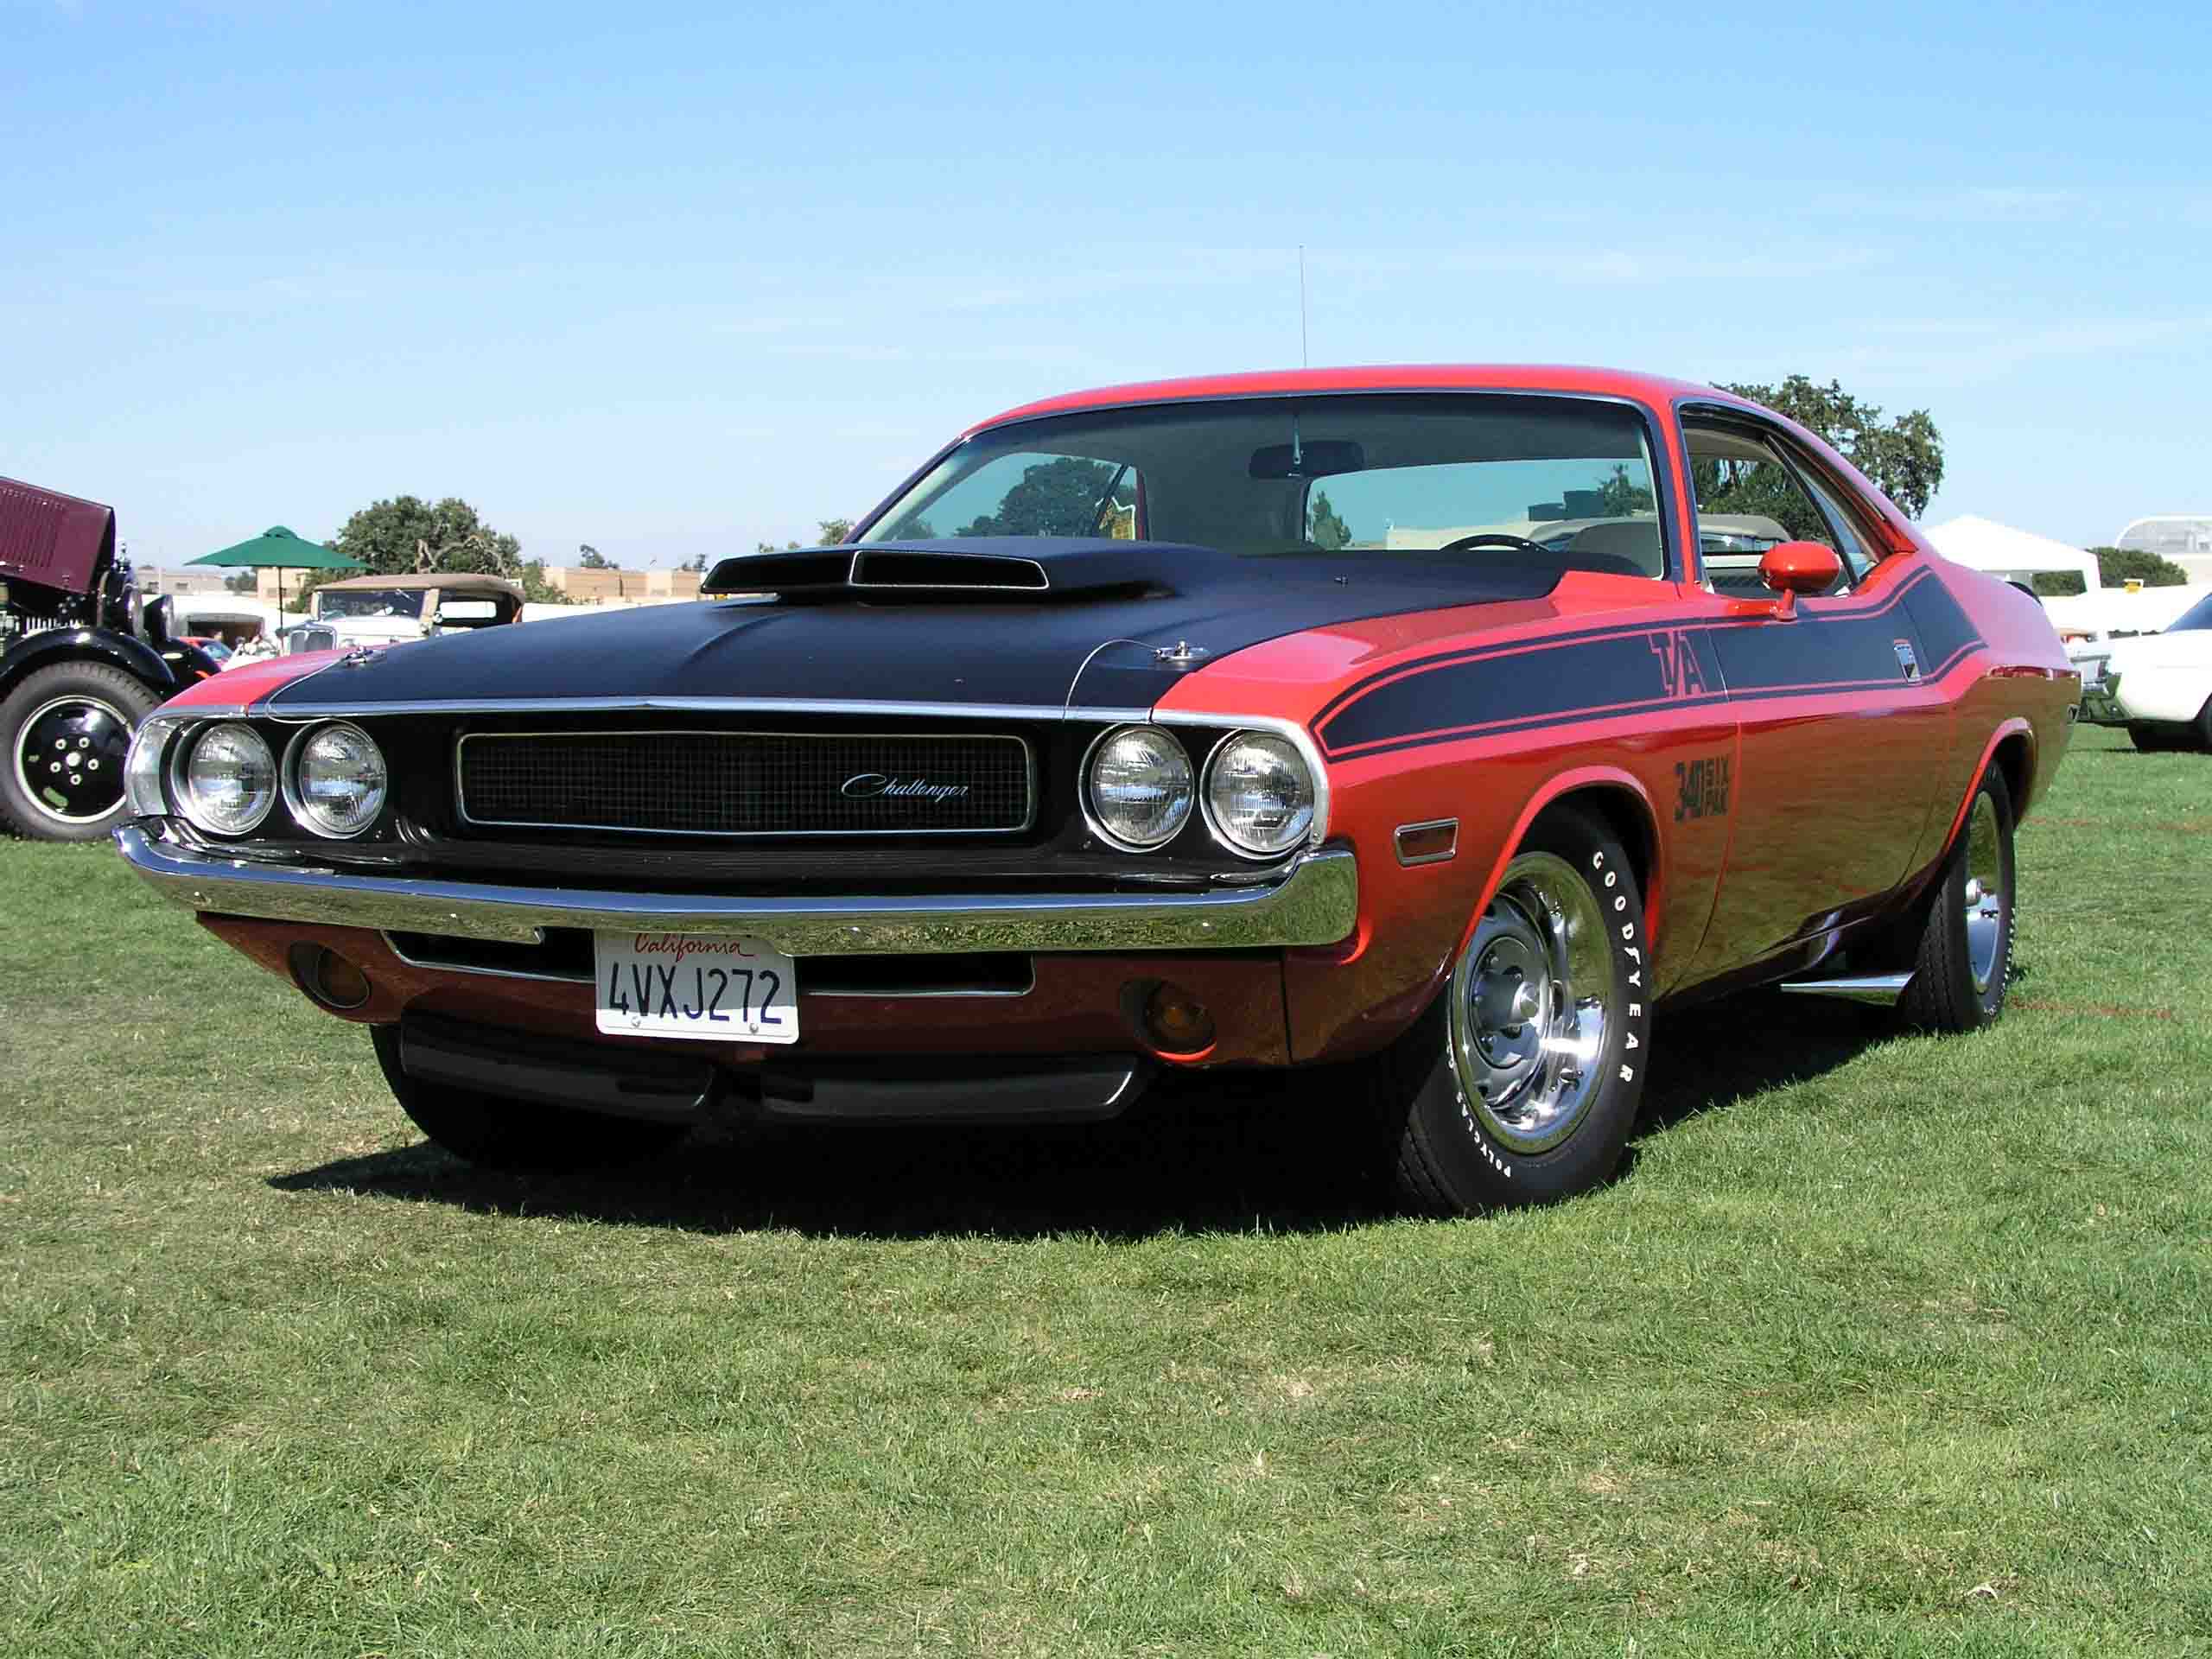
Today, I want to increase the front end height, not for tire clearance problems, but to change the appearance of 1970 Challenger to appear more stock.

Before I changed my suspension, the car rode about two inches lower, due to worn leaf springs. After I changed to “stock height” HD rear leaves from Firm Feel, the rear end rode higher than I expected. Replacing the front torsion bars increased the front end height (about 3 1/2 inches) but that was easily adjustable.

My initial desire was to keep the same front end height as before the suspension work, but the previous ride height was way too low for the new rear springs and the car looked “jacked up”.  At the suspension shop, we raised the height and kept a slight rake on the car although the guys at the shop thought it looked better leveled out…

Alternately, in the 1970’s a lot of guys raised the front ends high to give their Mopars a bit of that “Super Stock” look.

After driving the car for almost a year, I think giving the car a more decided “level-look” rather than a “slightly raked” look matches what I want out of the appearance, so I wanted to raise the front end to emphasize more of a showroom look than modified look.

Making the Adjustment

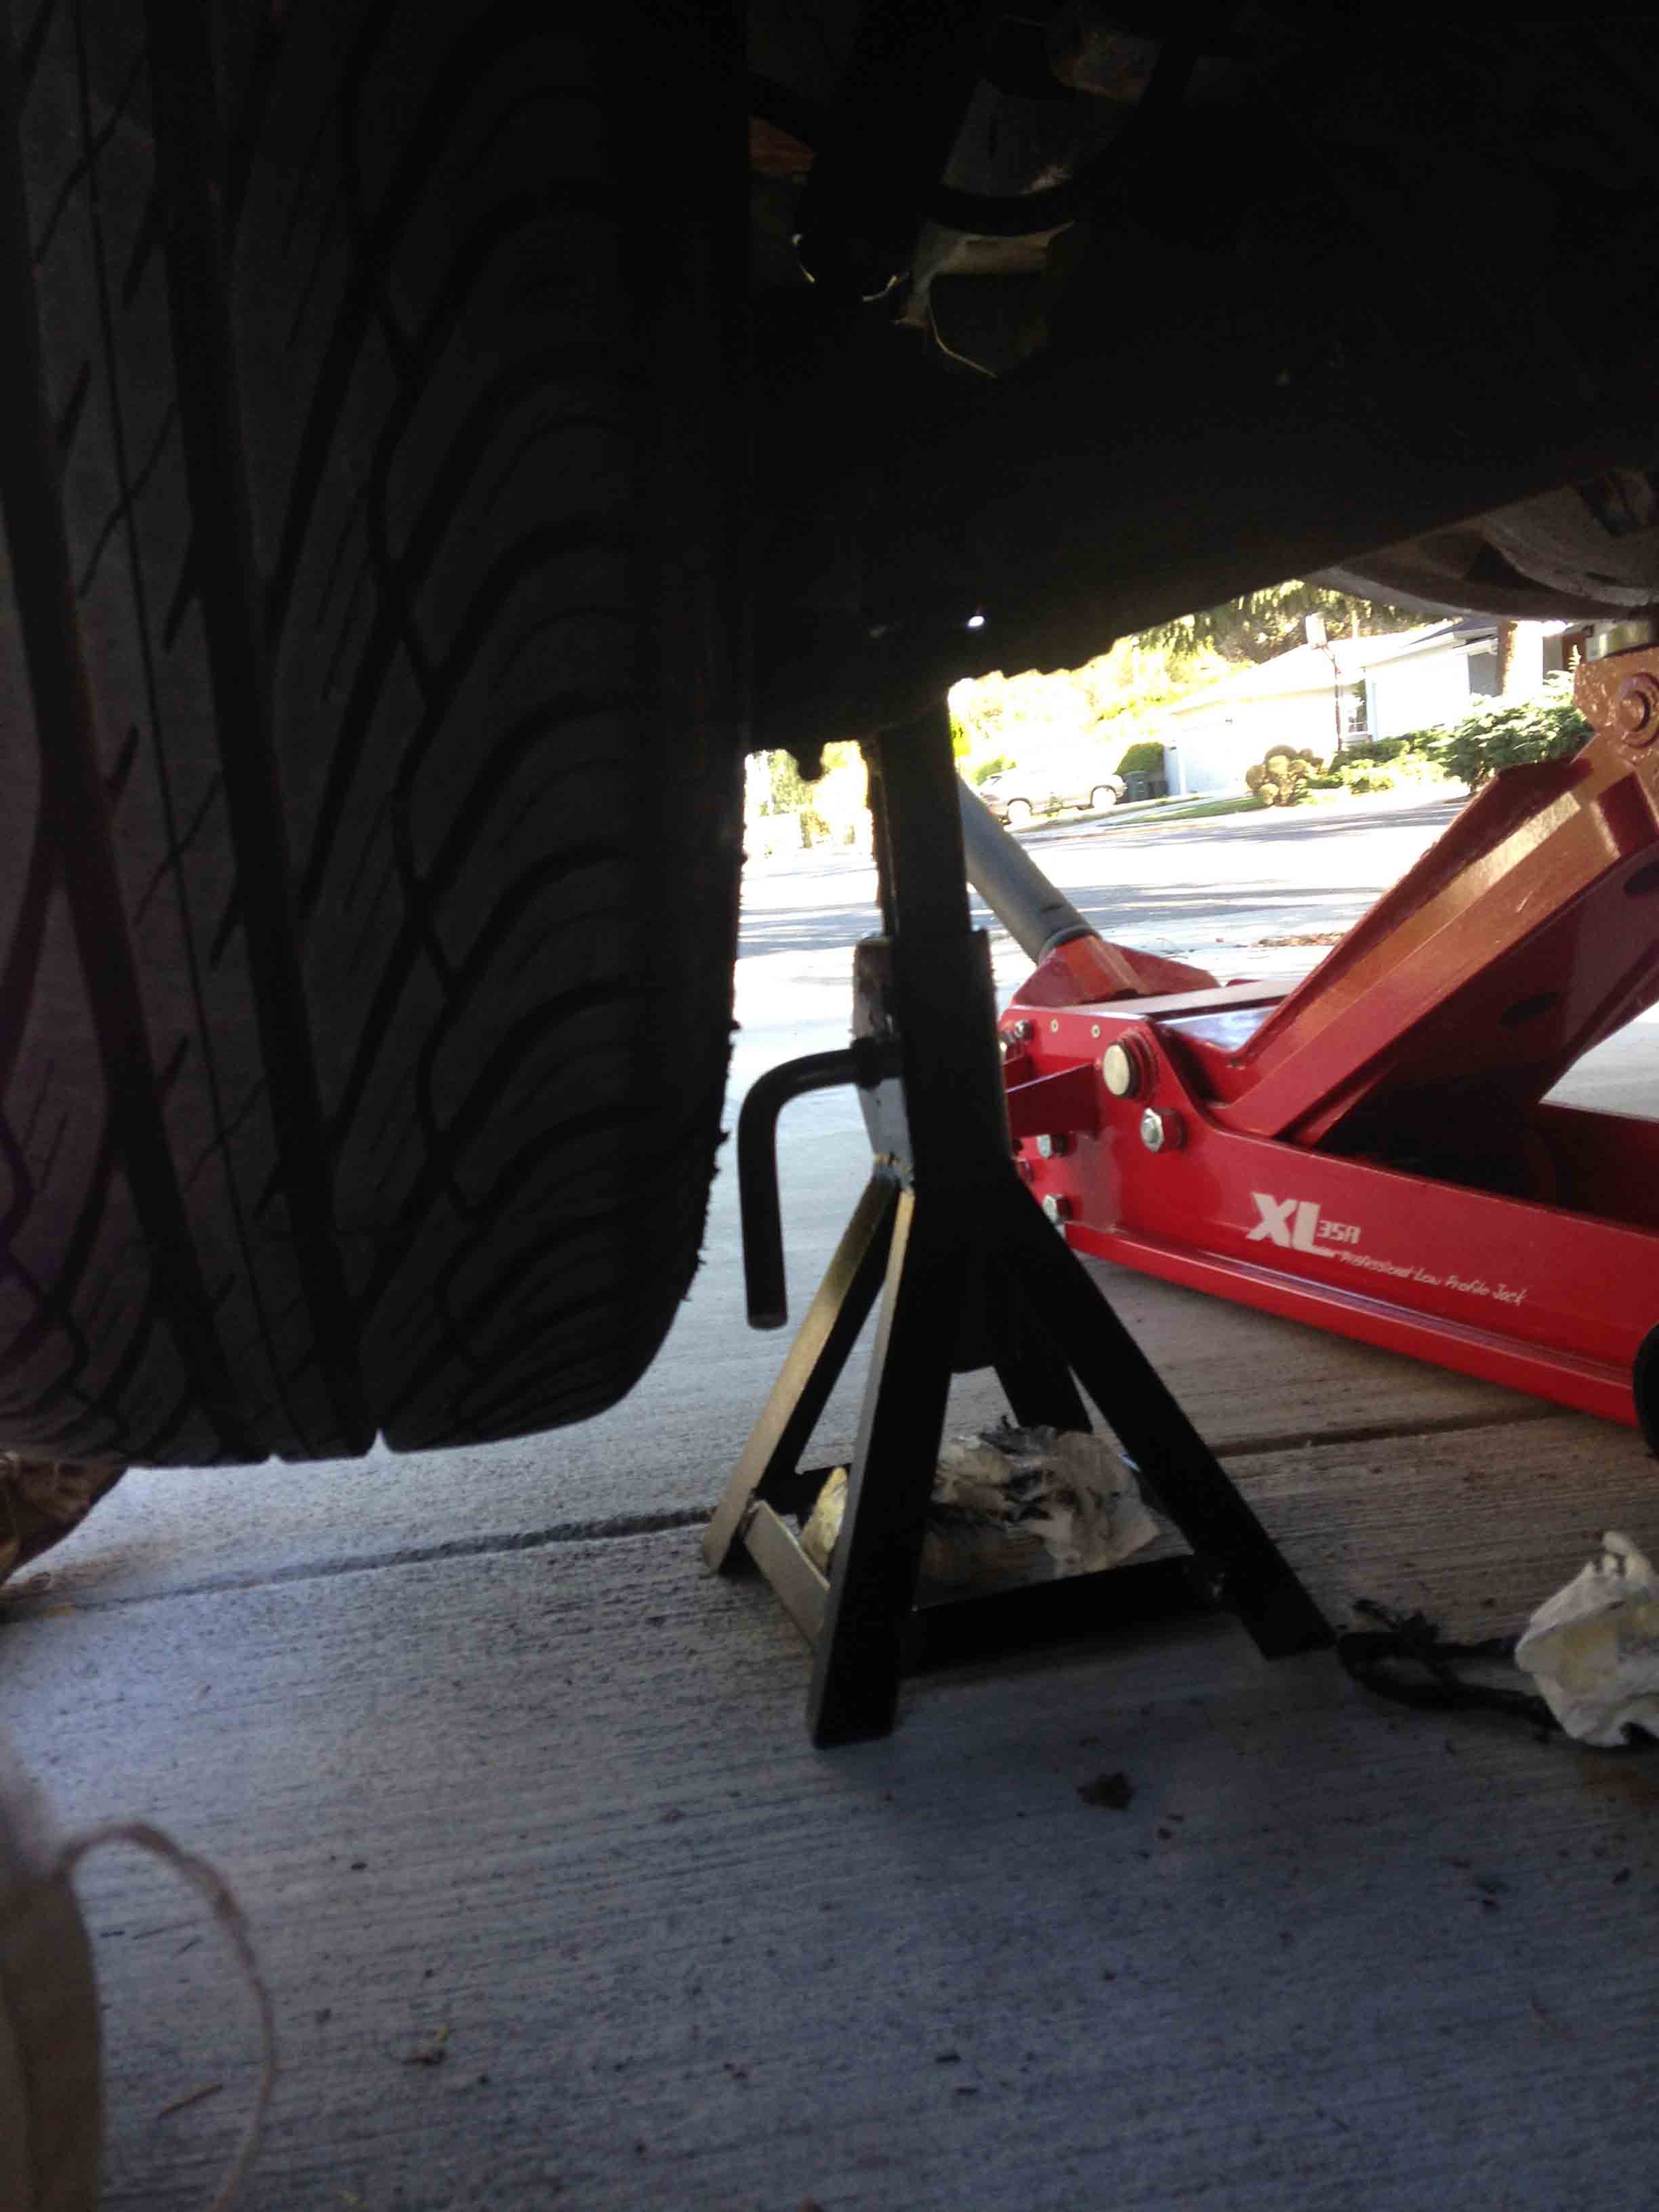
In order to do this, I decided to do it manually, meaning no power assisted tools. I first used my non-ratcheting breaker bar, but figured out it would take too long when I could only get about an 1/8 of a turn per pull with the car on the ground. I ordered a long handled ratchet to get the job job.

I looked on-line and found a nice black-parkerized Proto 16-inch ratchet, the same length of my breaker bar, and it gives me adequate leverage to pull on the adjuster screw while laying on the ground. If using a standard depth 3/4 inch socket, it’s helpful to use a short extension to both clear any undercarriage obstruction and allow ground clearance for the swing of the ratchet handle.

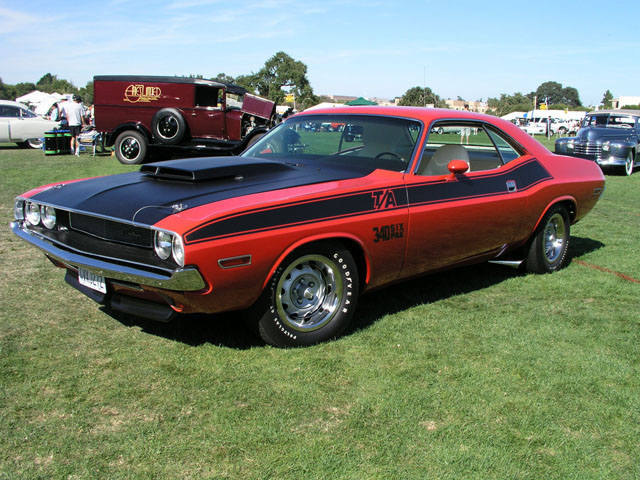
Before the adjustment, the distance from the ground to the apex of the froth wheel well (using the center of the wheel cap for a reference) was 24 inches (BTW, I am running 235/60/15 BFG’s, the equivalent to the old F-60’s which was the largest option sized tire for the E-bodies, only the T/A model had the larger G-60 on the rear).

After approximately 5 complete turns of the adjuster in a clock-wise, or tightening direction,  increased the height by approximately 3/4 inch. I did this pulling on the ratchet about an 1/8 of a turn at a time x 40 pulls.

tb3

A standard 3/4 inch half inch drive socket with a short  extension (not shown) would work well to help clear the lower control arm, under-carriage, and allow ground clearance when adjusting the torsion bar. Photo taken on my non-ratcheting 16 inch breaker bar.

tb1

If you don’t have an air driven power tool and your Mopar on a rack, you’ll need at least a 16 inch breaker bar/ratchet like this one to have enough leverage to make it reasonably easy to turn the torsion bar adjuster. A 10 inch long ratchet could work if you are Arnold Schwarzeneggar in his prime.

The one I used I bought myself for a Christmas gift, a Proto 5350BL. All the reviews suggest this is a quality tool that will not strip out on you when you on a high torque situation, like when you need a breaker bar. A torsion bar adjuster is not extremely hard to turn but I hate cheap tools.

The one I used I bought myself for a Christmas gift, a Made in the USA Proto 5450BL. All the reviews suggest this is a quality tool that will not strip out on you when you on a high torque situation, like when you need a breaker bar. A torsion bar adjuster is not extremely hard to turn but I hate cheap tools.

Here's the general area under the passenger side lower control arm. Notice the lower control arm is braced with a piece of sheet metal from FirmFeel. This stiffener plate is recommended for heavy duty front sway bars to reduce the stock lower control arms from twisting into mush with hot cornering.

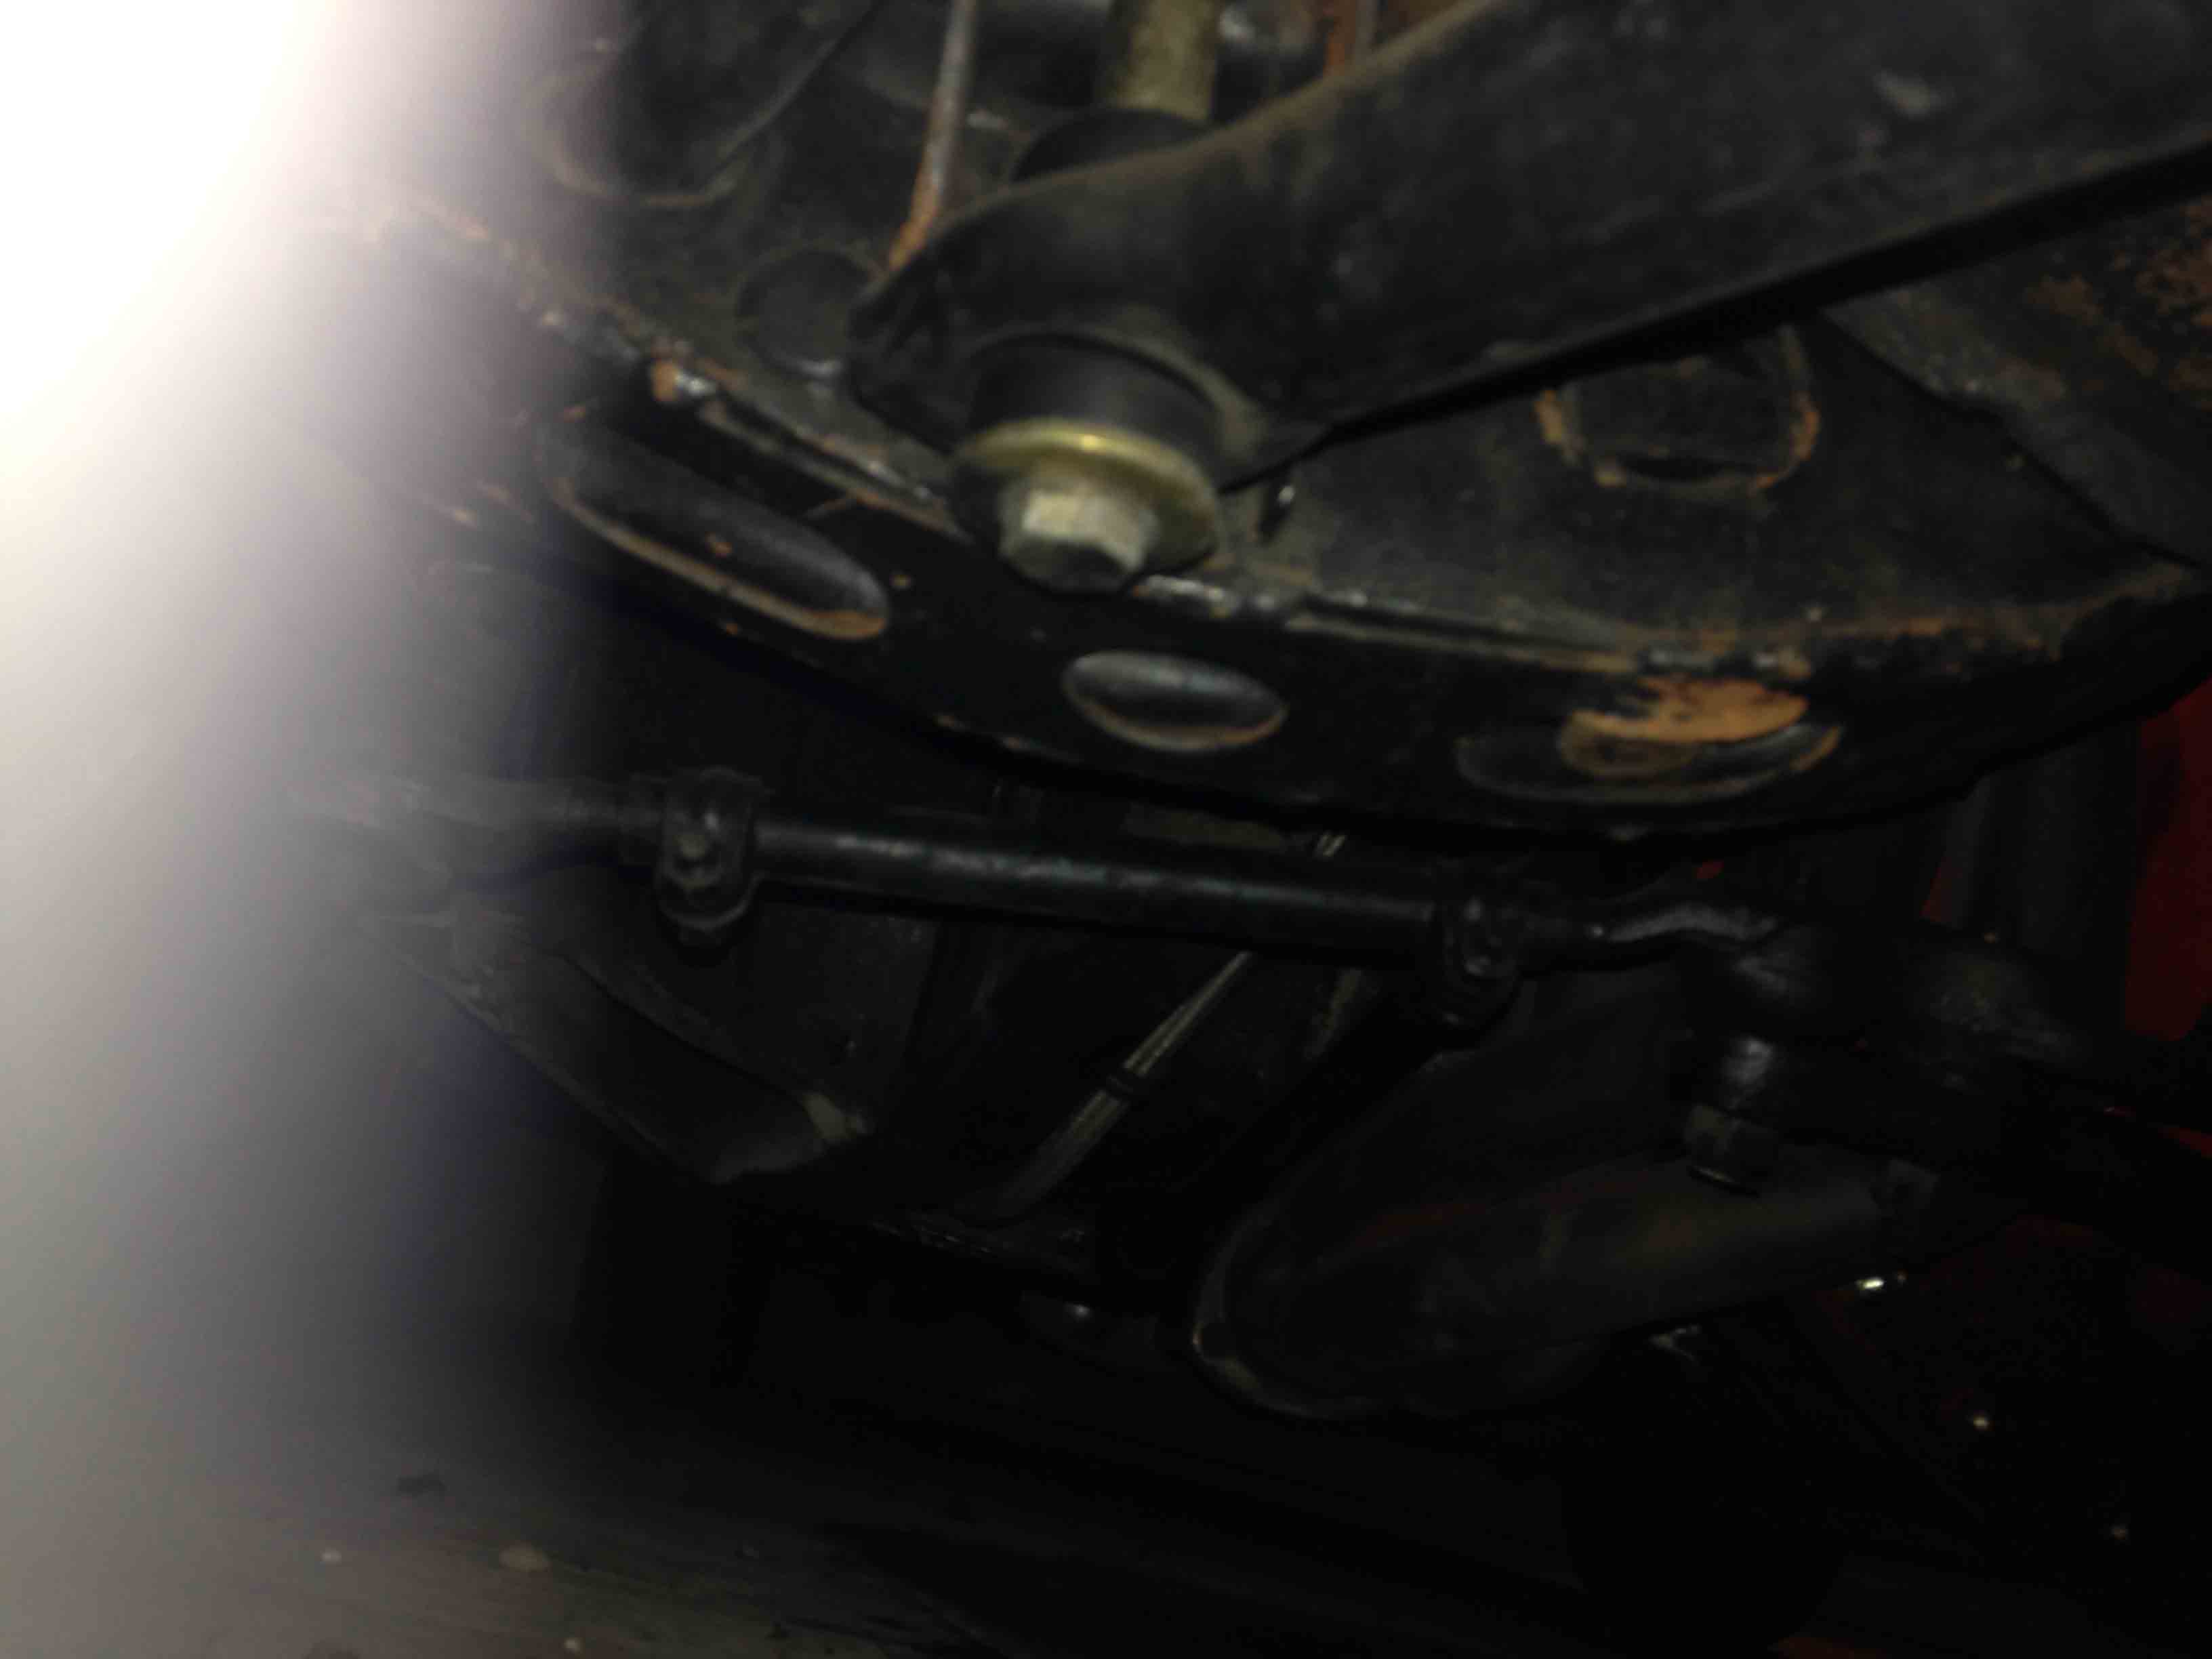
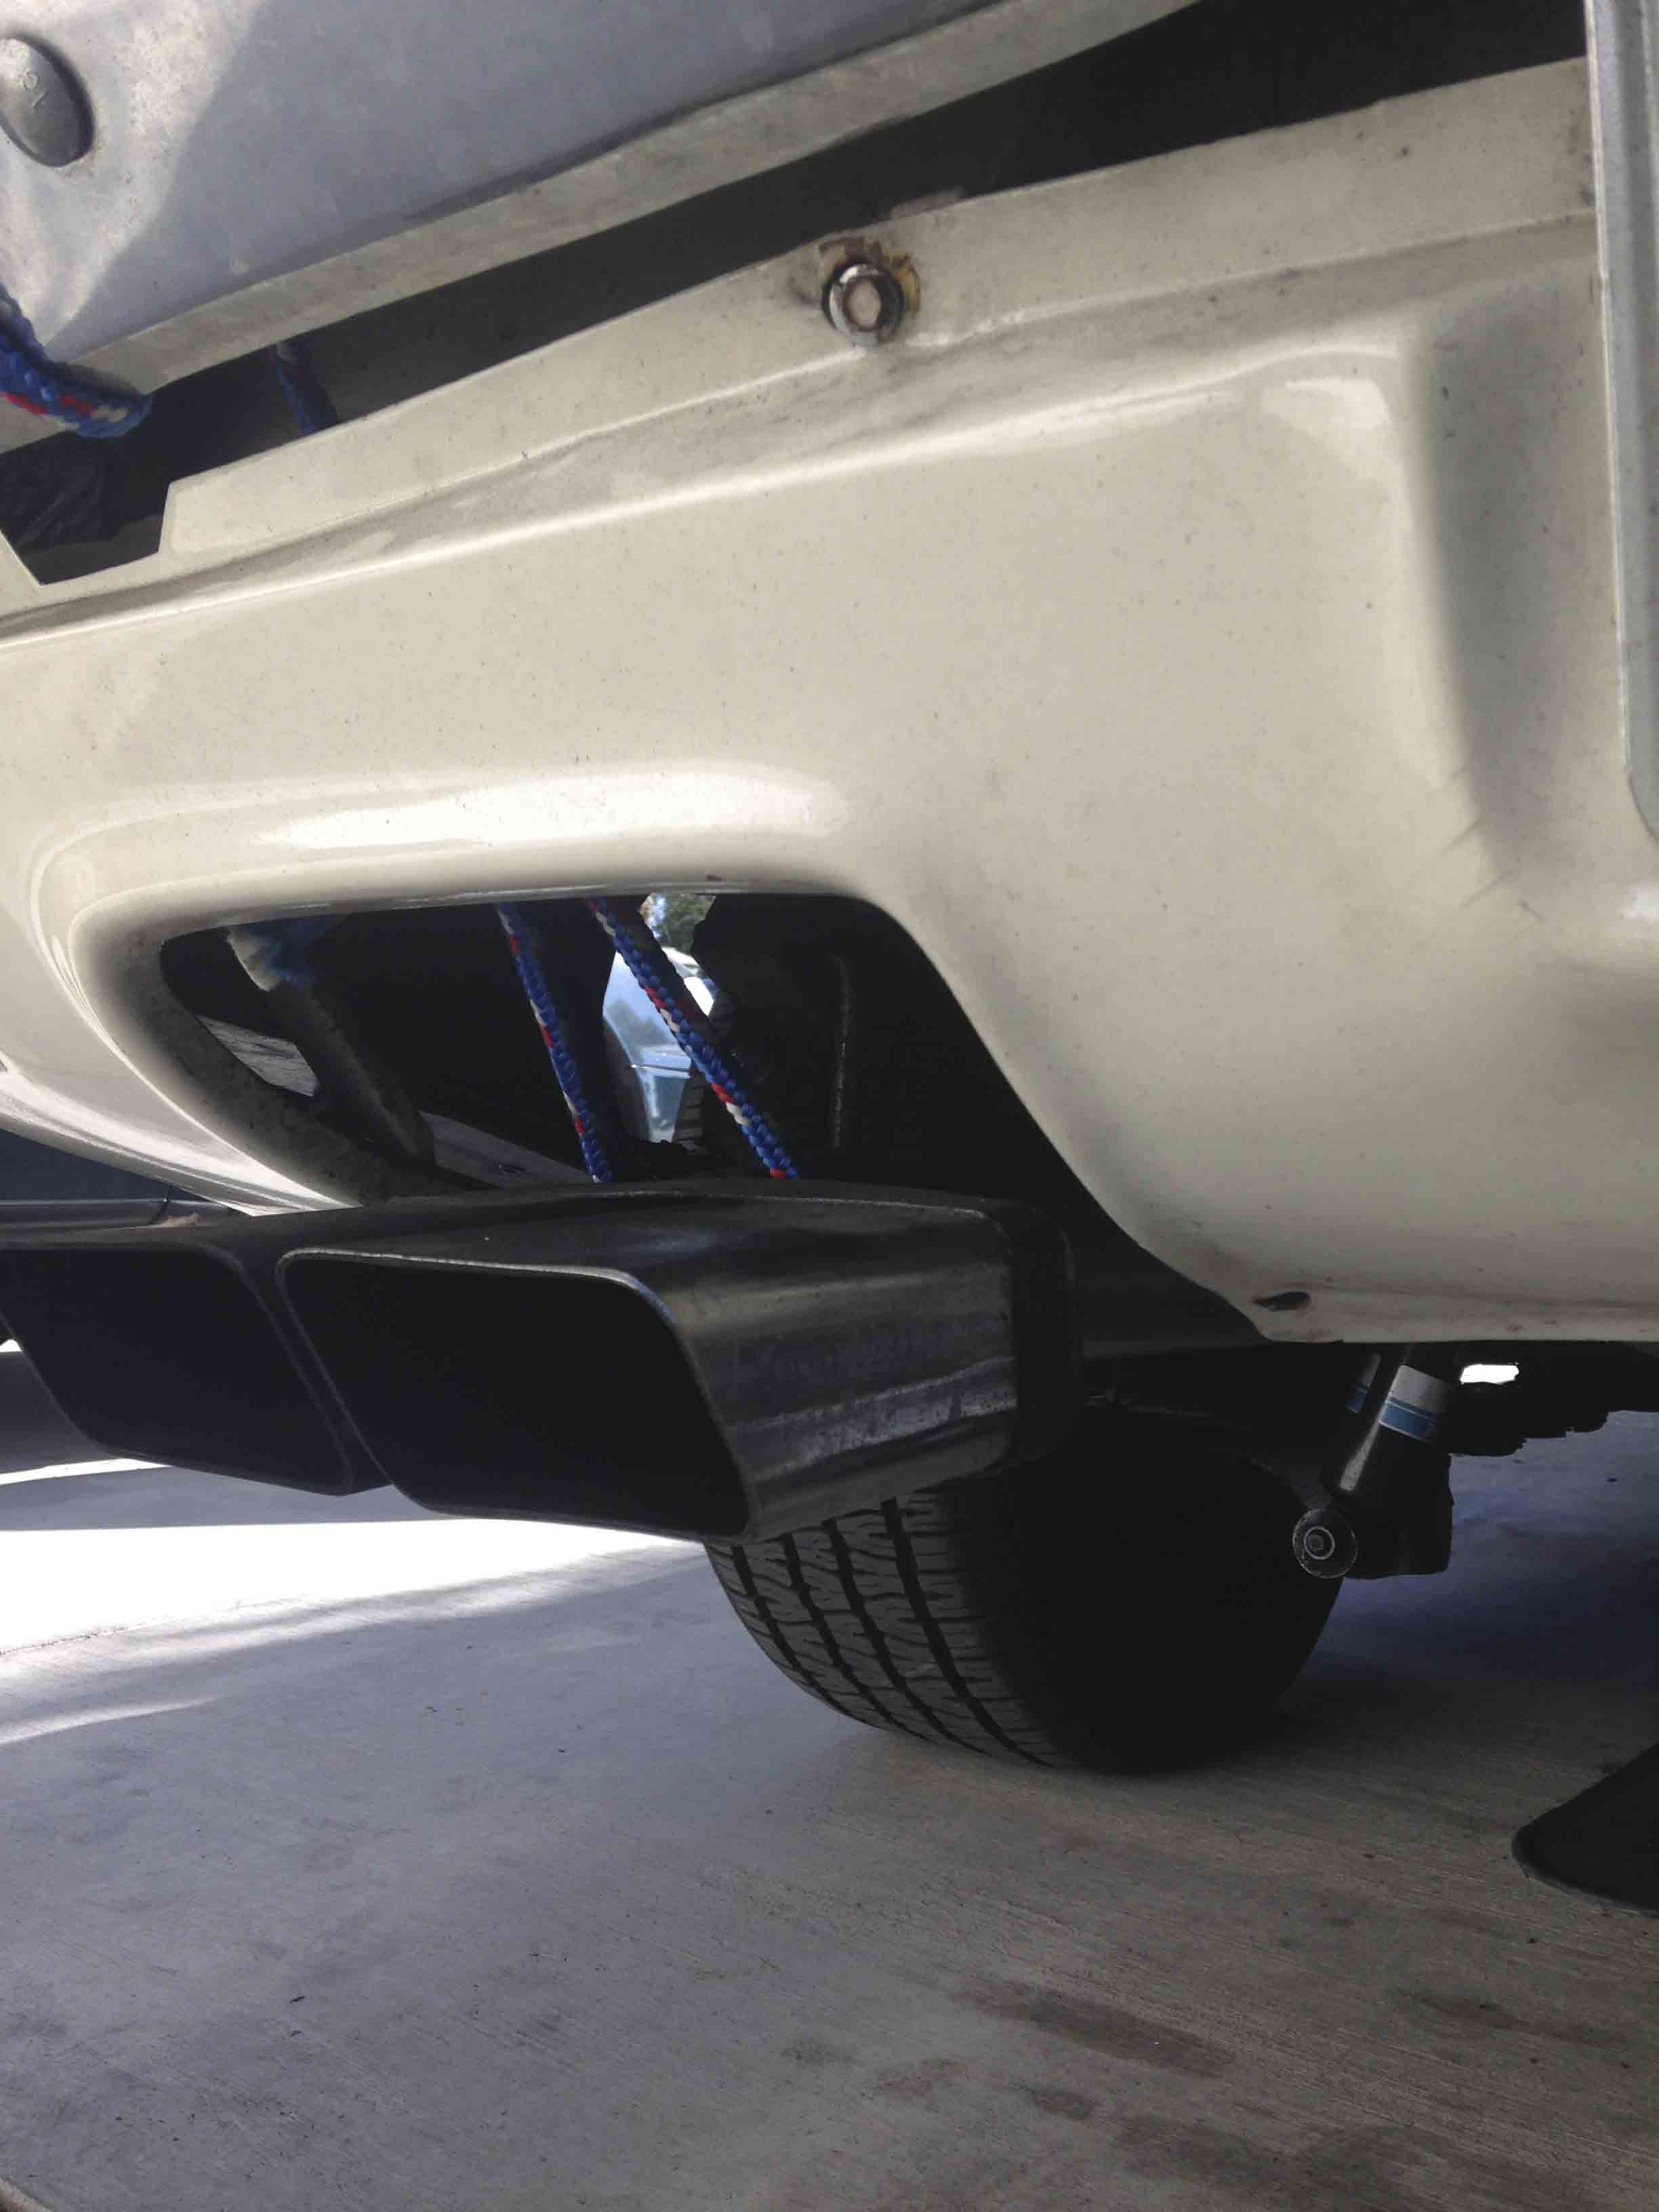
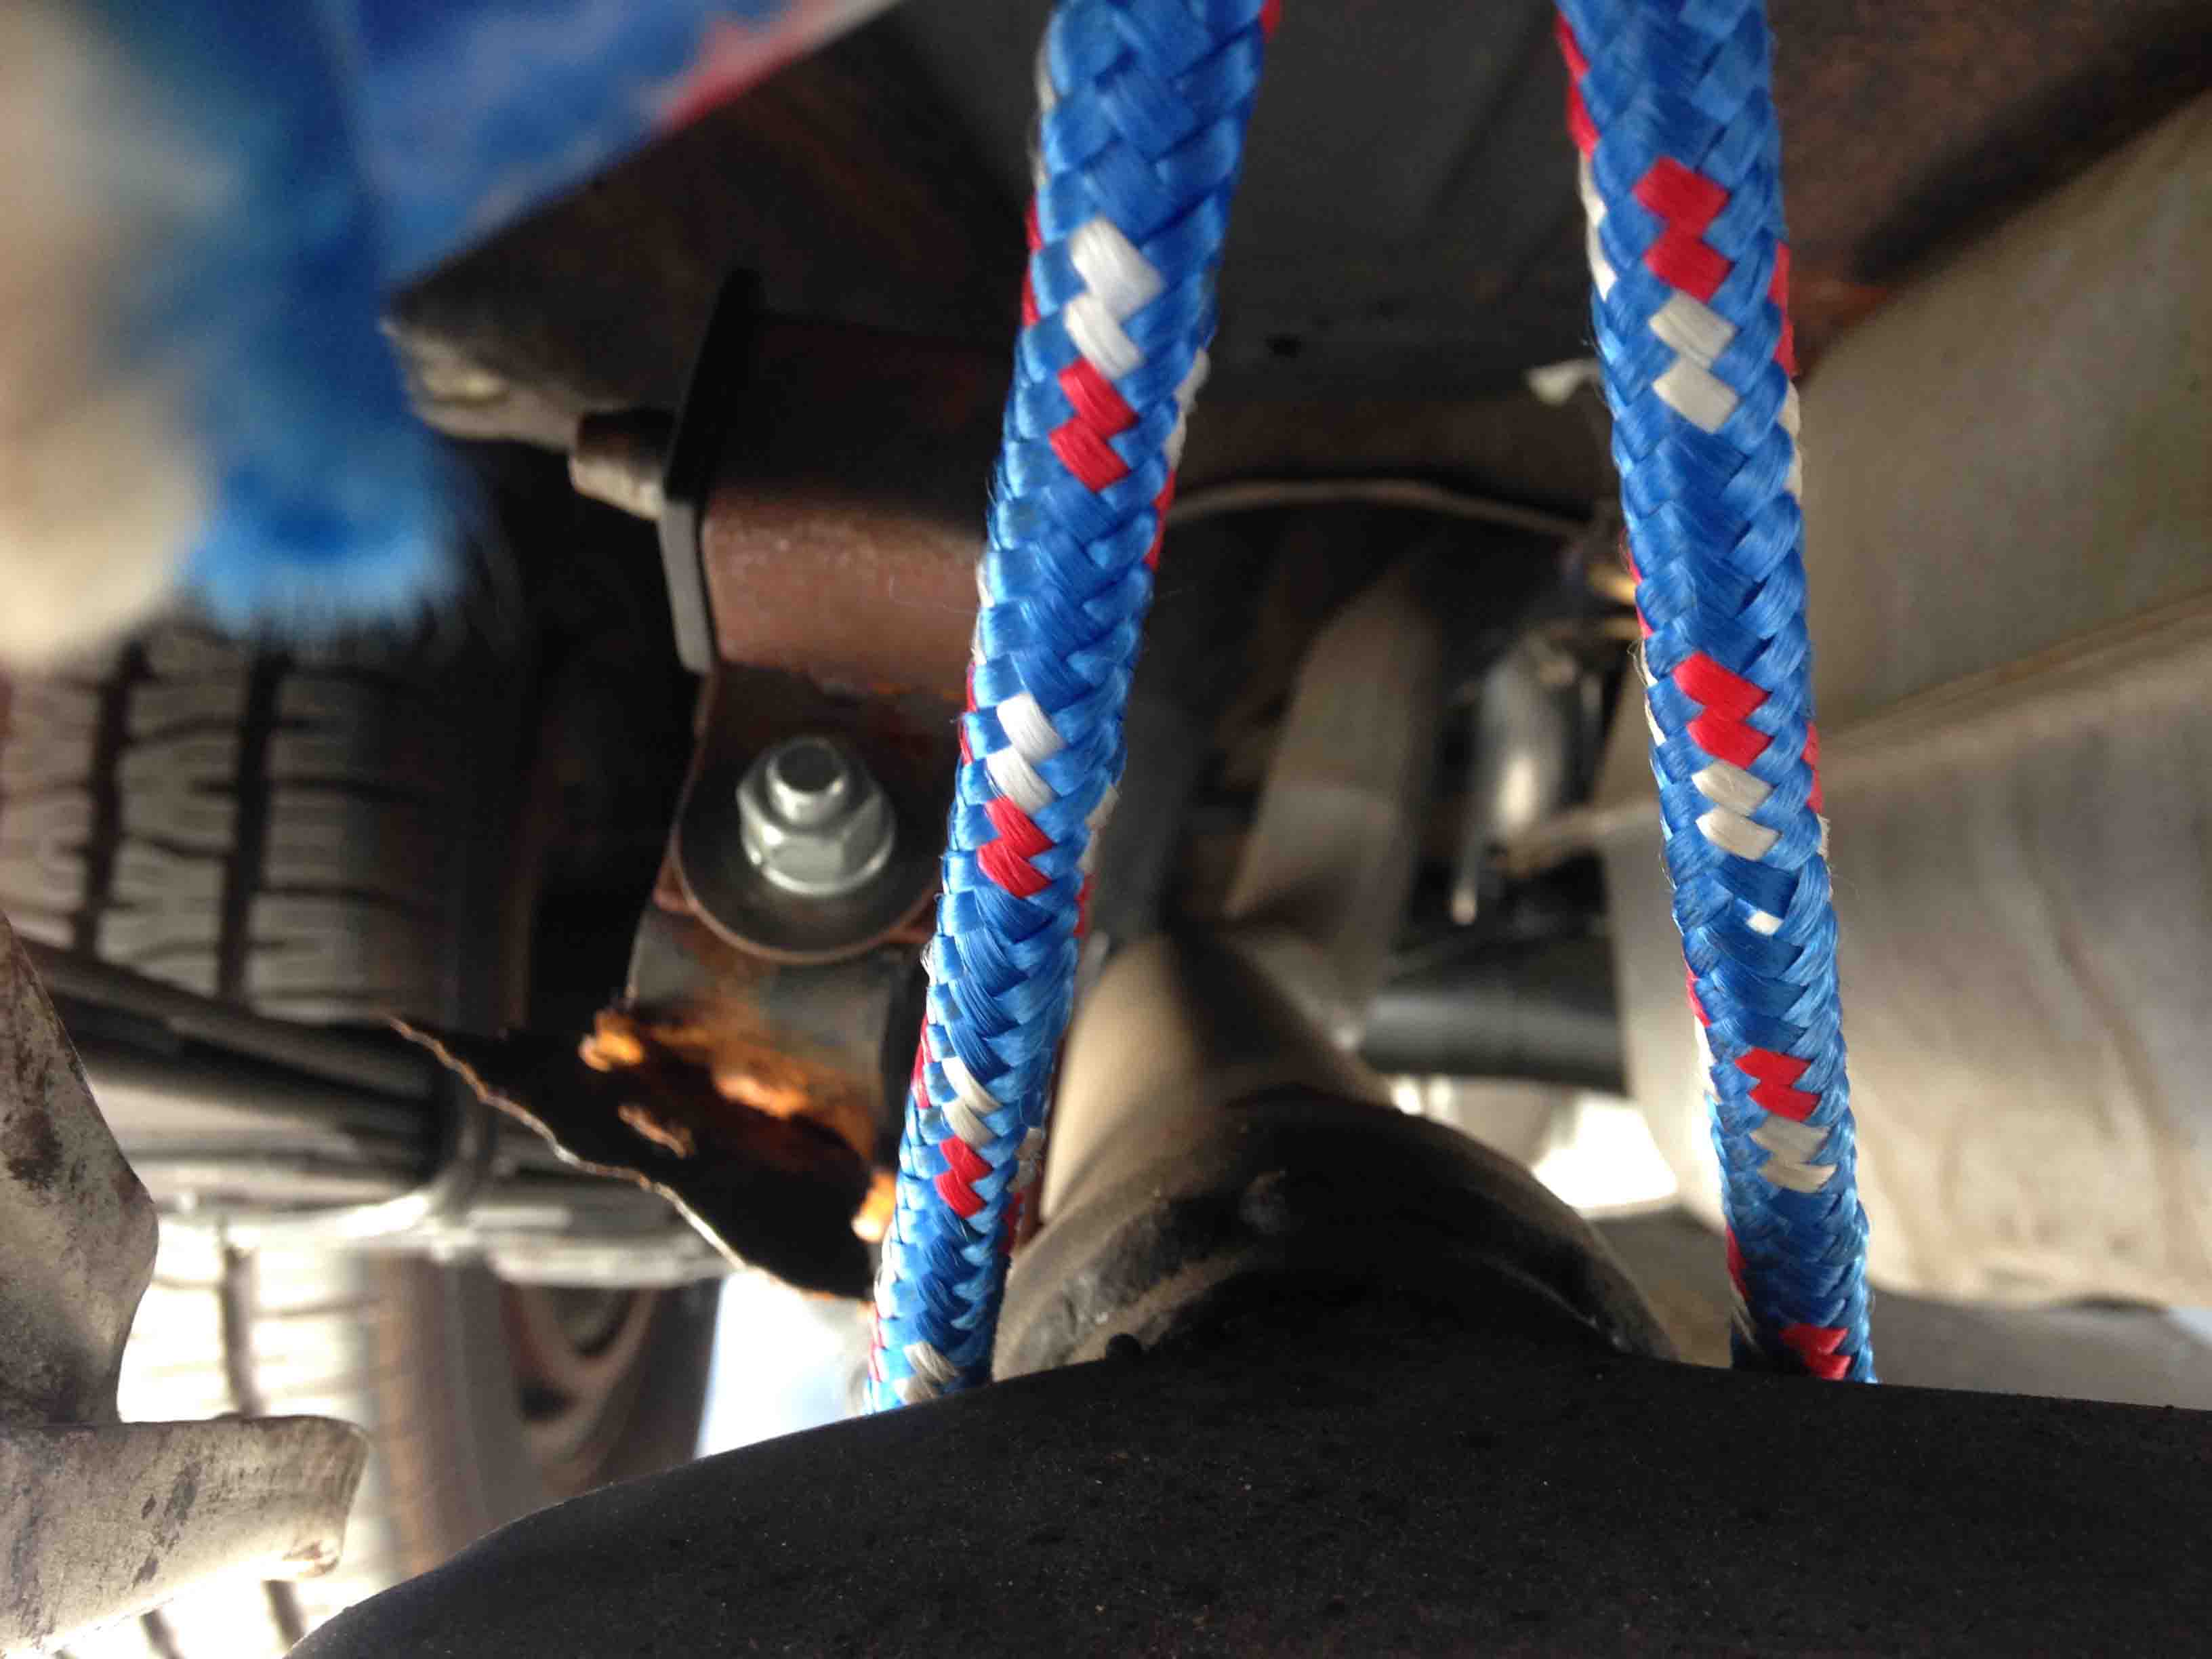
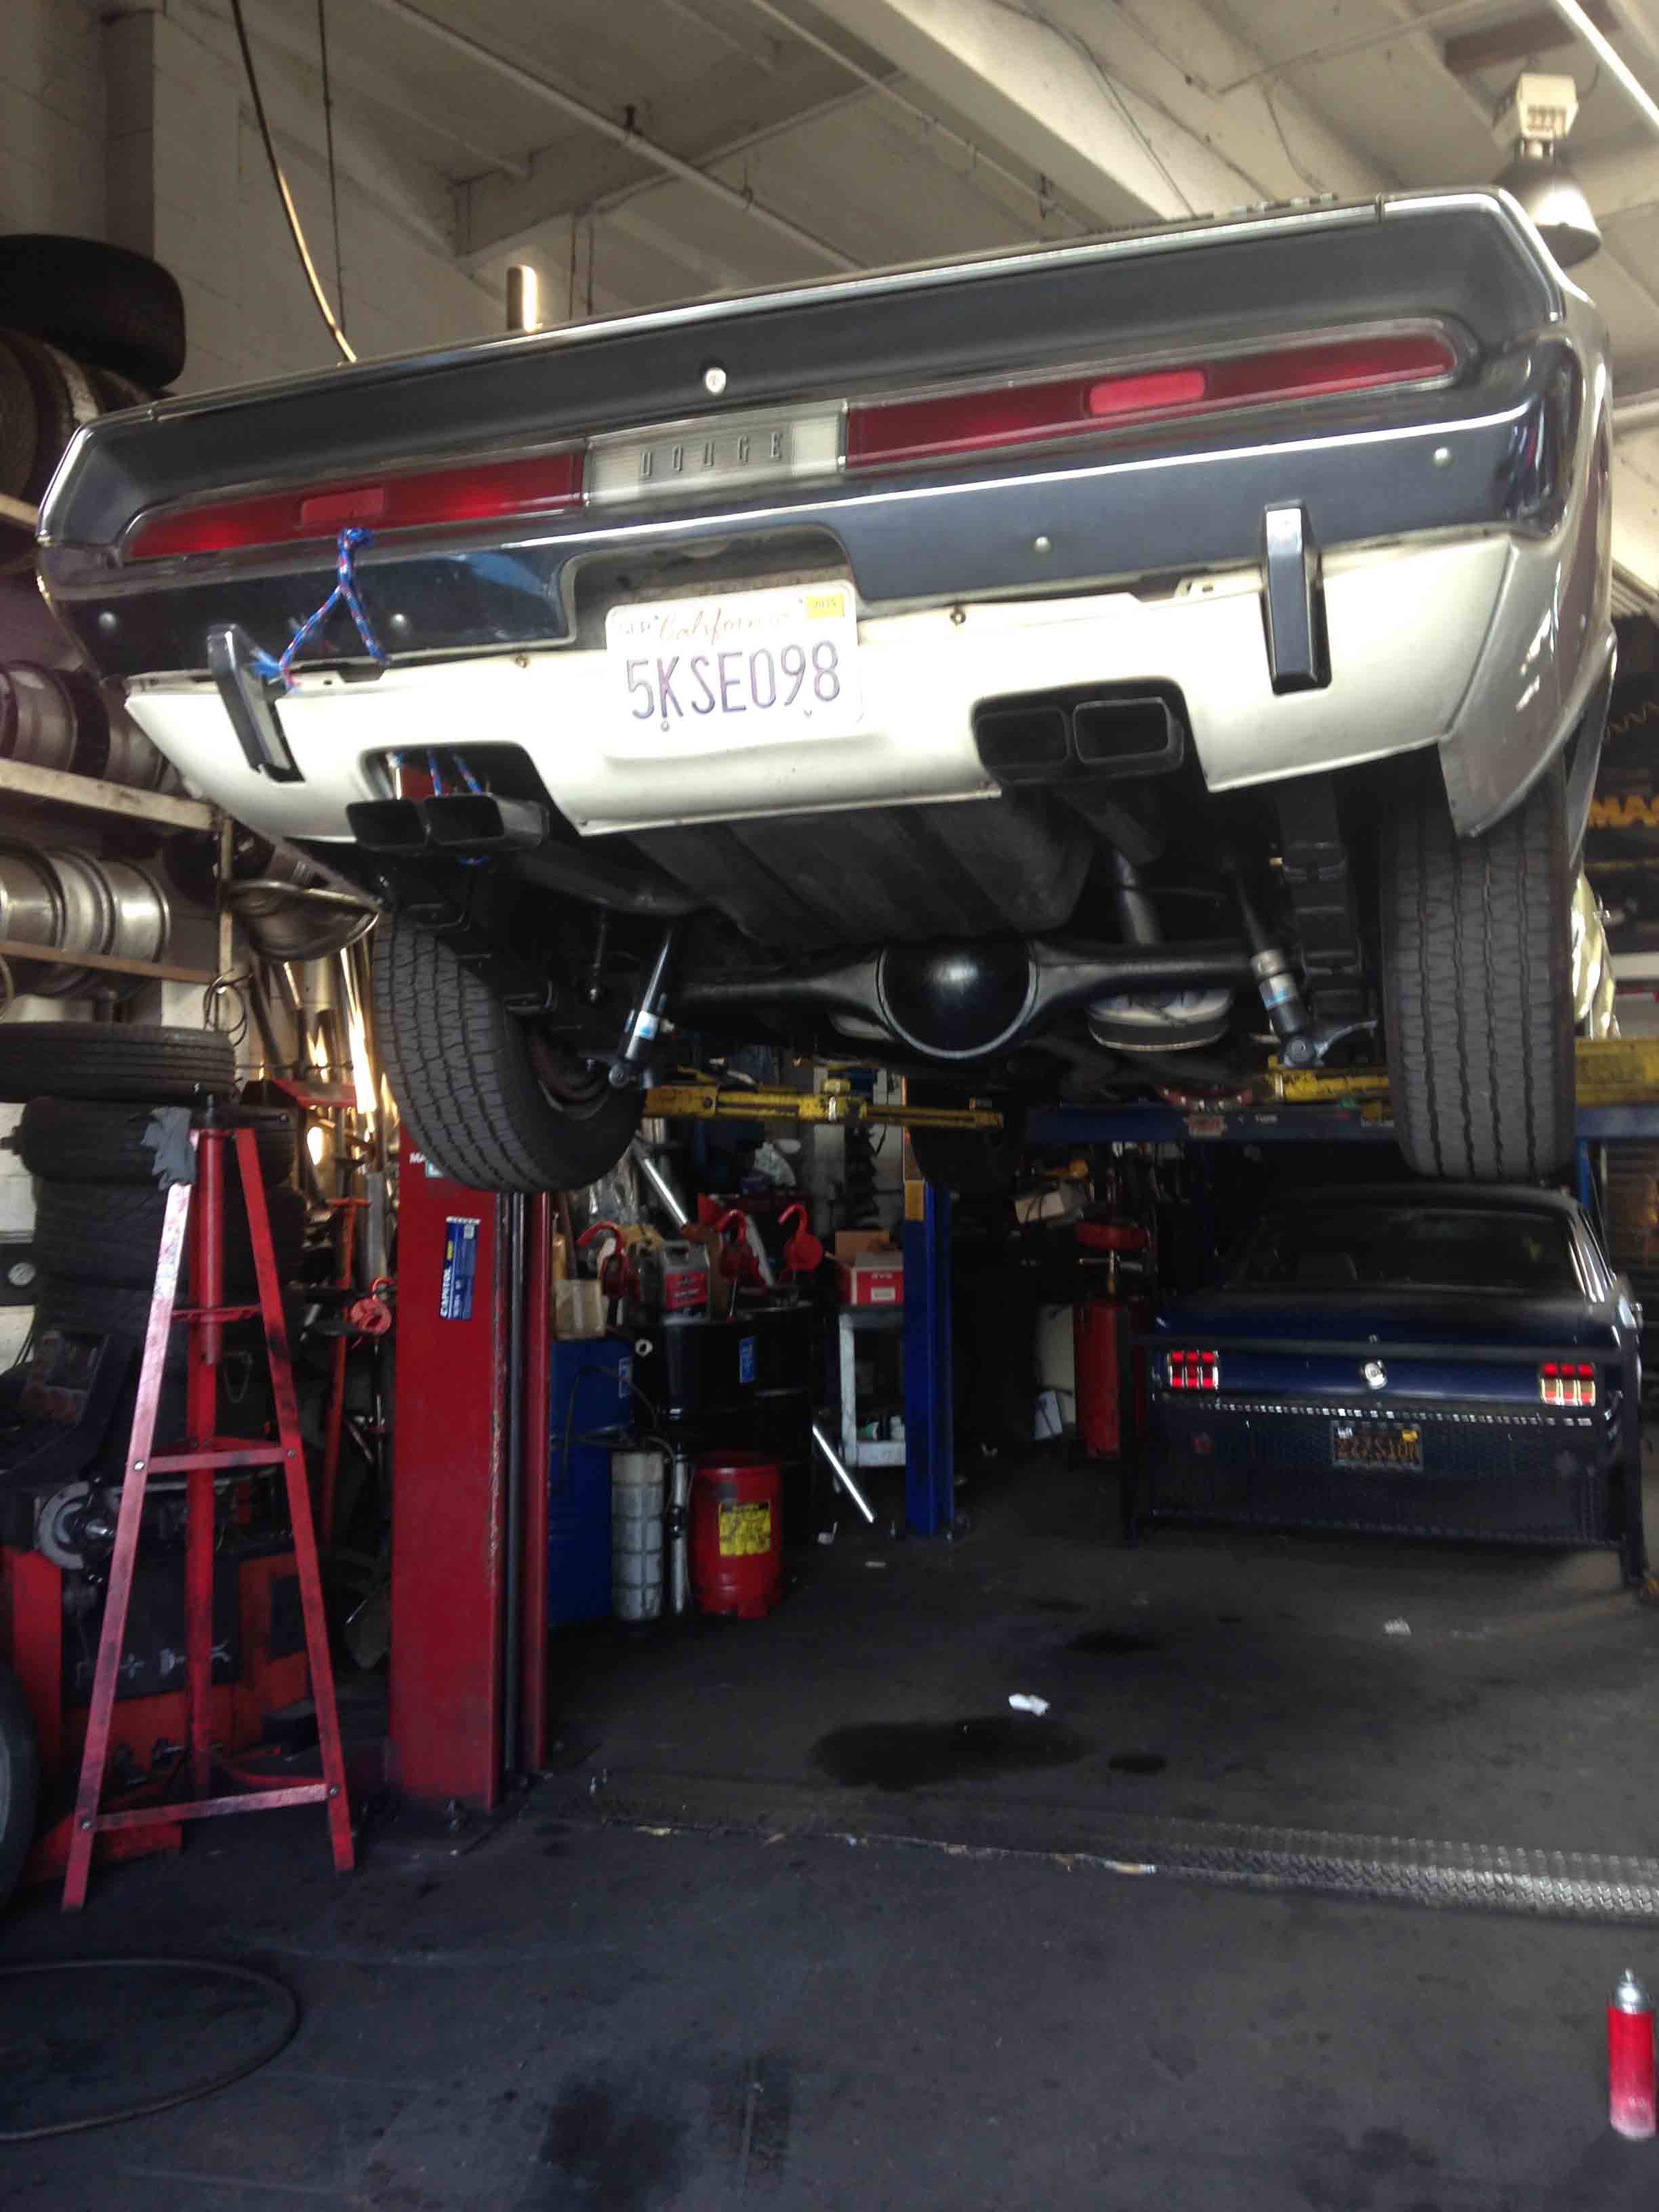
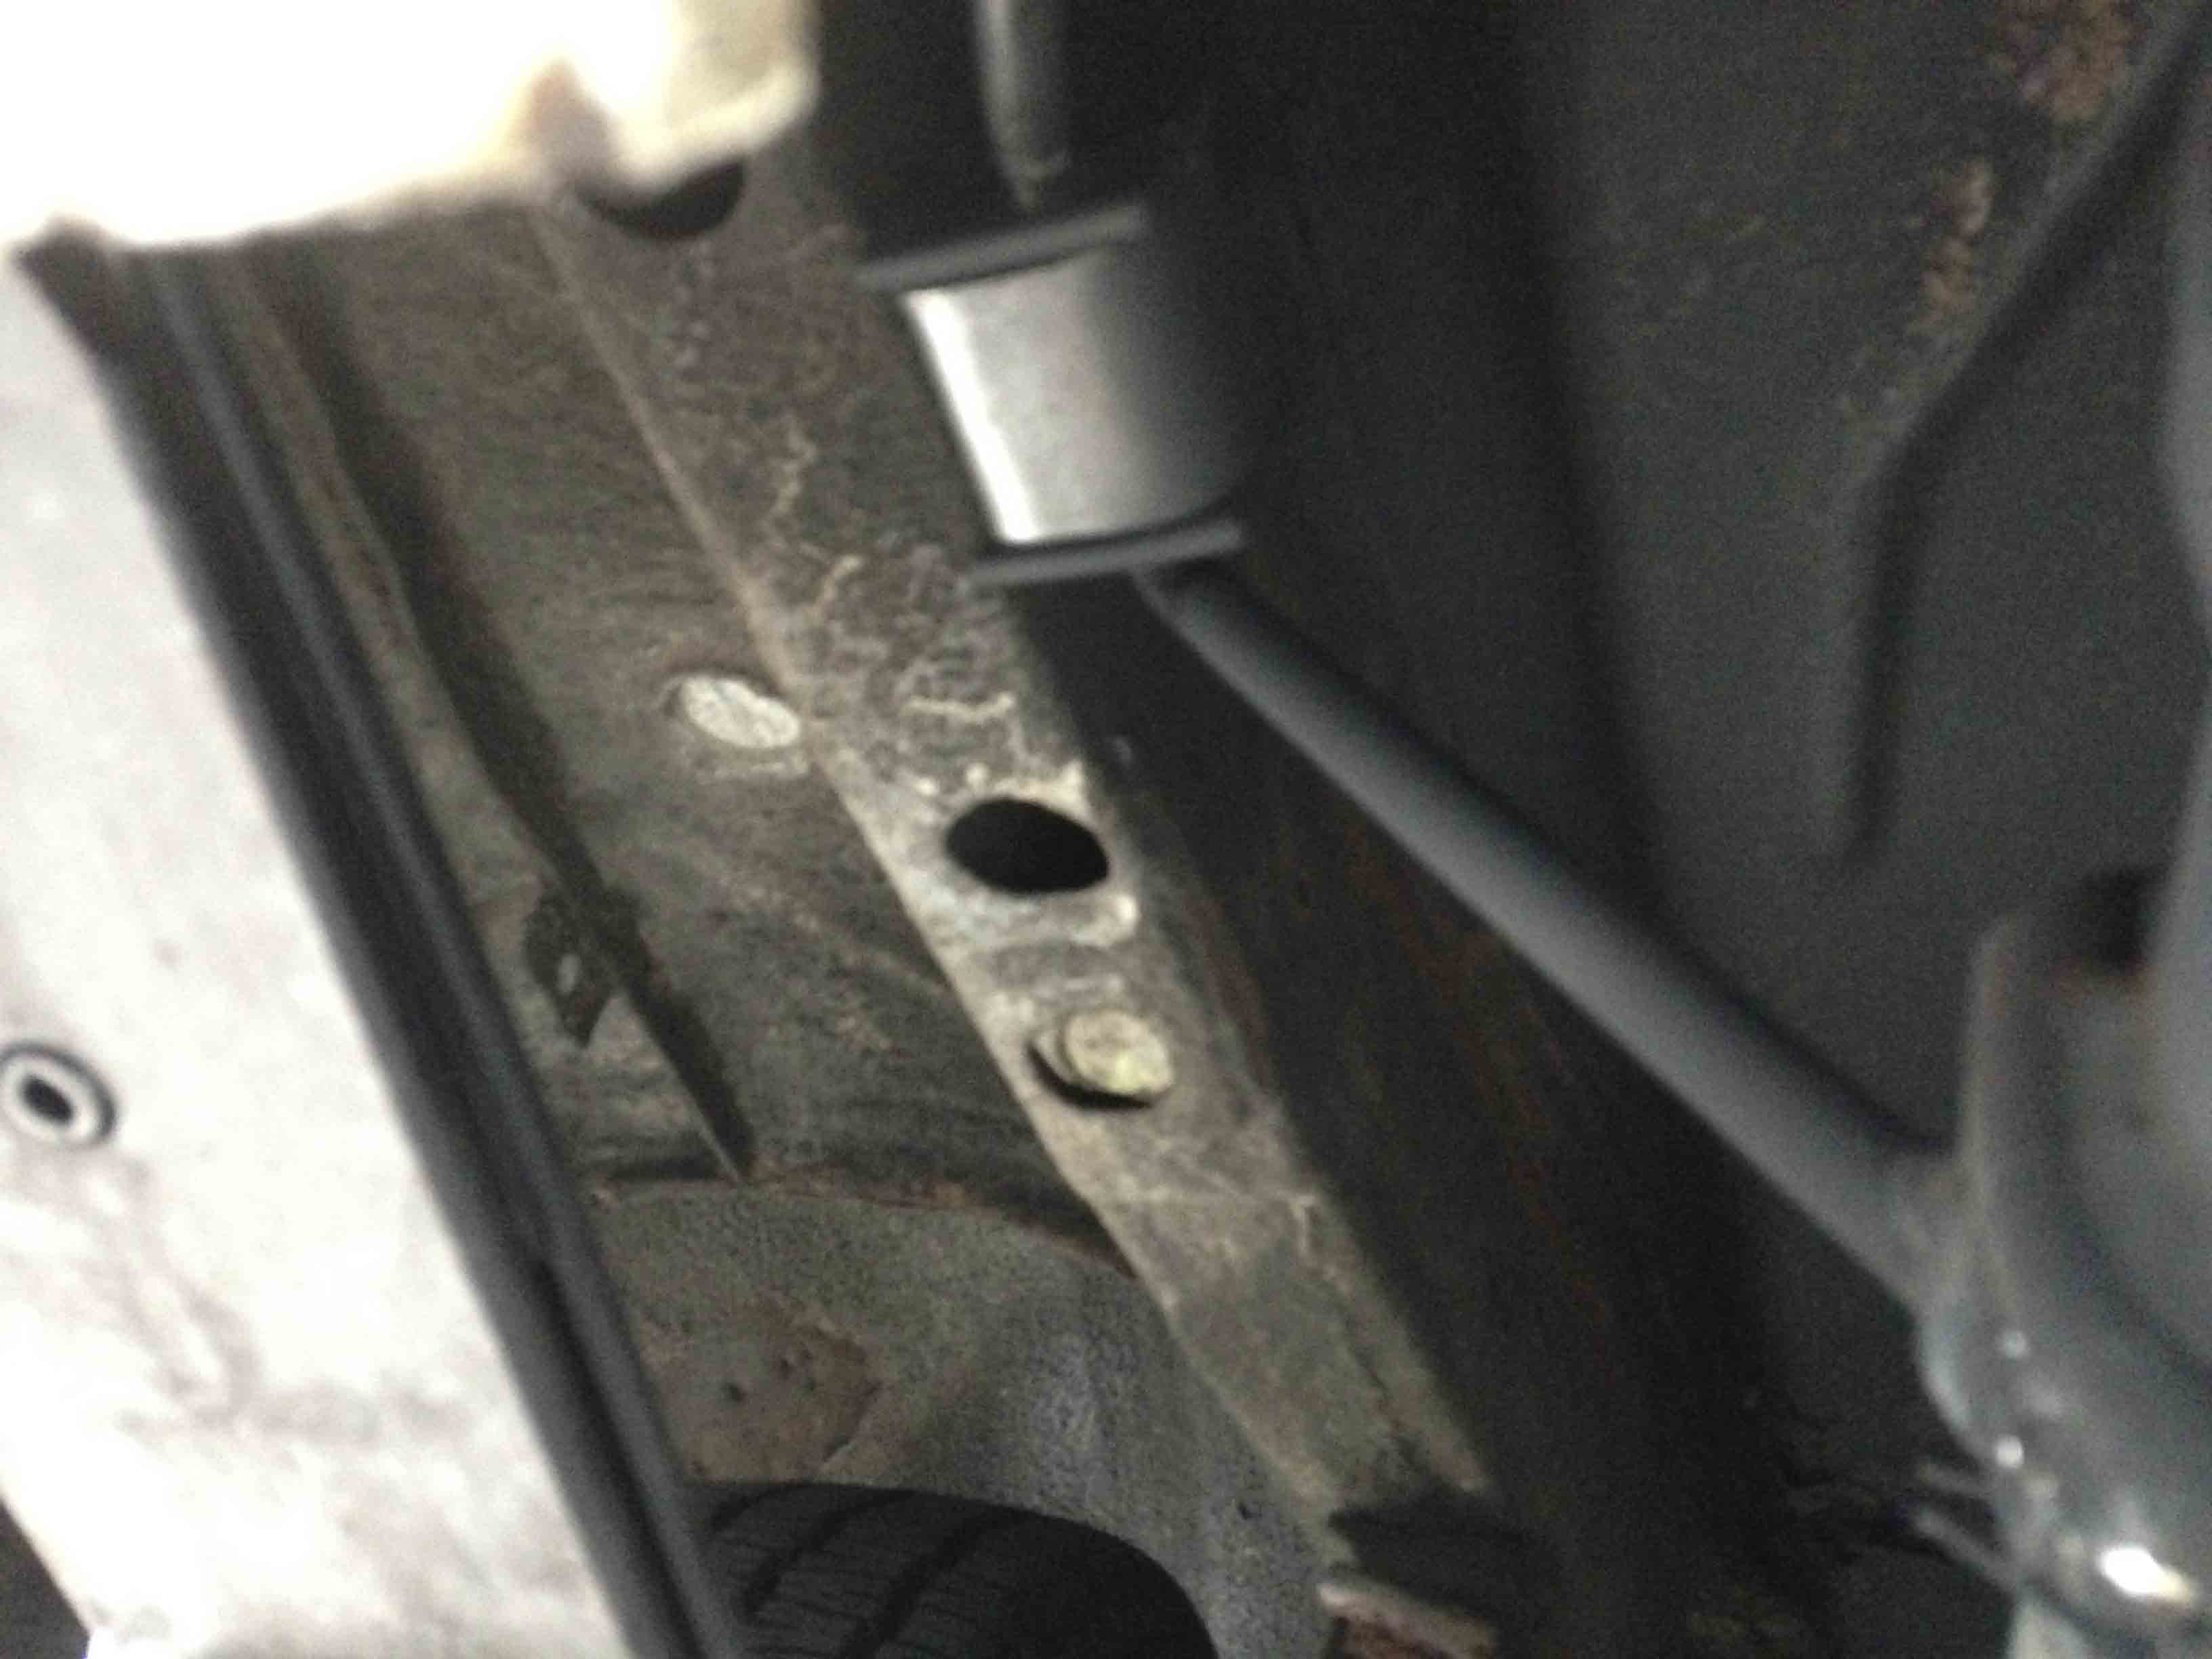
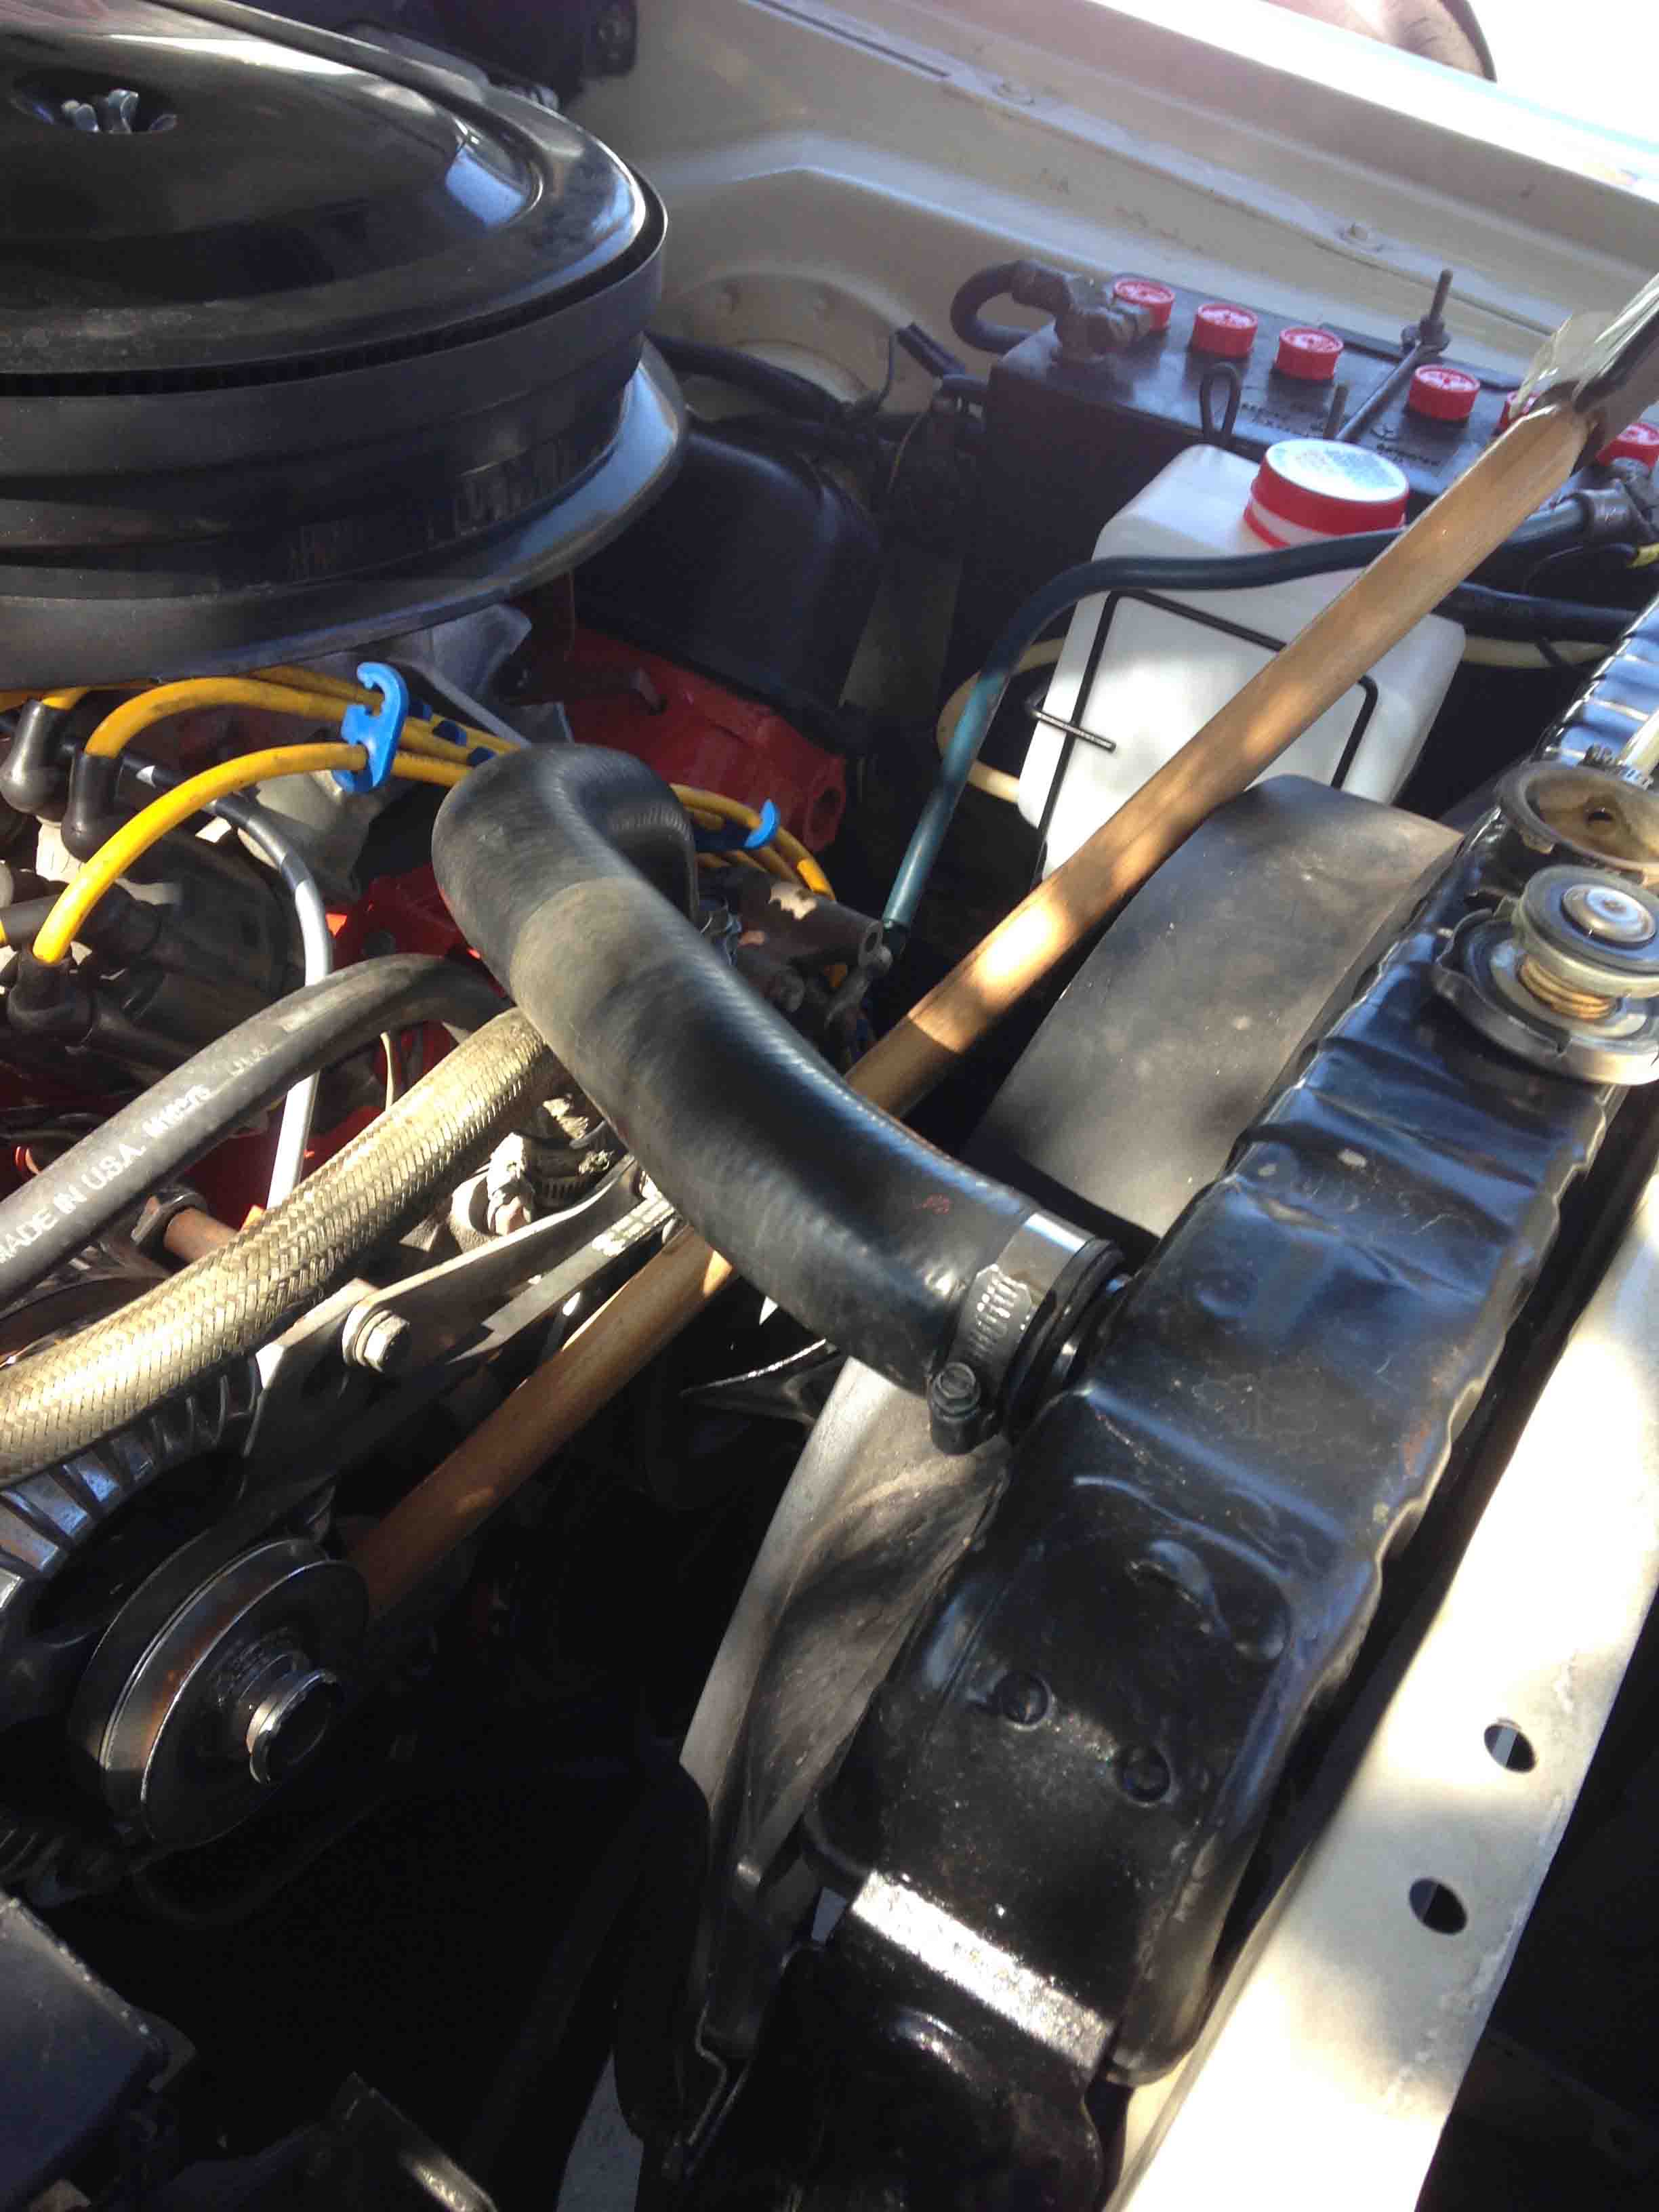
Here’s the general area under the passenger side lower control arm. Notice the lower control arm is braced with a piece of sheet metal from FirmFeel. This stiffener plate is recommended for heavy duty front sway bars to reduce the stock lower control arms from twisting into mush with hot cornering.

Here's a closer look at the adjuster for the torsion bar. Tighten (clock-wise) to raise the front end. I turned mine about 40 1/8 turns to raise the car 3/4 inch, or approximately 5 complete turns to raise 3/4 inch.

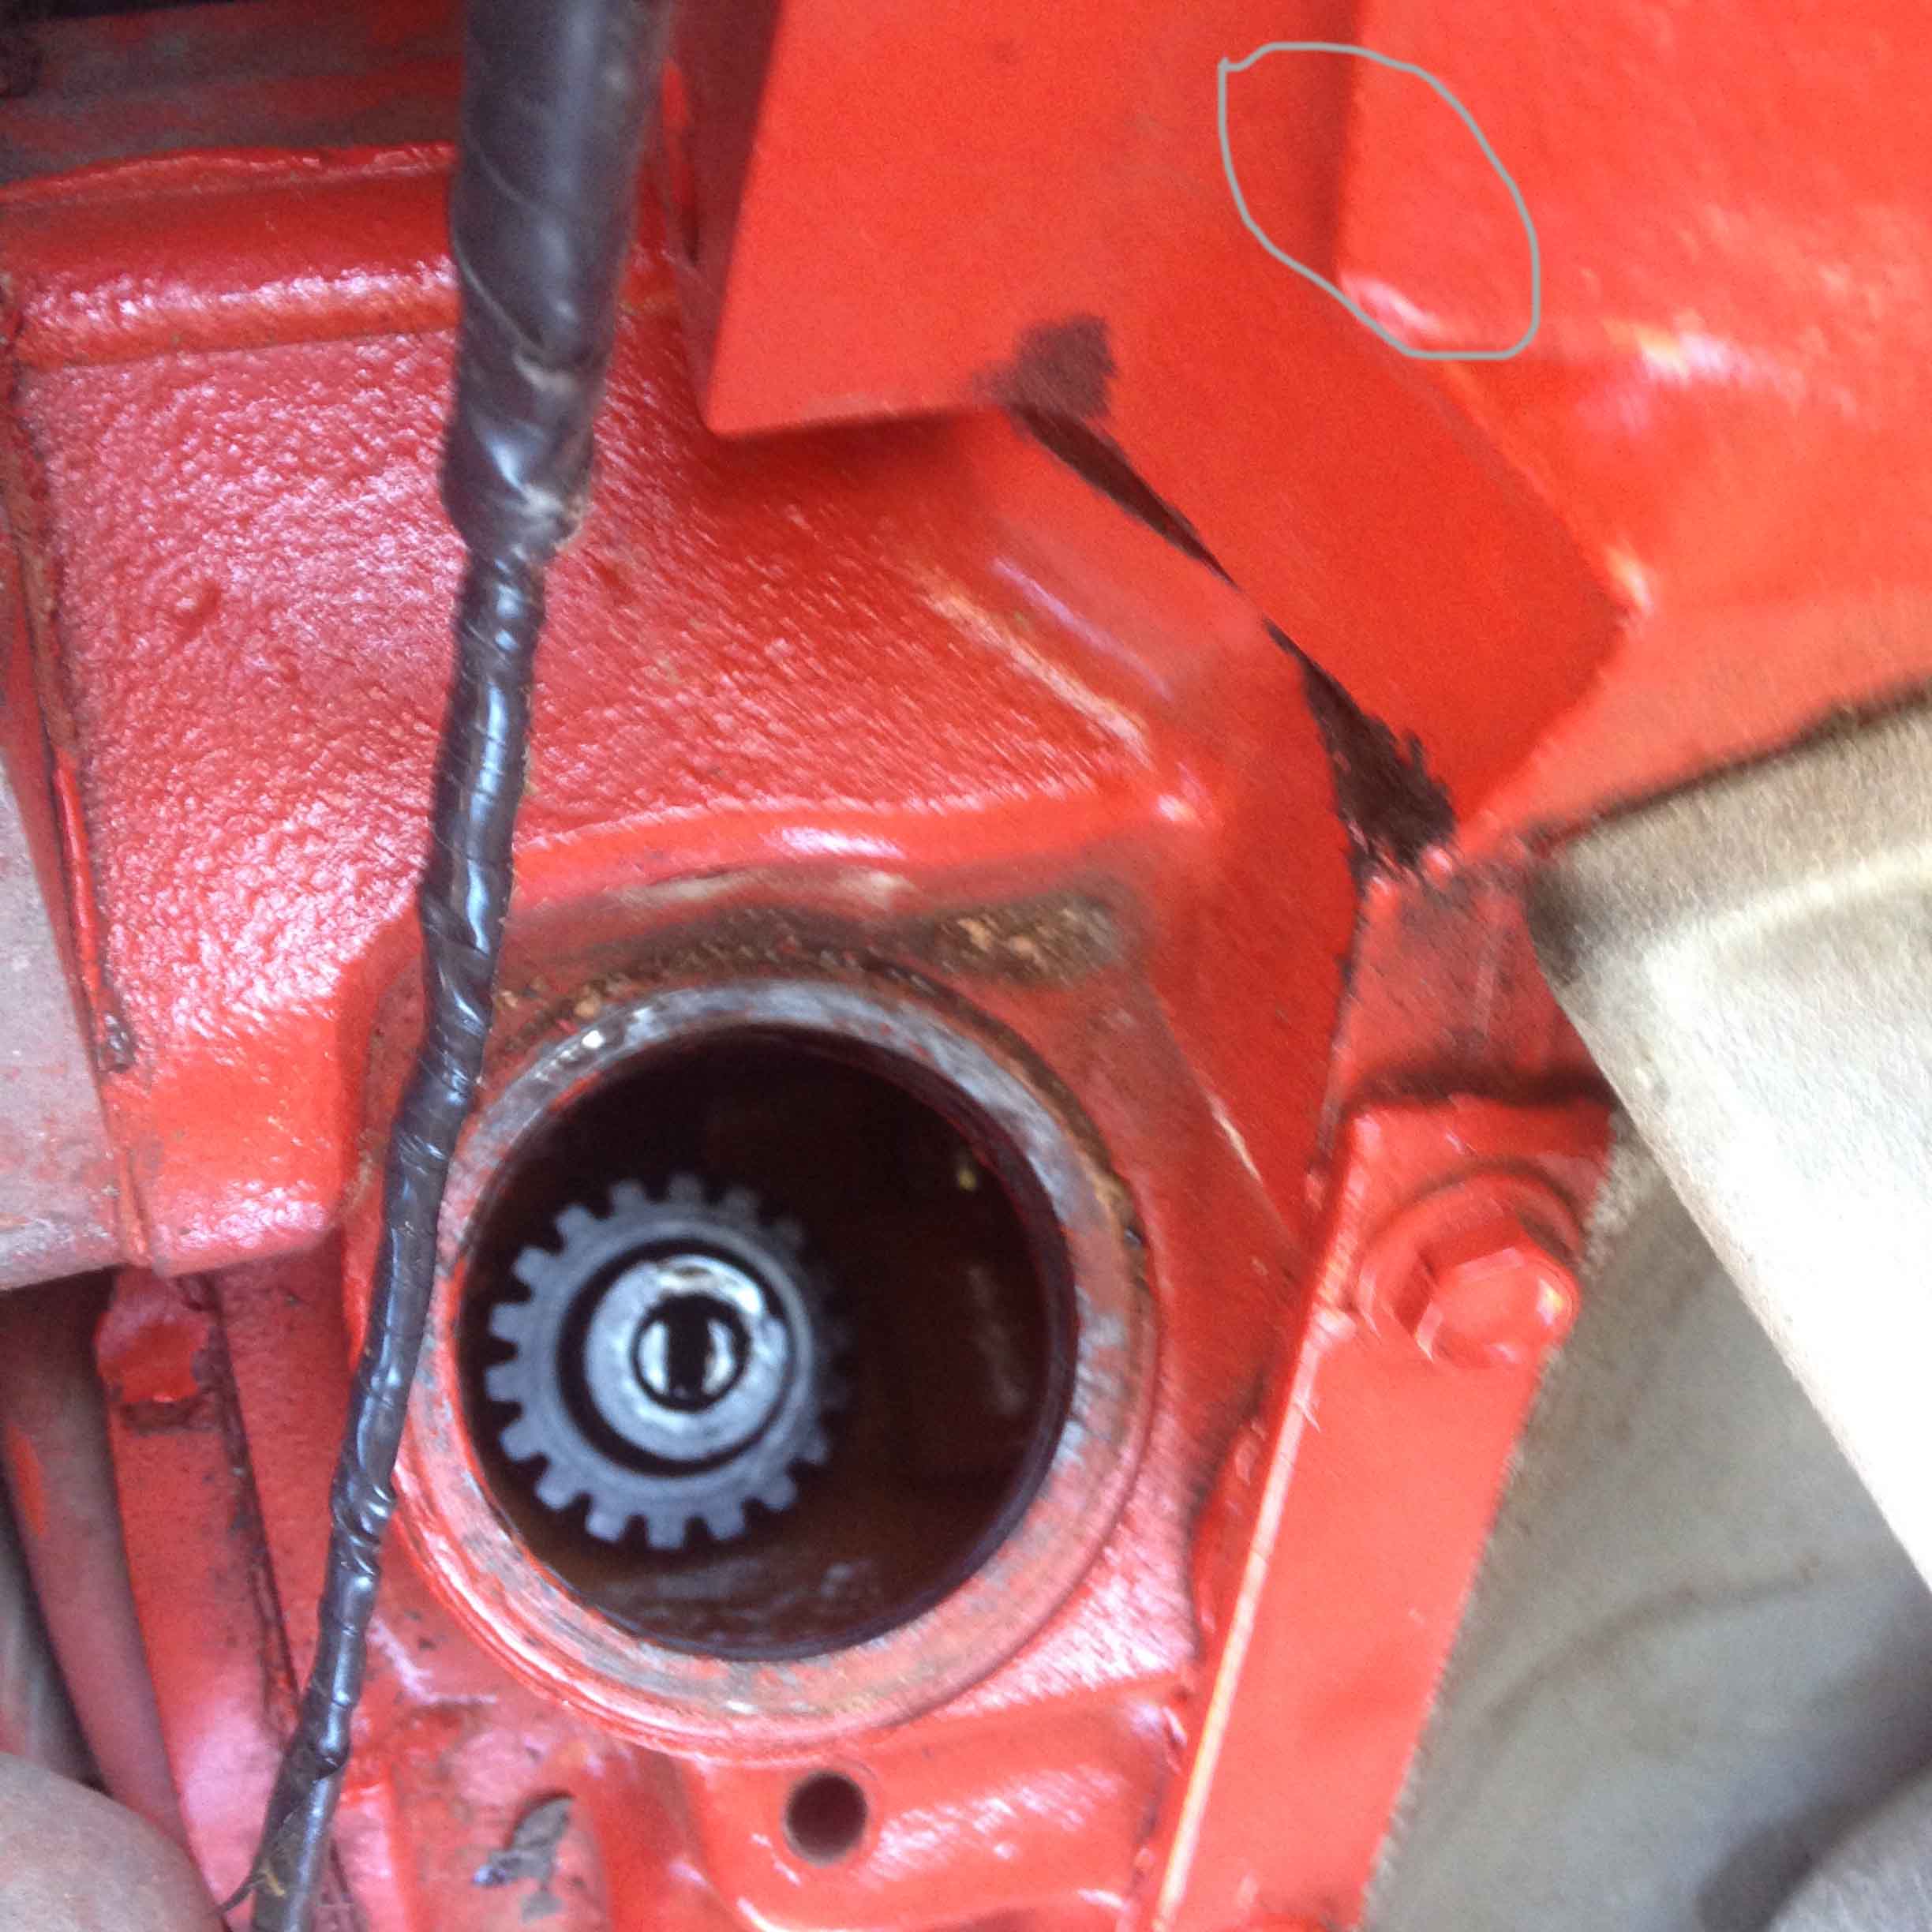
Here’s a closer look at the adjuster for the torsion bar. Tighten (clock-wise) to raise the front end.
I turned mine about 40 1/8 turns to raise the car 3/4 inch, or approximately 5 complete turns to raise 3/4 inch.

Here's a look at the driver's side in the daylight. You get a good look at the lower arm stiffener that is welded to the lower arm to strengthen it.

Here’s a look at the driver’s side in the daylight. You get a good look at the lower arm stiffener that is welded to the lower arm to strengthen it, plus you can see the torsion bar adjustment screw head protruding from the plate.

tb8

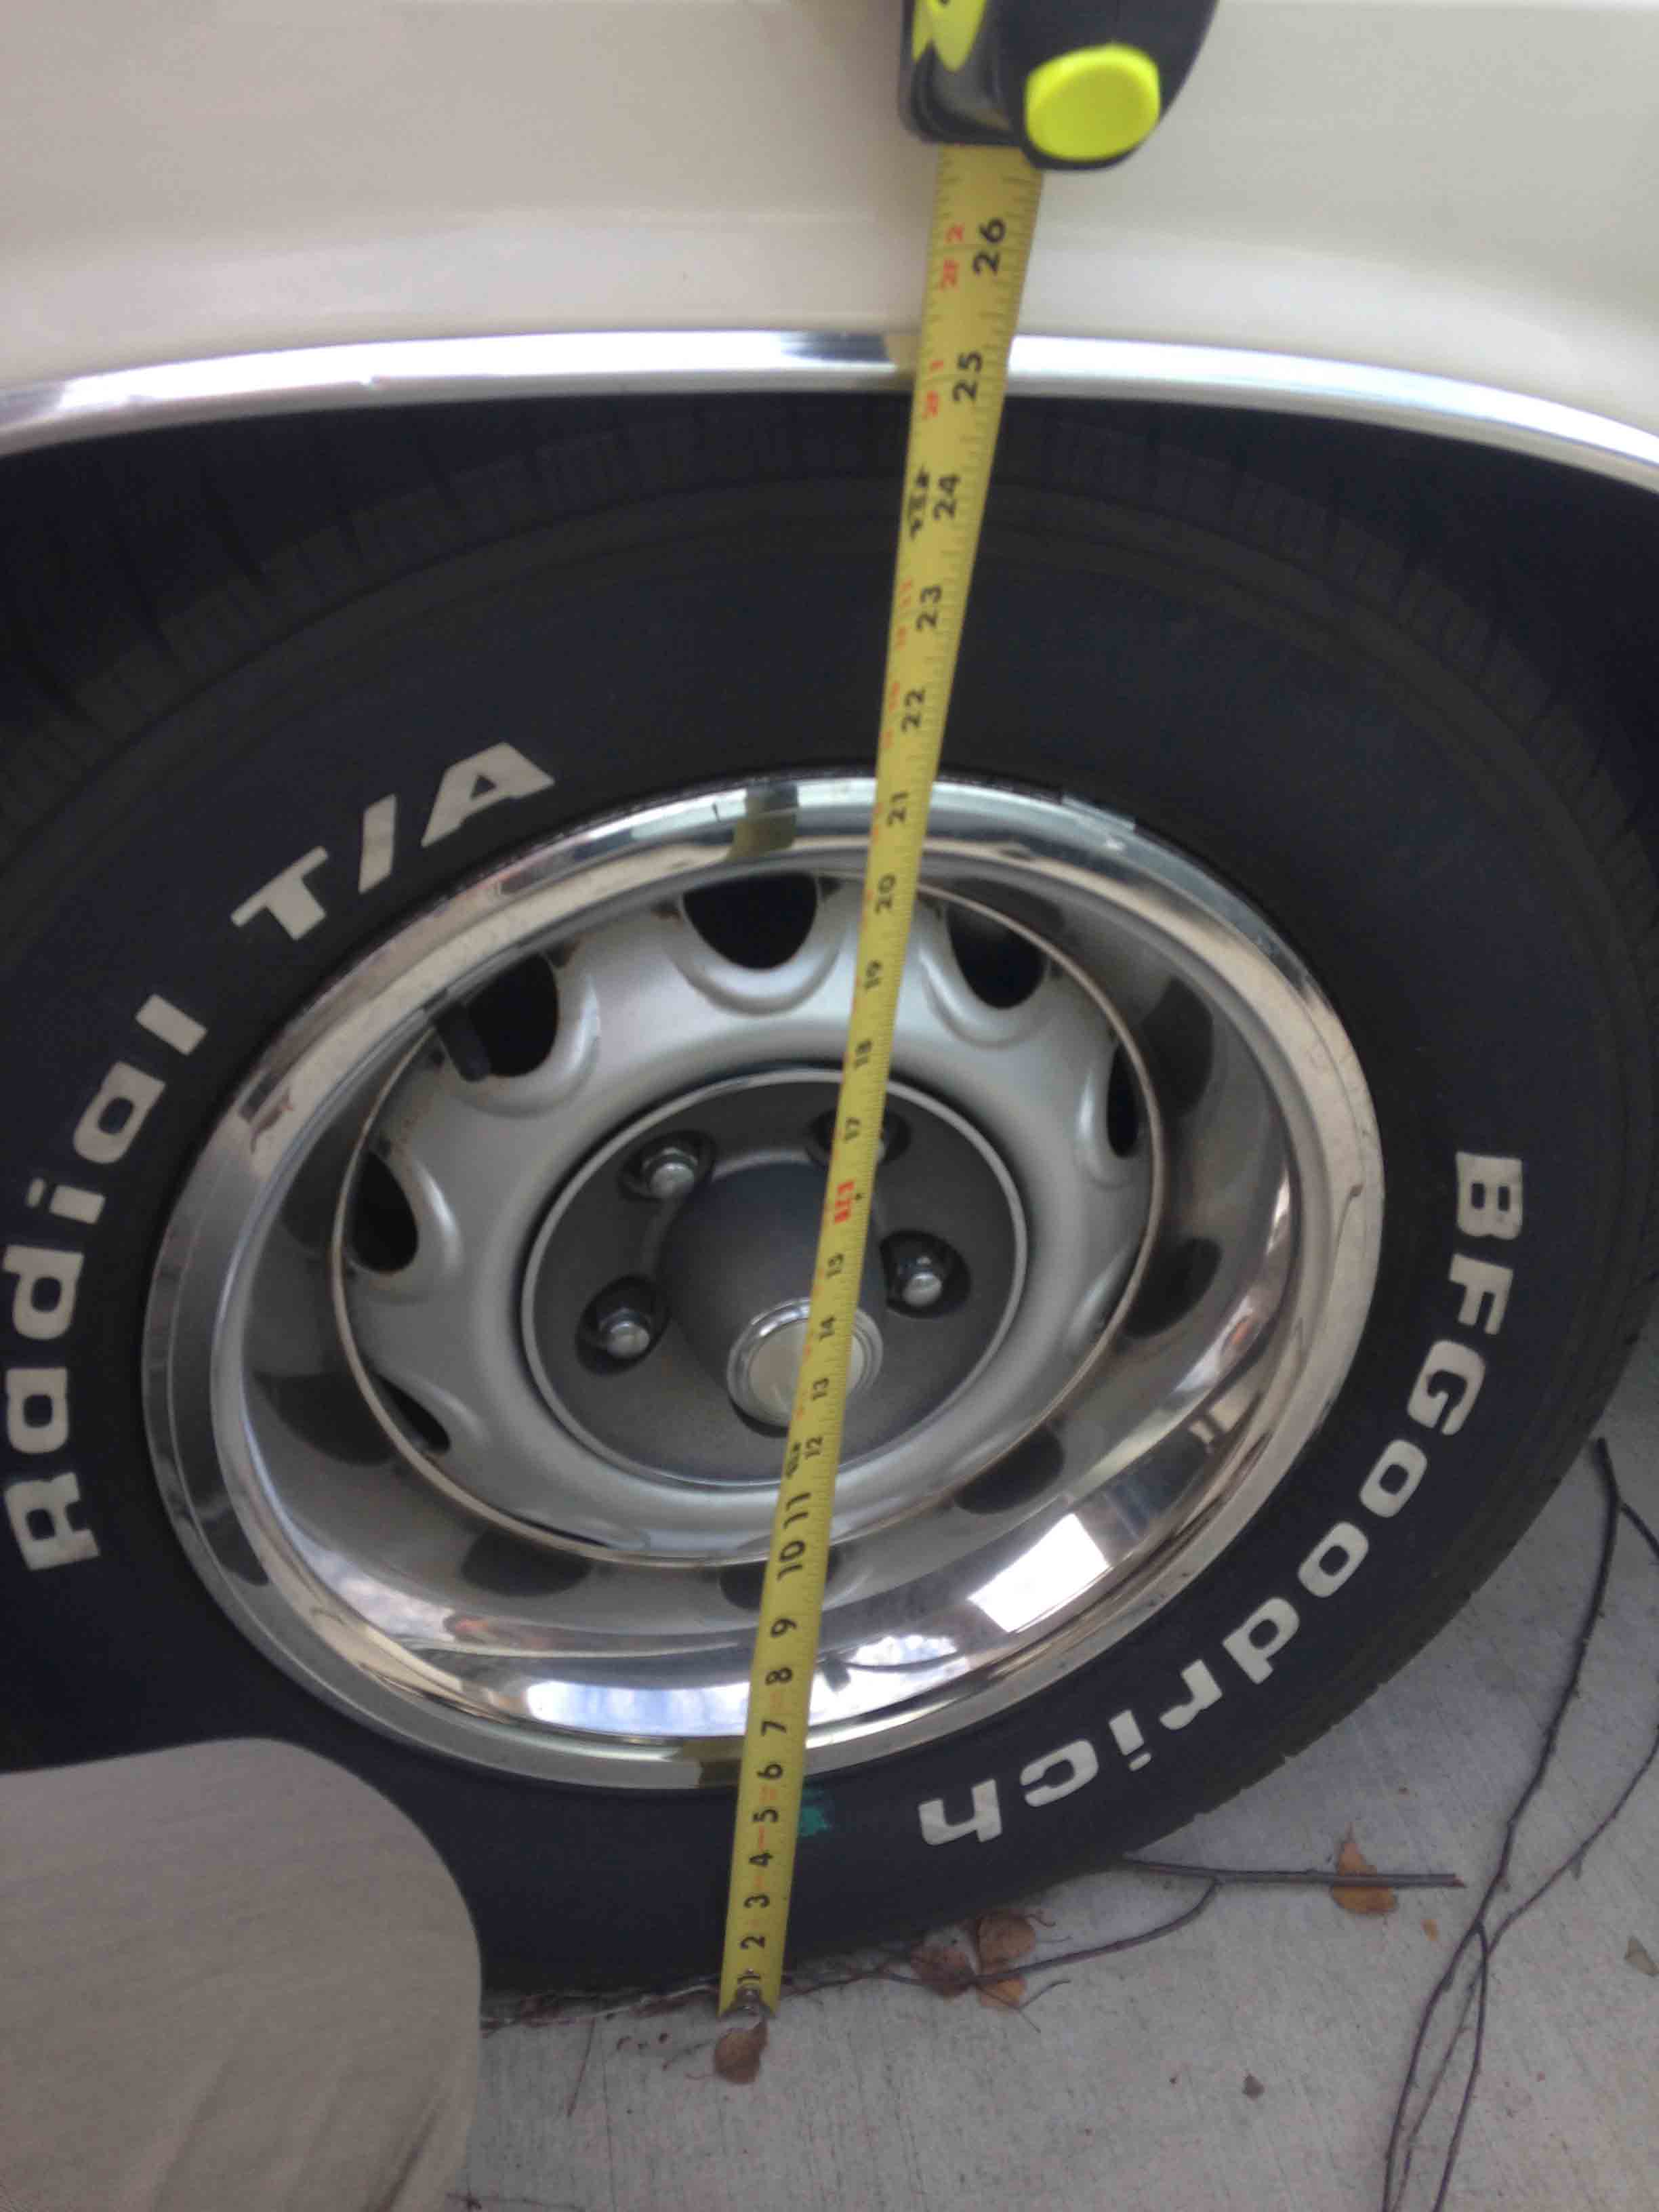
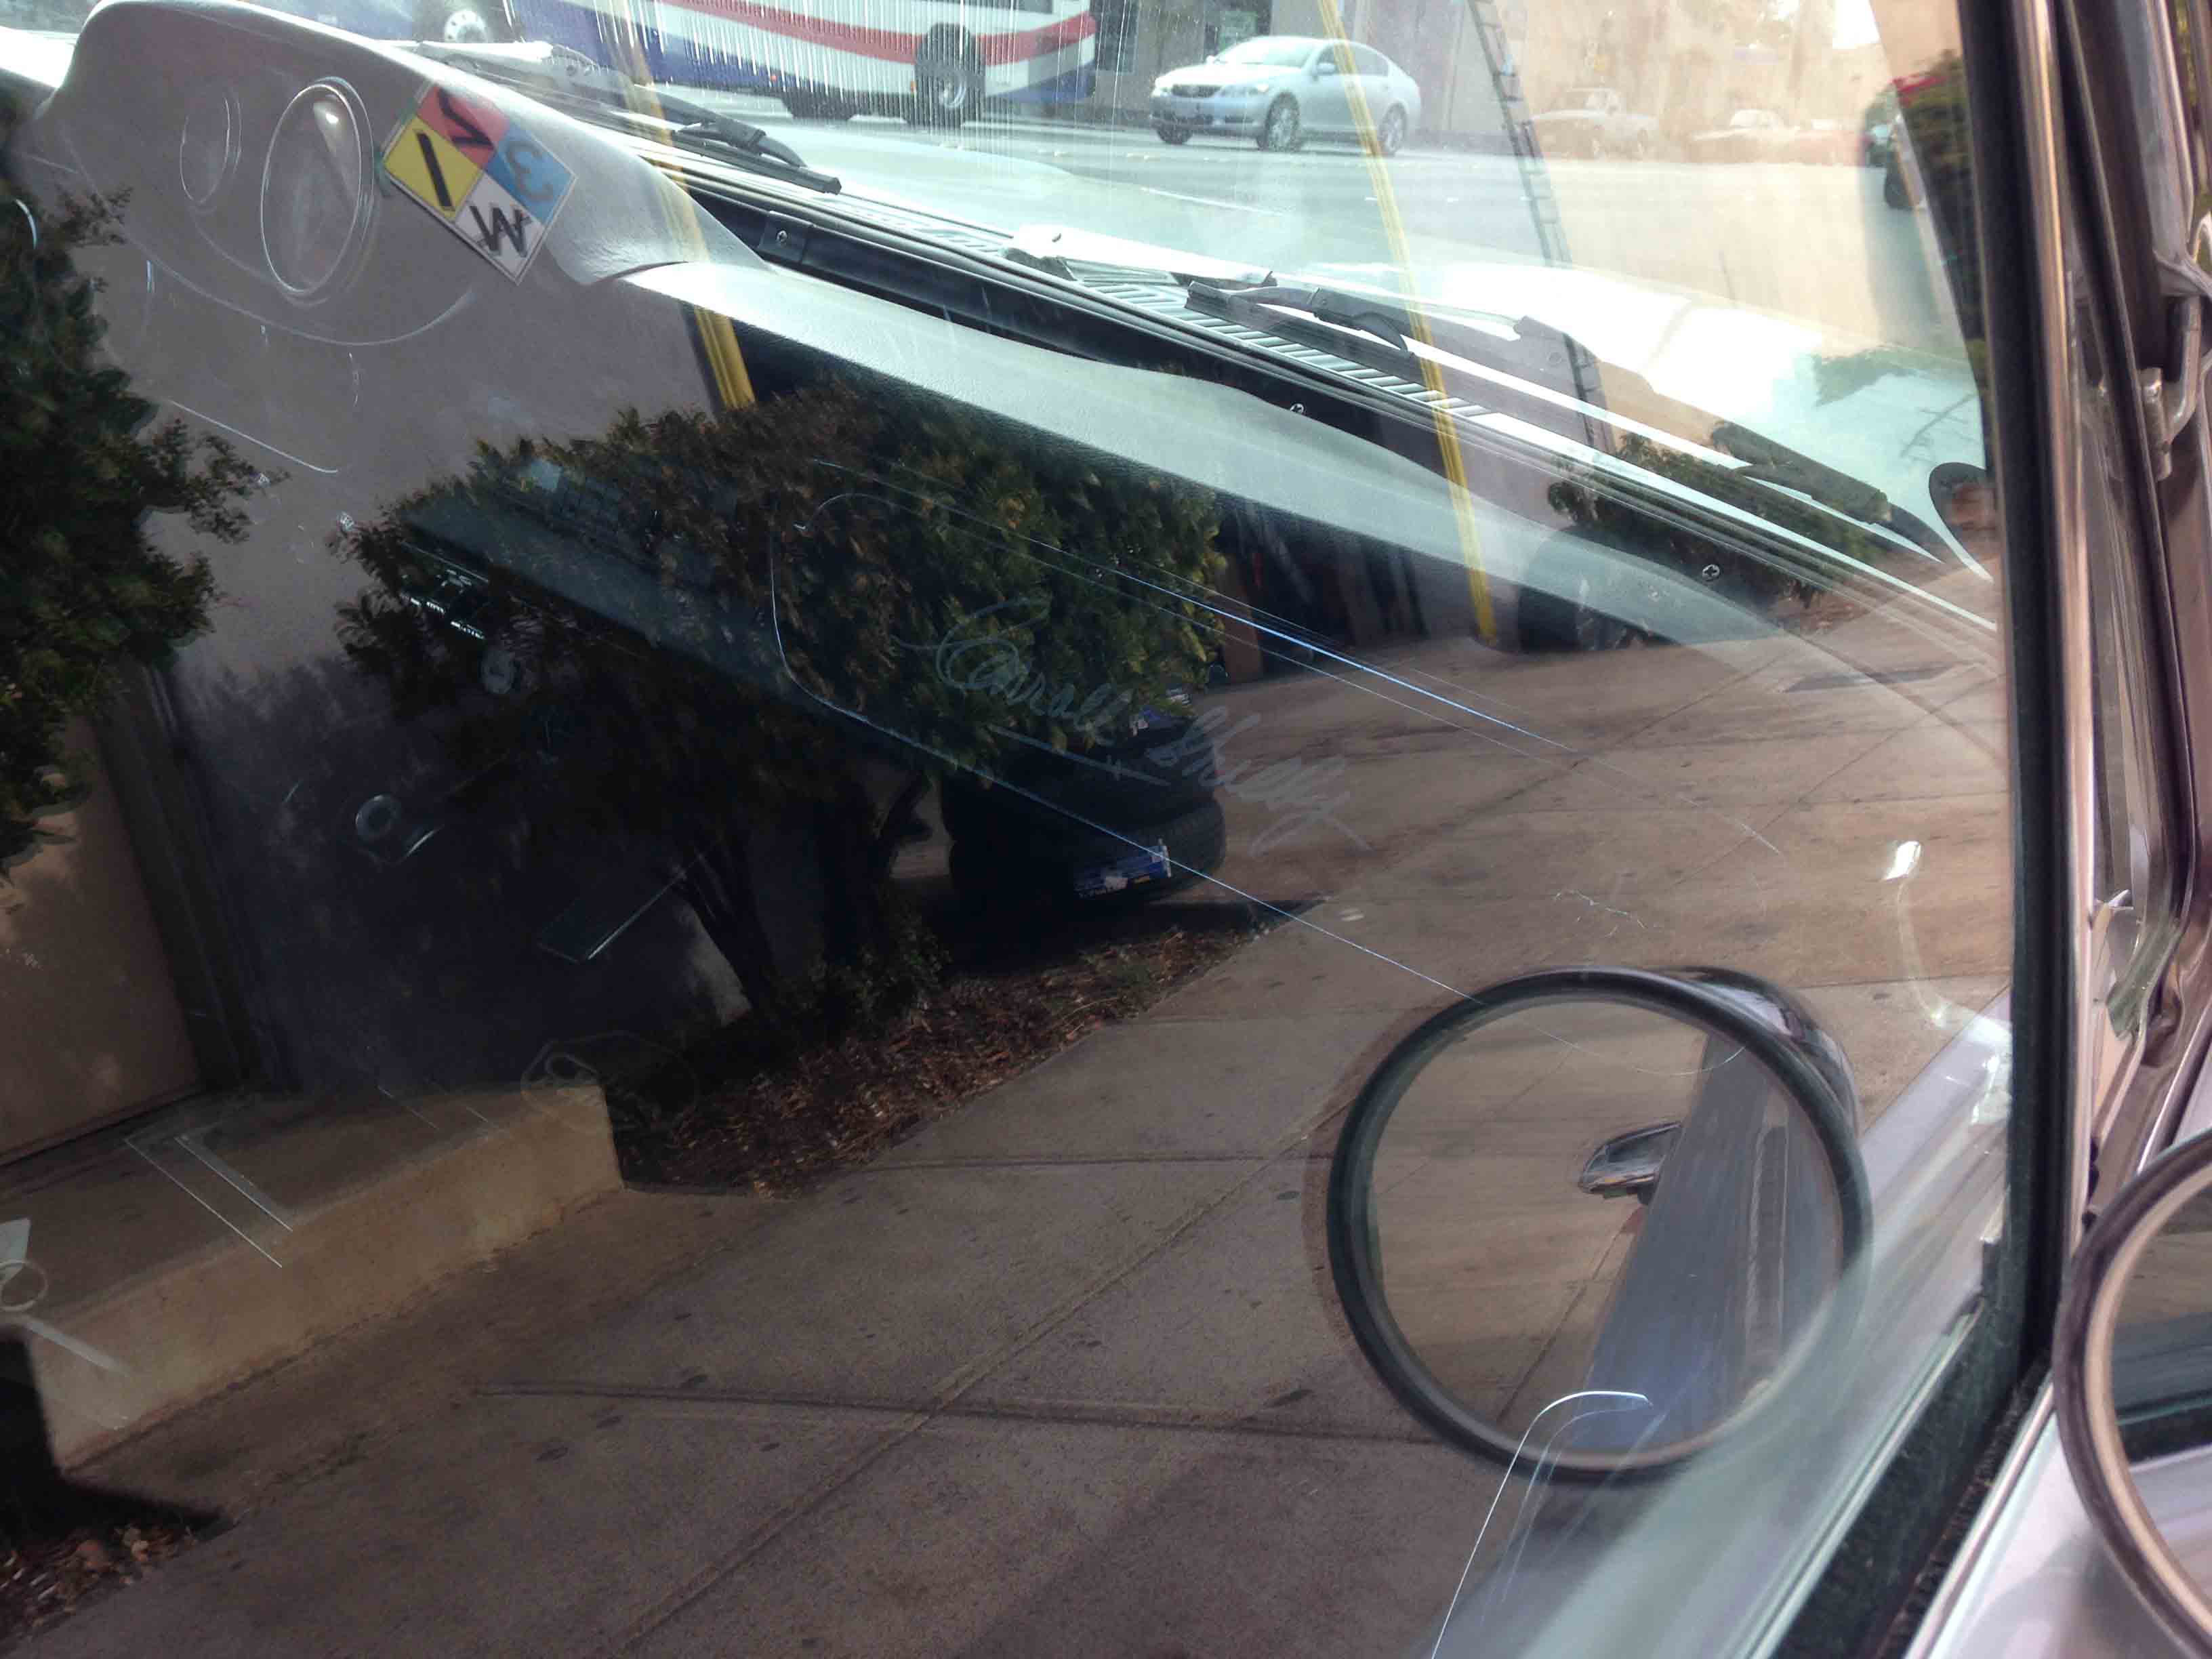
Here’s how I measure the height of the car, from the ground to the lower lip of the fender well moulding.

Be consistent and specific on your adjustment. It started at 24 inches, I raised it to 24 3/4.

Be consistent and specific on your adjustment. It started at 24 inches, I raised it to 24 3/4. The photo is a bit of an angle looking downward, you’ll need to look directly perpendicular to sight your measurement.

BEFORE and AFTER SHOTS

In the back parking lot of Palo Alto High School, the boys' gym in the background. Same building as in 1980 and many years before, but we didn't have the cool looking Viking Ship paint job back in then.

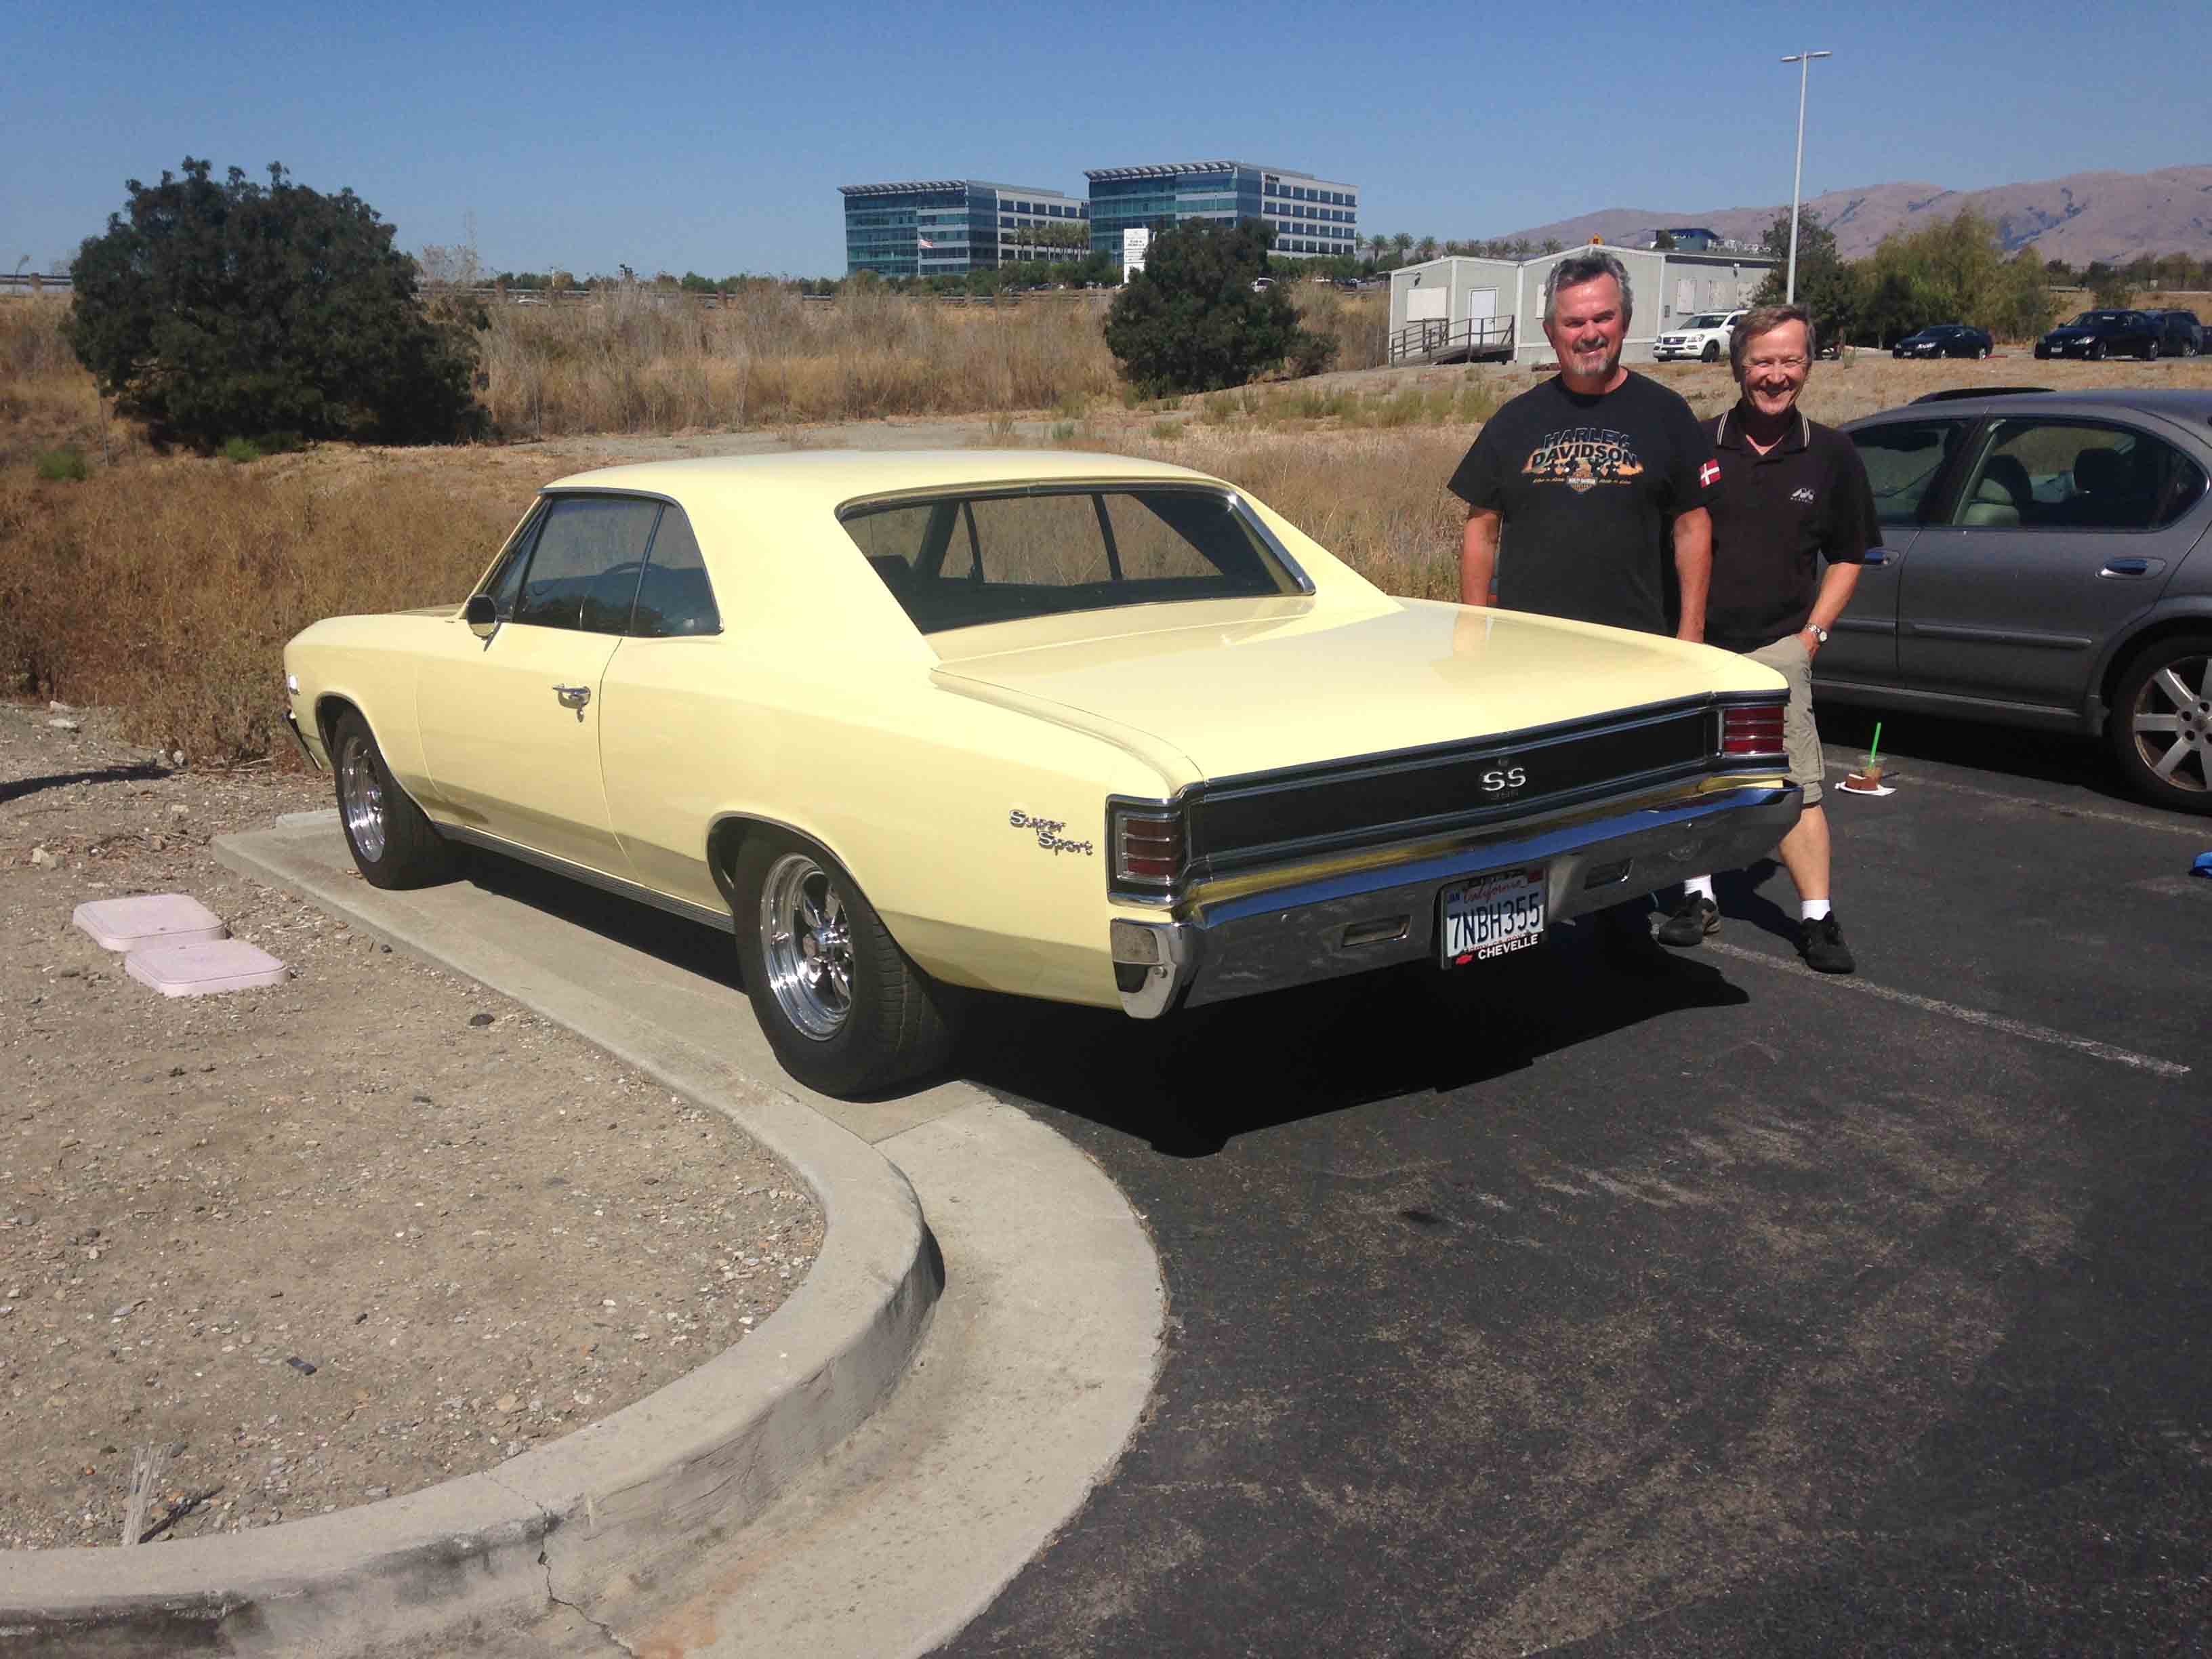
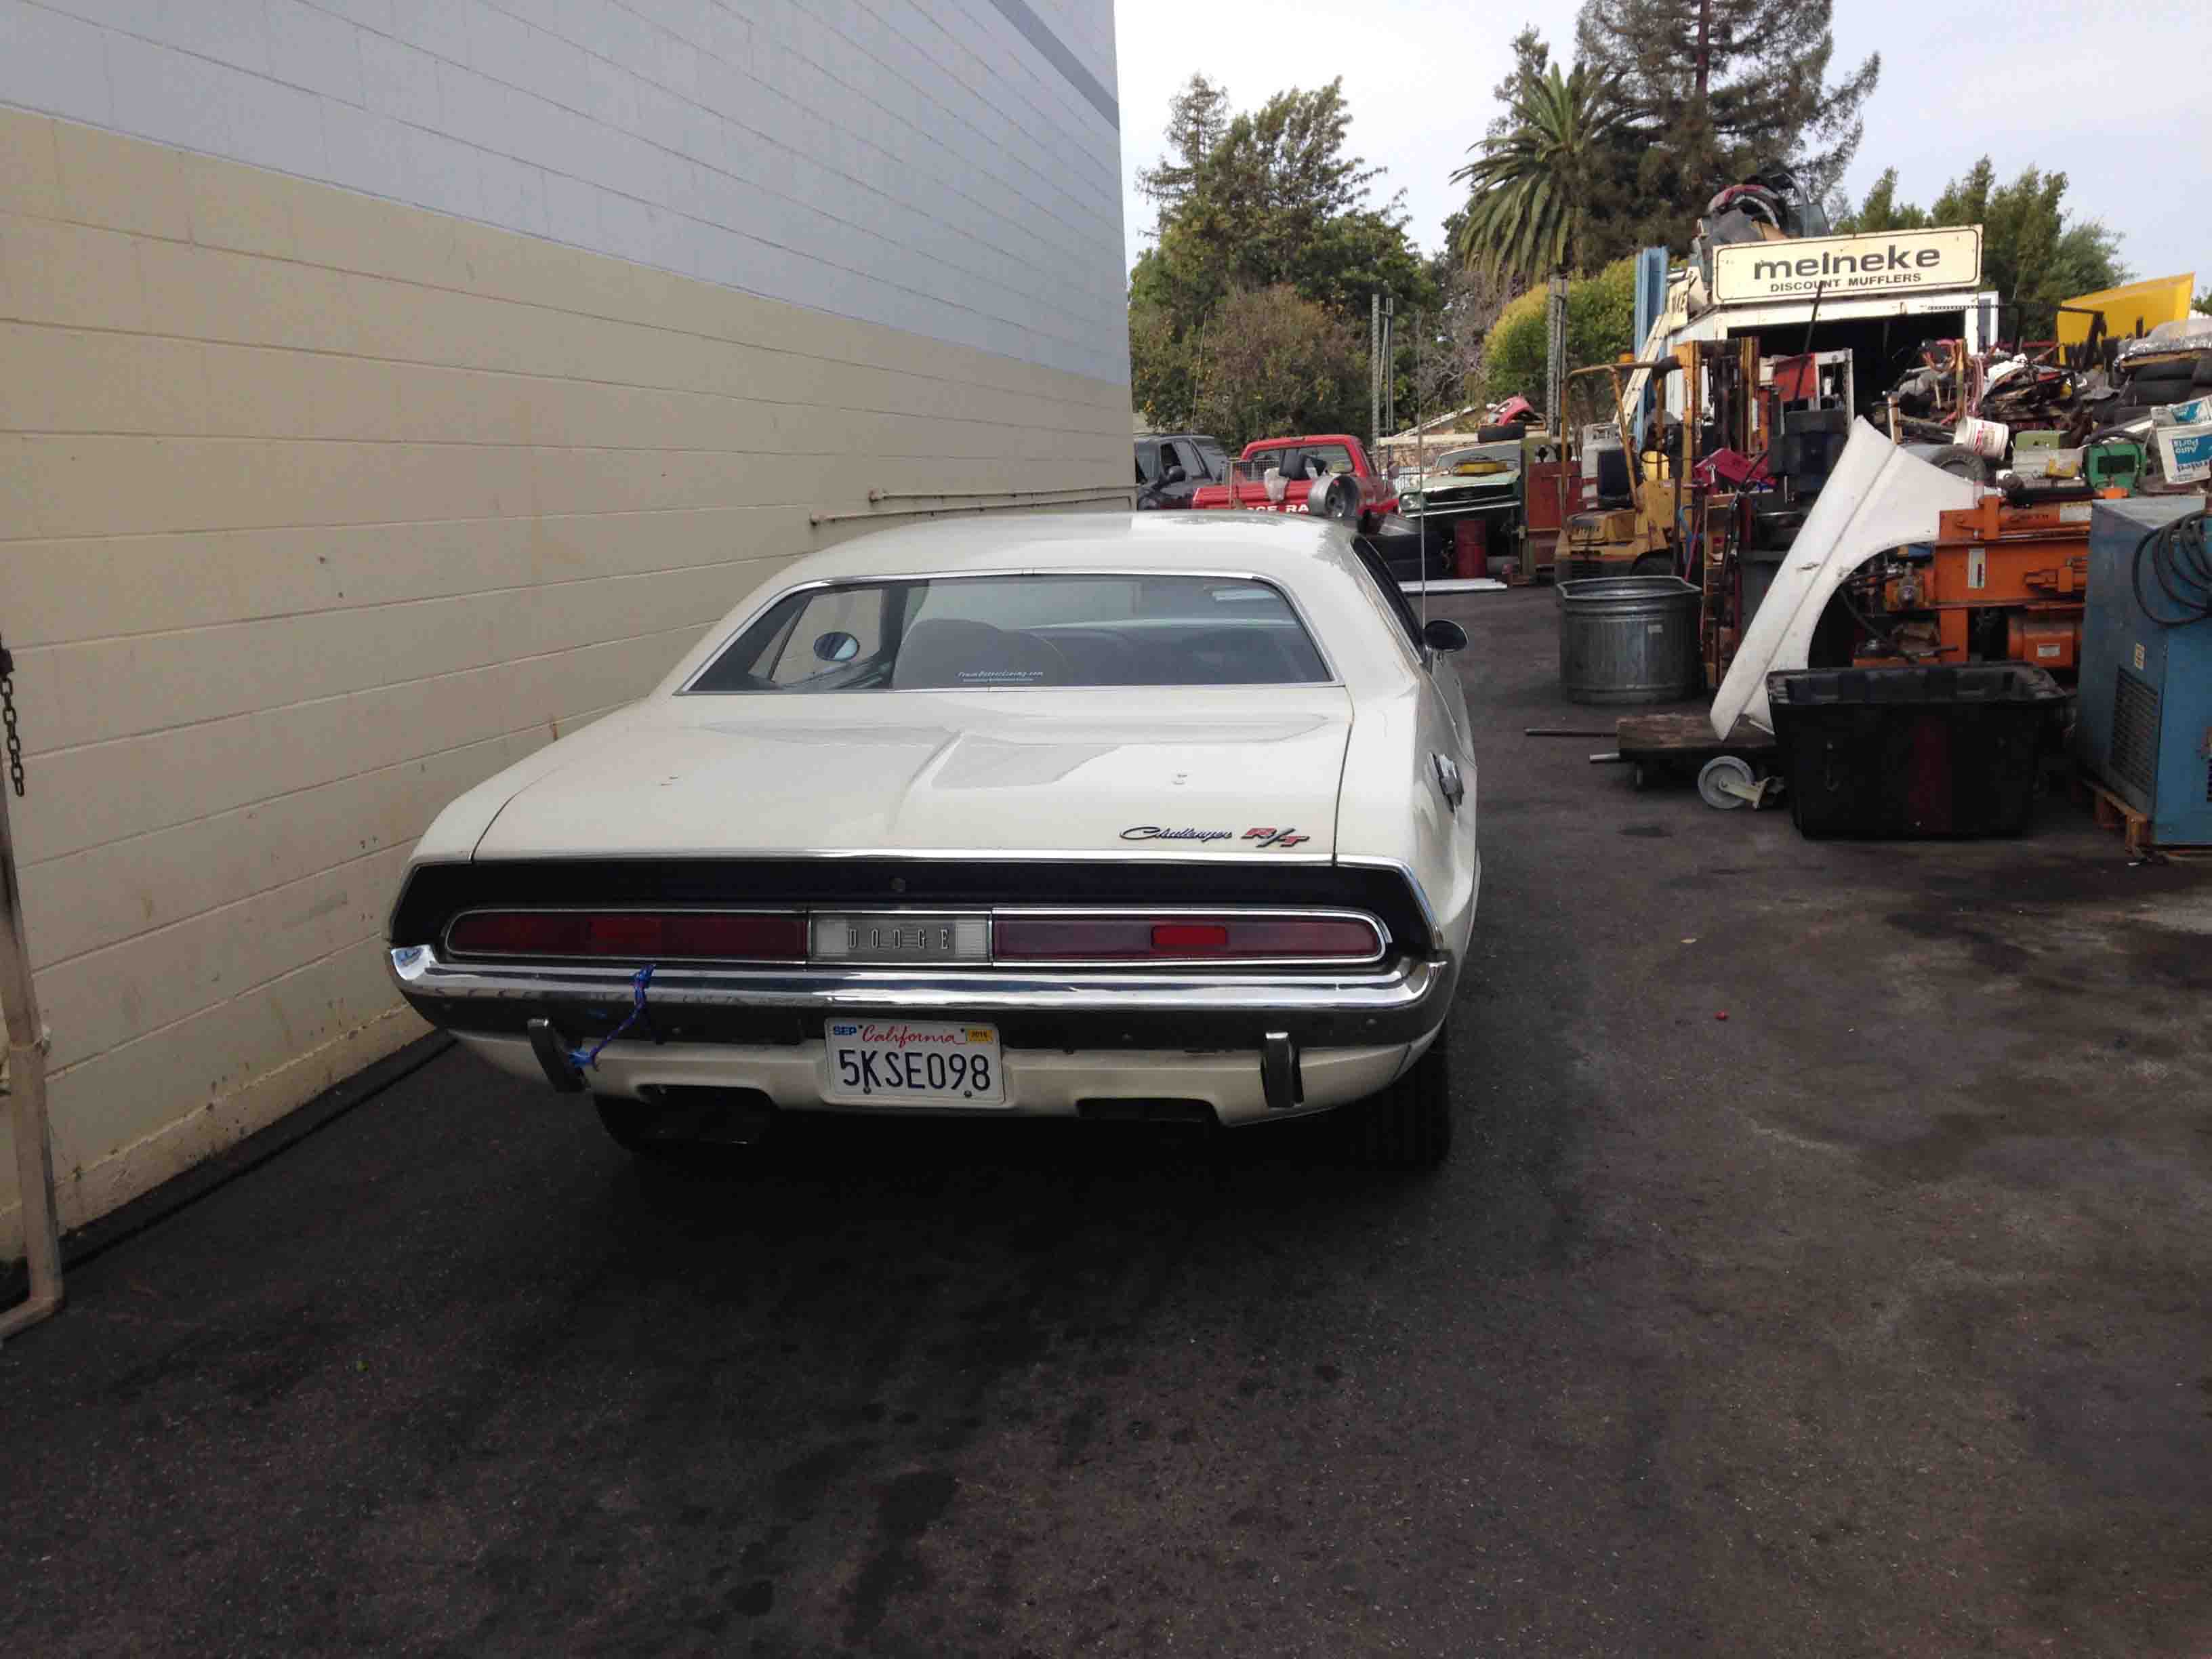
BEFORE ANGLE: In the back parking lot of Palo Alto High School, the boys’ gym in the background.

BEFORE ANGLE- side view

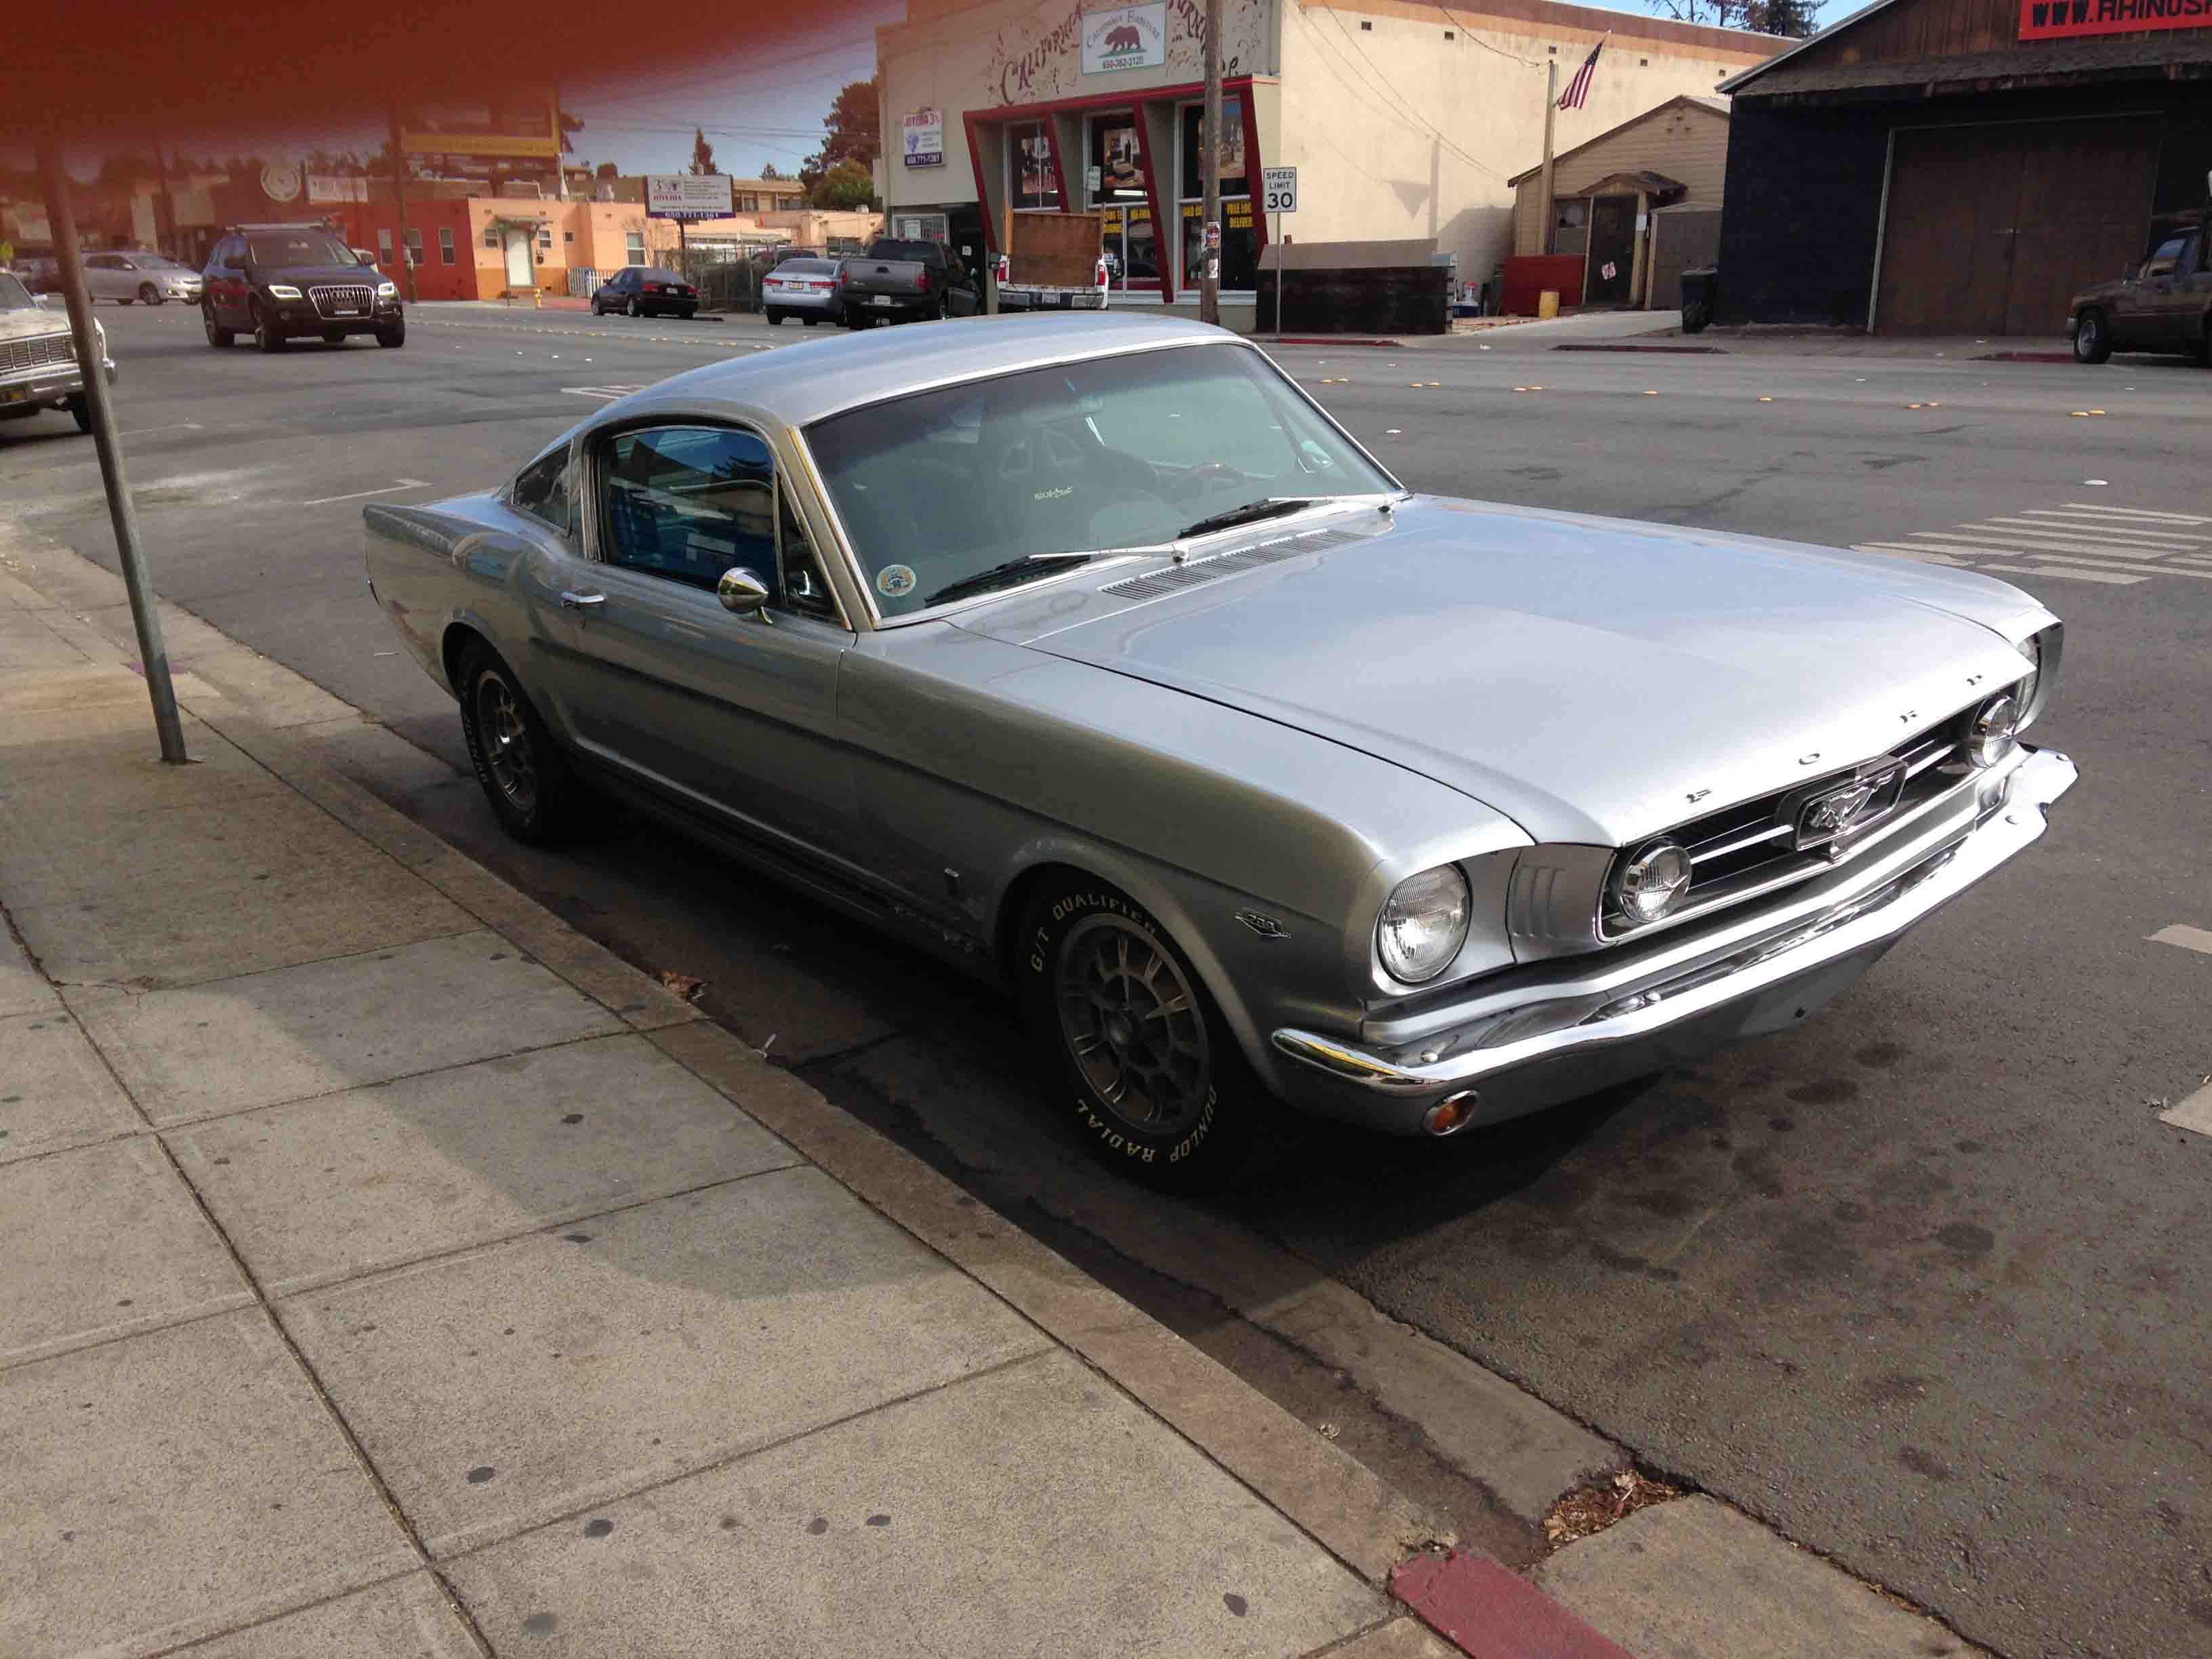
BEFORE ANGLE- side view at work last Summer

tb10

UPdated driver’s side

tb11

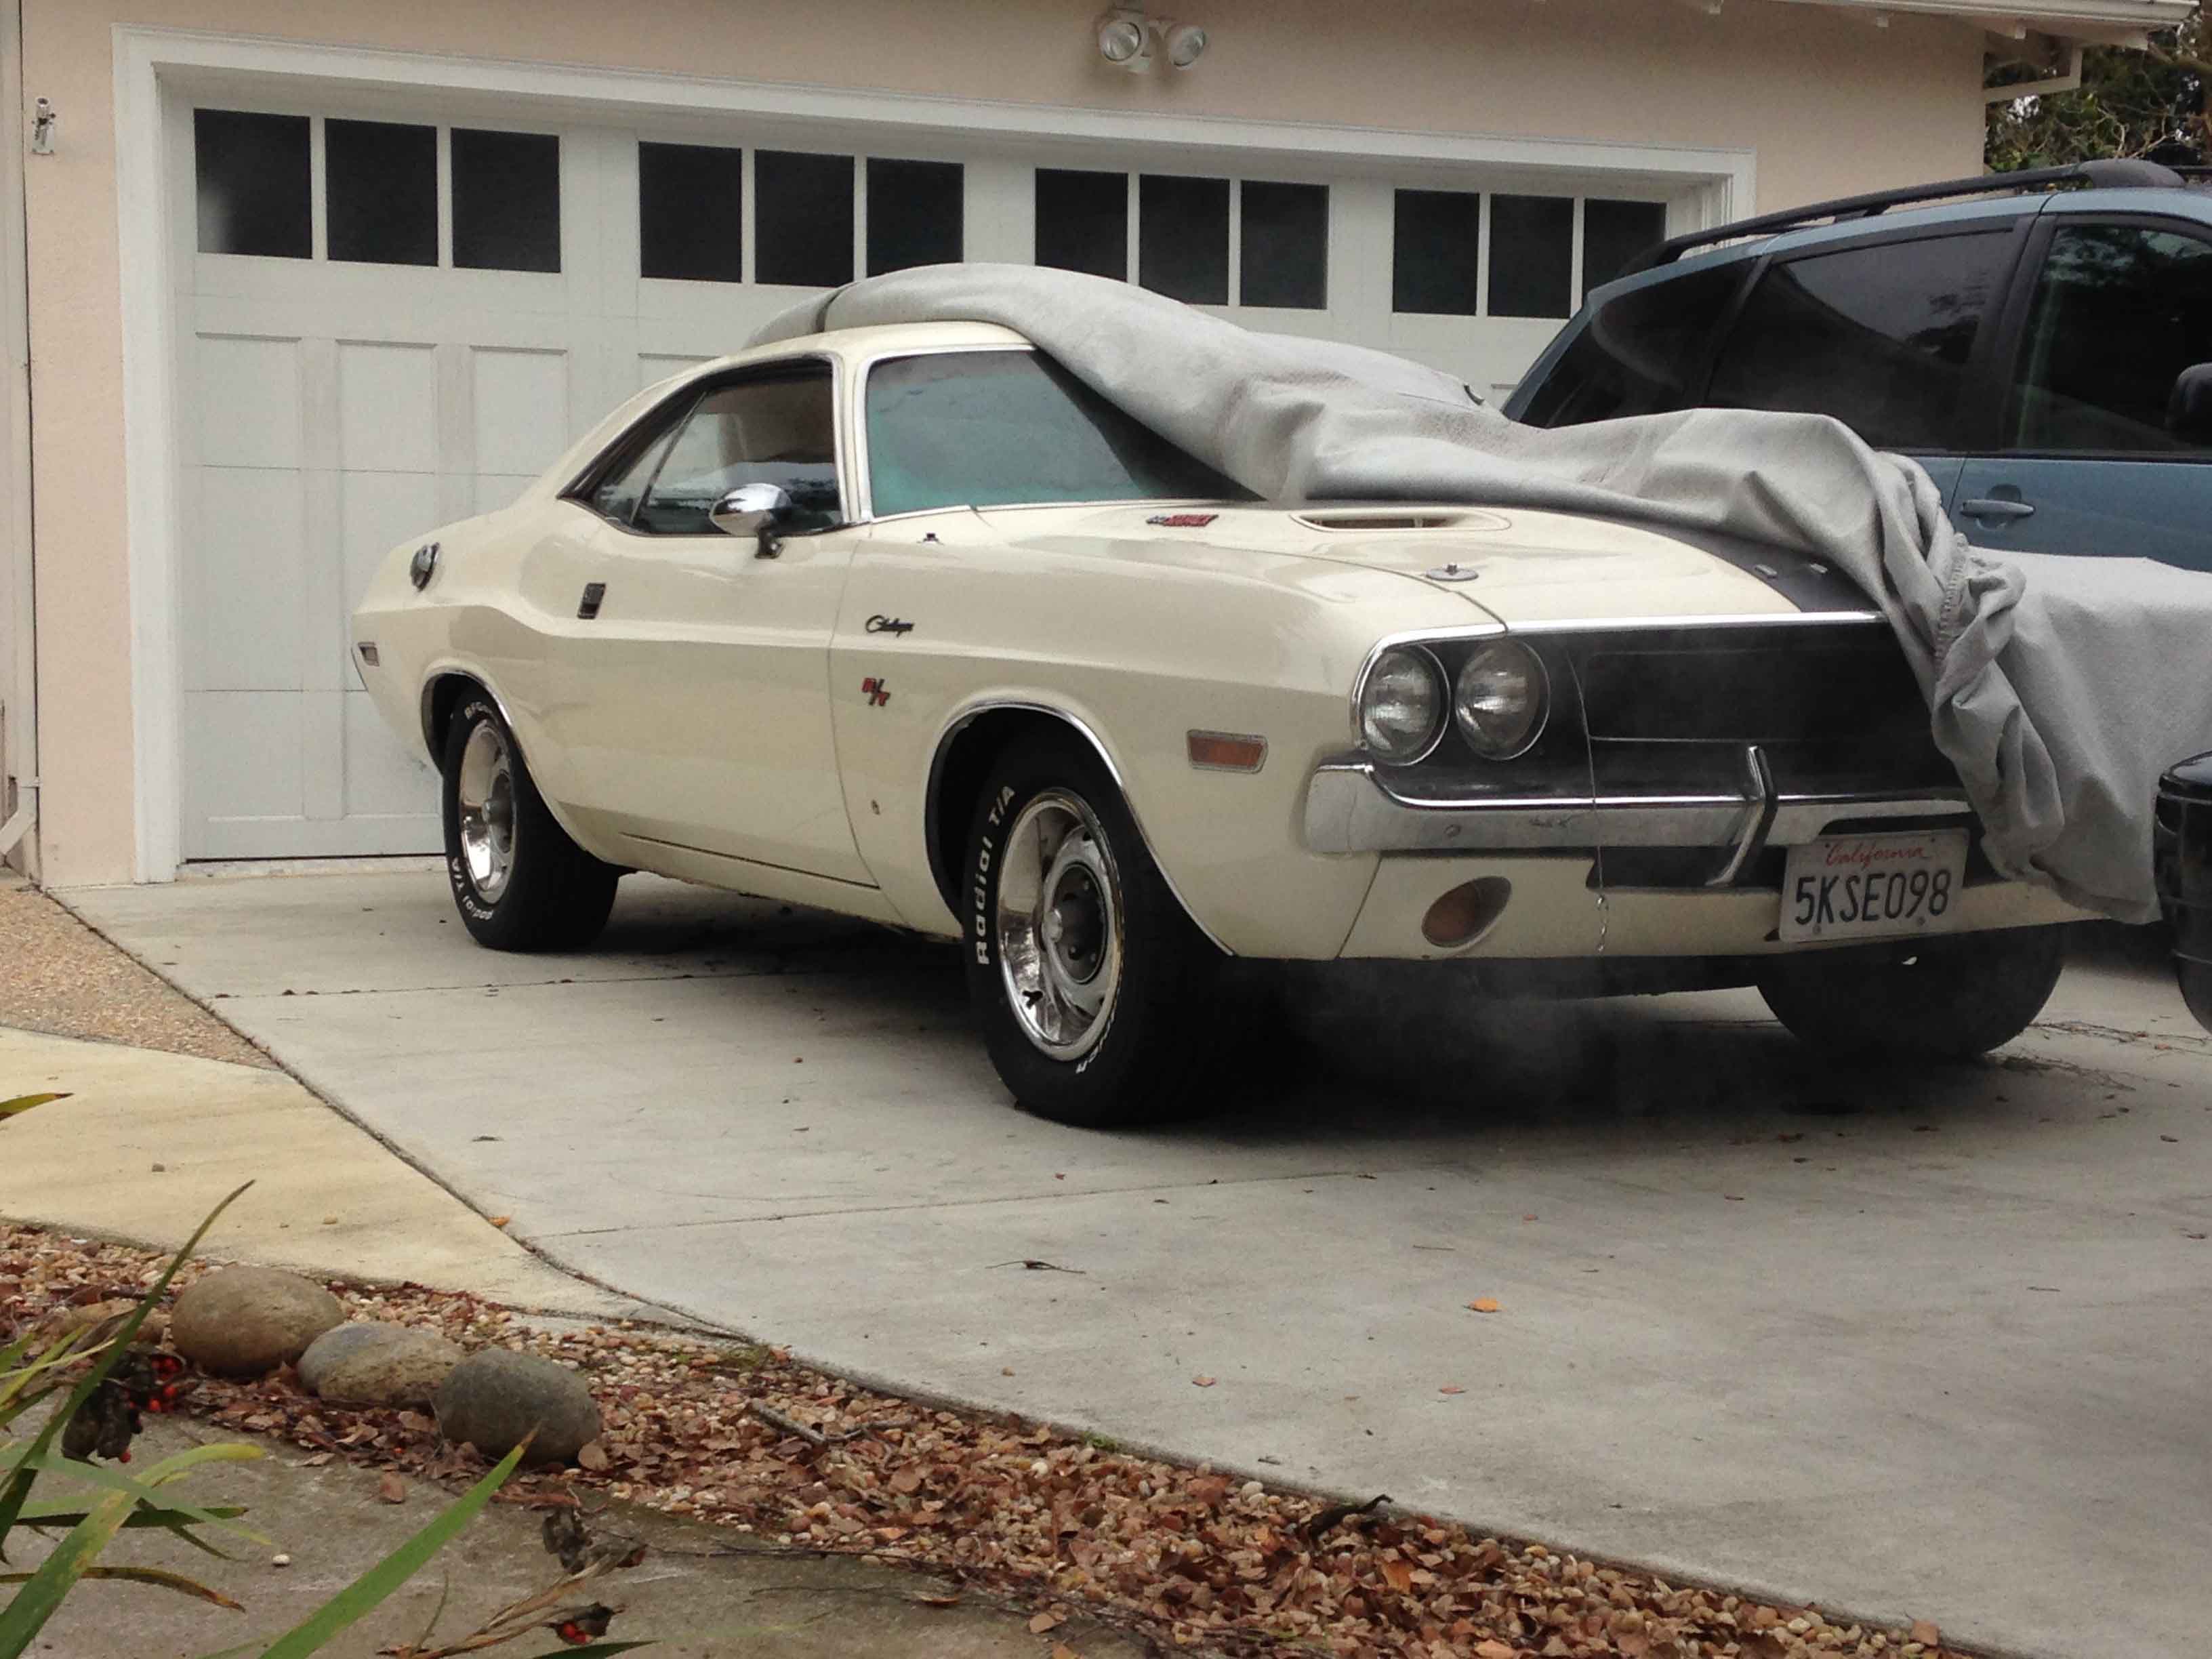
UPdated passenger side

tb12a

UPdated side view,

So what do you think? Car’s have this great capacity for personalization and the torsion bar setup on your Mopar makes tweaking your ride height a snap.

.   If you enjoyed this post, please LIKE SHARE COMMENT

The Dodge Kid in his youth about 1976. I think I wore this hat everyday through my Freshman year in high school. Photo by Nick Yee

The Dodge Kid in his youth about 1976.

Copyright © 2015 ChallenYee.com TheDodgeKid.com BestBuckBuck.com  TeamBetterLiving.com All Rights Reserved.

It’s Alive

yellownight

The 383 R/T… It’s Alive

With the kids out on a playdate at their friend’s house and my wife busy on her own in the house,  and good weather, I finally  got around to putting the transmission filter in, putting the pan back on and filling the Torqueflight back up with Dextron 6.

I was anxious to get the car running again, if for anything else, to burn some of the aging gas through the engine and to keep the seals lubricated.

A few details I learned about the Torqueflight are:

The serial number and date code are located on casing on the driver’s side, directly above where the pan seals. The date code has to be calculated from  a starting date of July 29, 1961.  You can use this 10,000 Day Chrysler CALCULATOR  (link goes to MAXWEDGE.com) to discover your date of manufacture. For example, I think mine is 3267, which equals Wednesday, July 8, 1970.

Although my Challenger was originally equipped with a 4-speed, whoever replaced the transmission used a correct date (at least year) 727.  There’s another 4 digit code after that says 6396, if that’s the date code, that means the transmission is from 1979. The whole number is PK35158451 3267 6396. If anyone out there can tell me something else about this, I’d be happy to know. I know PK is the factory = KOKOMO.

I decided to use the larger filter that I had to replace the smaller filter that was on the valve body. Most references I’ve seen show the large filter and the final opinion came from the guy at the O-Reilly store I spoke to when I bought tranny fluid.

I also did not use any sealant with the pan gasket. There are several references on the internet that warn you not to put any sealant to avoid junk from floating into your transmission fluid. The new black material-rubber gasket lined up well with the pan holes while inserted the screws.

The fluid capacity for a Torqueflight is 9 quarts, but I only used 7  quarts to fill up while checking with the tranny in neutral and the engine running. There must have been some residual fluid in the tranny, probably in the the torque converter. And I was happy to get the engine running again.

Add fluid quart by quart, and once it shows up on your dipstick, be careful to add maybe a 1/4 quart at a time to avoid overfilling. I used a funnel that fits into the dipstick holder and offers a wide mouth to pour fluid.

Dextron II, from what I’ve read is the best choice for your daily driver. Dextron VI seems to have replaced Dextron II, so I used D6. I’ve read Type F can be used for reach application but it could cause additional wear.

It’s been such a long time since I’ve driven the car, I needed to take it out for a spin.

Ever since I bought the car in 2006, I’ve never driven it with any confidence, it’s been laid up at home or hiding in various shops the last few years. But tonight, I finally was able to take the car out and drive it without worrying if something was going to break.

It’s not as powerful as my 440 but the 383 4 barrel feels and sounds every bit the Mopar big block. Even with stock dual exhaust without headers, the acceleration has a great reminiscent feel with good torque pulling through the automatic and I think 3.23 rear gearing.  Nice for a stock engine.

The 383 Hi Performance option (335 HP) has a horsepower peak at 5200 rpm and a whopping 425 Ft lbs of torque at 3400, so out of the showroom you had a high revving engine with the torquey big block which makes a nice all around combination.

Slowing the yellow Challenger down, the drum brakes feel solid and get the job done.

The car needs an alignment to center the steering wheel, but I remember well the feel of the stock steering wheel and the power steering is something that’s appreciated after arm wrestling with my 440 with manual steering!

Now it’s back to another week, albeit Thanksgiving week and I was glad to get in a couple of hours on the yellow Challenger.  It’d be nice to keep this car, but I do  plan on selling it. I’m a little hesitant but I know at some point I need to follow through.

CY


torqueflightfilterin

This is the new large filter with screws torque in. I’ve had this filter for a few years, hence the surface rust.


torqueflightcode

This is the driver’s side, the tranny ID number and date code are on the rail right above the pan.


RT2

Challenger R/T Ranch


..   If you enjoyed this post, please LIKE SHARE COMMENT

The Dodge Kid in his youth about 1976. I think I wore this hat everyday through my Freshman year in high school. Photo by Nick Yee

The Dodge Kid in his youth about 1976.

Copyright © 2015 ChallenYee.com TheDodgeKid.com BestBuckBuck.com  TeamBetterLiving.com All Rights Reserved.

Poop on Pertronix Distributor for 440

I had hoped to tell you how I put in my new Pertronix Flame Thrower III distributor on my 440 but instead I have another point to make that some of you who are considering the swap will want to know.

I had put in a Pertronix distributor on my 340 six pack Challenger T/A and that wasn’t a problem, but the 340, although it is situation on the rear of the block, has more clearance standing straight up and down and away from the cylinder heads (unlike a 440).

Visually the new distributor is significantly larger, but I did not expect to run into clearance problems.

pert1

The first indication my one-day installation wasn’t going to happen was when I tried to seat the distributor into the block.

pert3

Without the hold-down bracket, it is easy to see the area where a small gap can be seen. The distributor cannot fully seat without some metal relief on the head.

Being an experienced mechanic, I did not force the distributor down into the seat. I noticed a small gap in the hold down area.

Upon closer inspection, I could see the larger distributor housing was touching the cylinder head at the point of a casting ridge.

pert2

This photo was taken before I tried installing the new distributor, so there are no scrape marks to be seen in the area that is circled.

I thought about this for a few minutes, thinking, I bet the guys on RoadKill (that amazingly entertaining show) would probably take a grinder to cylinder head and get the needed clearance but I realized I’m not set up to grind, nor can I take a risk on my driver just to put in this distributor.

Disappointed, to say the least, but saving the part of the future.


PART II

Chevy at Work

This is not a Mopar, but I just wanted to post these photos for  Roger (left) at work who is a proud new owner of a 67 396 SS Chevelle. Jim (right) owns an old restored 340 Dart. I’m waiting for him to drive that to work.

Congratulations Roger, nice ride.

roger1 roger2 roger3

..   If you enjoyed this post, please LIKE SHARE COMMENT

The Dodge Kid in his youth about 1976. I think I wore this hat everyday through my Freshman year in high school. Photo by Nick Yee

The Dodge Kid in his youth about 1976.

Copyright © 2015 ChallenYee.com TheDodgeKid.com BestBuckBuck.com  TeamBetterLiving.com All Rights Reserved.


Exhaust Hanger Hangover

What happens when your only commuter car is your classic and when you’re about to get in the car to go to work you notice that one of your exhaust tips/pipes looks like it has lost its mojo? It’s hanging down almost dragging on the ground. This is what happened a few weeks ago.

That’s one thing about driving the 45 year old car daily, it’s like taking it on a shakedown cruise. If something is weak it will let you know.

I’ve got to drive the machine to work but I do not want the car to look bad… what to do?

Take it to the muffler shop as soon as possible! There is no honor in letting your classic car run around with a goofy looking tail pipe (aside from the fact you’d hate to have it drag on the ground, should that happen!).

I take my cars to one of the local Meineke Muffler shops, the one in Redwood City, run by a muscle car guy named Lupe Garcia. He has been helping me since around 1990 when I used to take my GT-350 clone there. A fellow open track racing member of the Nor-Cal Shelby American Club, I can always trust him to make the right corrections of repairs to my exhaust. Sometimes they’ve done some specialty welding for me, including on my white Challenger.

pipe2

You think this looks bad? It was way worse, hanging down about twice as much that is shown before I hauled it up with a strand of rope. It was looking pretty UN-high performance, a bit like it suffered from a stroke.

pipe3

Notice how the original hangar broke away from the under trunk 45 year old sheet metal that is rotted. The detachment process was accelerated because the muffler hangar screw came loose, so everything from the header tip on back was resting on the tailpipe hangar which eventually tore away. There’s not much rot in the car that I can tell, but there are some spots in the “under side” trunk pan that has some weak spots.


pipe1

Here’s where I tied the pipe up to the bumper. Pretty secure, enough to get me to work and then to a late afternoon trip to the muffler shop.

pipe5

Here’s the Challenger waiting at the muffler shop.

pipe6

This is the shop owner’s Mustang Fastback GT which he still uses for open track. Nice clean car with the 1966 Shelby 10 spoke wheels. One of my favorite wheels.

pipe7

Bad photo but here’s the interior of Lupe’s Mustang, the glove compartment is signed by Carroll Shelby.

pipe8

Look close… See? “Carroll Shelby”

pipe13

On the rack again. It’s good to be back up on the rack again…

pipe12

pipe14

Lupe doing his magic using tool for delicate work… not

pipe15

We’re not worried about making it concours correct, just solid, fix it so I can get back to driving again. We can take some liberties with pipe hangars.

….

The Return of the Camry

I just got the 1994 Camry repaired (replaced the transmission with a good 1999 version) and picked it up this last weekend, putting and end to this chapter of daily driving of the Challenger. I was getting pretty use to it and rarely missed a shift after I figured out the little nuances of the Richmond/Long Shifter combination my car has.

Driving in rush hour traffic jams Monday through Friday was getting me more sensitive to people tailgating me  while looking down at their handheld devices. I want to have an neon sign light up on the back of my car that says, “KEEP YOUR EYES ON ROAD” or “BIG FINE FOR TEXTING”. Might not do any good however, since I need the message translated into 15 different languages out here in California.

There’s a days when I’m perfectly happy to drive the car without abusing it, I feel like I’ve actually accomplished something noble. And then there’s times when redline tire smoking launches at the highway metering light is just too natural.


ROADKILL

By the way, do any of you guys know about “Roadkill”? (www.roadkill.com). I happened to stumble upon it when I was looking at Youtube. It’s a Motor Trend Channel show featuring two experienced and comedic hot rodders who do some amazingly wild and crazy stuff with cars, almost always beating machines to the outer reaches of the human experience.. It’s become one of my favorite “TV” shows. Very entertaining. Watching it certainly makes me feel pretty sane.


..   If you enjoyed this post, please LIKE SHARE COMMENT

The Dodge Kid in his youth about 1976. I think I wore this hat everyday through my Freshman year in high school. Photo by Nick Yee

The Dodge Kid in his youth about 1976.

Copyright © 2015 ChallenYee.com TheDodgeKid.com BestBuckBuck.com  TeamBetterLiving.com All Rights Reserved.

Summer Driving Impressions

In the middle of this hot summer, my normal daily driver, a 1994 Camry, decided to have a transmission slippage problem. The final straw was when the old Toyota would not move, but at least we were only a block away from home. Amazingly, seemingly out of nowhere, two neighbors came out and helped me push the Camry back home while my wife steered the car.

While I am investigating solutions, including  getting a new car and/or getting the old tranny replaced, I’ve had to drive the white 440 manual transmission Challenger to work. The 45 year old muscle car becomes my daily driver.


marvell

Here is the Challenger as it sits in the covered parking lot at work. Better to keep it out of the sun during working hours., especially through the recent heat wave where temps reached near 100. Manual steering makes it a chore to get in and out of 90 degree spaces. A couple of muscle car enthusiasts spotted my car at work and now I have new friends at work.

90 to 100 degrees in the Bay Area, and how does it feel to drive a 440 Six Pack Challenger in traffic and boiling summer heat? How has the cooling system handled keeping the engine from puking coolant in traffic jams? How has it been driving a manual transmission with a CenterForce clutch? How has the Richmond 5 speed been shifting?How much gas am I sucking up? What kind of modifications would  I like to make to the car after using it to commute for several weeks?

Keep on reading for answers to these questions and more…

waterwetter2

Adding a bottle of WaterWetter to my distilled water-filled cooling system. It’s good to mix it up with some distilled water in a jug before adding it to your radiator. You should drive the car immediately to normal operating temperature to ensure thorough mixing in your system.

screen2

I haven’t checked this home made coolant screen at my upper hose connection to the radiator for months. It was still there and this is the little crud that was captured by it. I replaced it with a new copper mesh screen.

wfm

In the underground parking lot of a Whole Foods Market, doing some grocery getting with with th skids and  the 440 six pack Challenger. Right before I was pacing a blue Cobra roadster going down El Camino Real. THe traffic was too heavy for me to catch up with him but it would have been a pretty sight for onlookers to see a Cobra and a Challenger lined up at a stoplight on a Sunday afternoon in Silicon Valley. Nothing like stalking a Cobra to keep your mind focused on driving.


vida

Here’s we’re parked in downtown Menlo Park in front of one of my favorite restaurants, Vida Bistro, where my wife and I got engaged in 2000. But today, I just parked her to take the kids to the local Stone Cold Creamery for some ice cream. Good thing the reverse lights work on this car! And getting out of these spots is easier for steering the manual box.


How does it feel to drive a 440 Six Pack Challenger in traffic and boiling summer heat?

It is hot, especially wearing work attire. Although it’s nice to have the A/C from my other car, opening the windows makes the heat tolerable. Wear sunscreen to keep from getting burned!

I’ve got a little exhaust fume problem. Opening one window tends to suck in some exhaust into the interior, but opening both sides tends to keep keep the smell in check more. The fumes and for general performance I want to add a multiple spark ignition to the 440.


How has the cooling system handled keeping the engine from puking coolant in traffic jams?

The cooling system has worked admirably, quite admirably, despite sitting in traffic jams, stuck mostly in first and second gear creeping  along in near 100 degree heat. The temperature gauge tended to rise into the middle range on the temp gauge, which from my experiments with the laser thermometer means the temperature is closer to 220 degrees rather than 180-190. The engine never regurgitated any coolant.

When I changed the mesh filter in my upper hose, I noticed I was slightly low on coolant, but still covered the radiator core. When I topped the system off, I added a bottle of Water Wetter and mixed it first with some distilled water before adding it to the radiator and overflow jug. Putting it in right before driving helps ensure thorough  mixing. Adding it seemed to do a better job controlling the temps.


How has it been driving a manual transmission with a CenterForce clutch?

Survivable. The pedal pressure is reasonable for a performance clutch. What takes muscle is shifting the transmission when it gets moody. Sometimes coming out of 5th gear to down shift it feels like the shift pattern gets  a little confused. This problem would never occur with the 4 speeds I’ve had in the past.


How has the Richmond 5 speed been shifting?

With the 5 speed Long shifter on the Richmond, the 1st 2nd gate is spring loaded, where the natural alignment (unsprung) is the 3rd-4th gate. 5th requires pushing against a spring and reverse (under 5th) requires downward pressure which virtually eliminates the chance of accidentally going into reverse and thereby scattering your transmission across the highway. So when you’re coming out of 5th, sometimes the resistance going to the 1st-2nd gate is not enough to keep from missing a clear shot into 3rd or 4th. Does that make sense? The result is, you have to be more aware than you would normally like to make a well executed downshift. Usually the down  shift  goes hard into gear also requiring a momentary conjuring of The Incredible Hulk’s arm.

Getting into gear most of the time is like what you’d expect, a nice low effort throw and snap into gear, but sometimes it doesn’t go into 3rd with the  Midas Touch, it takes Rocky Balboa to ram it, but it goes.

My old Ford Toploader with a clean shifter and I’m sure a good 833 Mopar tranny shifts a lot easier than this monster. 3rd gear takes the most muscle as sometimes I just have to just have let that gorilla know who is boss. Actually, I think it would be nice to have a 6 speed TREMEC and be able to keep the RPM’s low on the highway and get better mileage. Right now, with the 2.94 rear axle gears, 65 mph (about) in 5th gear puts the engine at about 2300-2500 RPM, which is not bad, but the engine has so much torque, and in reality, typical cruising speed is 70-80 mph near 3000 RPM.

I’ve considered changing tranny oil from the Mobil 1 that’s in there now, to Pennzoil Synchromesh Fluid, which is similar to what’s used in Corvette transmissions. I’ve read is can help make shifting easier, but for now, I’ll opt for the added protection of the more conservative and heavier Mobil synthetic (which is what I used in my Mustang’s top loader).

Road and Drag Racing Tip: When performance driving, with the way my car is running with the Richmond, I plan to stay out of 5th gear. If I treat it like a four speed, shifting is a lot more predictable. 5th gear( which is a direct 1:1)  with the 2.94’s I’m running in back is just meant to be “cruise” mode.  If I’m in road course mode, pretend it’s just a four speed. Moreover, 3,000 RPM launches work out with minimal tire spin if I don’t mercilessly hammer the throttle right off the line .


How much gas am I sucking up?

I fill up once a week (4-5 days of driving) going to work. 30 miles to work and back, I’m estimating about 10-12.5 miles per premium gallon in commuter traffic. If I start stomping on it, that can change quickly. My old 71 Challenger with a 383 (2 barrel cam) got about 15.5 on the highway with 3.23 gears on regular gas.

It’s nice after I fill up because the fuel gauge stays on “F” for about a day, before it starts it rapid descent toward “E” (the 16 gallon tank). Quite frankly, it makes my want to opt for the 4 cylinder option (instead of the V-6) on my next daily driver, just to reduce the trips to the gas station, just to restore the Yin-Yang balance to life. That’s not to say it isn’t fun driving the big Mopar, it IS fun and it get’s attention from car enthusiasts in a way that a Honda Accord  would never get.


What kind of modifications would  I like to make to the car after using it to commute for several weeks?

So much time is spent under 3000 RPM when commuting, it is worth getting a multiple spark discharge ignition. I like the Pertronix Billet distributors. Despite retiring the Prestolite Dual Point, which was old and ran like hell, I used a Pertronix in my 1970 Challenger T/A and it worked like a charm, and that only had the basic Pertronix Ignitor. The one I’d get for the 440 uses a Ignitor III with has a hotter, multispark, and rev limiter unit inside. More power, better gas mileage – what’s not to like? That’s what’s great about modifying a driver and not having to adhere to the requirements of a show car.

I’d like to get my seats reupholstered because ever since I’ve had it, the driver’s seat right side is sagging, probably from the hard driving as a drag car. Plus I hate the “drug dealer” tuck and roll upholstery.  I like the stock looking Legendary stuff I have in storage. I’m getting used to that also, but I’m sure it’s not good for my back’s alignment.

It would be nice to finally get the exhaust smell removed from the interior. I have already reduced much fumes by, in the past, changing the trunk seal and the grommet that seals the gas filler tube to the gas tank. But it still can smell. I’m hoping the Pertronix ignition will help.

The manual steering is okay, and although it takes strength to turn that thing in a parking lot, what I would really consider fixing is removing the about 10 degrees of play in the steering. The excess play makes driving down a straight highway more of a conscious effort than it should be. It’s pretty tolerable in most circumstances. Driving the car on a regular basis helps a lot in getting used to how much muscle it takes to handle it. If you’re used to driving power steering most of the time, it can be a pain, but once you eliminate the memory of wimpy arm power steering, you accept the fact that having another inch on your biceps is a welcome addition to your physique.

Whether that’s just an adjustment or requires replacing the steering box, I have yet to figure out. It would be nice to have a faster steering ratio, ala, my old GT-350 clone (which had about a 2.75 turn lock to lock) or my old T/A which with a fast pitman arm had about a 3.5 turn lock to lock is something that is nice. I like the manual box because of the road feel, but steering can be a pain in the arm, literally. And between the Richmond tranny and the manual steering, driving this Challenger can be a real work out. Stay in shape if you want to drive a non-power assisted muscle car.

***

Reminiscing about the Mustang: I remember I actually liked using the 70 series (Michelin) tires in my Mustang on the street instead of the 50 series Comp T/A tires I used on the track since turning the 70 was a LOT easier with the manual steering box and fast arm. Handling with 70 series had much to be desired (pretty much mush), but nothing you couldn’t handle through slide control. The Mustang was lighter and had  a 289 which helped.


..   If you enjoyed this post, please LIKE SHARE COMMENT

The Dodge Kid in his youth about 1976. I think I wore this hat everyday through my Freshman year in high school. Photo by Nick Yee

The Dodge Kid in his youth about 1976.

Copyright © 2015 ChallenYee.com TheDodgeKid.com BestBuckBuck.com  TeamBetterLiving.com All Rights Reserved.

.

Minor 727 Torqueflight Issues

I was doing some work on my other 1970 Challenger R/T, replacing the transmission filter and pan gasket plus fixing a bad connector for the reverse light. These things are normally something that could be done in an afternoon but when you’re working on a car that’s 45 years old and has had some engine and tranny swaps, the job may not be straightforward.

  1. Wire color code may not match replacement part.
  2. Transmission filter size varies between mid 60’s and 70’s

These are the kinds of issues that can occur when the car no longer has the original equipment and when previous owners or mechanics don’t care about maintaining vintage consistency. Problem may occur with the lack of correct matching parts availability, for example, a wiring harness or transmission.

I have not run into these specific problem before so without taking anything for granted, I was able to trial connect the 3 wires leading to the new electrical connector, but I am not willing to replace the filter without someone else confirming the interchangeability of the filter.

So  here are some notes and photos about my work in progress.

tranny1

That’s enough clearance to access the tranny pan and reverse-neutral-safety switch which has a broken connector. The tranny pan leaks, so the gasket and filter will be replaced.

tranny2

I hate it when people work under a car without jack stands. I was run over by a car many years ago, so I am gleefully paranoid about having another, much heavier car fall on me. Here’s a point to place a stand under the lower control arm.

tranny3

Stand number two: under the frame near the tranny crossmember.

tranny11

My reverse lights don’t work, so a place to check is the connector or the safety switch located on the left side of the tranny slightly above the pan. The wires were broken at the connector.

tranny10

Peeling back a few inches of black electrical tape that was very greasy, I exposed the three wires. After taking a cloth to clean off the residue, I checked the wires to see if they were brittle. They felt okay and so I cut back a couple of inches before stripping the ends to connect to the new lead wires extending from the new connector.

tranny13

The color coding on the new connector didn’t match what was on the car, but there was enough correspondence that I could guess the first time the right connection. The new connector comes with a black, purple and brown wire with yellow stripe. The existing wires are brown, black and what looks like black with a white stripe. I temporarily connected the brown wires together, the black wires together and the purple and black striped wire together. THe reverse light works and the engine can turn over in neutral.

tranny9

YES! It’s a great feeling to fix anything with the car. There’s got to be some weird genetic switch that gets triggered when an you get something to work that was broke.

tranny6

The new filter, which is designed for the 1970 B-727 Torqueflight is bigger than the old filter which I suspect is from a 1967 type 727.  The car originally was equipped with a 4 speed and some previous owner converted it to an automatic., apparently an older than 1970 version. The filter mounting holes are the same.

By the way, to remove a transmission pan that is not equipped with a drain plug, you need to loosen the screws and while retaining loosened screws on the “uphill” side, carefully pry apart the pan from the tranny on the downhill side and let the fluid drain into a larger vessel (like a large oil drain pan). I used a broad tip flat tipped  screwdriver to pry the pan enough to break the seal. Make sure you do not chip the sealing surface, avoid bending the pan, or possibly damaging anything internal with you prying instrument. Make sure the retaining screws are adequately loosened to allow the pan to tip at an angle without bending any metal.

Once the pan is off, expect a little more fluid to drain when you remove the filter.

tranny4

The top side (tranny valve body side) of the new filter has one hole.

tranny15

The top of the old filter, has two holes. One is in the same location as the new/larger filter. There is enough differences, that I, who do not have experience or knowledge in this area, am unwilling to ASSUME, that sticking the new filter is going to work. THe last thing I need is to seal this tranny back up with a filter that doesn’t work. Your expert or knowledgeable feedback is welcome.

tranny7

Here’s the dirty pan with the old gasket. Sealant was used on the bottom, but not on the top (facing the transmission). I’ve read several recommendations that no sealer should be used to avoid sealer from getting loose into the tranny fluid.

tranny14

A wide bladed instrument like this old trowel worked well to scrape the old gasket and silicone like sealer of the pan. Avoid gouging the sealing surfaces.

Do you know for sure?

If you know if the larger filter is safely interchangeable with an older type, please comment.

About my keys…

I DID have a hard time looking for my keys which was a drag because I could not check the reverse light function without them, but I finally found them in one of those places that I thought safe and I would not forget…

..   If you enjoyed this post, please LIKE SHARE COMMENT

The Dodge Kid in his youth about 1976. I think I wore this hat everyday through my Freshman year in high school. Photo by Nick Yee

The Dodge Kid in his youth about 1976.

Copyright © 2015 ChallenYee.com TheDodgeKid.com BestBuckBuck.com All Rights Reserved.

.

Racing Fuel Blues?

I will float a recent experience out there about hard starting, feel free to comment.


Done. The test drive that day revealed NO popping out the carb. I thought I had fixed the problem. But as I push the engine harder, like I did the following weekend. It still backfires through the carb under harder acceleration. When this thing stops popping, it is going to accelerate like mad money. Notice the 340 decal - this air cleaner assembly was from my Challenger T/A when I first bought it. It was the wrong assembly for a small block, but correct for a big block. I sold the T/A a few years ago, it was completely restored with the correct small block T/A air cleaner. I may keep this decal on just as a remembrance of the old car and to mess with people's minds.

Sucks when you’re ready to jump in the Challenger and take it to work and then you can’t start it. By the way, there’s a story behind the “340 six pack” decal when it’s actually a 440. It’s off my old 340 T?A and I kept it for the memory.

A few weeks ago went to the local 76 Station that carries Racing Fuel and decided to put in a mix of Premium and Racing Gas.

After sitting for a few weeks and after some hot weather, not sure if that had anything to do with it, I tried starting the Challenger in the morning and could not start it. I got some starting fluid and nothing.

Sort of suspecting the engine was flooded, after I came back from work in the late afternoon and tried to start the car and, it started immediately.

A week later, still with the same mix of gas, the same thing happens. Exactly the same thing happens, down to the late afternoon immediate starting.

So the second time I drove out to the nearest gas station and put some regular low octane in the tank to neutralize the racing gas. Since then, knock wood, I haven’t had the problem and I’ve driven the Challenger several times this week.

(By the way, even in 90 degree weather in rush hour traffic, the engine runs cool as a cucumber).

I’m not sure if the racing gas, which burns more slowly than regular or premium, was the culprit, but I’m thinking it was.

I’m speculating with the particular setup in my engine, from the carb jets, compression, and type of ignition and timing, it is just not liking racing fuel.

I know that it’s best to run the lowest octane gas your engine can run safely on, without pinging, since lower octane gas actually contains more power and the additives commonly added to higher octane fuel have nothing to do with producing power, rather they are mainly to control preignition problems.


What do you think is going on?


..   If you enjoyed this post, please LIKE SHARE COMMENT

The Dodge Kid in his youth about 1976. I think I wore this hat everyday through my Freshman year in high school. Photo by Nick Yee

The Dodge Kid in his youth about 1976.

Copyright © 2015 ChallenYee.com TheDodgeKid.com BestBuckBuck.com All Rights Reserved.

Bilstein Shock Installation and Road Report

TBT – I dug out an old email I sent to Firm Feel Suspensions up in Vancouver, Canada after I installed a set of new Bilstein shocks on my 70 440 Challenger back around New Years of 2013.

I figure you might get a kick out of it.

In the back parking lot of Palo Alto High School, the boys' gym in the background. Same building as in 1980 and many years before, but we didn't have the cool looking Viking Ship paint job back in then.

In the back parking lot of Palo Alto High School, the boys’ gym in the background. Same building as in 1980 and many years before, but we didn’t have the cool looking Viking Ship paint job back in then.


—-Original Message—–
From: challen yee [mailto:challenge@sbcglobal.net]
Sent: Sunday, January 27, 2013 8:55 PM
To: Dick Ross
Subject: Re: Bilstein Shocks RCD 70 challenger

Hi Dick,

I finally installed my Bilsteins on my car this weekend and have my initial report.
First, the installation was straightforward. I haven’t replaced shocks on a Challenger since I was in high school in about 1978, but fortunately, my memory came back and remembered the little techniques to make the job go smoothly. The main one was using a 10 inch cresent wrench to open up the lower control arm mount just enough to gain enough clearance to tap that lower front shock mount home.
The trick on the rear shocks is that the upper bolt needs to be hand installed from the bottom of the car, sitting facing the brakes with the head in the wheel well. Tightening happens with the 3/4 box holding the self locking nut through the trunk to hold while tightening the bolt from the bottom.

The rears, fortunately have clearance in the upper mount that no problems occurred when slipping the upper mount in.

All this was done in my driveway while my wife was out on errands.  (LOL)

First, it’s nice to hold in my hands some quality shocks and say good bye to the old monroe-matic garbage. I noticed the Monroes had some pressure in them but nothing compared to the effort required to collapse the Bilsteins.

Initial driving impressions. Getting quality shocks makes my Challenger more composed and mature.

The ride quality improvement is definitely noticeable, especially on the highway at speed. I can go 80 to 90 easily without the shuddering from all the imperfections in the road. Down here in the Bay Area we’ve got a lot of highway reconstruction going on so the pavement is a mess. Before with the old shocks, you’d need some spinal traction to stop your back from feeling every crack in the highway.

THe Bilsteins smooth things out, I wouldn’t necessarily say it was a surprise, because the reputation of the Bilsteins preceded my ordering them, but definitely, they meet my expectations in terms of ride. Very nice.

The second test was stopping. Low speed and highway speed hard braking.
This is an area there is also very noticeable and welcomed improvement.

The big difference is the apparent departure of what my 9 year old son calls “Cartoon Stops.” That’s when I’m hard braking and the rear end is unweighting the back tires so they start screeching, unable to grab the road. It’s the epitome of a stereotypical big block muscle car trying to stop.

Well, that has changed after adding the Bilsteins. The car has a more mature attitude, more composure when stopping, as the shocks help keep the big e-body’s weight balanced the right amount to keep the tires planted on the road. Even the tires are some old BF Goodrich T/A’s,I’m getting some solid performance now out of them (eventually I want to get some better tires after I burn these out).

I used to auto cross a mainly-track-driven 1966 GT-350, so it’s nice to get some of this awesome handling in my street driven 1970 Challenger 440 R/T. THanks to Firm Feel, I’ve got a Mopar that is more fun and more drivable.

I haven’t taken enough turns to get solid impressions on how the car handles but I’ll send a note after I get some data together.

Thanks,
Challen

—END EMAIL

..   If you enjoyed this post, please LIKE SHARE COMMENT

The Dodge Kid in his youth about 1976. I think I wore this hat everyday through my Freshman year in high school. Photo by Nick Yee

The Dodge Kid in his youth about 1976.

Copyright © 2015 ChallenYee.com TheDodgeKid.com BestBuckBuck.com All Rights Reserved.

1970 Dodge Challenger Trans Am

The following write up was what I used for my car show placard when I showed my Challenger T/A at car shows.

Article and Photos by Challen Yee

OLYMPUS DIGITAL CAMERA

1970 Dodge Challenger Trans Am

By Challen K. Yee with excerpts from “Dodge Challenger and Plymouth Barracuda” by David Newhardt (2000)

“Chrysler was a bit tardy in getting a factory entry into the SCCA Trans-Am racing series. Both Ford and General Motors had been slugging it out with Boss 302s and Camaro Z-28s. “The gang at Mopar wanted some racing glory to rub off onto their line of street cars, so they dove into the fray for the 1970 season. The rules required that the manufacturer build 2,500 street models of its racing car. To this end, Chrysler released All-American Racers (AAR) `Cuda and its cousin, the T/A Challenger…

“2,142 Challenger T/As were put on the road. All of these were built in a five-week period in March and April of 1970.

“Unlike the racers, which had to use a 340-ci engine destroked to 303.8 ci and topped with a single four-barrel carburator, the street versions were powered by a Six-Pak-equipped [three two-barrel Holley carbs combining for over 1300 cfm] 340-ci engine.

“The iron block was stressed relieved, and the main bearing area, while delivered with a two-bolt main, had plenty of material for the fitting of four-bolt main bearing caps. [Furthermore, the block had a higher nickel content and the heads were also a special T/A item designed to allow more radical porting by the use of an offset rocker arm system which relocated the valve pushrods].

“The engine was rated at 290 horsepower at 5,000 rpm, but redline came up at 6,500. “The Challenger T/A was modeled after the Trans-Am racer Sam Posey wheeled around the Trans-Am series. Its fiberglass hood was influenced by the belly air scoop on the P-51 Mustang fighter plane, and Dodge pulled it off beautifully.”

(The following excerpts are from David Newhardt’s “Dodge Challenger and Plymouth Barracuda”).

The standard rear axle set was 3.55:1 which according to Car & Driver magazine’s July 1970 issue helped deliver 0-60 in 5.8 seconds and a quarter-mile time of 14.3 seconds at 99 mph. Optional gear sets included 3.91 and 4.10 housed in the mighty Dana 60. The transmissions, both the A-833 manual and the A-727 automatic were “big-block” pieces designed to be mated to the hot performing “small-block” 340. Some of the distinctive standard equipment on the T/A models were: front disc brakes, E60x15 Goodyear tires in front and G60x15 on the back, higher rate front and rear sway bars, torsion bars and rear leaf springs, side exit exhaust, frame stiffening features, special stripe and decal treatments, fiberglass hood, and front and rear spoilers. Some of the many popular options included: fast ratio steering, rally gauges, dual painted mirrors, vinyl tops, and a myriad of awesome colors for both interior and exterior.

OLYMPUS DIGITAL CAMERA

OLYMPUS DIGITAL CAMERA

The Annual Concours is no longer being held at Stanford University. Not sure for which political reason.

OLYMPUS DIGITAL CAMERA

OLYMPUS DIGITAL CAMERA

Non-matching numbers TA engine out of a AAR Cuda that got totaled in the late 1970’s. The father of the owner saved it in a garage in central California until I bought it through an Ebay auction. The restoration was meticulously performed by Restorations By Julius in Chatsworth, CA.

OLYMPUS DIGITAL CAMERA

My friend Scott Douglas. “The Shelby Kid” and the Ford guy at school,  he’s owned several Ford products in his life including a Shelby like this one. Shelby’s are also one of my favorite non-Mopars, having been a Mustang owner in the past I had a lot of fun with the NorCal Shelby Club at open tracks.

OLYMPUS DIGITAL CAMERA

Simply one of my favorite non-Mopars, and with respect for my old departed friend Rick Elliott, who was the Chevy guy in school.

OLYMPUS DIGITAL CAMERA

Let’s end this article with my old garage queen MoPar. As life would have it, I no longer own this Challenger. Sure was nice.

..   If you enjoyed this post, please LIKE SHARE COMMENT

The Dodge Kid in his youth about 1976. I think I wore this hat everyday through my Freshman year in high school. Photo by Nick Yee

The Dodge Kid in his youth about 1976.

Copyright © 2015 ChallenYee.com TheDodgeKid.com BestBuckBuck.com All Rights Reserved.

Simmering over 440 Overheating Problems – Part 5 -FINAL

The long-awaited final part has finally arrived for the overheating issue.

I ran the Challenger without a thermostat for drives to get the maximum clearing effect to catch crud in the copper screen trap I installed in my upper radiator hose. I had also been draining my coolant after every extended drive to flush and dilute out as much old coolant and the green stuff as possible before I pour in the Water Wetter. 

I’ve read several accounts that Water Wetter mixed with normal anti-freeze/coolant will gum up your cooling system as well as not working or not working well. As I mentioned before, I used to run Water Wetter with distilled water in my old open track car. Spilling that on the track was less of  nuisance than dropping coolant. The best cooling is effected by using pure distilled water, but you need the anti-corrosive and lubricating properties of a product like Water Wetter added.


The thermostat gasket managed to last a few removals of the t-stat housing before it died so I replaced the gasket.

The drained coolant, after sitting for a day has what look like a powder sitting at the bottom of the plastic jugs I’ve been storing it in. I’m guessing its the remnants of Bar’s Stop Leak or something. With each draining, the amount is decreasing and is almost negligible now.

.

top side (radiator end) of hiflow thermostat. Removing it from system to flush engine block at high RPM.

top side (radiator end) of hiflow thermostat. Removing it from system to flush engine block at high RPM.

Better cooling performance with a thermostat

I’ve heard that cars can run cooler with a thermostat rather than without one. I think it depends on the design of your cooling system and the positions of the inlet and outlets. On a typical engine with the inlet and outlet on the front, there is a certain amount of inefficiency in regards to the coolant that is in the rear of the engine.

What I noticed was that not only did the engine run cooler, based on my temperature gauge reading, but the subsequent draining yielded more fluid that smelled more like coolant and less like plain water. I take this to mean that there is better mixing of fluid coming back from the radiator in through the engine passages than without a thermostat.

The temperature gauge without the thermostat read in the low “normal”range, but after the thermostat was installed the reading in slightly below the “normal range.”

.

Effect on water pump churning and installed thermostat

So, it appears, with the thermostat installed and resisting the flow of coolant back to the radiator, the water pump has time to churn the coolant inside the engine passages, allowing more mixing before the thermostat opens at the set temperature.


Some extra crud sitting in the upper hose. Clean it.

Some extra crud sitting in the upper hose. Clean it.

Here's the flakey cast iron crud, including some pieces of gasket seal. Also need to brush out crud from upper hose. Copper screen is reusable but check it before reinstalling.

Here’s the flakey cast iron crud, including some pieces of gasket seal. Also need to brush out crud from upper hose. Copper screen is reusable but check it before reinstalling.

rad_crud4

These are a few of the photos I took after before cleaning out the copper filter. I typically get a little less that what you see in this picture as of late.

rad_crud3rad_crud1rad_crud5

At first I was saving the crud from the filter, here is what was in the cooling passages (except for the washer).

At first I was saving the crud from the filter, here is what was in the cooling passages (except for the washer). I stopped collecting it.

.

Catching debris before and after thermostat installed

I’ve been running the copper mesh at the top inlet of the radiator, held in place by the upper hose. Before and after the thermostat was installed, a consistent amount of small debris are being caught. They look like small pebble-like cast iron flakes from the water passages in the engine. One piece of copper mesh lasts several cleanings. High RPM runs causes a better flushing action as indicated by the amount of crud being caught.

This process would be a lot more efficient if you could pop the freeze plugs and flush out the engine that way, but if you can’t…. well it takes several rounds to clear out. I ended up adding the Water Wetter finally after I managed to drain out the coolant with just a whiff of coolant smell. The heated water comes out with a brown tint from going through the 200+ degree iron passages.

Here's my running collection of drained coolant. Notice the progression from top to bottom from the traditional 50/50 coolant water mix to virtually pure distilled water.

Here’s my running collection of drained coolant. Notice the progression from top to bottom from the traditional 50/50 coolant water mix to virtually pure distilled water. About 2.5 gallons every drain. You do the math. Yes, I’ve called it quits when it comes to draining. Before I put the thermostat back in I managed to get a non-coolant scent in the drain, but after I put the thermostat back in, I get at least a small scent from the drained coolant. Poinsettias not included.


Miscellaneous tips

.

 fanbelt1

Lonesome Dove Fan Belt Tightening

How about it you are alone and need to tighten your fan belt. If you have a handy wooden-handled ax  like I have pictured, you can use that for leverage to extend your alternator after you loosen your holding screws.


.

.

rad_seal1

rad_seal2

Just in case you were interested in reading the small print on the bottle.

rad_seal3

Pesky coolant drip from the lower radiator hose?

The lower radiator hose had a slow drip, so I sanded the outlet pipe with #80 grit paper and felt for any imperfections in the pipe. Then I used Permatex Aviation Form-A-Gasket Sealer #3 with the intention that I don’t want to have to think about any more leaking there. I only coated the radiator pipe and let it set for the required time before sliding the new uncoated hose on and clamping it. I did that to eliminate any possible dripping of sealant into the hose.

I used the same Permatex product on the thermostat housing. It’s a little messier than using silicon but I gave it a go and it works. Again, no intention of removing the housing unless I expect to replace the gasket. The thermostat should be sitting inside a recess in the T-stat housing and should be not interfering with the gasket. Clean the surfaces first of old gasket and sealant before applying the new sealant.

.

.

Carb Backfiring

I’m not sure exactly what was causing my 440 to pop out the carbs, but the problem appears to have gone away except on rare occasion.

However, I have a few possible candidates for culprits.

After several high RPM runs (over 5000) I could have blown the combustion chambers cleaner or it could be the number 7 plug wire touch a header tube and had a couple inches of insulation burned away, cause for some arcing. I adjusted the routing of the wire away from the header.

I plan on replacing the plug wires later.

I would imagine any multiple carb set up could use some more tuning. Have to keep that for later. Also toying with the idea of replacing the old MP electronic ignition with a multiple spark discharge type.

.


*

If you enjoyed this post, please LIKE SHARE COMMENT

The Dodge Kid in his youth about 1976. I think I wore this hat everyday through my Freshman year in high school. Photo by Nick Yee

The Dodge Kid in his youth about 1976.

Copyright © 2014 ChallenYee.com. TheDodgeKid.com  All Rights Reserved.