What Does This Mean?

As a result of a stray meteorite dropping from a construction overpass at Willow and 101

It means I’ve got to drive my 1970 Challenger to work.

After being spoiled by these new cars like my Outback with all their new technology, it’s back to getting workout driving the Challenger until I can get my windshield replaced. Without power steering and a heavy clutch and manual transmission, so sophisticated safe devices and a keyed entry.

It’ll be fun, but just not as mindless as commuting in a late-model driver.

See yah!


If you enjoyed this page, please LIKE SHARE COMMENT

The Dodge Kid in his youth about 1976. I think I wore this hat everyday through my Freshman year in high school. Photo by Nick Yee

The Dodge Kid in his youth about 1976.

Copyright © 2016-2019 ChallenYee.com TheDodgeKid.com BestBuckBuck.com  TeamBetterLiving.com ChallenYee.net PaloAltoBNB.net All Rights Reserved.

Poop on Pertronix Distributor for 440

I had hoped to tell you how I put in my new Pertronix Flame Thrower III distributor on my 440 but instead I have another point to make that some of you who are considering the swap will want to know.

I had put in a Pertronix distributor on my 340 six pack Challenger T/A and that wasn’t a problem, but the 340, although it is situation on the rear of the block, has more clearance standing straight up and down and away from the cylinder heads (unlike a 440).

Visually the new distributor is significantly larger, but I did not expect to run into clearance problems.

pert1

The first indication my one-day installation wasn’t going to happen was when I tried to seat the distributor into the block.

pert3

Without the hold-down bracket, it is easy to see the area where a small gap can be seen. The distributor cannot fully seat without some metal relief on the head.

Being an experienced mechanic, I did not force the distributor down into the seat. I noticed a small gap in the hold down area.

Upon closer inspection, I could see the larger distributor housing was touching the cylinder head at the point of a casting ridge.

pert2

This photo was taken before I tried installing the new distributor, so there are no scrape marks to be seen in the area that is circled.

I thought about this for a few minutes, thinking, I bet the guys on RoadKill (that amazingly entertaining show) would probably take a grinder to cylinder head and get the needed clearance but I realized I’m not set up to grind, nor can I take a risk on my driver just to put in this distributor.

Disappointed, to say the least, but saving the part of the future.


PART II

Chevy at Work

This is not a Mopar, but I just wanted to post these photos for  Roger (left) at work who is a proud new owner of a 67 396 SS Chevelle. Jim (right) owns an old restored 340 Dart. I’m waiting for him to drive that to work.

Congratulations Roger, nice ride.

roger1 roger2 roger3

..   If you enjoyed this post, please LIKE SHARE COMMENT

The Dodge Kid in his youth about 1976. I think I wore this hat everyday through my Freshman year in high school. Photo by Nick Yee

The Dodge Kid in his youth about 1976.

Copyright © 2015 ChallenYee.com TheDodgeKid.com BestBuckBuck.com  TeamBetterLiving.com All Rights Reserved.


Driving Impressions 440 Six Pack 1970 Dodge Challenger R/T

CLICK ON PHOTO TO GO TO VIDEO OF MOMENTS IN THE DAILY COMMUTE USING A 440 SIX PACK 1970 DODGE CHALLENGER. Make sure you have a good ear bud or a decent sound on your computer and listen you the MoPar V-8 Big block music. There’s no radio playing since I discovered You-Tube automatically screens music playing for some kind of licensing infringements… so I turn the radio off while I’m shooting videos and do what I can to stay within the limits of the law…  sort of like the Duke Brothers on the way to to entering the Gumball Rally. 😉


commutingphoto

I am still short a non-classic-muscle car daily driver, but driving the Challenger almost every day for the last few weeks has worked some bugs out of the car and out of my driving technique.

It actually takes some practice to drive this machine well, so having been forced to drive it daily has helped. There’s a saying that “cars like this like to be driven.” Well, it’s true, cars in general like to be driven. Old fuel, stagnant liquids, and dried up seals never did any good for any car and the Challenger is no exception.

Aside from  the fact it’s drinking fuel like an elephant drinks water (no one has told it that gas is no longer 50 cents per gallon) and the clutch pedal return spring squeaks a bit, it’s very much a blast.

The more I drive it, the more rubber gets left on the roads around here. However, the main thing is, compared to 40 years ago when I was a teenager, is I’m a lot more aware of how not to put other people at risk and, moreover, despite the increasing number of burnouts, I really do have a mindset of not to thrash the car… it is my daily driver (for now) nevertheless!


Left my lights on and killed my battery yesterday and had to call for a jump…

commuterjump

In case you’re wondering, “yes” it is a real R/T but  “no” it is not a V-code Challenger. I figure, I might be just a little too crazy to drive a real V-Code to work in traffic jams every day, but… I think if I actually had one and it wasn’t a garage queen… I think I would. Like Junior Brown sings, it is a “Freedom Machine.”

For those of you who are not versed in Mopar-linguistics, a “V-code” is a manufacturer’s code based on the VIN (Vehicle) number. “V” denotes an originally equipped 440 six pack Challenger or Cuda and those still with the originally “matching” serial number engine and transmission in great condition are fetching $75-100K. Maybe more in conjunction with other very rare option combinations. Not bad for an old muscle car.

And, I got a new ignition in the mail! (more to come).

..   If you enjoyed this post, please LIKE SHARE COMMENT

The Dodge Kid in his youth about 1976. I think I wore this hat everyday through my Freshman year in high school. Photo by Nick Yee

The Dodge Kid in his youth about 1976.

Copyright © 2015 ChallenYee.com TheDodgeKid.com BestBuckBuck.com  TeamBetterLiving.com All Rights Reserved.

.

Summer Driving Impressions

In the middle of this hot summer, my normal daily driver, a 1994 Camry, decided to have a transmission slippage problem. The final straw was when the old Toyota would not move, but at least we were only a block away from home. Amazingly, seemingly out of nowhere, two neighbors came out and helped me push the Camry back home while my wife steered the car.

While I am investigating solutions, including  getting a new car and/or getting the old tranny replaced, I’ve had to drive the white 440 manual transmission Challenger to work. The 45 year old muscle car becomes my daily driver.


marvell

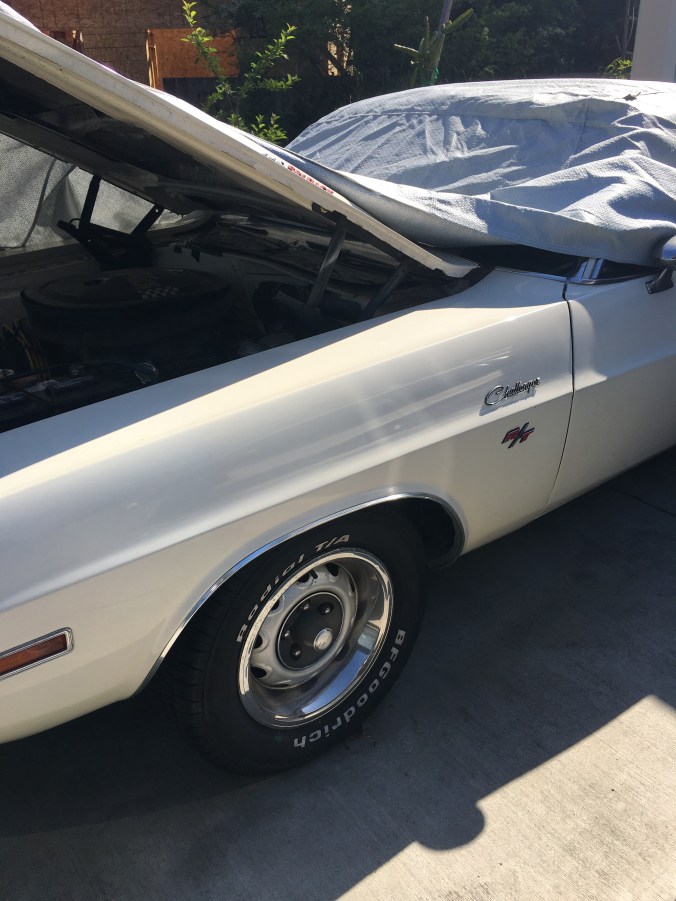
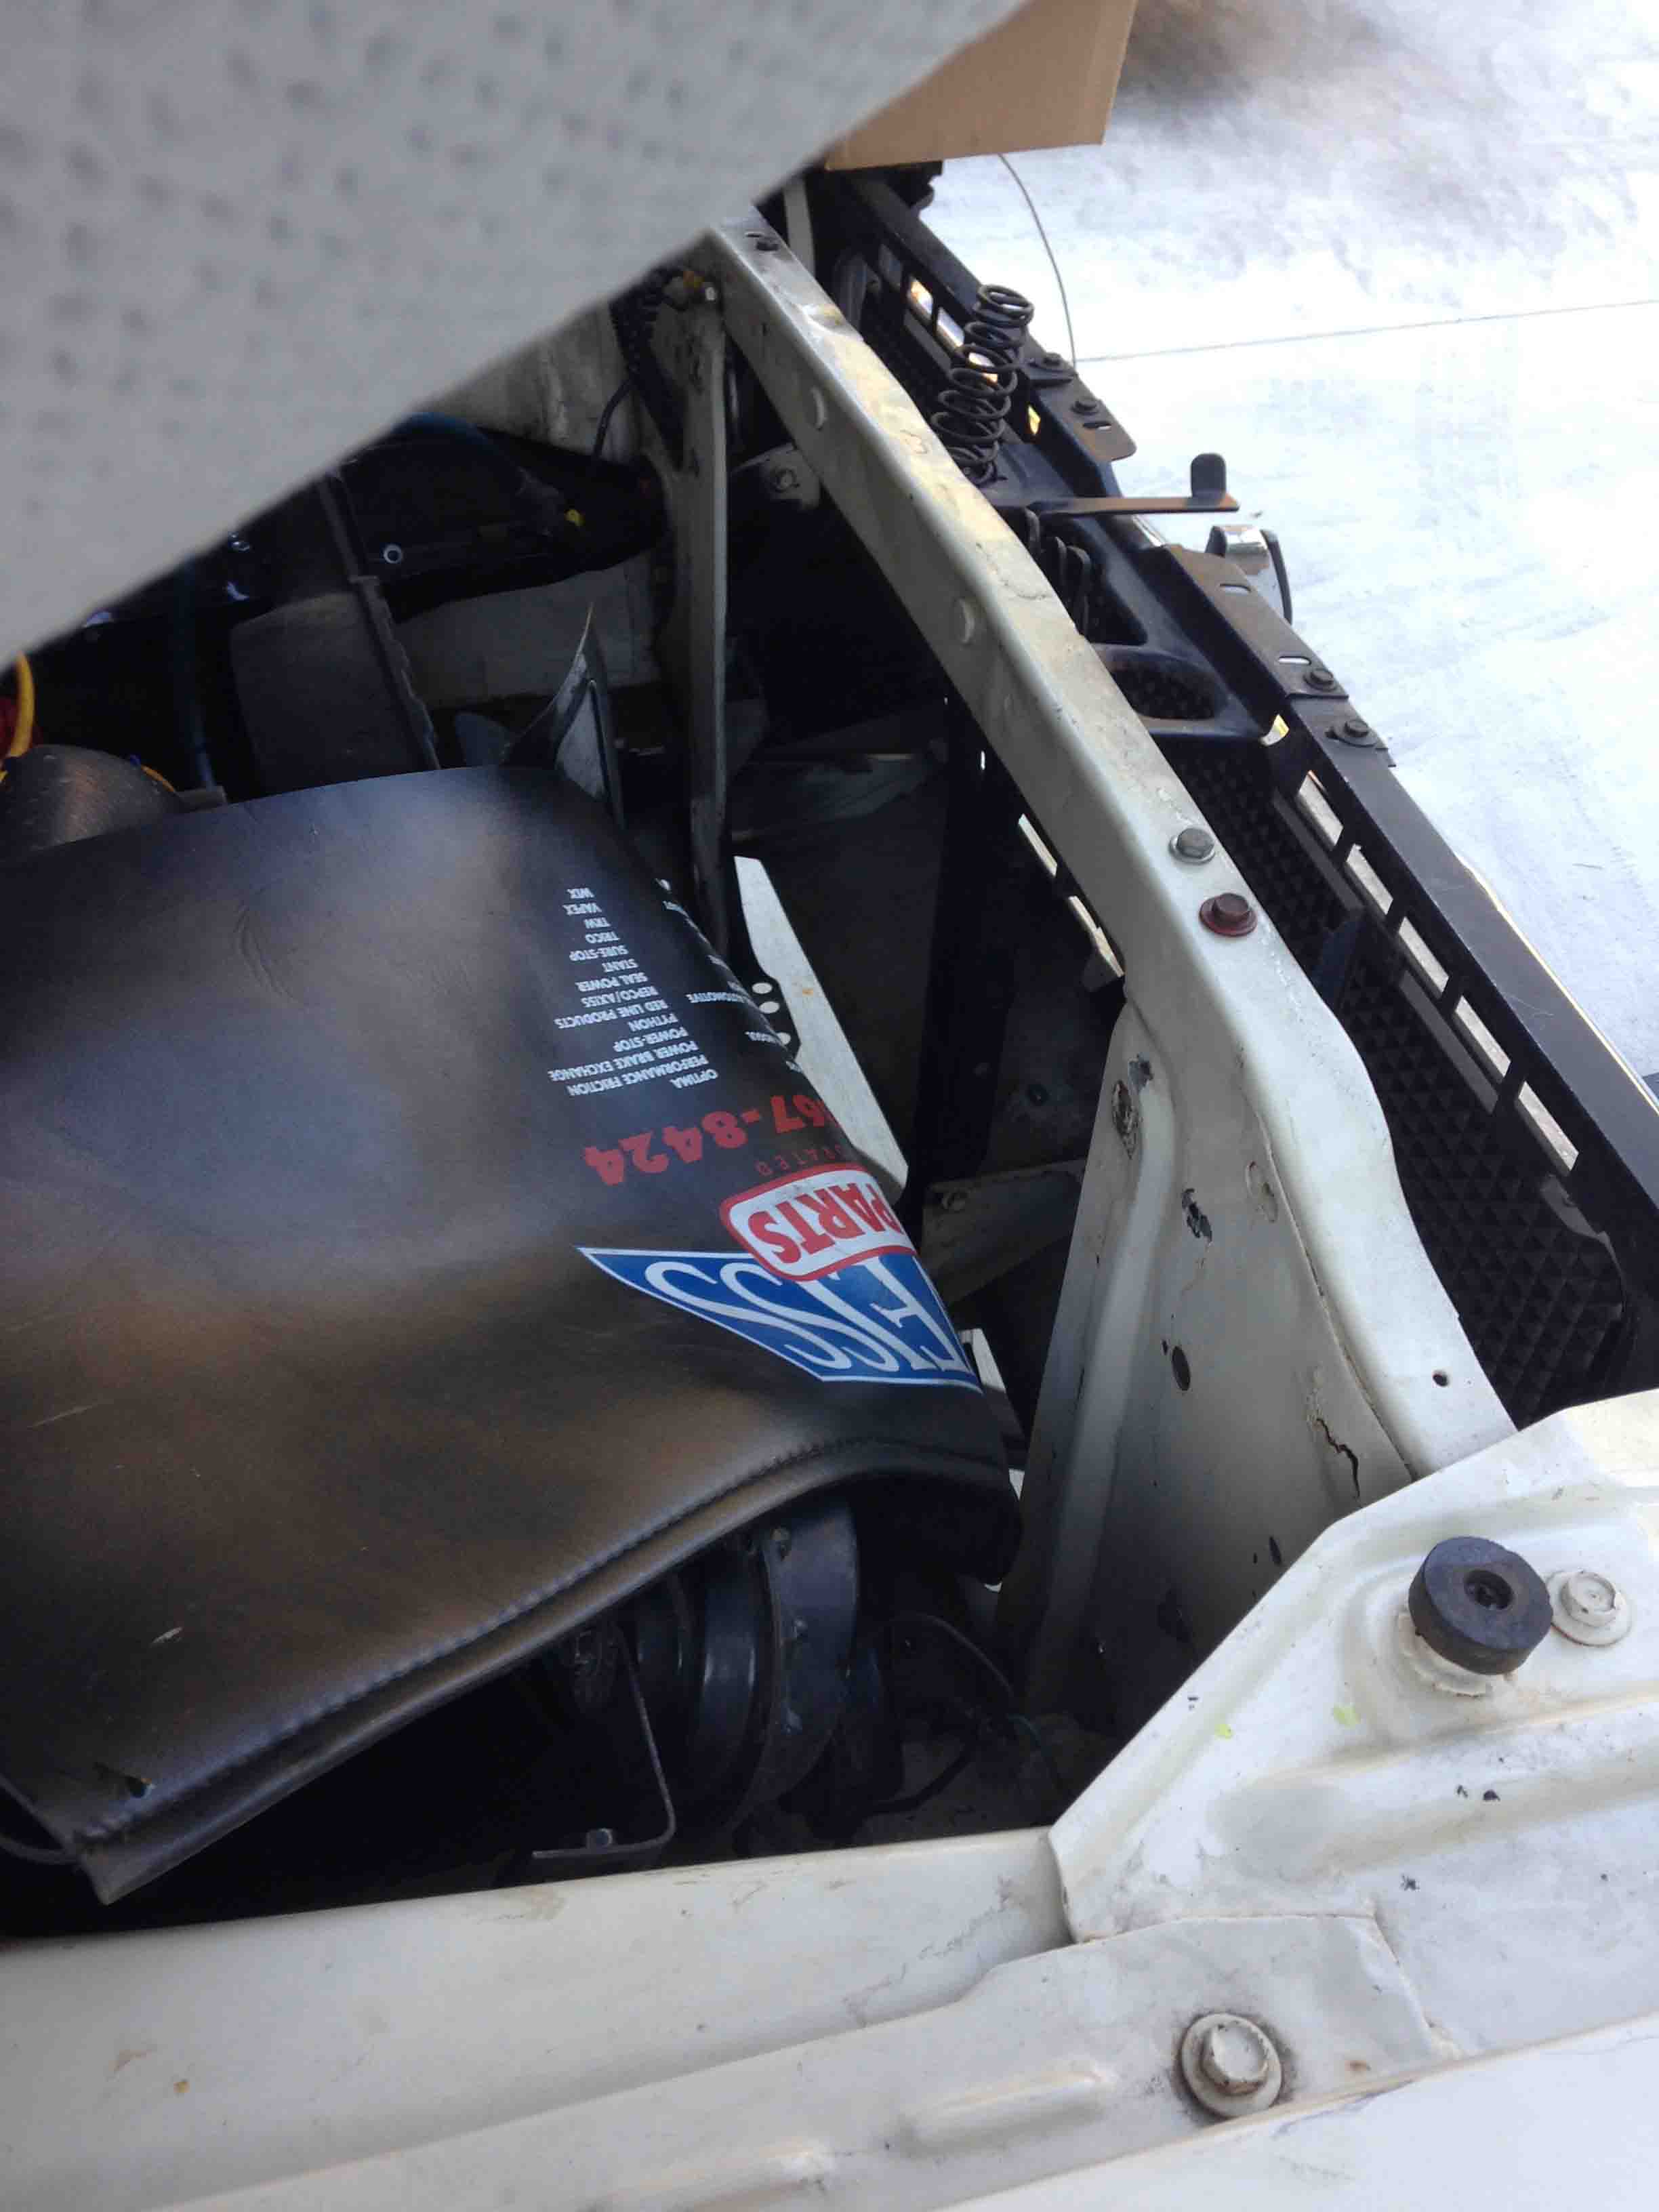
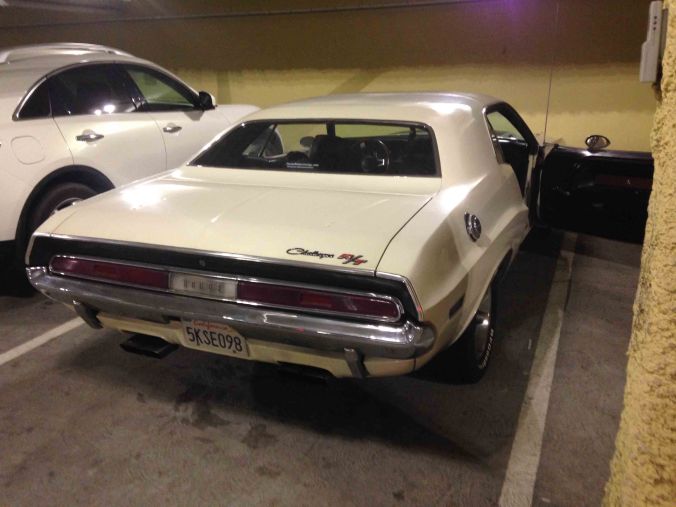
Here is the Challenger as it sits in the covered parking lot at work. Better to keep it out of the sun during working hours., especially through the recent heat wave where temps reached near 100. Manual steering makes it a chore to get in and out of 90 degree spaces. A couple of muscle car enthusiasts spotted my car at work and now I have new friends at work.

90 to 100 degrees in the Bay Area, and how does it feel to drive a 440 Six Pack Challenger in traffic and boiling summer heat? How has the cooling system handled keeping the engine from puking coolant in traffic jams? How has it been driving a manual transmission with a CenterForce clutch? How has the Richmond 5 speed been shifting?How much gas am I sucking up? What kind of modifications would  I like to make to the car after using it to commute for several weeks?

Keep on reading for answers to these questions and more…

waterwetter2

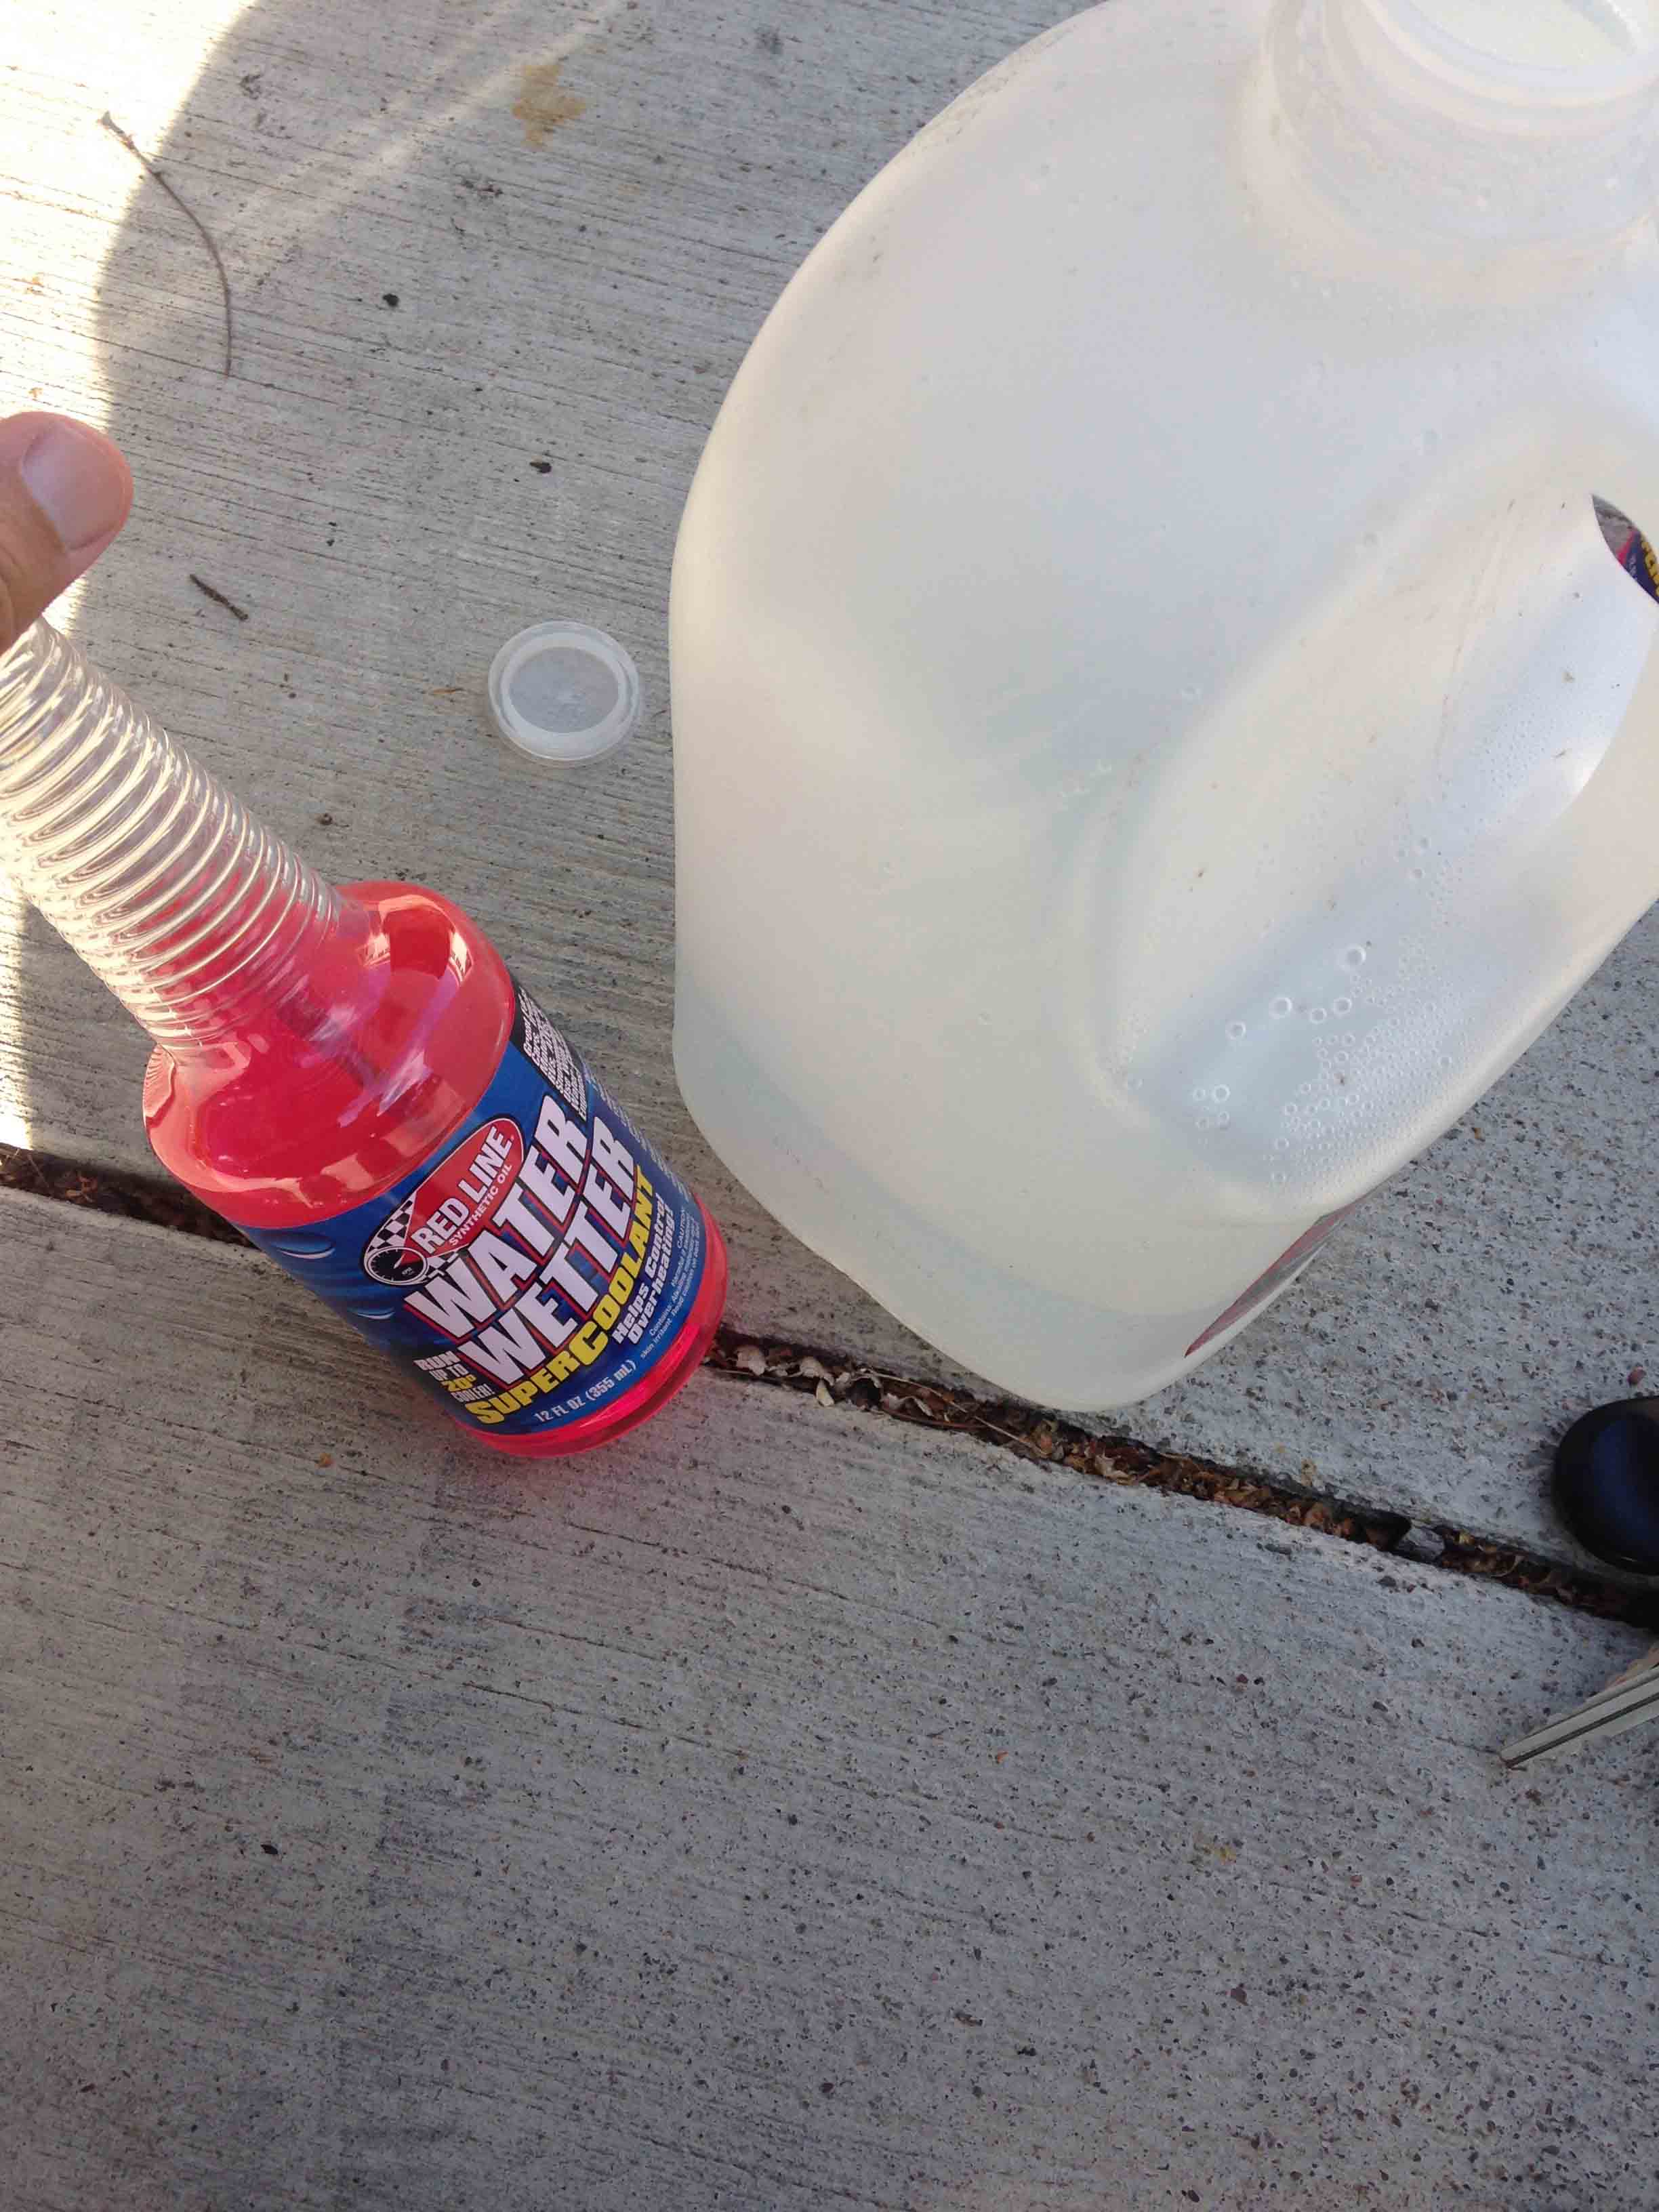
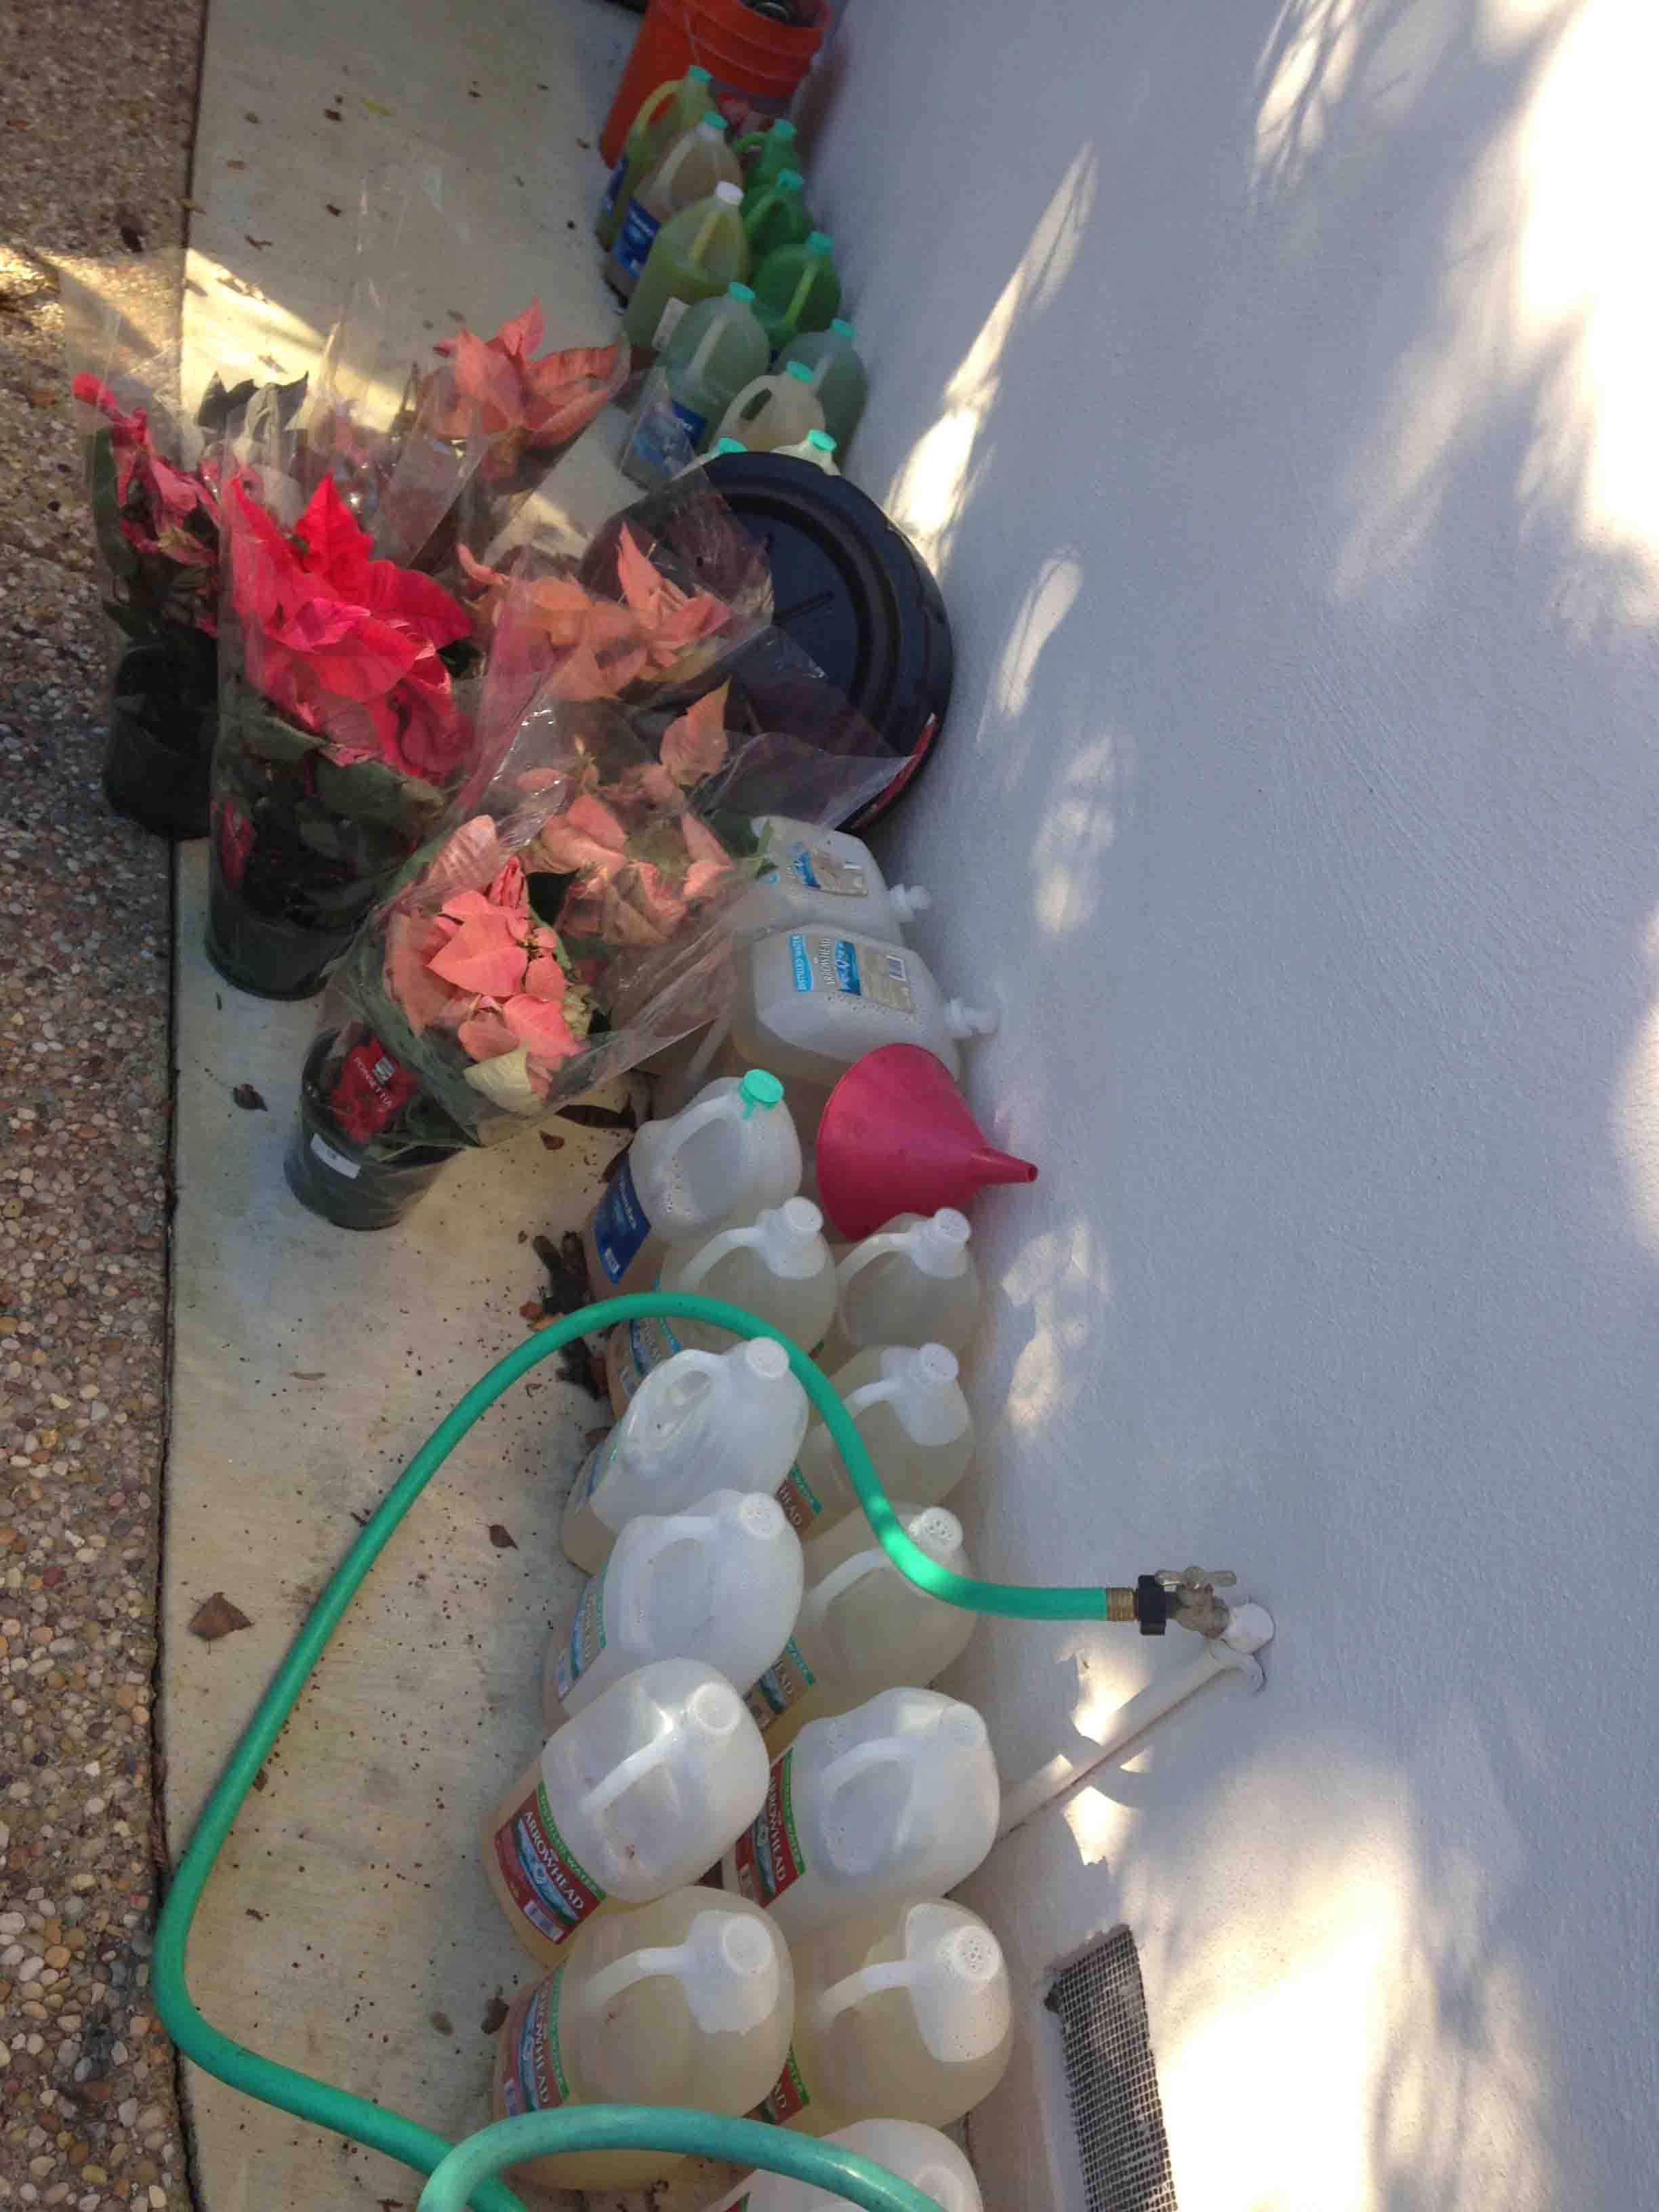
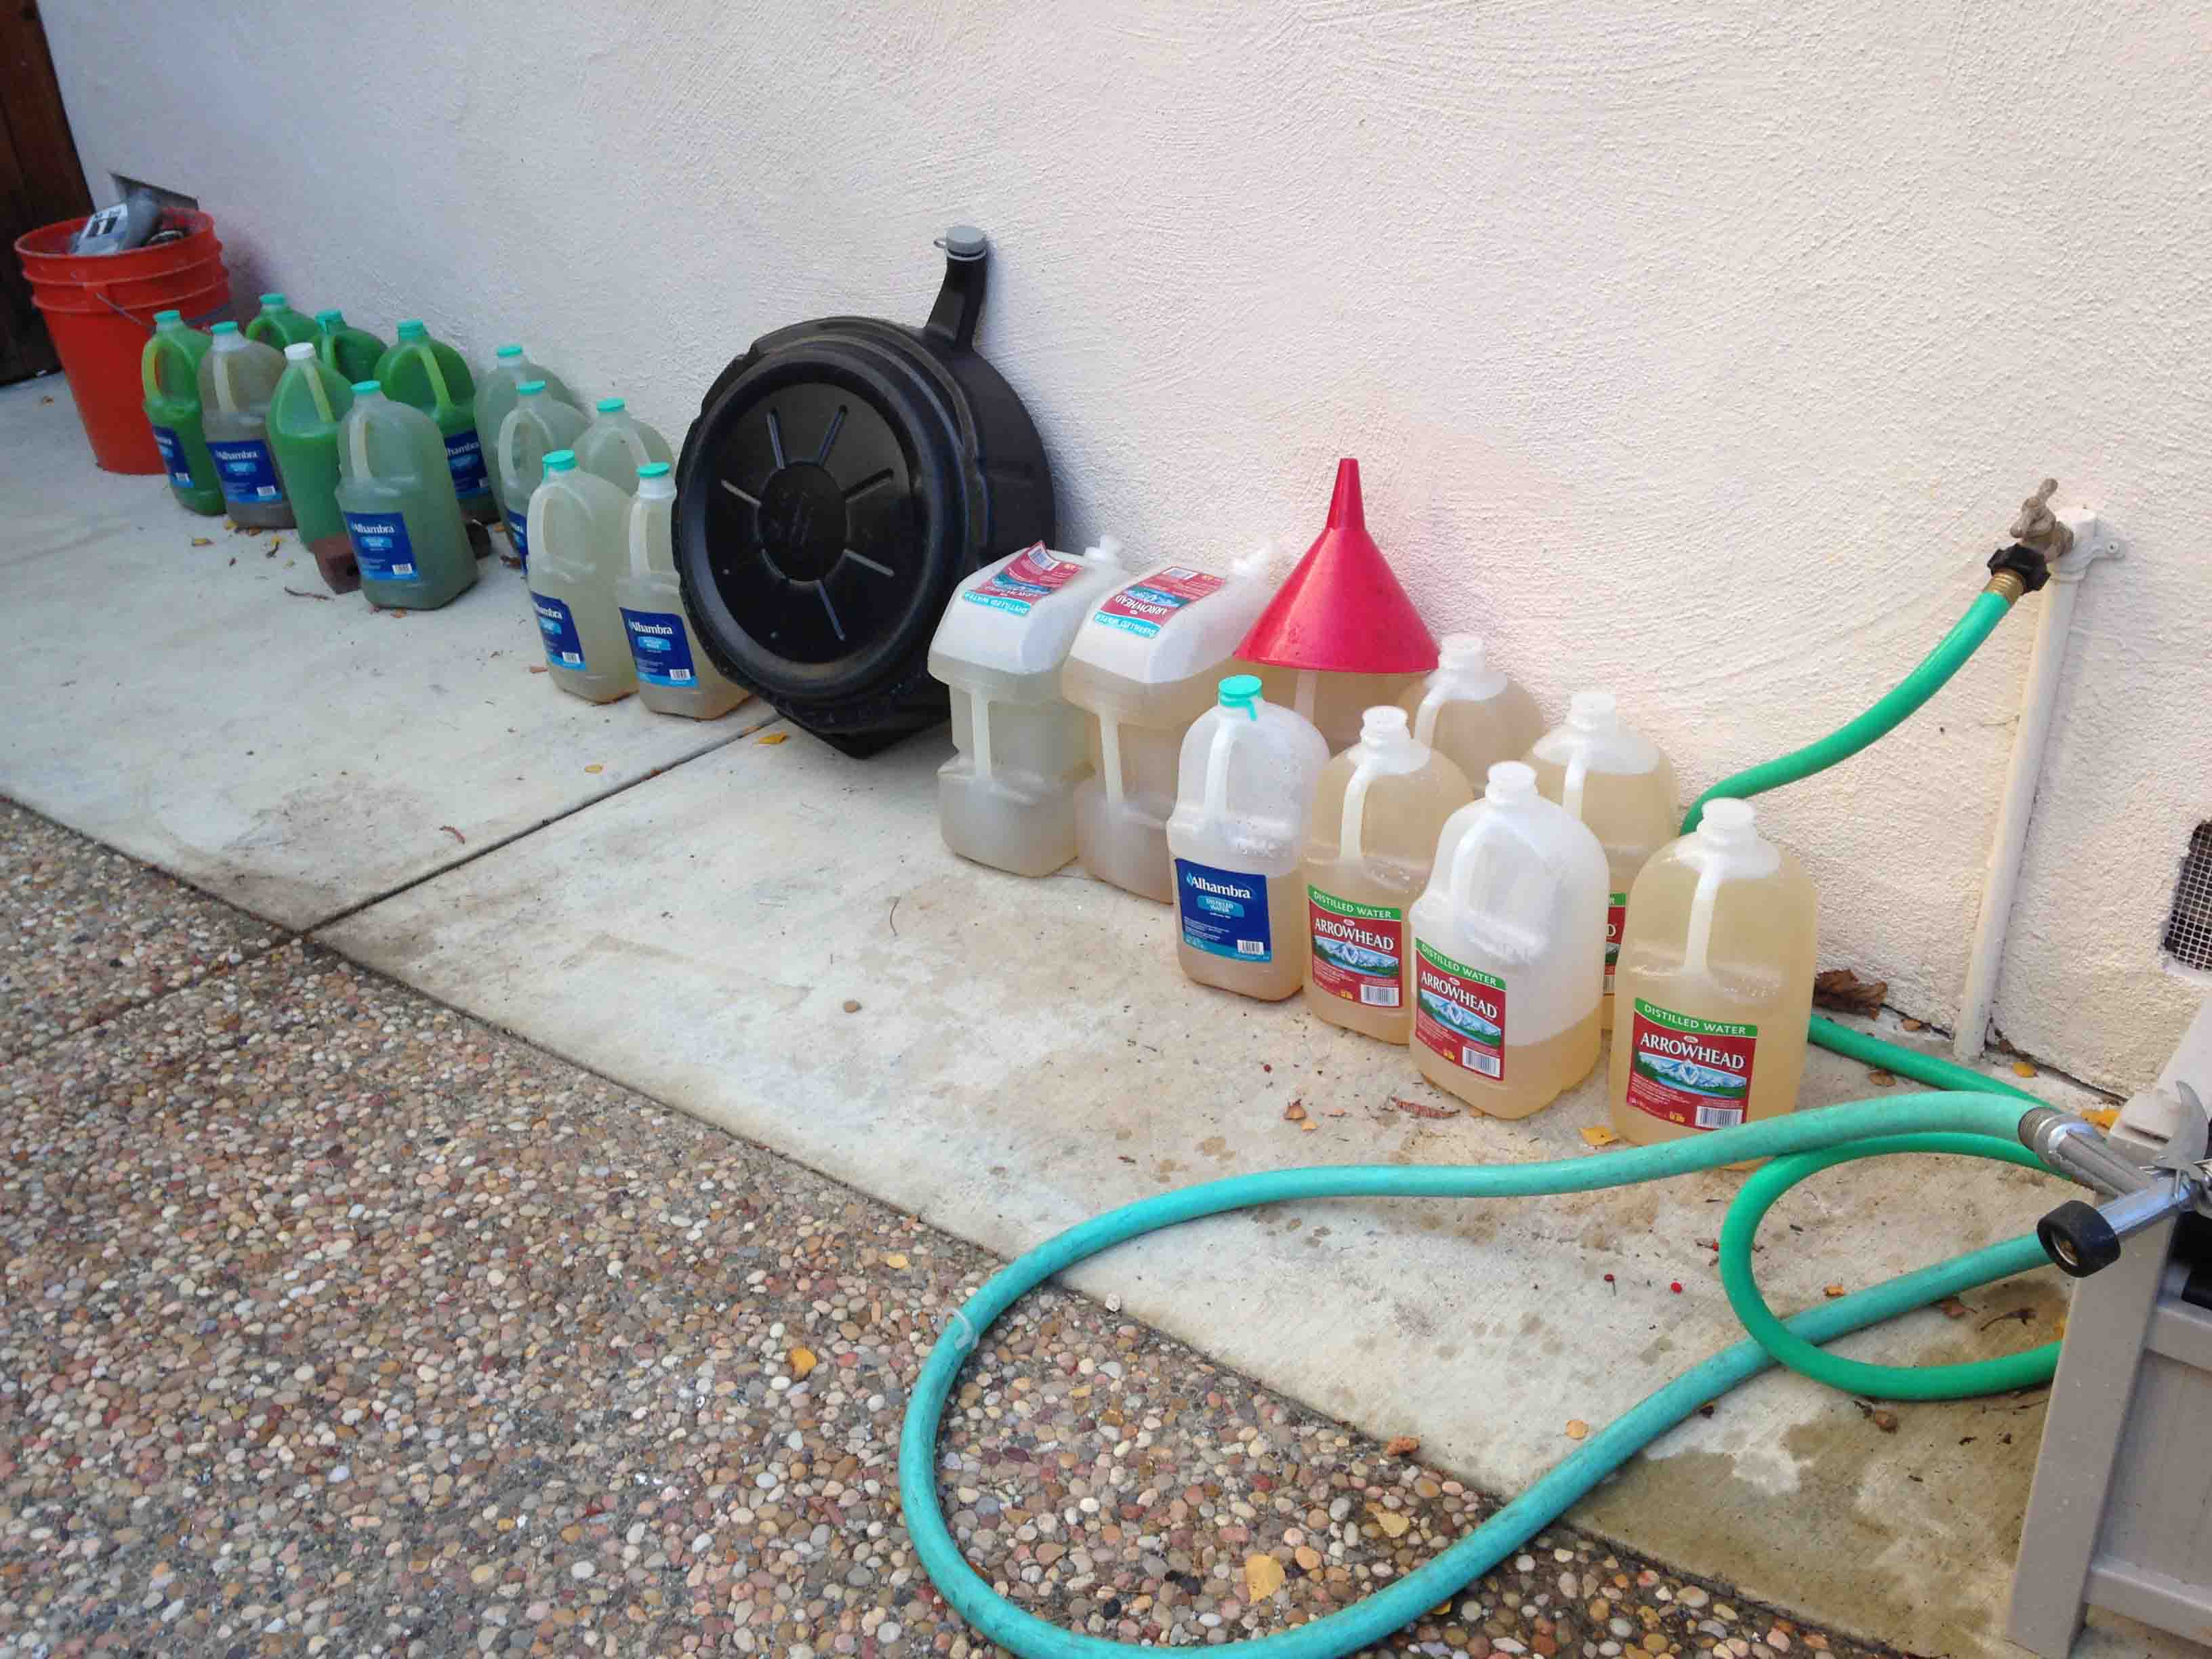
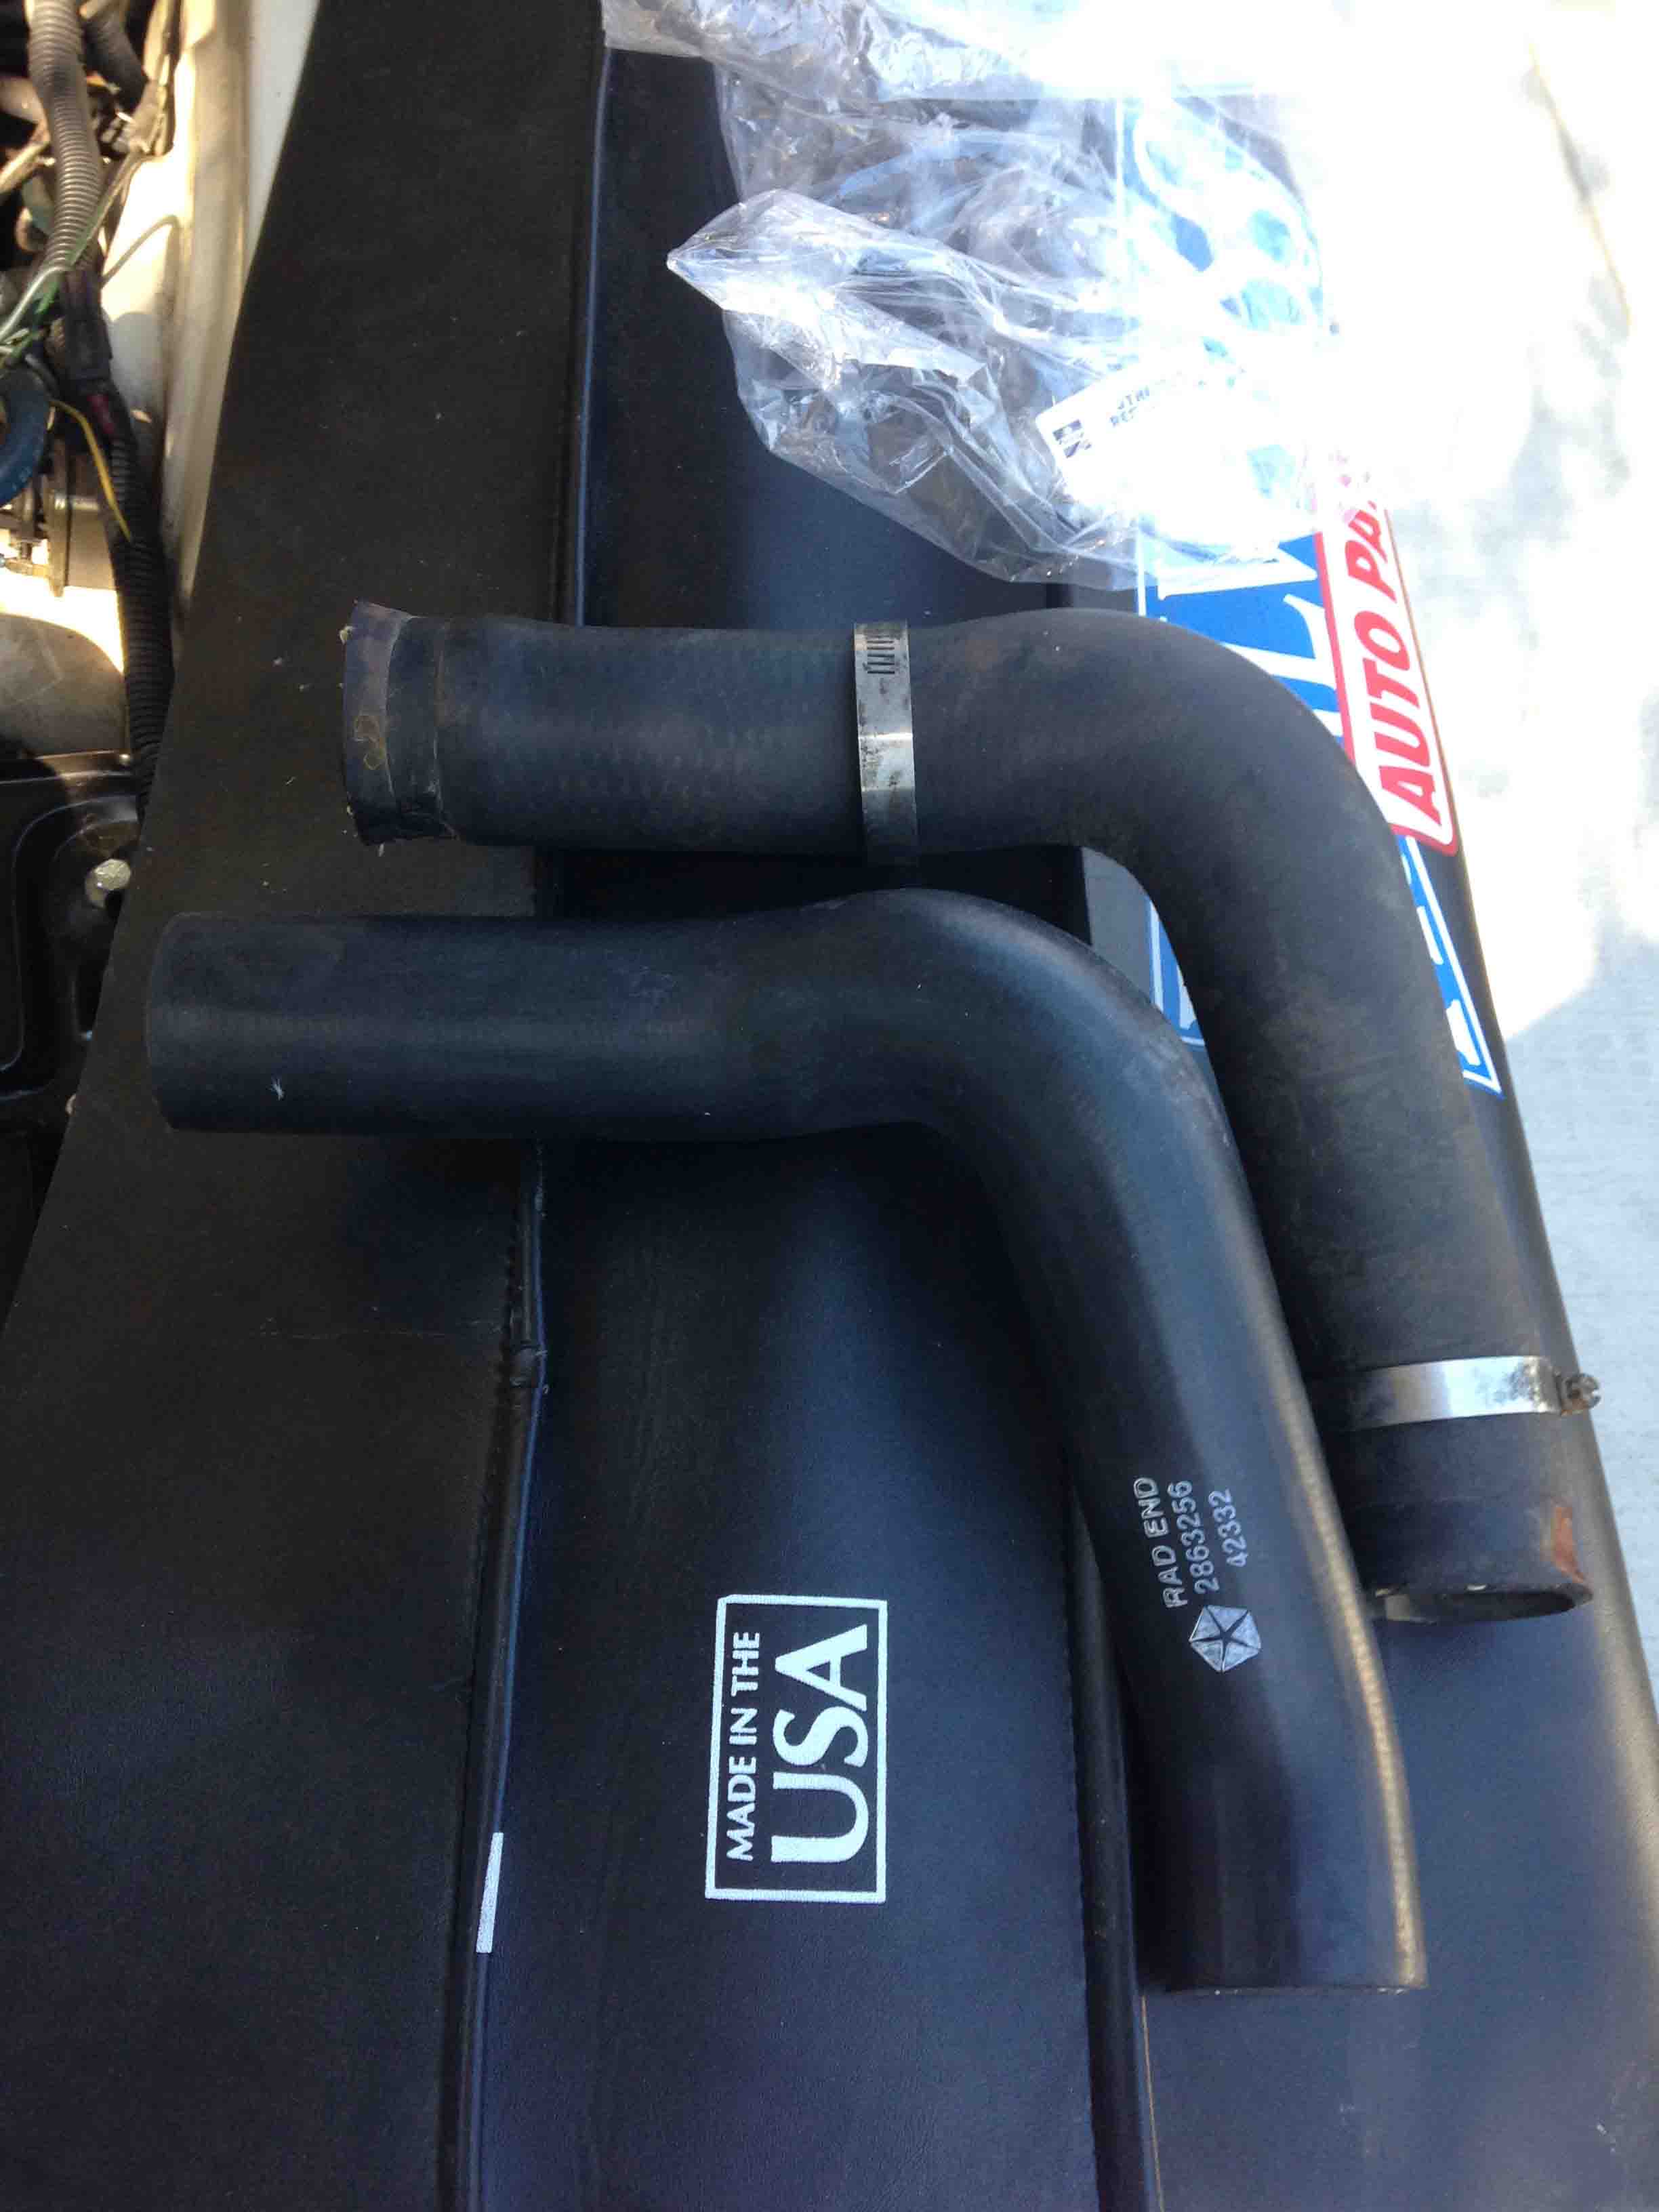
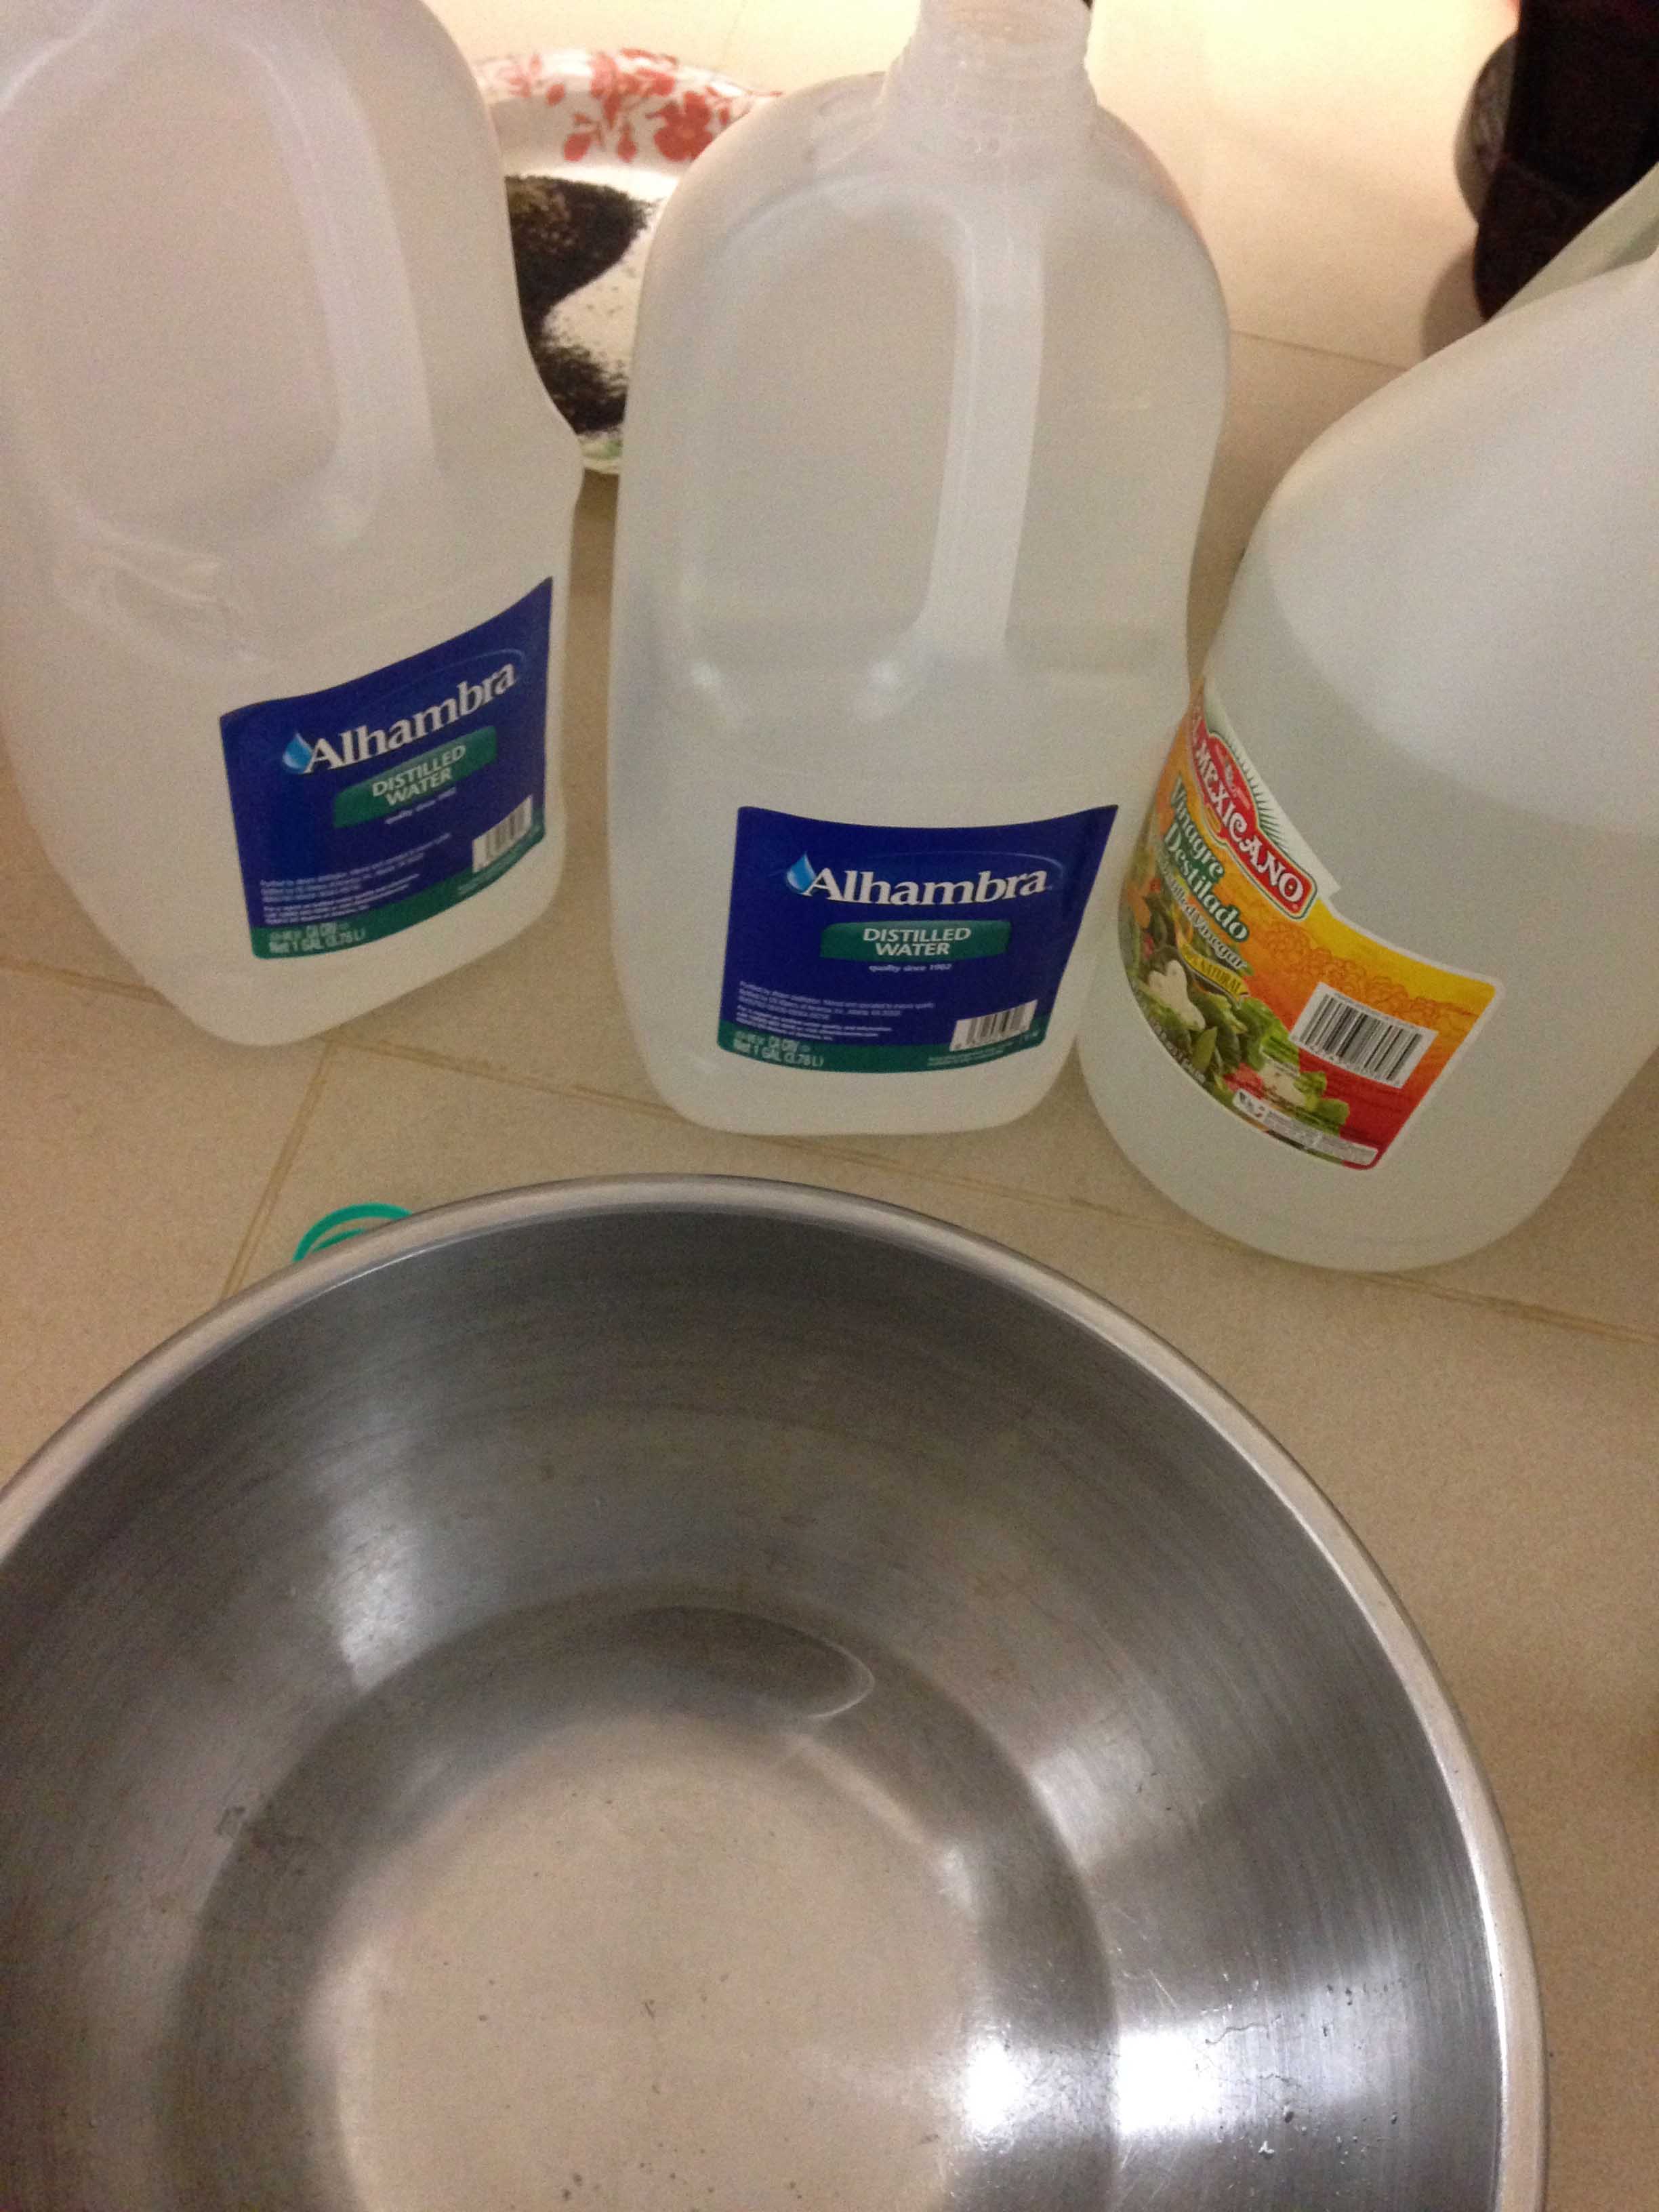
Adding a bottle of WaterWetter to my distilled water-filled cooling system. It’s good to mix it up with some distilled water in a jug before adding it to your radiator. You should drive the car immediately to normal operating temperature to ensure thorough mixing in your system.

screen2

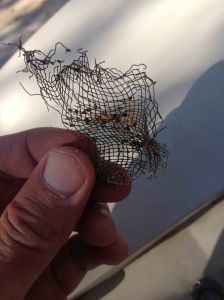
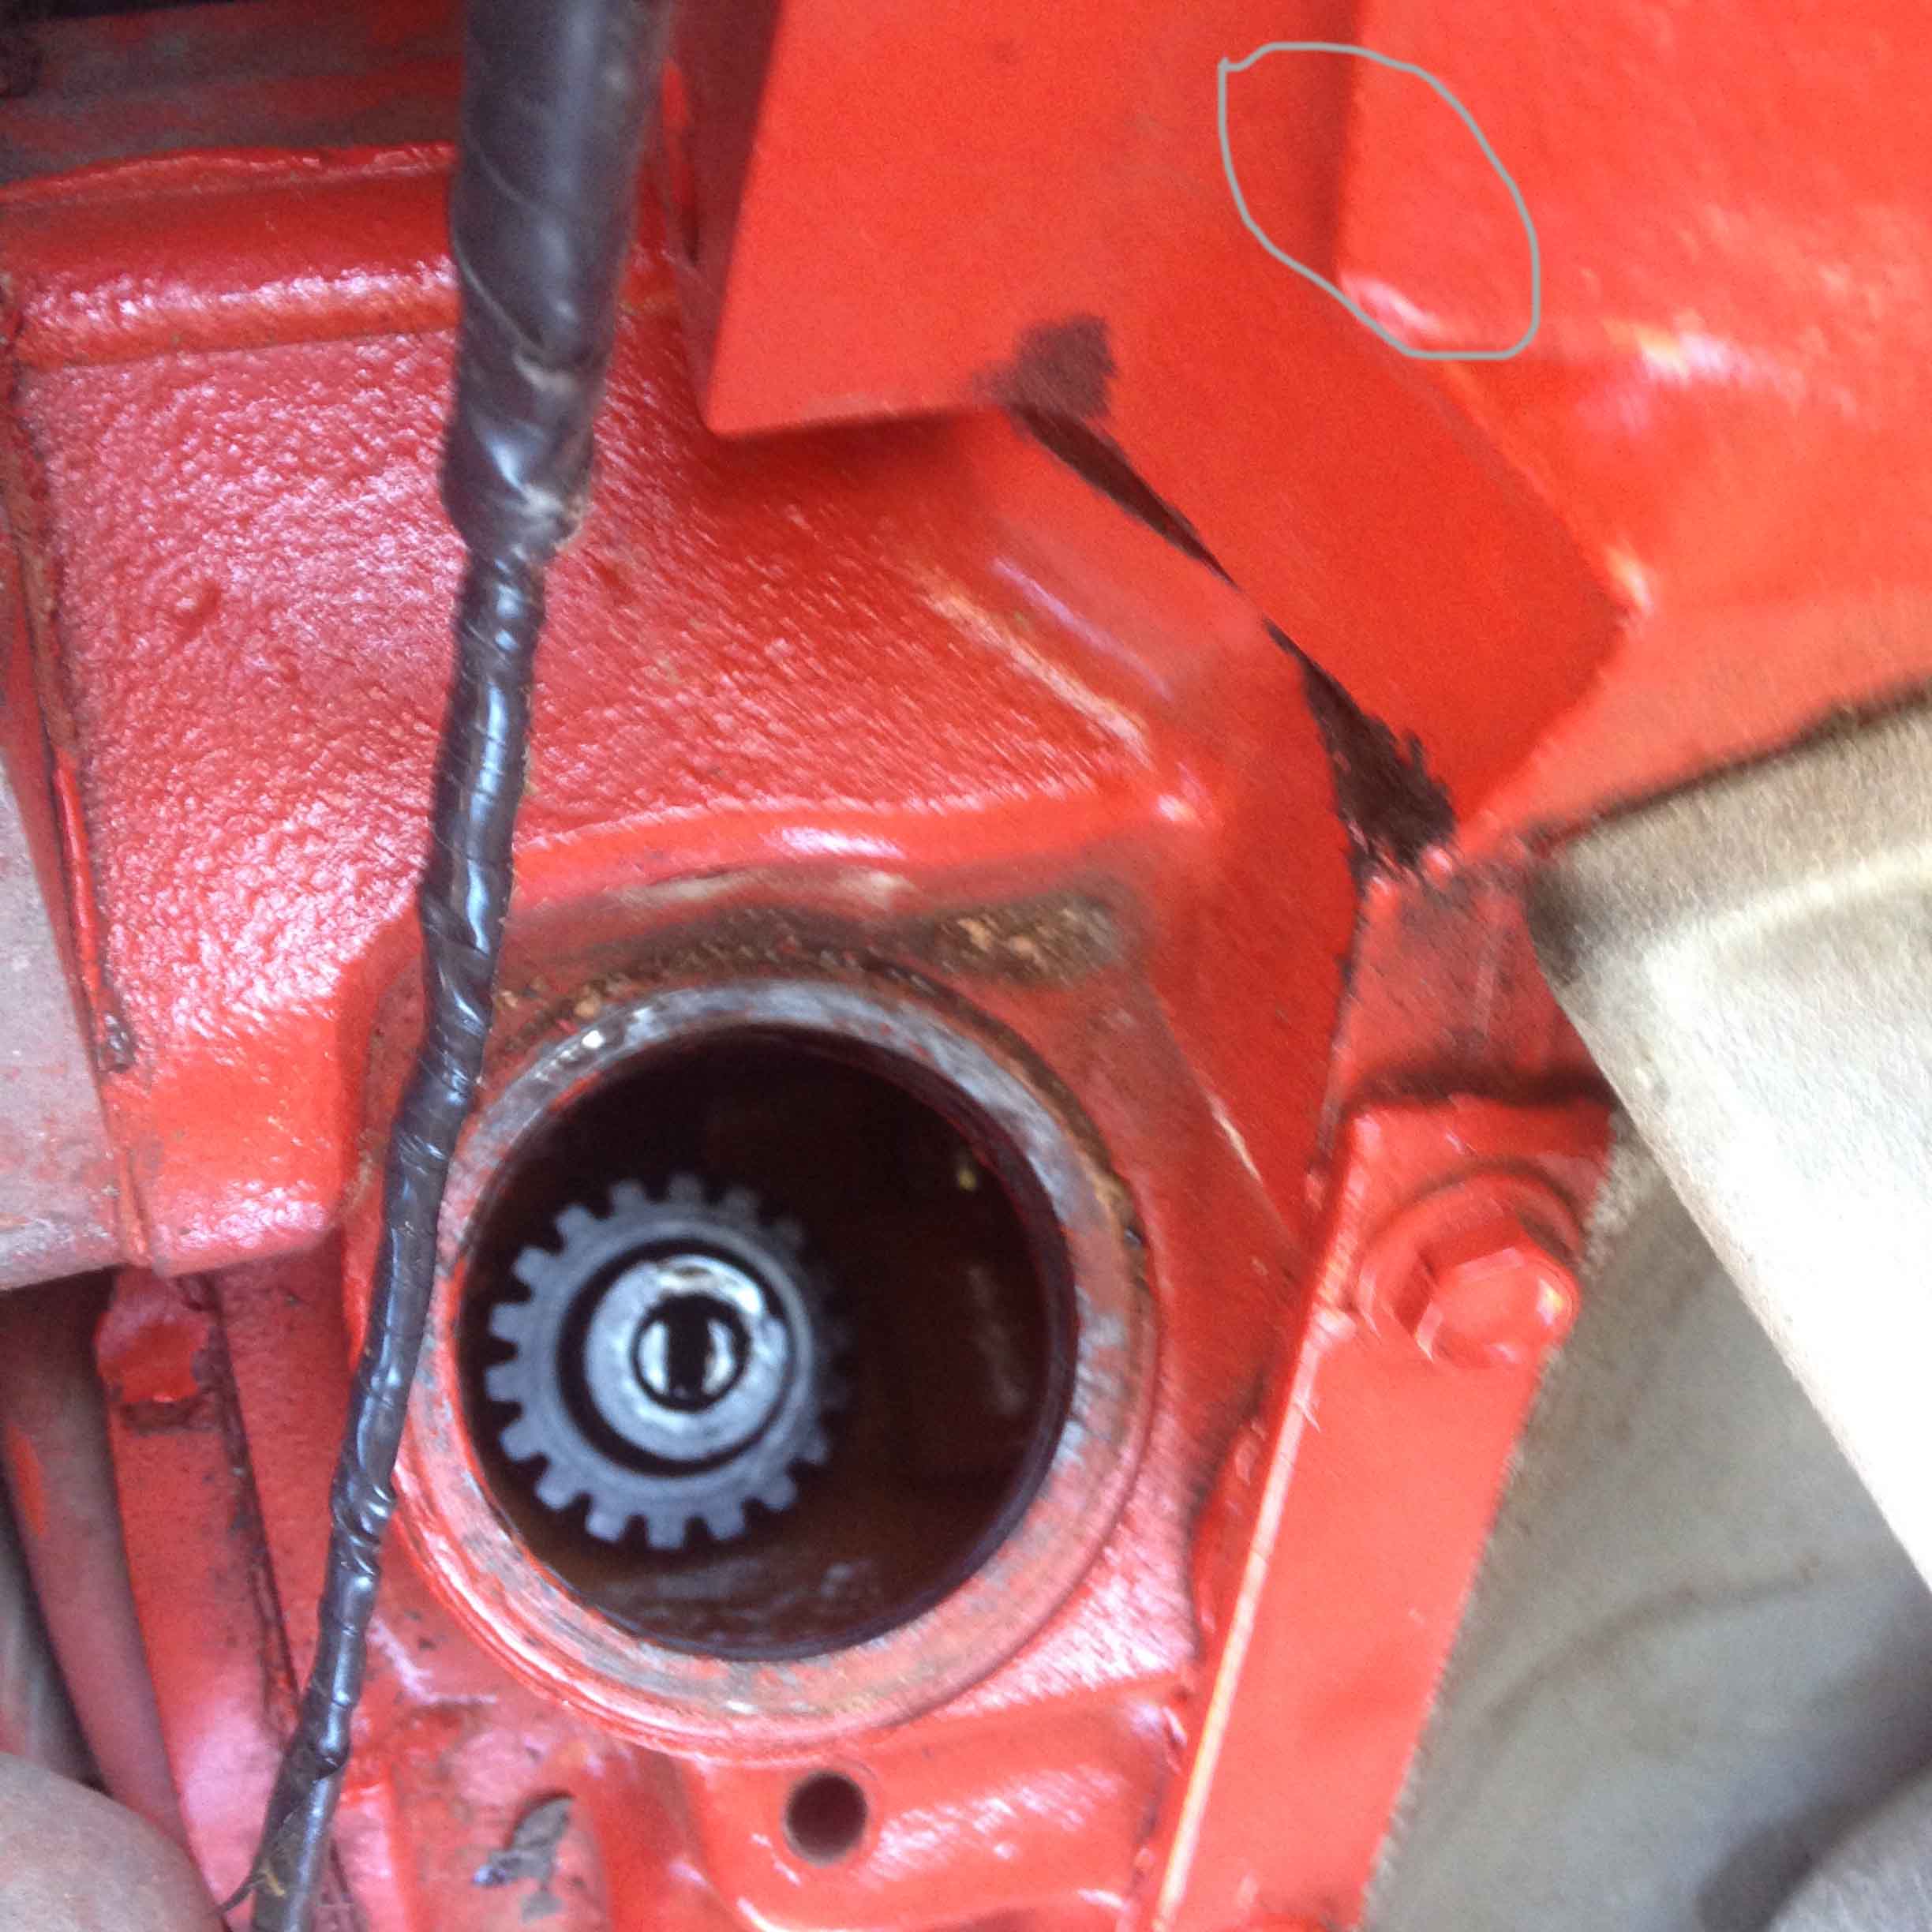
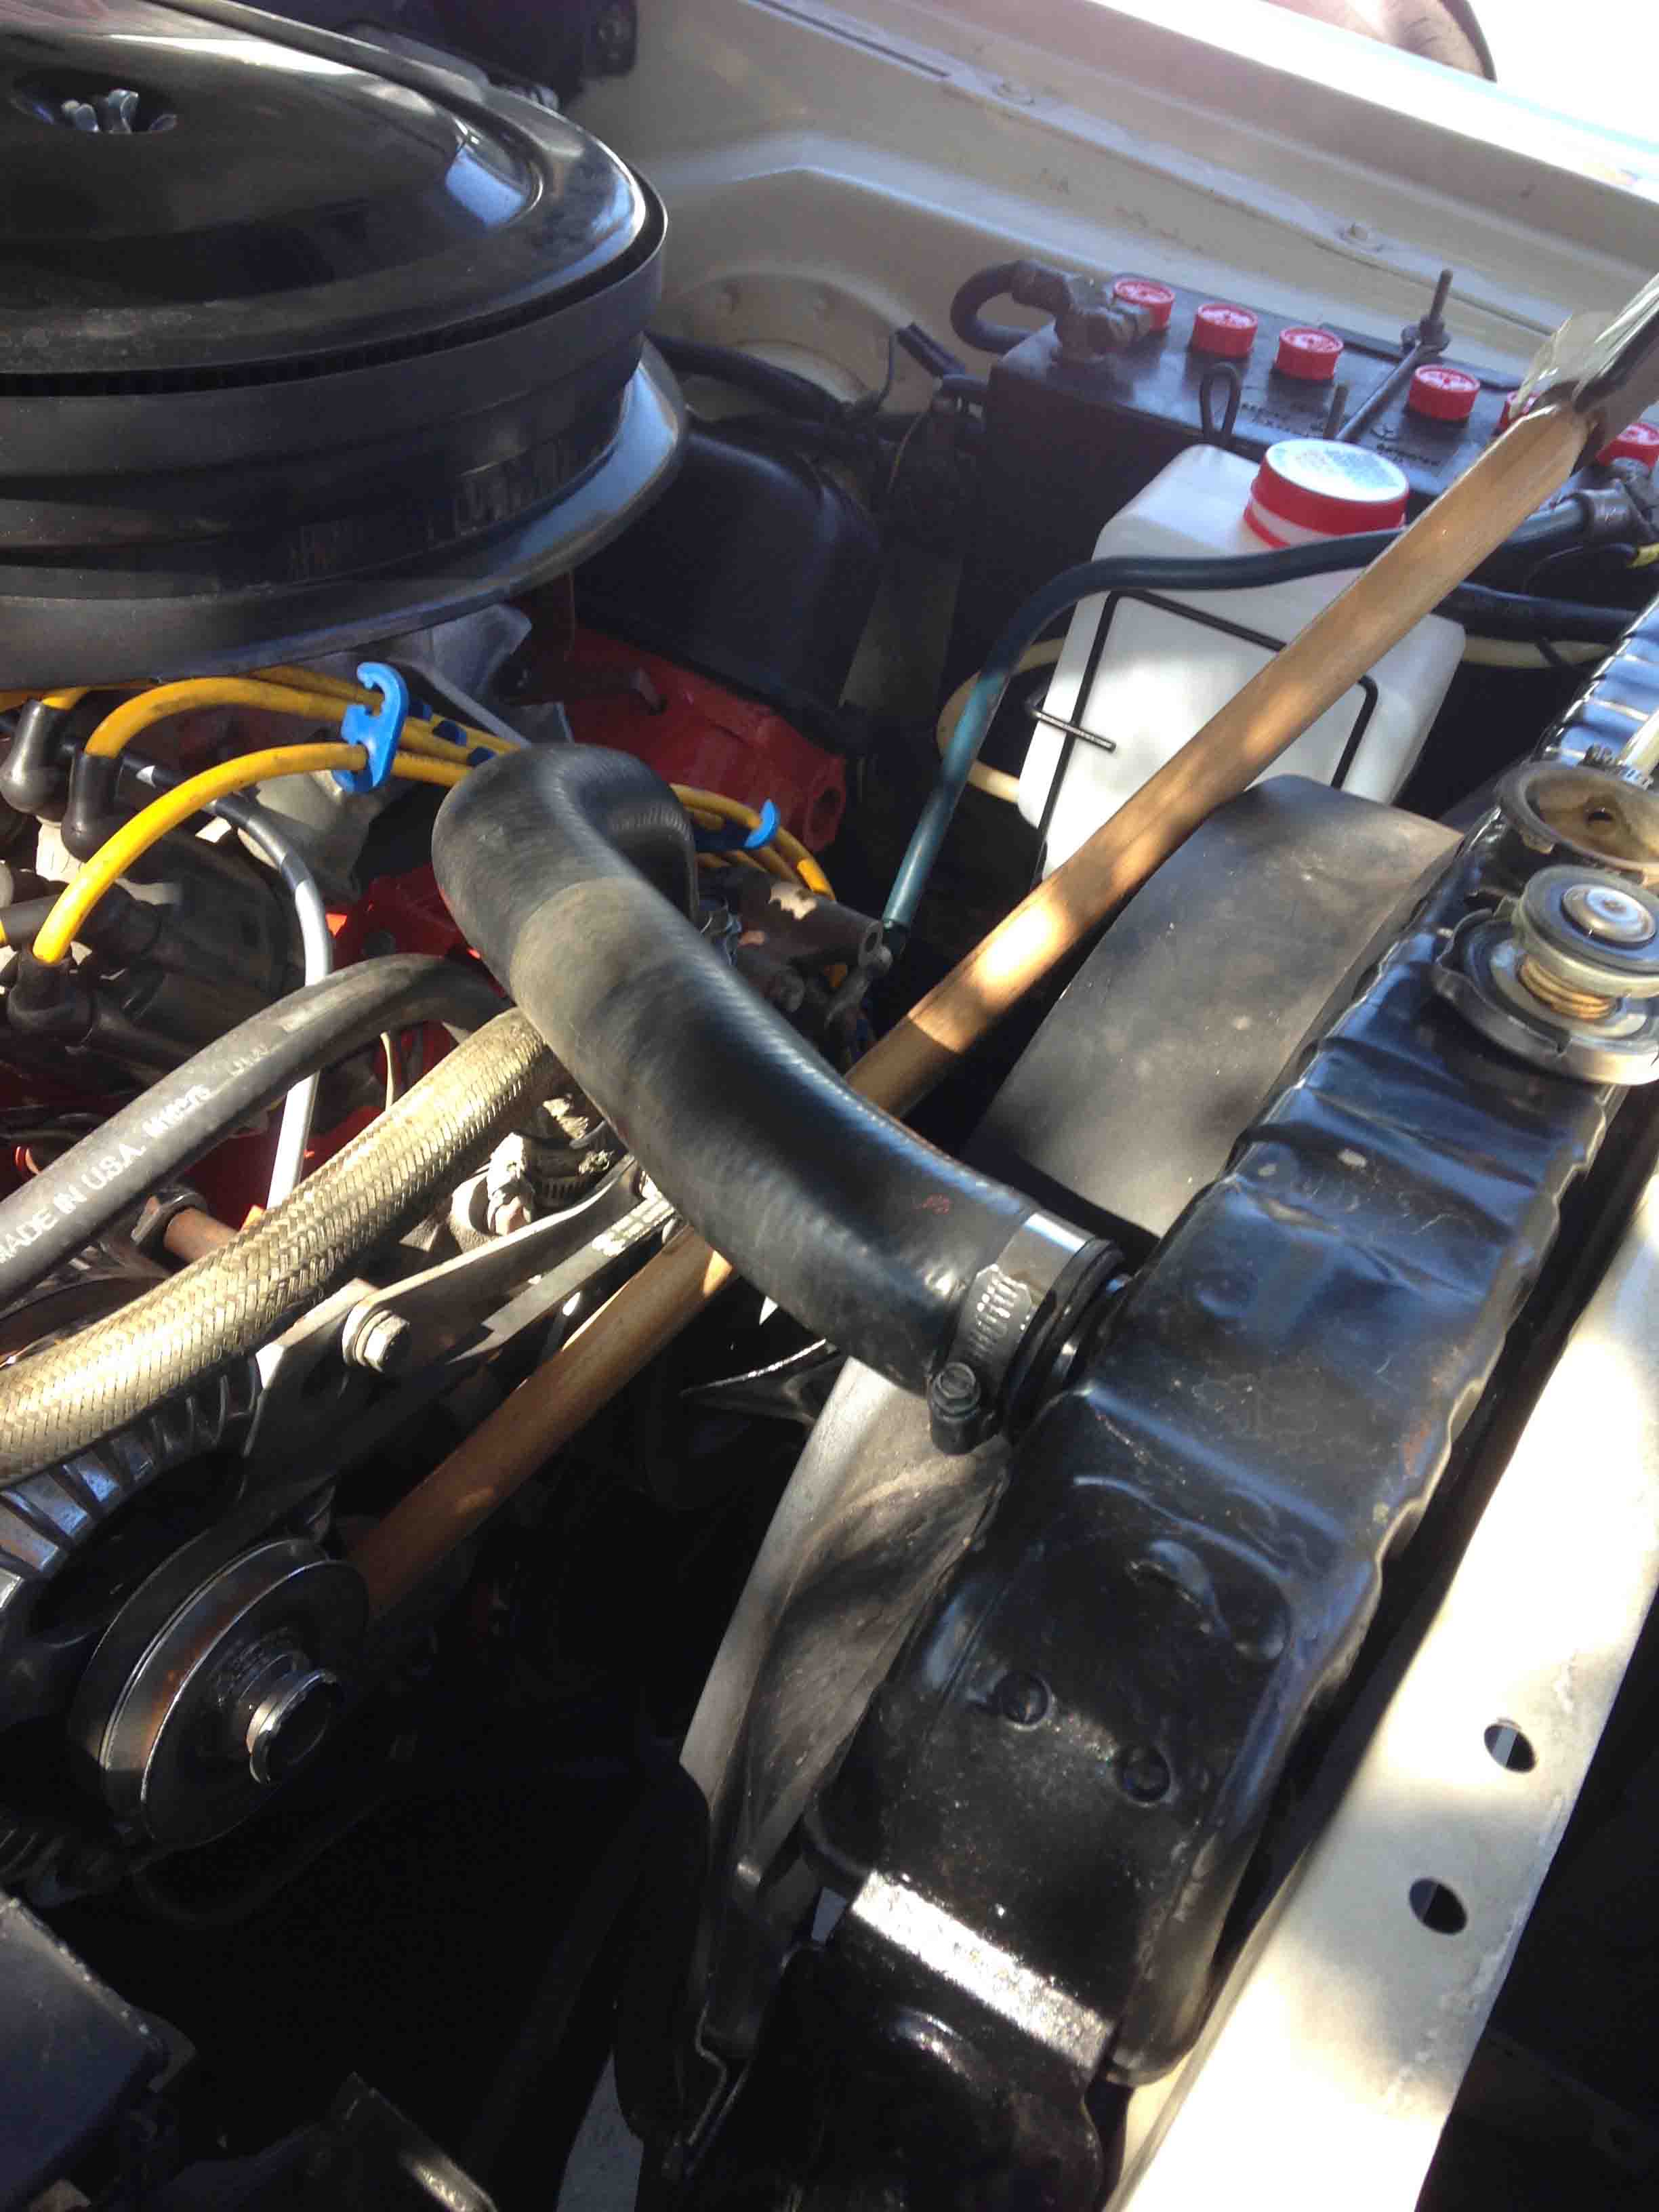
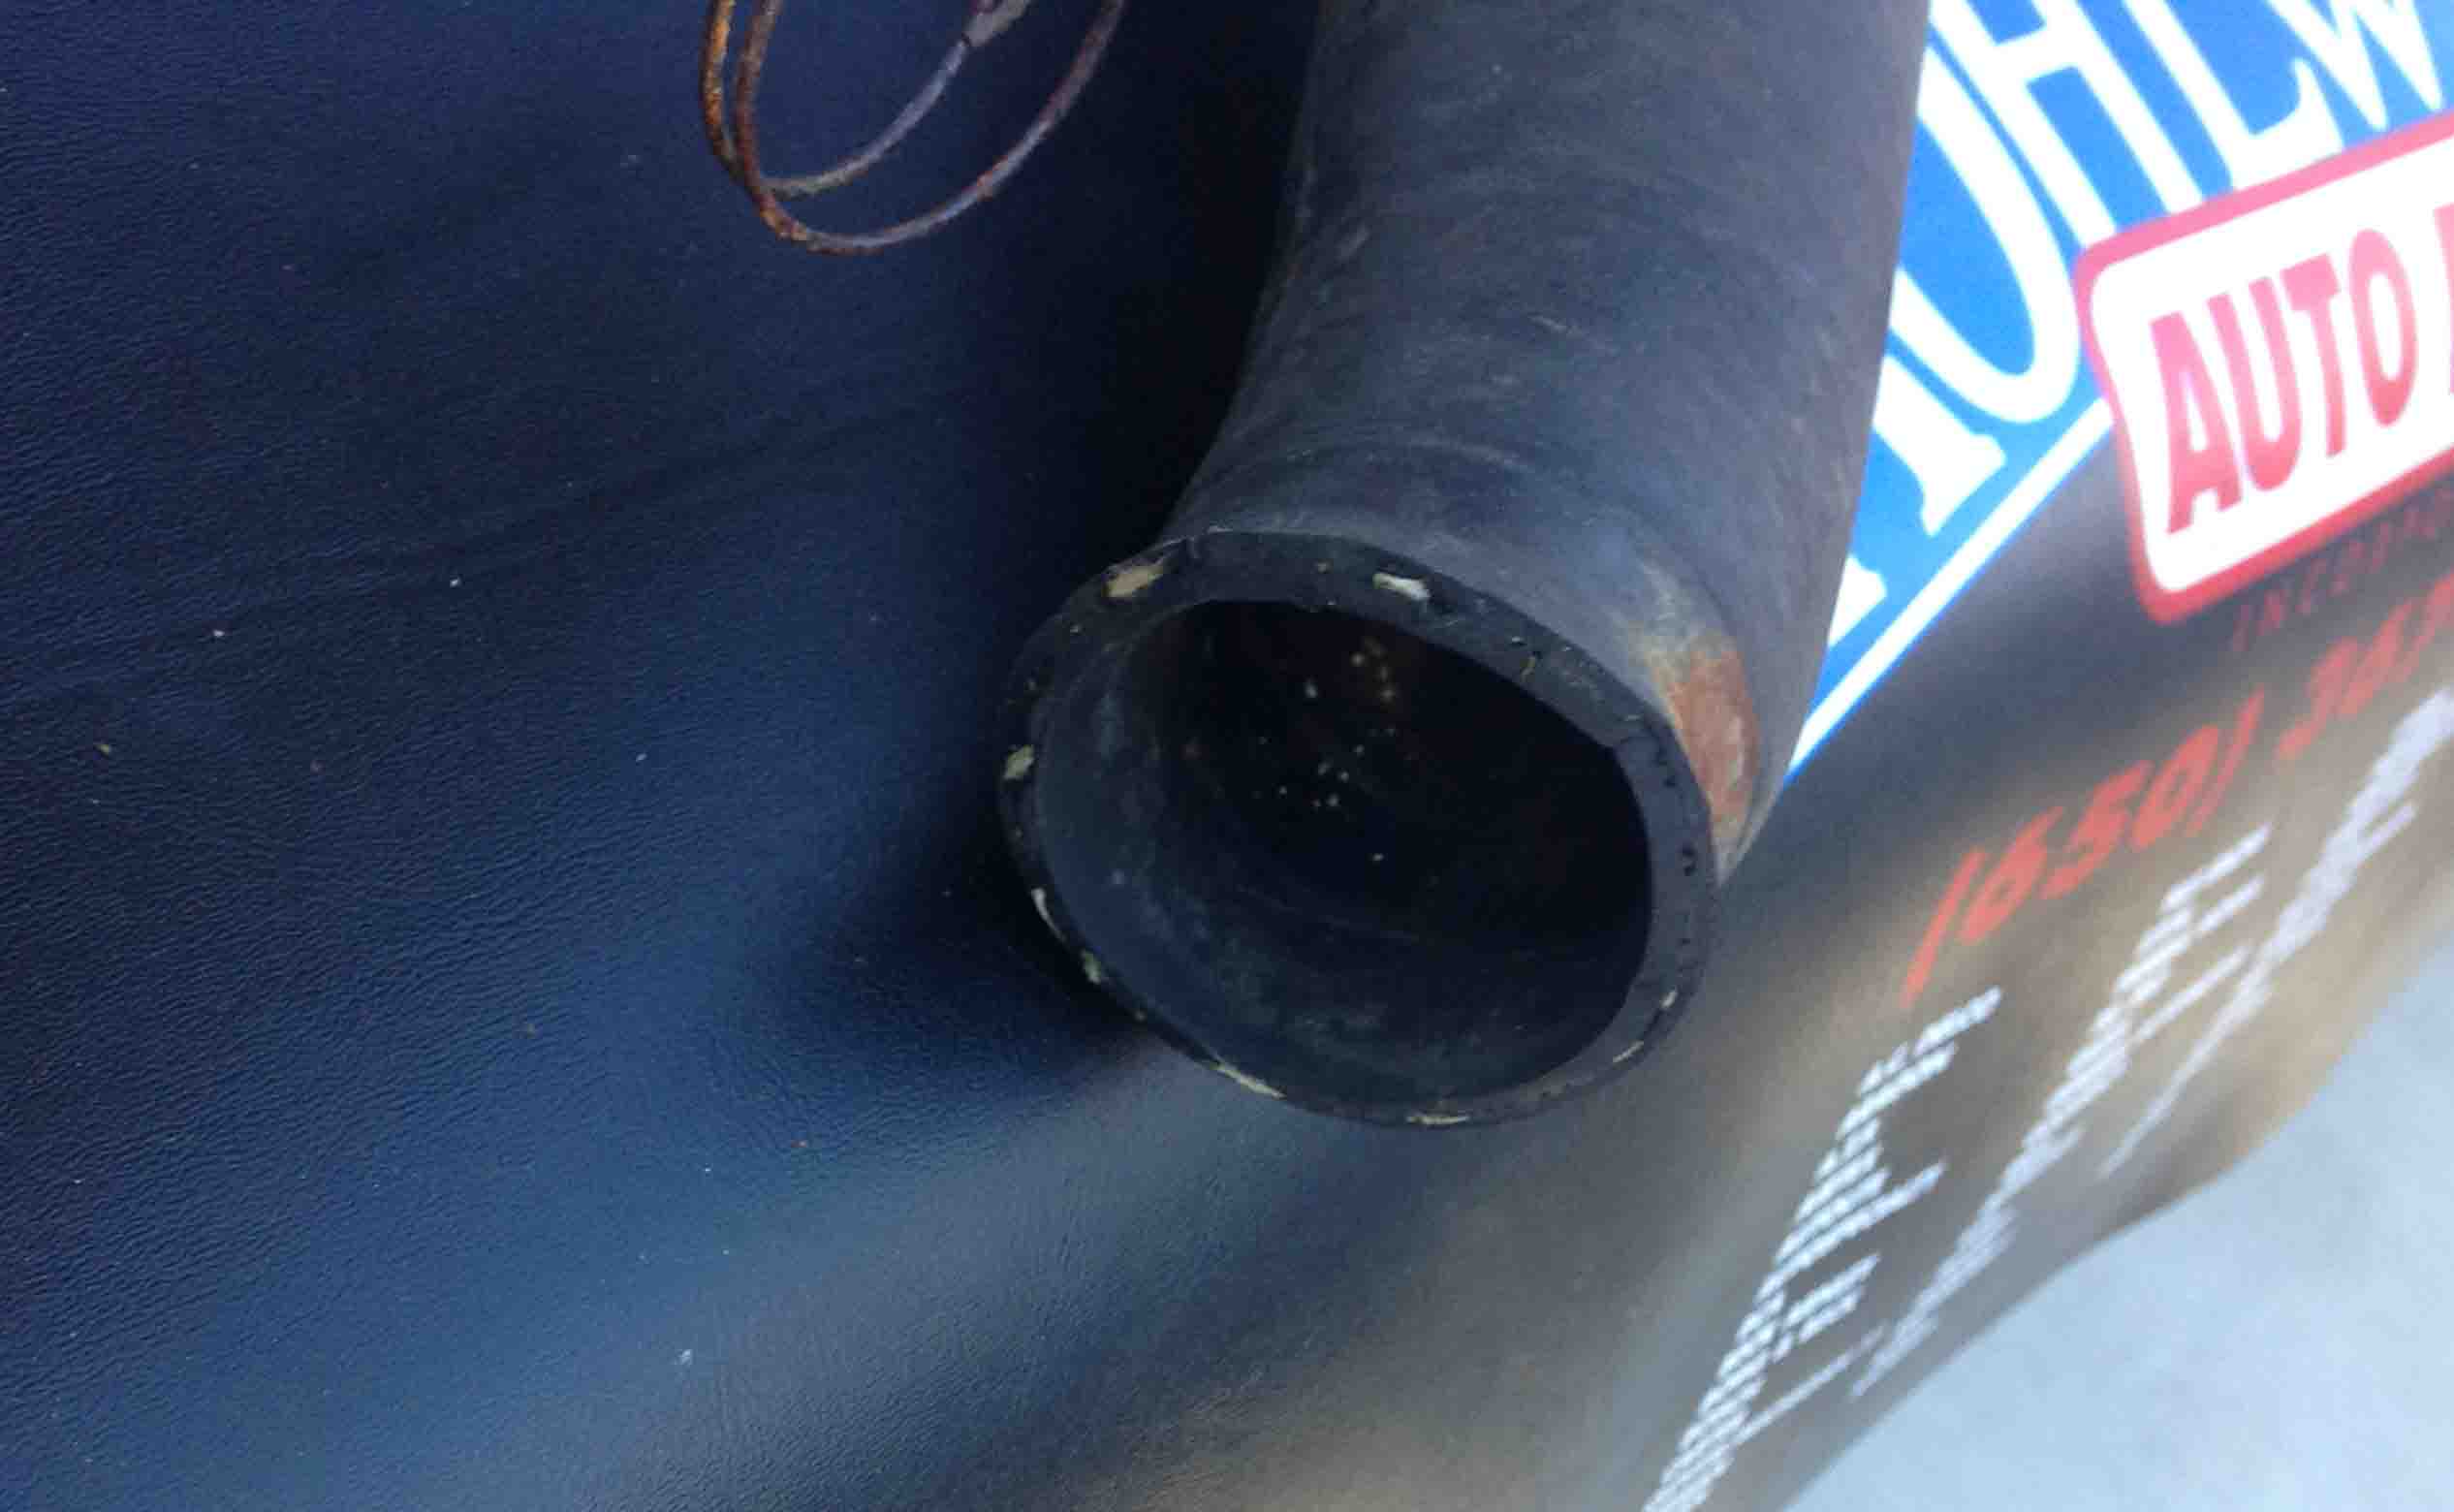
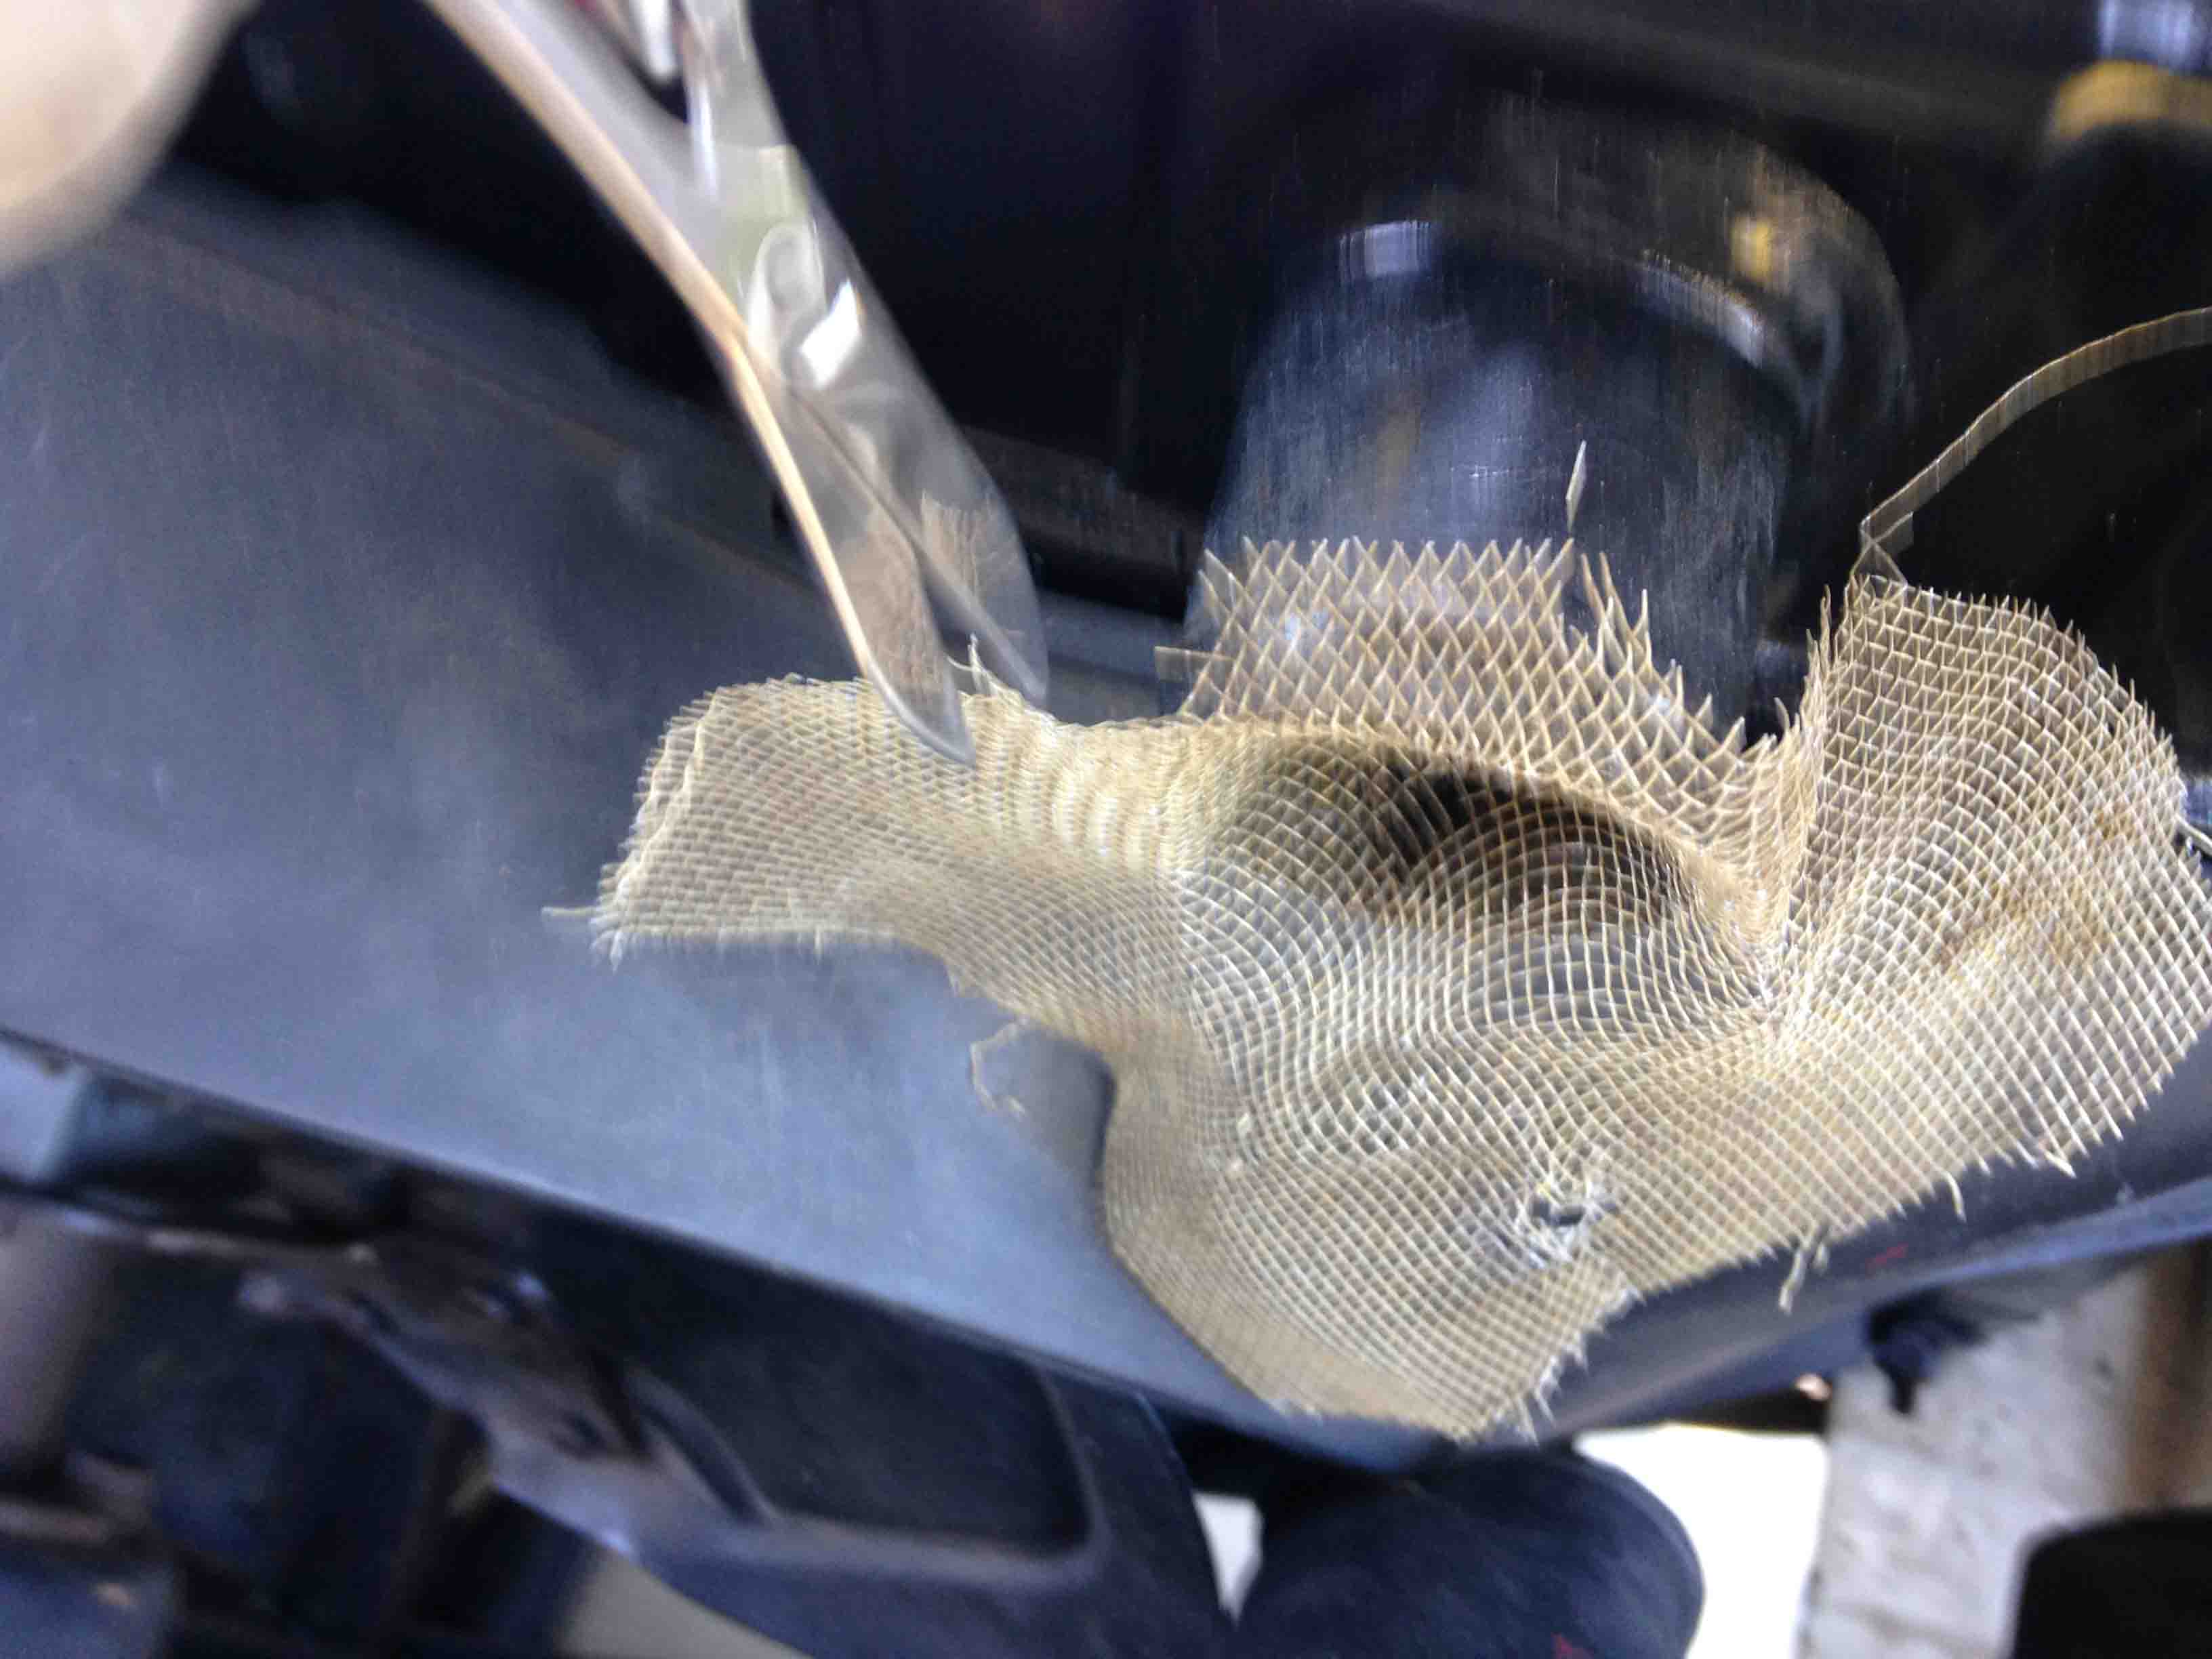
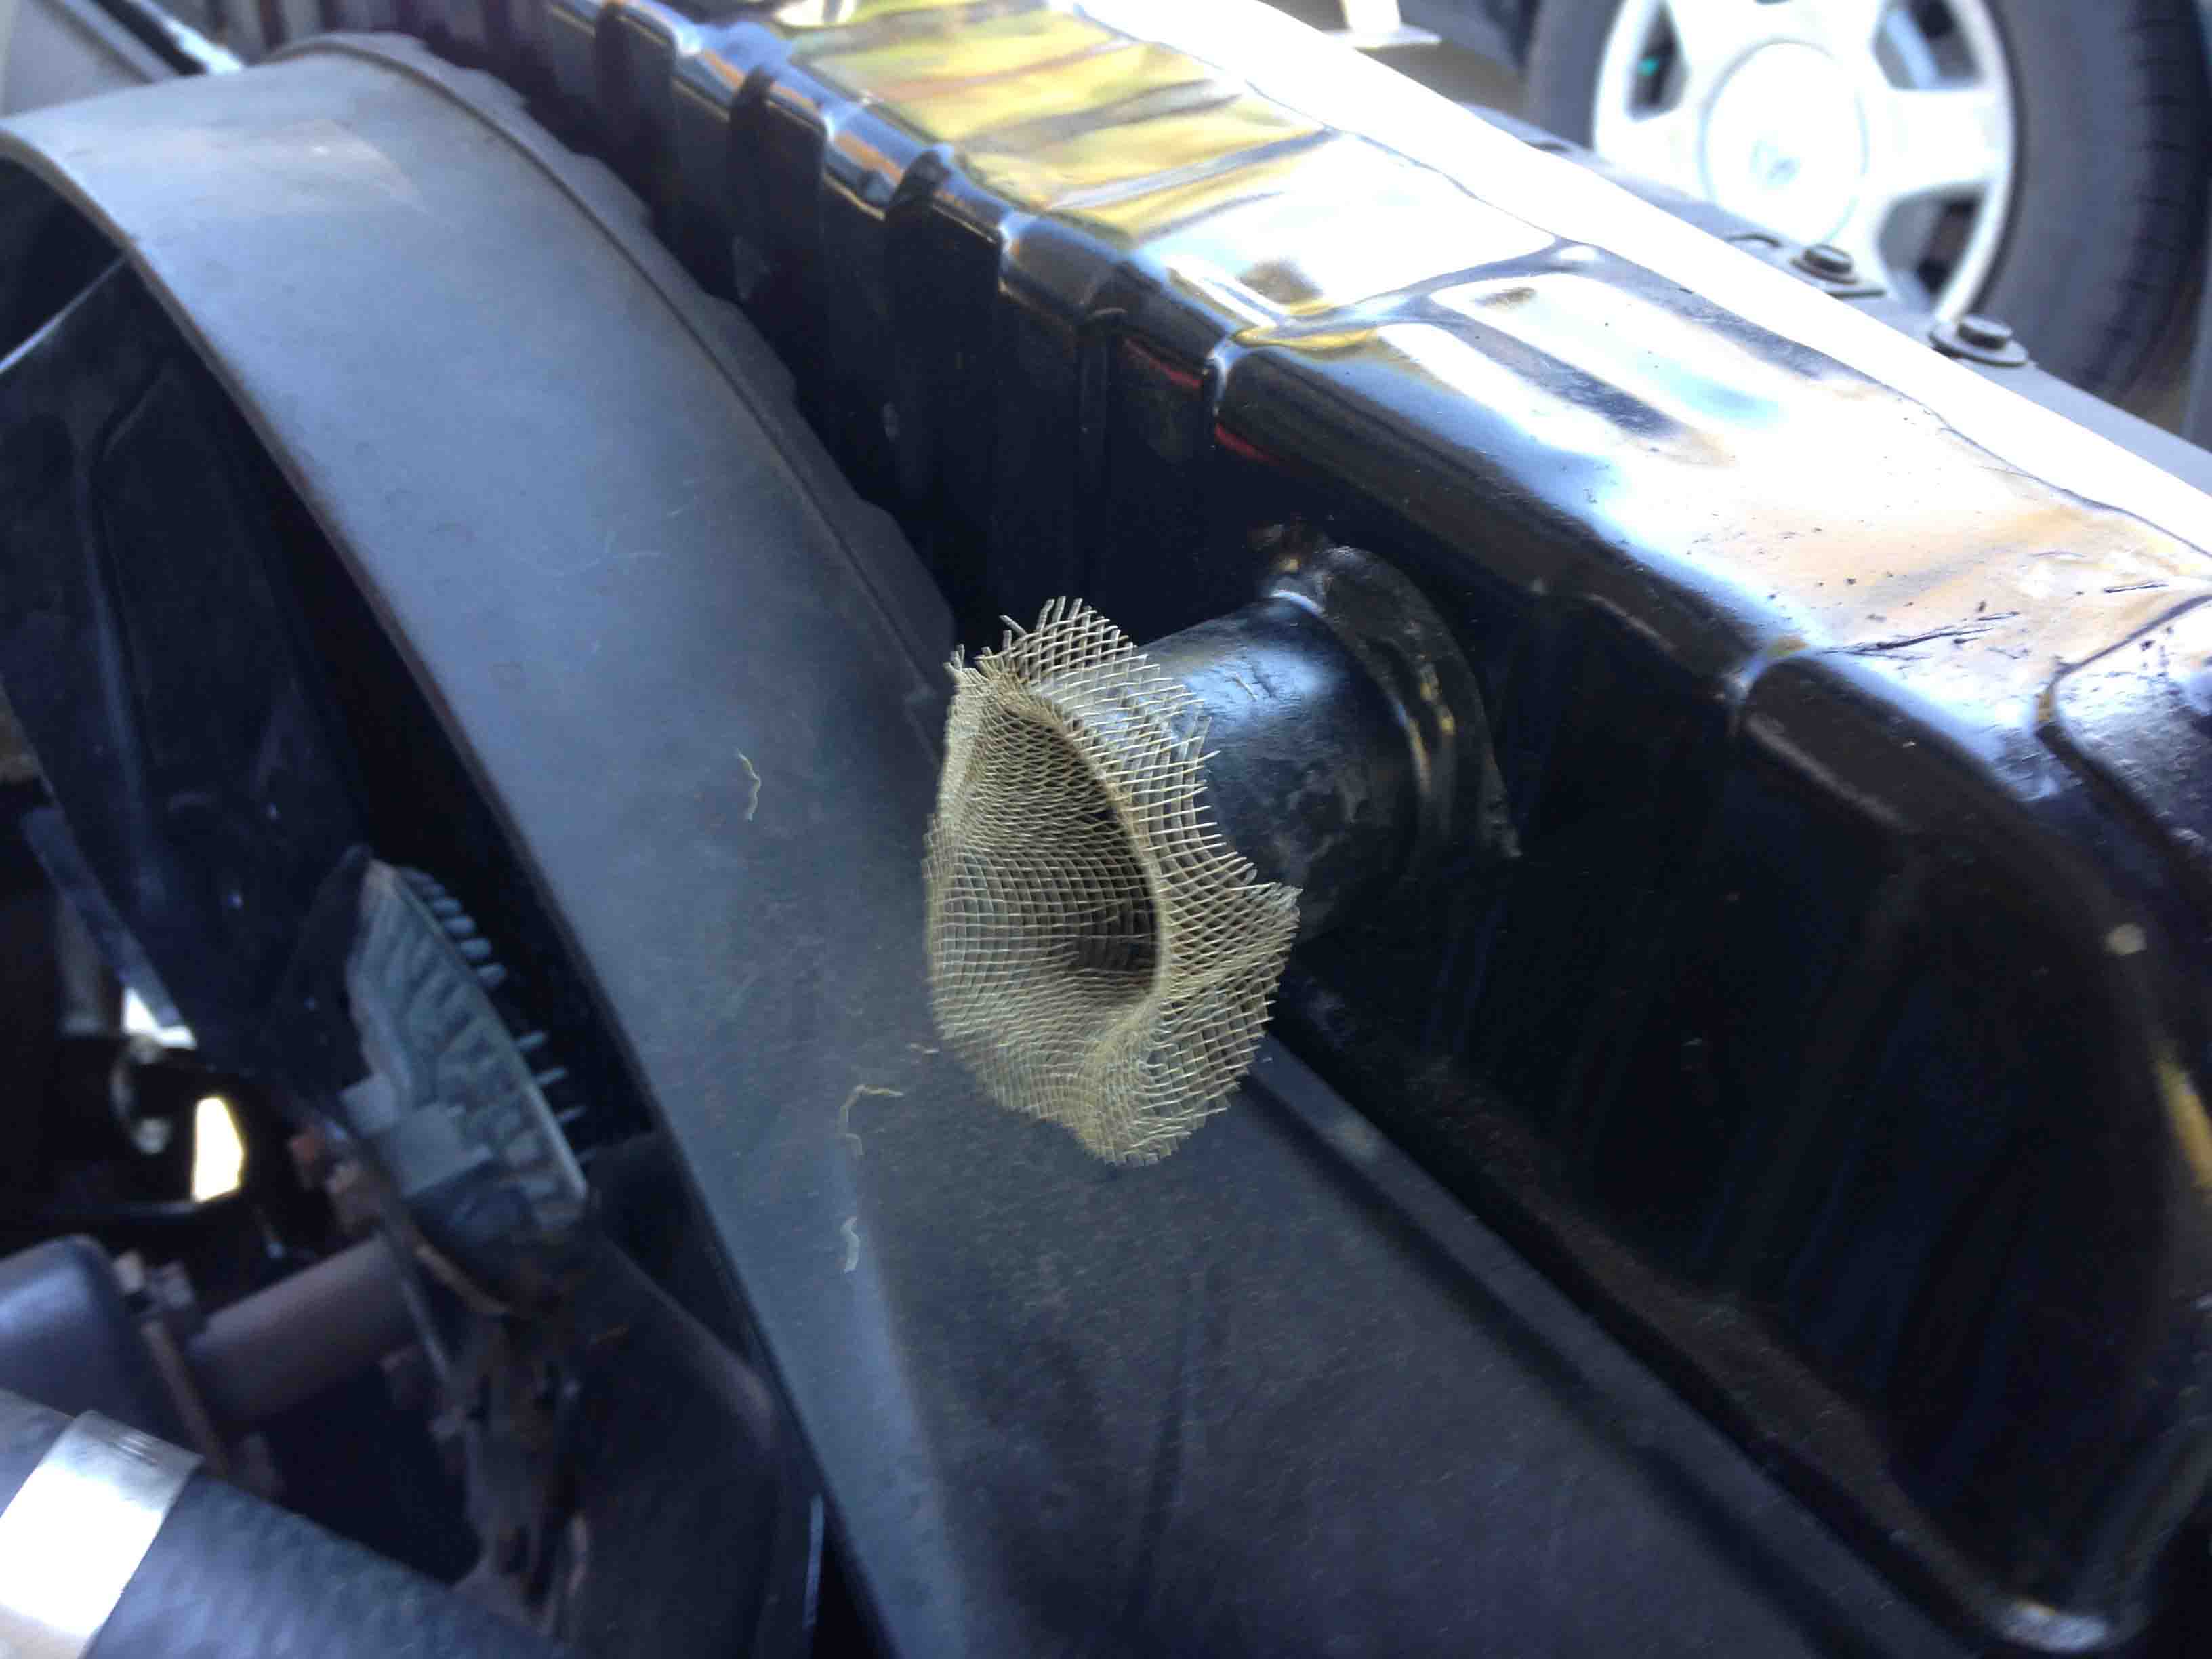
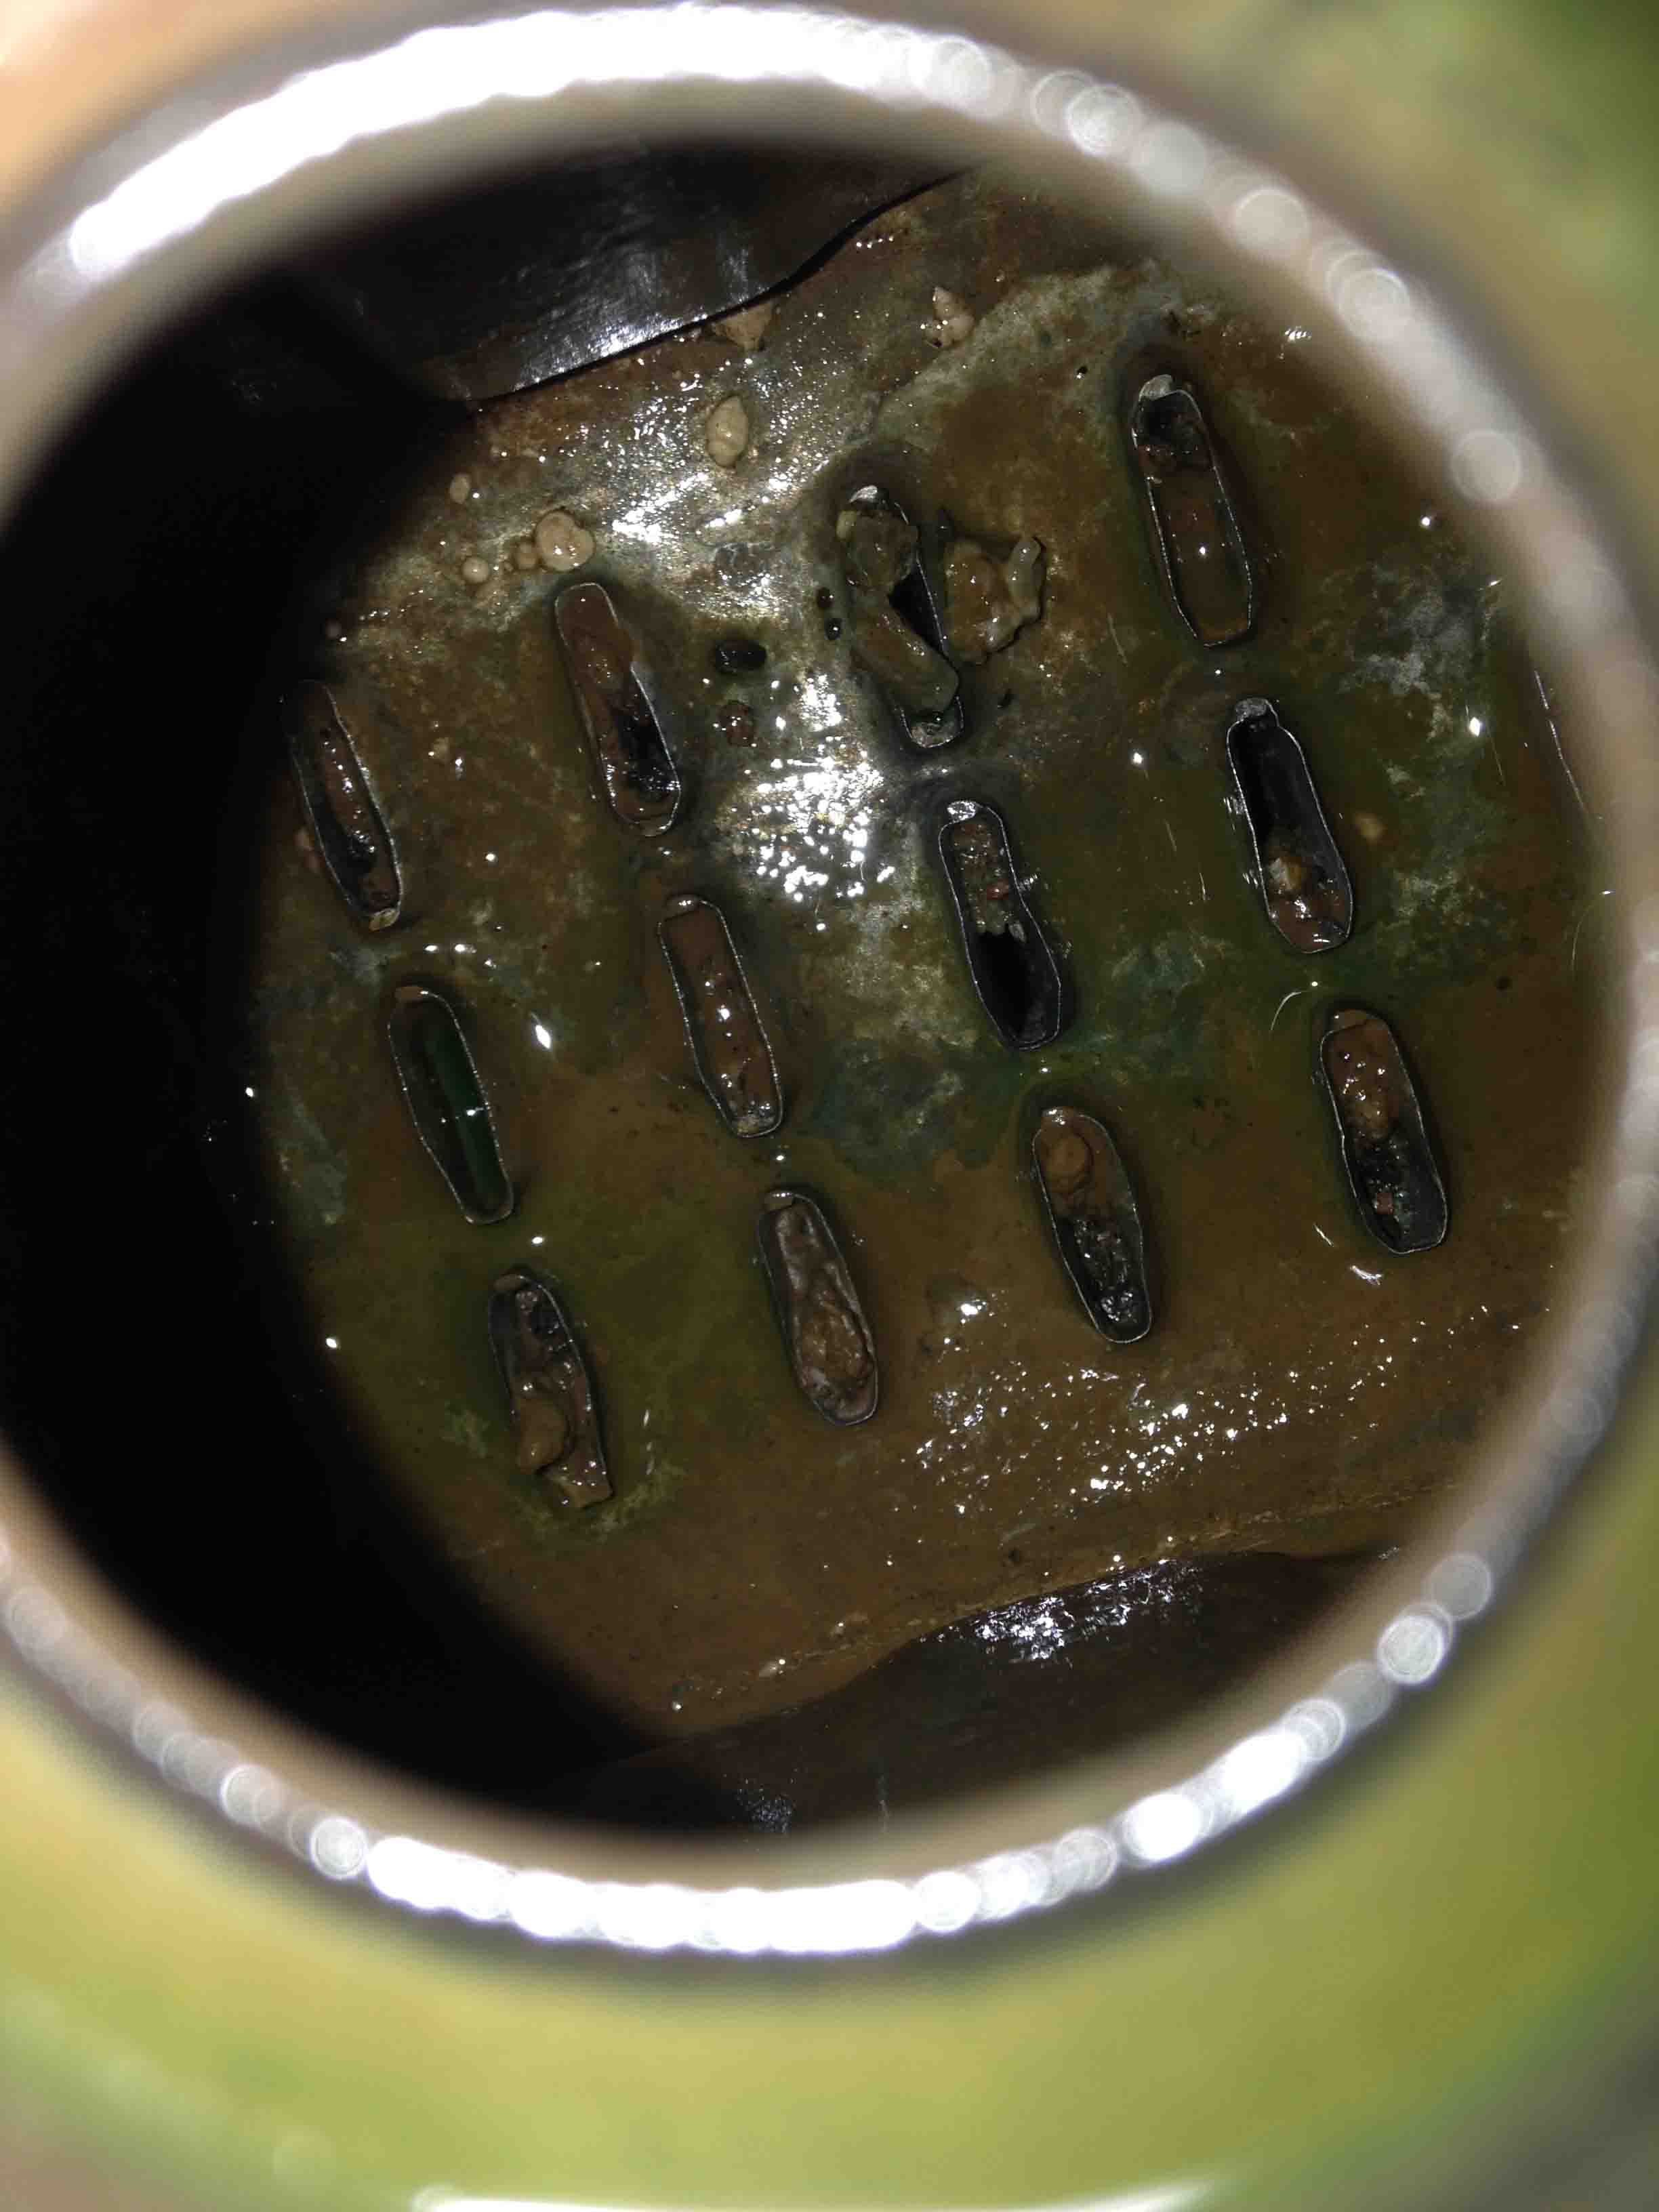
I haven’t checked this home made coolant screen at my upper hose connection to the radiator for months. It was still there and this is the little crud that was captured by it. I replaced it with a new copper mesh screen.

wfm

In the underground parking lot of a Whole Foods Market, doing some grocery getting with with th skids and  the 440 six pack Challenger. Right before I was pacing a blue Cobra roadster going down El Camino Real. THe traffic was too heavy for me to catch up with him but it would have been a pretty sight for onlookers to see a Cobra and a Challenger lined up at a stoplight on a Sunday afternoon in Silicon Valley. Nothing like stalking a Cobra to keep your mind focused on driving.


vida

Here’s we’re parked in downtown Menlo Park in front of one of my favorite restaurants, Vida Bistro, where my wife and I got engaged in 2000. But today, I just parked her to take the kids to the local Stone Cold Creamery for some ice cream. Good thing the reverse lights work on this car! And getting out of these spots is easier for steering the manual box.


How does it feel to drive a 440 Six Pack Challenger in traffic and boiling summer heat?

It is hot, especially wearing work attire. Although it’s nice to have the A/C from my other car, opening the windows makes the heat tolerable. Wear sunscreen to keep from getting burned!

I’ve got a little exhaust fume problem. Opening one window tends to suck in some exhaust into the interior, but opening both sides tends to keep keep the smell in check more. The fumes and for general performance I want to add a multiple spark ignition to the 440.


How has the cooling system handled keeping the engine from puking coolant in traffic jams?

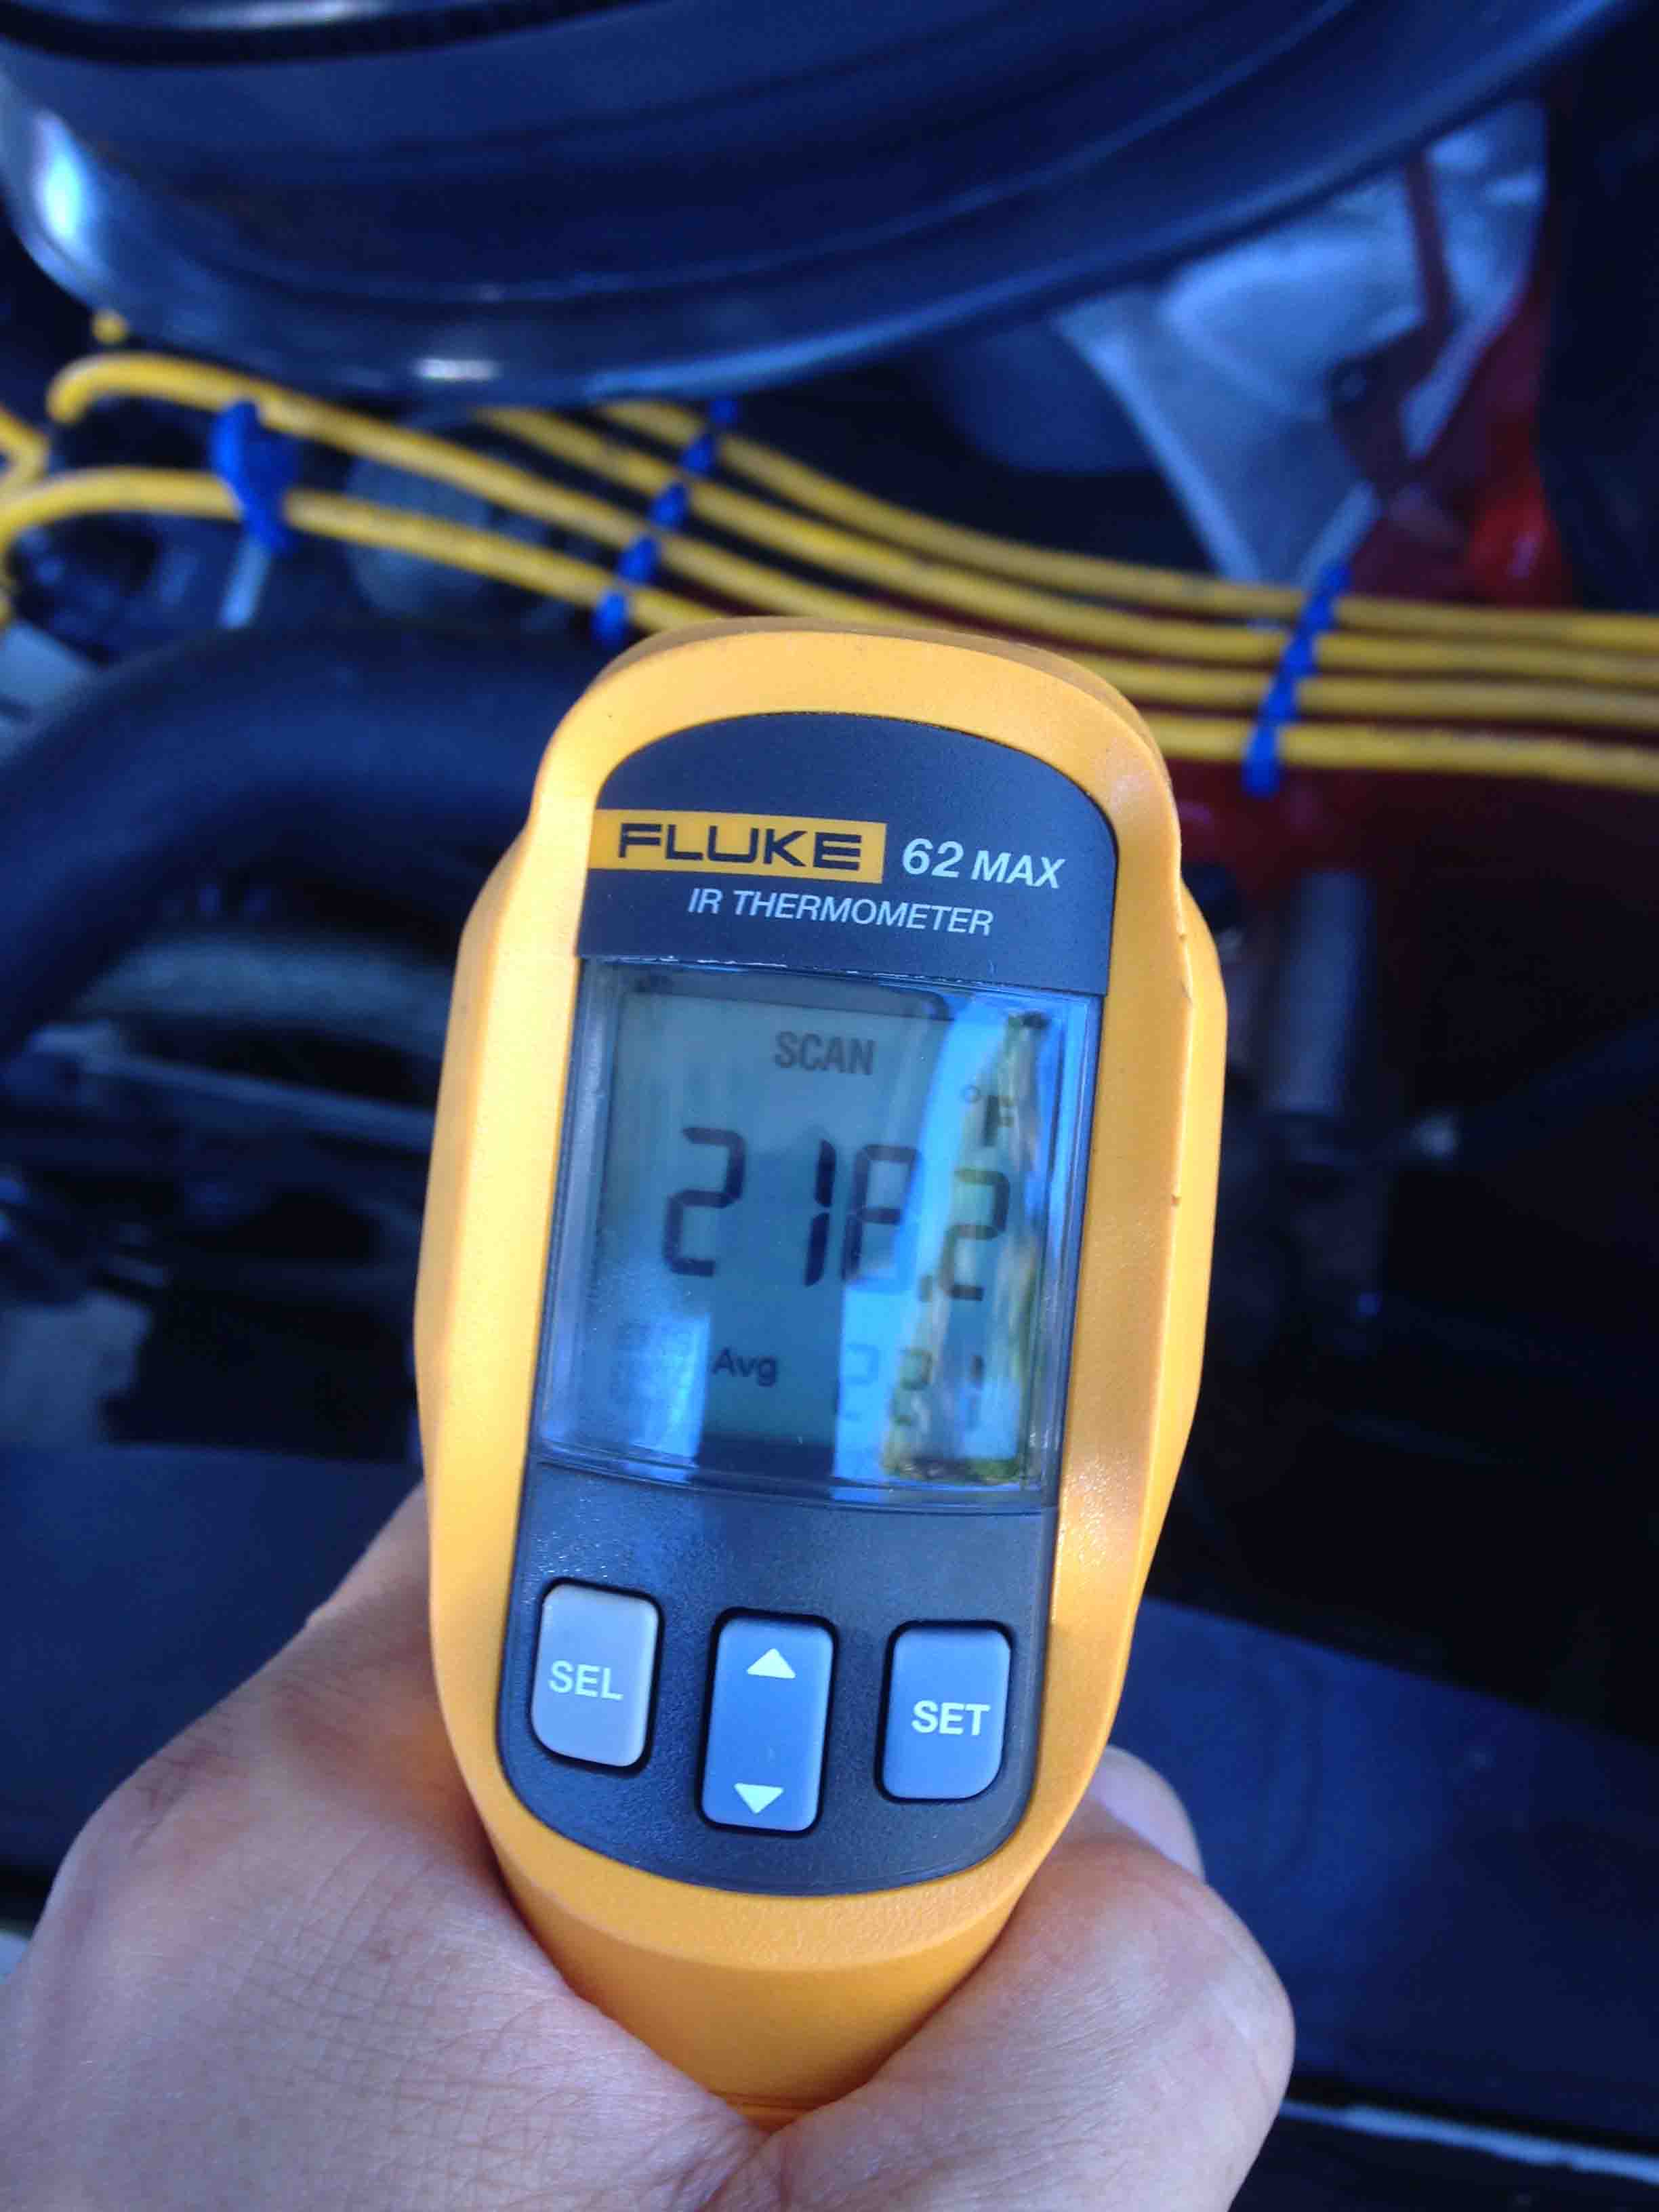
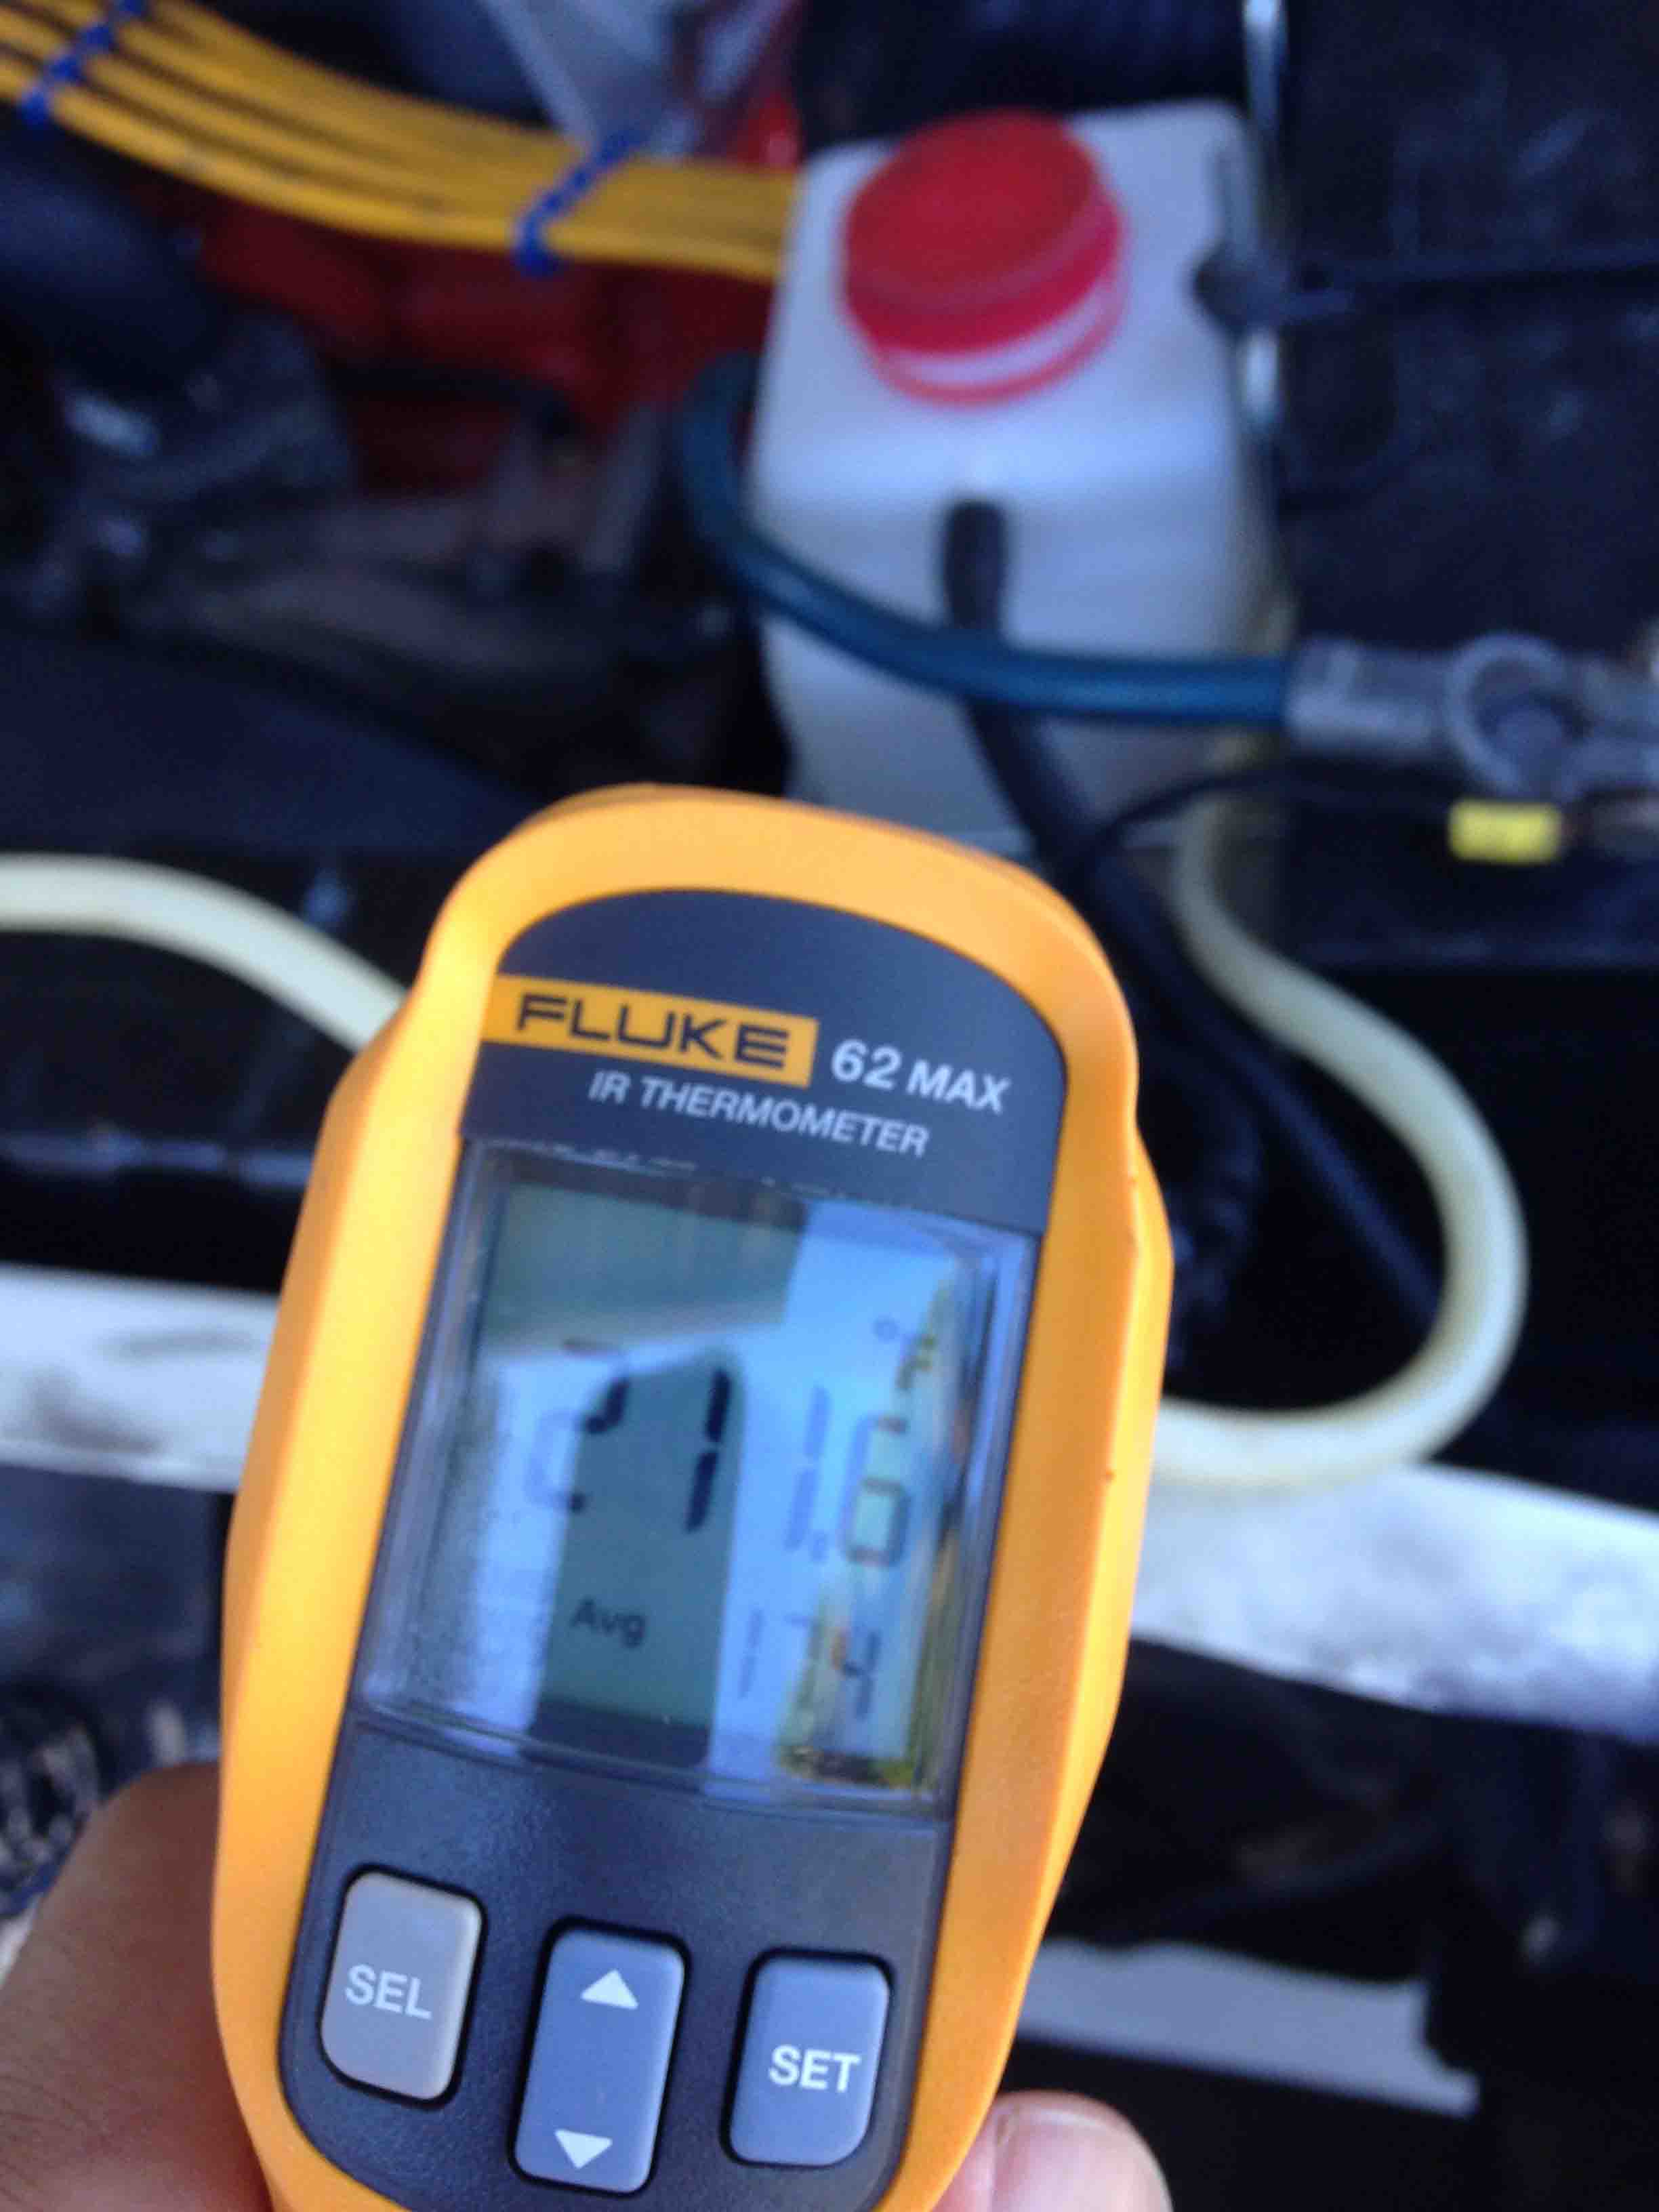
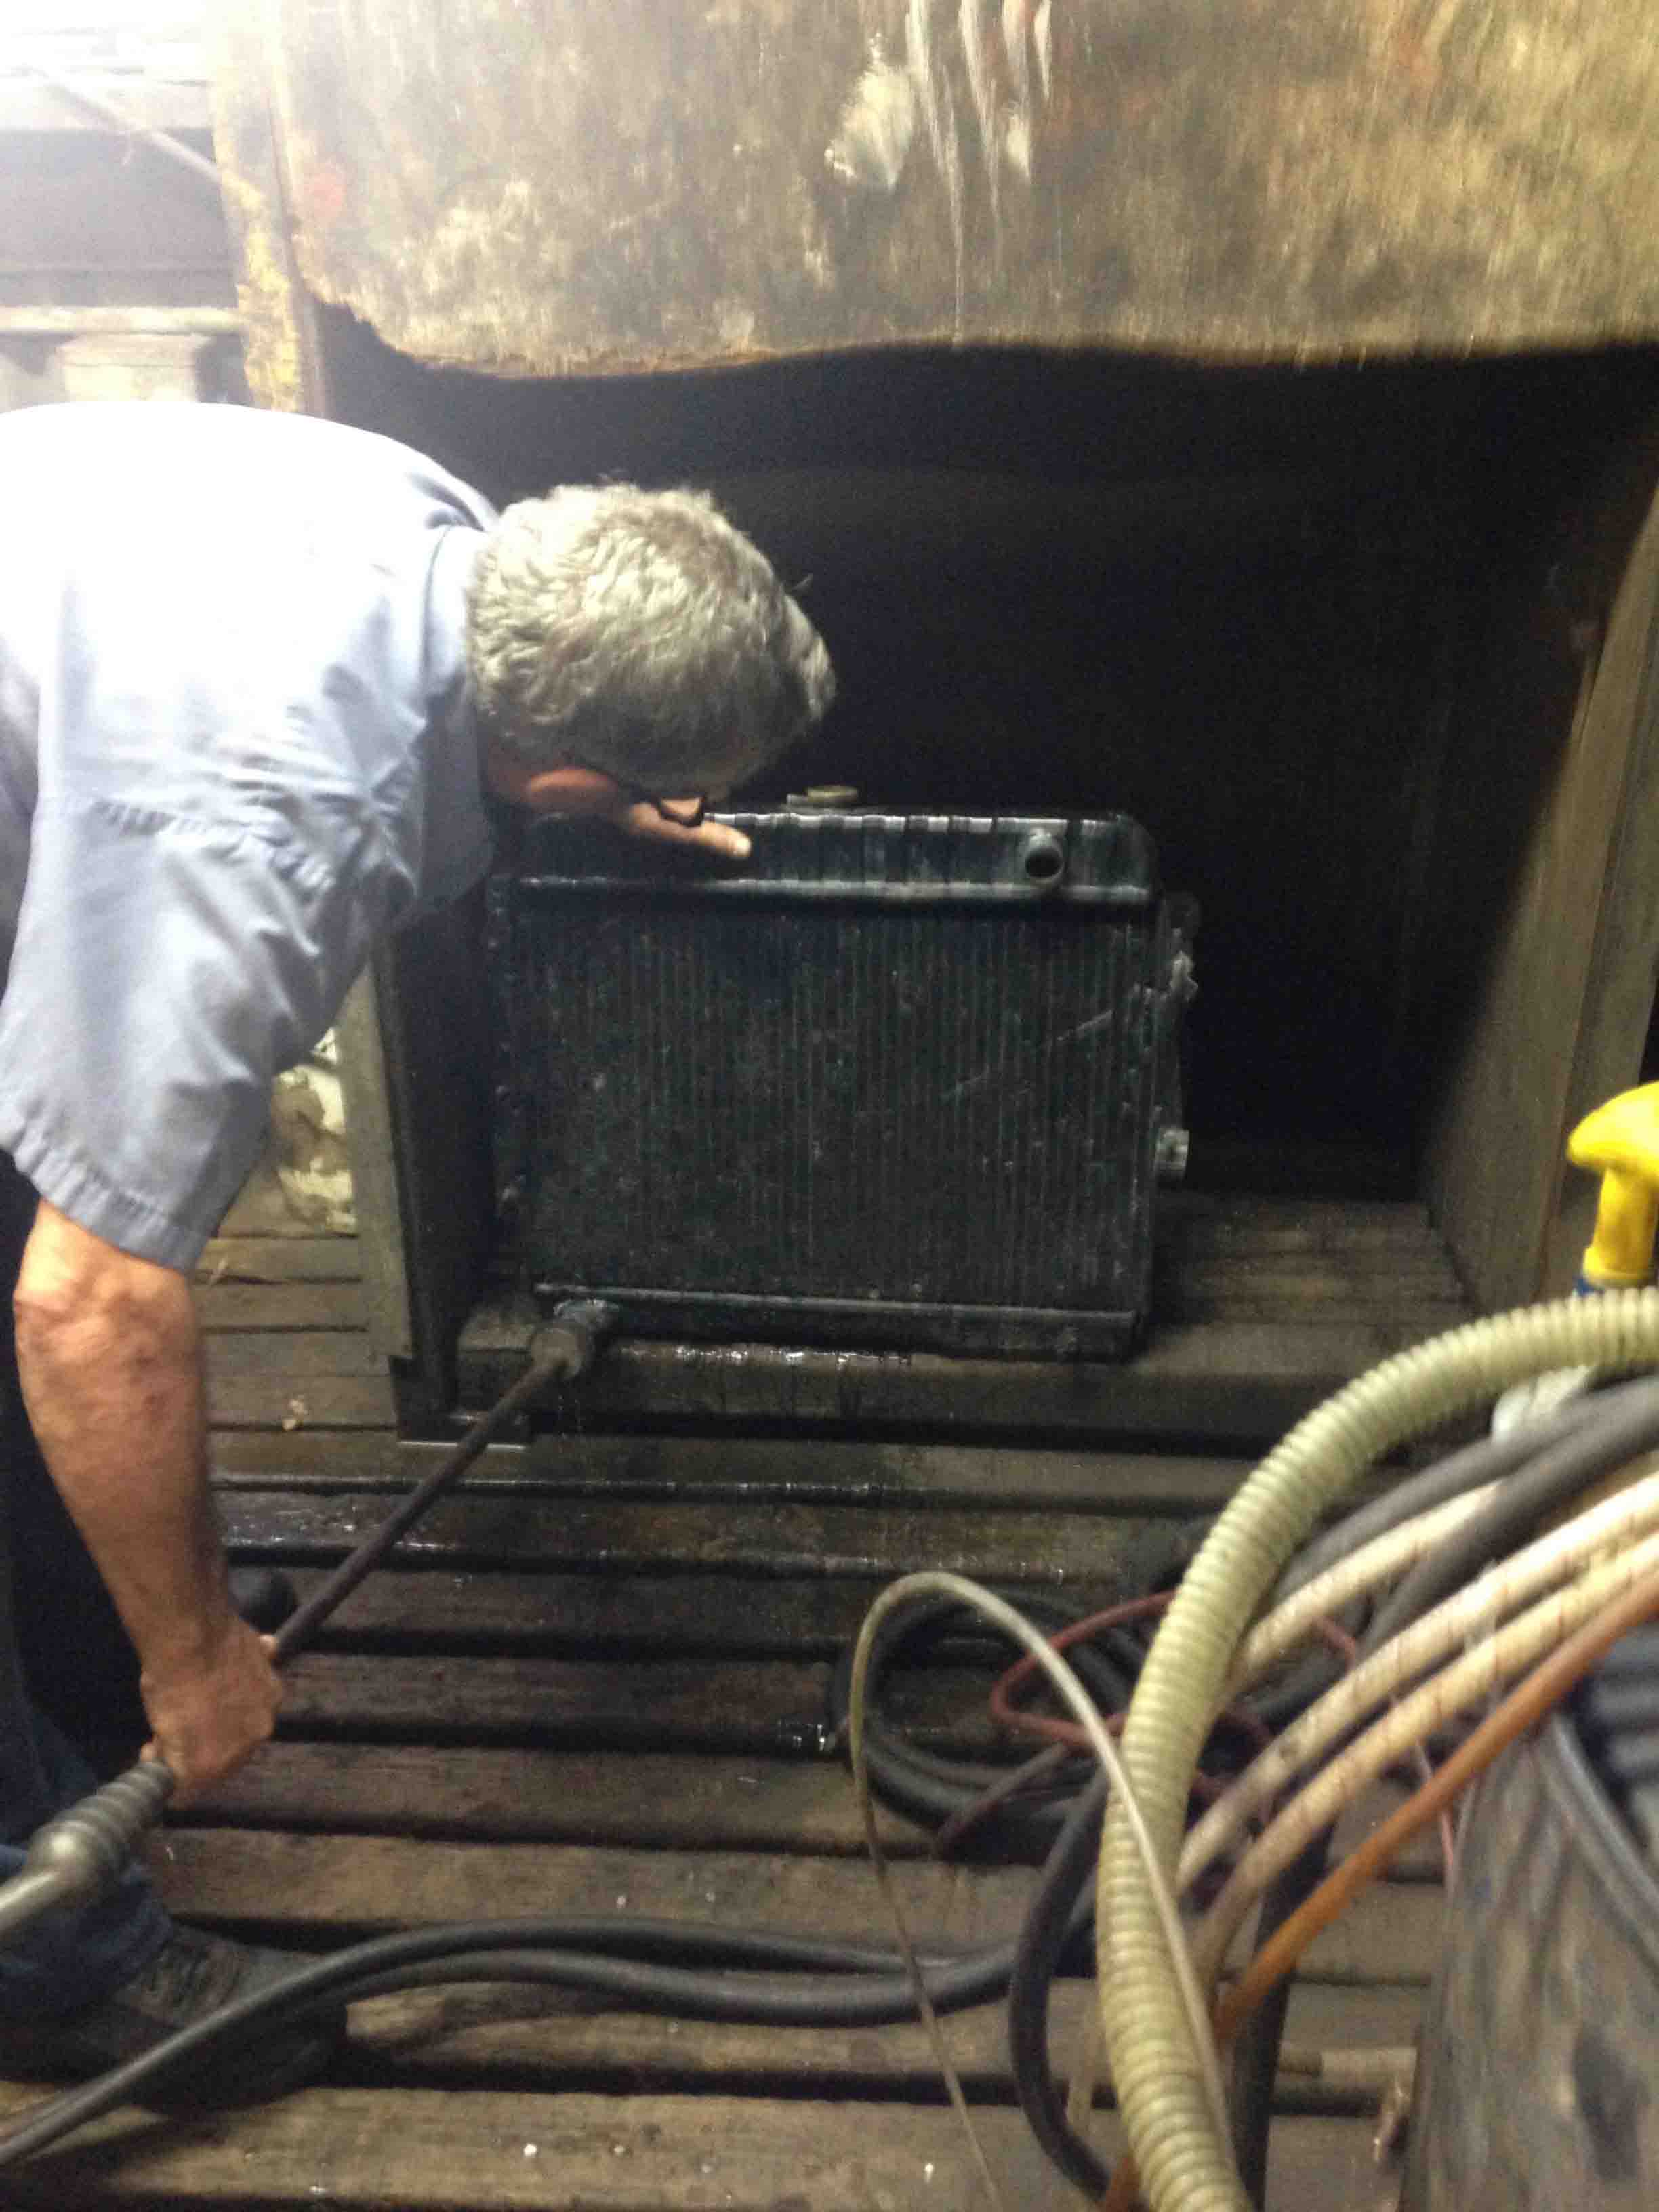
The cooling system has worked admirably, quite admirably, despite sitting in traffic jams, stuck mostly in first and second gear creeping  along in near 100 degree heat. The temperature gauge tended to rise into the middle range on the temp gauge, which from my experiments with the laser thermometer means the temperature is closer to 220 degrees rather than 180-190. The engine never regurgitated any coolant.

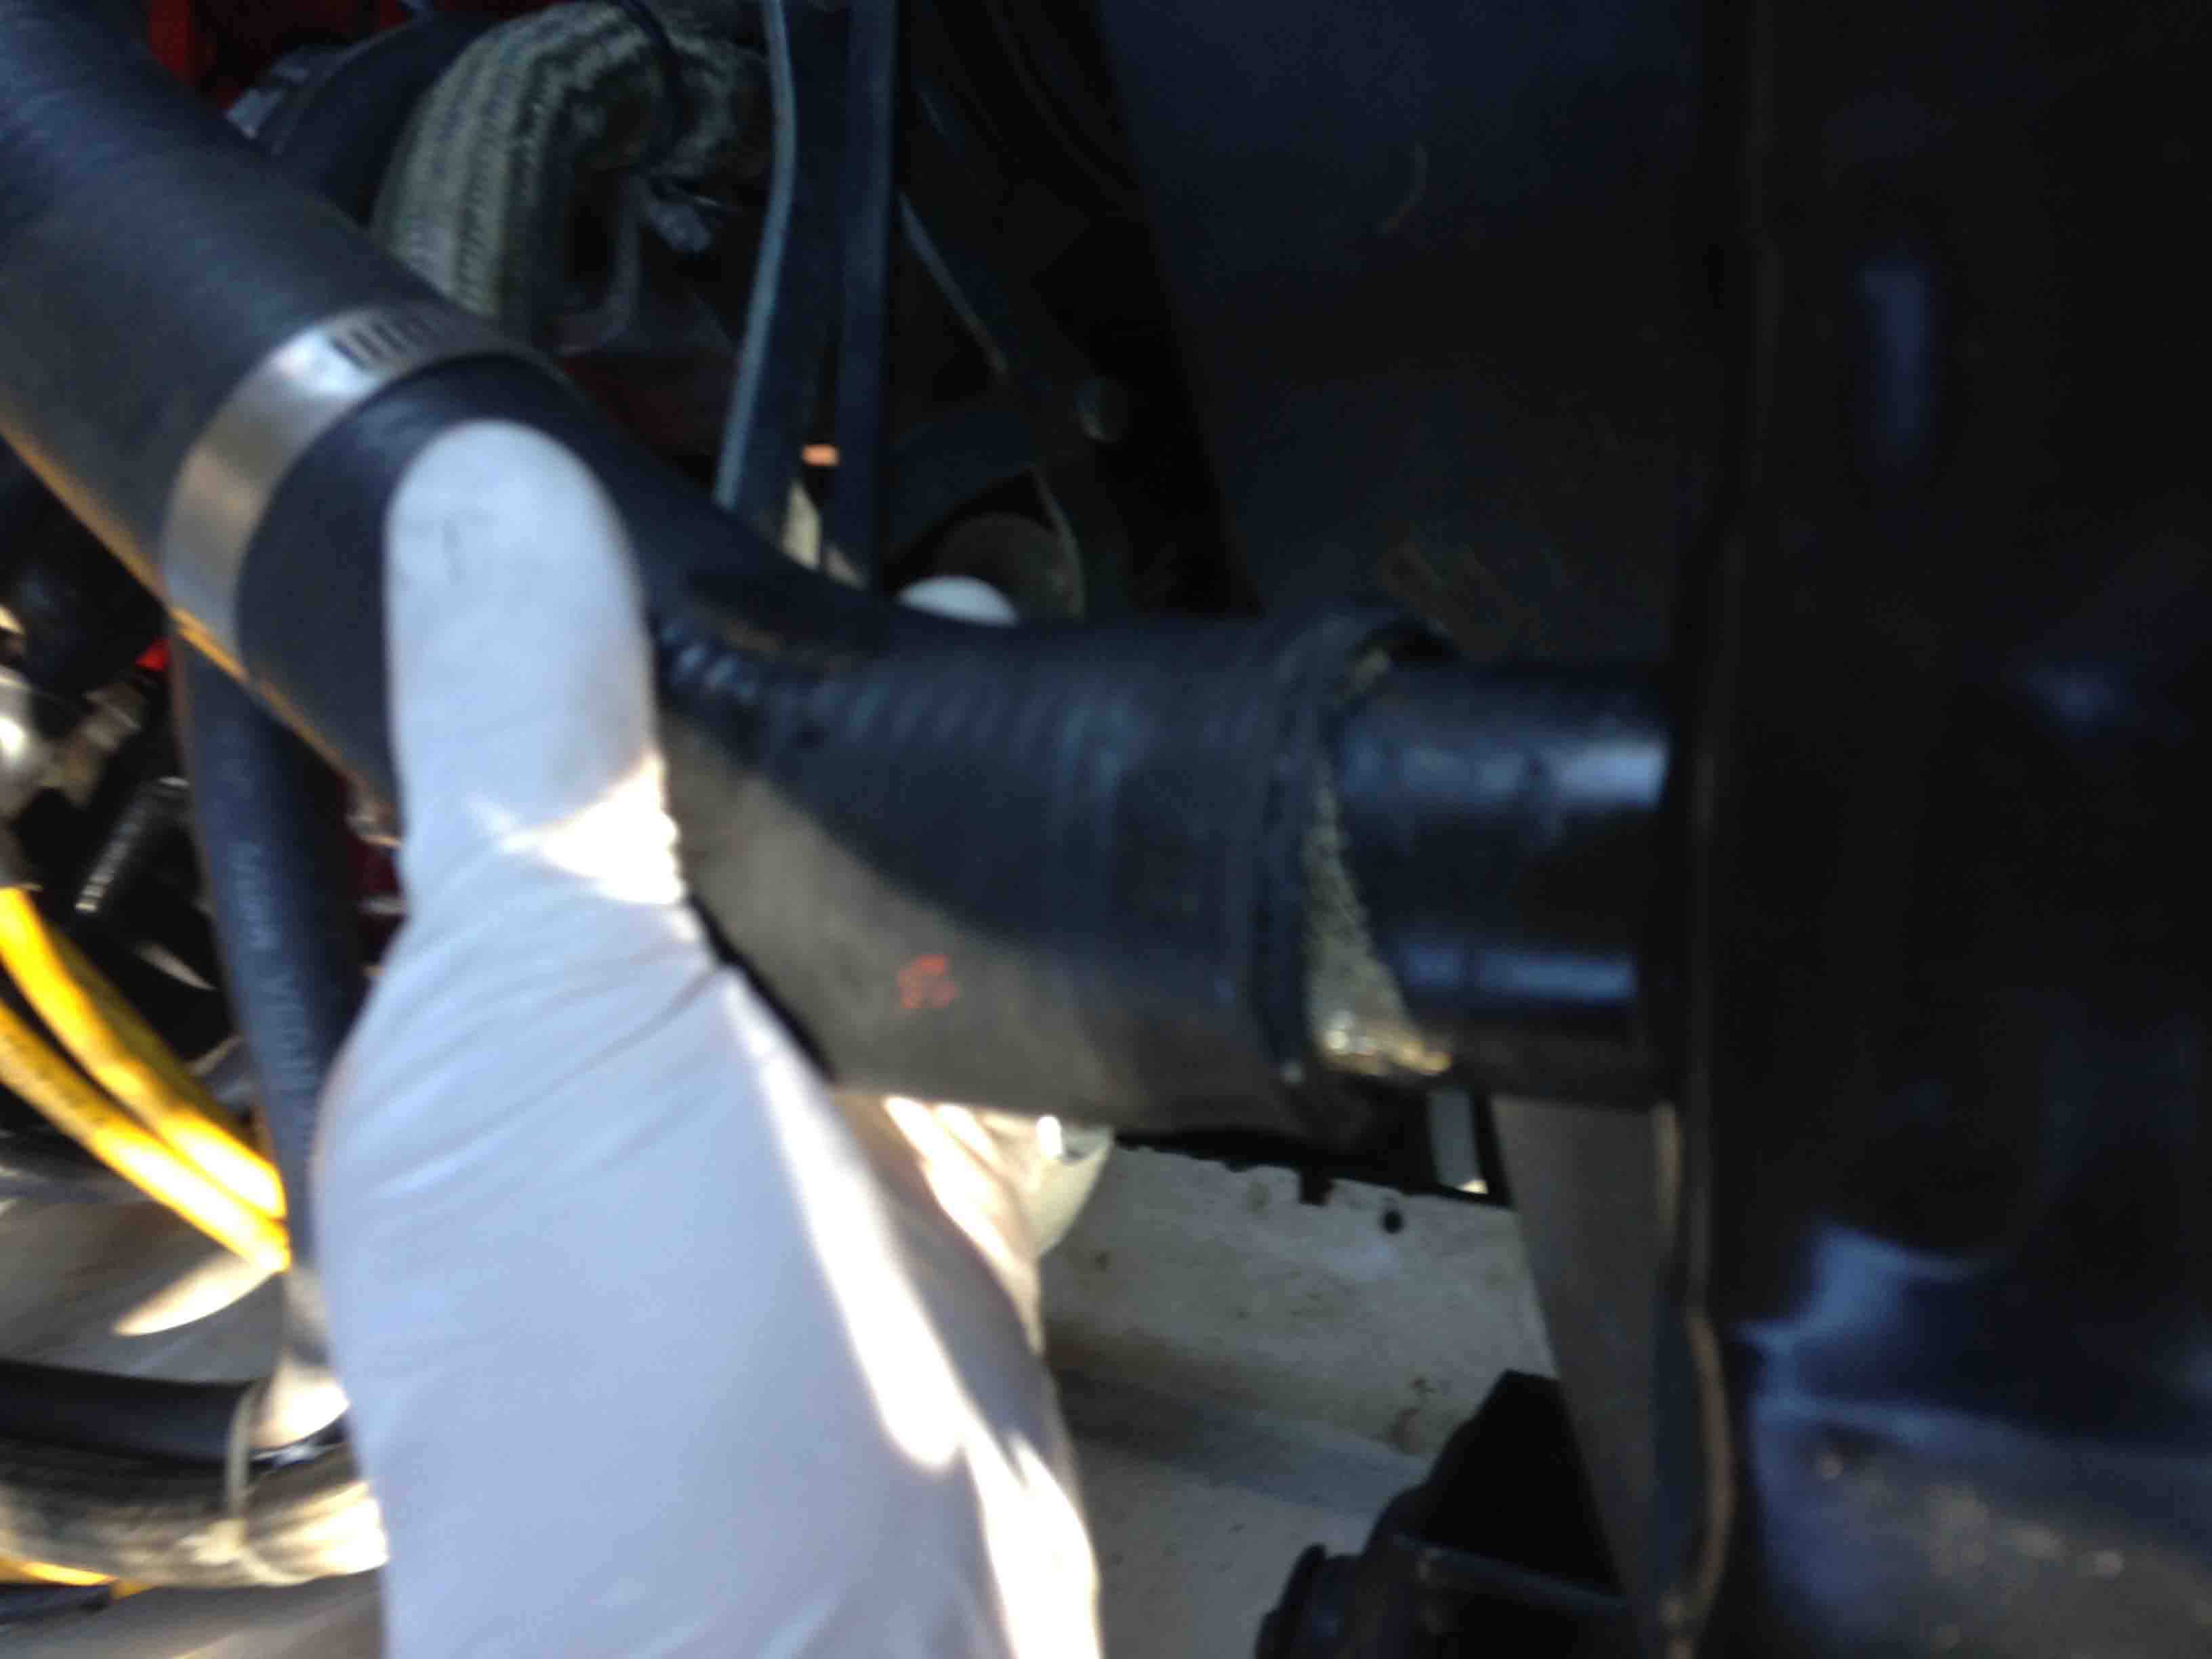
When I changed the mesh filter in my upper hose, I noticed I was slightly low on coolant, but still covered the radiator core. When I topped the system off, I added a bottle of Water Wetter and mixed it first with some distilled water before adding it to the radiator and overflow jug. Putting it in right before driving helps ensure thorough  mixing. Adding it seemed to do a better job controlling the temps.


How has it been driving a manual transmission with a CenterForce clutch?

Survivable. The pedal pressure is reasonable for a performance clutch. What takes muscle is shifting the transmission when it gets moody. Sometimes coming out of 5th gear to down shift it feels like the shift pattern gets  a little confused. This problem would never occur with the 4 speeds I’ve had in the past.


How has the Richmond 5 speed been shifting?

With the 5 speed Long shifter on the Richmond, the 1st 2nd gate is spring loaded, where the natural alignment (unsprung) is the 3rd-4th gate. 5th requires pushing against a spring and reverse (under 5th) requires downward pressure which virtually eliminates the chance of accidentally going into reverse and thereby scattering your transmission across the highway. So when you’re coming out of 5th, sometimes the resistance going to the 1st-2nd gate is not enough to keep from missing a clear shot into 3rd or 4th. Does that make sense? The result is, you have to be more aware than you would normally like to make a well executed downshift. Usually the down  shift  goes hard into gear also requiring a momentary conjuring of The Incredible Hulk’s arm.

Getting into gear most of the time is like what you’d expect, a nice low effort throw and snap into gear, but sometimes it doesn’t go into 3rd with the  Midas Touch, it takes Rocky Balboa to ram it, but it goes.

My old Ford Toploader with a clean shifter and I’m sure a good 833 Mopar tranny shifts a lot easier than this monster. 3rd gear takes the most muscle as sometimes I just have to just have let that gorilla know who is boss. Actually, I think it would be nice to have a 6 speed TREMEC and be able to keep the RPM’s low on the highway and get better mileage. Right now, with the 2.94 rear axle gears, 65 mph (about) in 5th gear puts the engine at about 2300-2500 RPM, which is not bad, but the engine has so much torque, and in reality, typical cruising speed is 70-80 mph near 3000 RPM.

I’ve considered changing tranny oil from the Mobil 1 that’s in there now, to Pennzoil Synchromesh Fluid, which is similar to what’s used in Corvette transmissions. I’ve read is can help make shifting easier, but for now, I’ll opt for the added protection of the more conservative and heavier Mobil synthetic (which is what I used in my Mustang’s top loader).

Road and Drag Racing Tip: When performance driving, with the way my car is running with the Richmond, I plan to stay out of 5th gear. If I treat it like a four speed, shifting is a lot more predictable. 5th gear( which is a direct 1:1)  with the 2.94’s I’m running in back is just meant to be “cruise” mode.  If I’m in road course mode, pretend it’s just a four speed. Moreover, 3,000 RPM launches work out with minimal tire spin if I don’t mercilessly hammer the throttle right off the line .


How much gas am I sucking up?

I fill up once a week (4-5 days of driving) going to work. 30 miles to work and back, I’m estimating about 10-12.5 miles per premium gallon in commuter traffic. If I start stomping on it, that can change quickly. My old 71 Challenger with a 383 (2 barrel cam) got about 15.5 on the highway with 3.23 gears on regular gas.

It’s nice after I fill up because the fuel gauge stays on “F” for about a day, before it starts it rapid descent toward “E” (the 16 gallon tank). Quite frankly, it makes my want to opt for the 4 cylinder option (instead of the V-6) on my next daily driver, just to reduce the trips to the gas station, just to restore the Yin-Yang balance to life. That’s not to say it isn’t fun driving the big Mopar, it IS fun and it get’s attention from car enthusiasts in a way that a Honda Accord  would never get.


What kind of modifications would  I like to make to the car after using it to commute for several weeks?

So much time is spent under 3000 RPM when commuting, it is worth getting a multiple spark discharge ignition. I like the Pertronix Billet distributors. Despite retiring the Prestolite Dual Point, which was old and ran like hell, I used a Pertronix in my 1970 Challenger T/A and it worked like a charm, and that only had the basic Pertronix Ignitor. The one I’d get for the 440 uses a Ignitor III with has a hotter, multispark, and rev limiter unit inside. More power, better gas mileage – what’s not to like? That’s what’s great about modifying a driver and not having to adhere to the requirements of a show car.

I’d like to get my seats reupholstered because ever since I’ve had it, the driver’s seat right side is sagging, probably from the hard driving as a drag car. Plus I hate the “drug dealer” tuck and roll upholstery.  I like the stock looking Legendary stuff I have in storage. I’m getting used to that also, but I’m sure it’s not good for my back’s alignment.

It would be nice to finally get the exhaust smell removed from the interior. I have already reduced much fumes by, in the past, changing the trunk seal and the grommet that seals the gas filler tube to the gas tank. But it still can smell. I’m hoping the Pertronix ignition will help.

The manual steering is okay, and although it takes strength to turn that thing in a parking lot, what I would really consider fixing is removing the about 10 degrees of play in the steering. The excess play makes driving down a straight highway more of a conscious effort than it should be. It’s pretty tolerable in most circumstances. Driving the car on a regular basis helps a lot in getting used to how much muscle it takes to handle it. If you’re used to driving power steering most of the time, it can be a pain, but once you eliminate the memory of wimpy arm power steering, you accept the fact that having another inch on your biceps is a welcome addition to your physique.

Whether that’s just an adjustment or requires replacing the steering box, I have yet to figure out. It would be nice to have a faster steering ratio, ala, my old GT-350 clone (which had about a 2.75 turn lock to lock) or my old T/A which with a fast pitman arm had about a 3.5 turn lock to lock is something that is nice. I like the manual box because of the road feel, but steering can be a pain in the arm, literally. And between the Richmond tranny and the manual steering, driving this Challenger can be a real work out. Stay in shape if you want to drive a non-power assisted muscle car.

***

Reminiscing about the Mustang: I remember I actually liked using the 70 series (Michelin) tires in my Mustang on the street instead of the 50 series Comp T/A tires I used on the track since turning the 70 was a LOT easier with the manual steering box and fast arm. Handling with 70 series had much to be desired (pretty much mush), but nothing you couldn’t handle through slide control. The Mustang was lighter and had  a 289 which helped.


..   If you enjoyed this post, please LIKE SHARE COMMENT

The Dodge Kid in his youth about 1976. I think I wore this hat everyday through my Freshman year in high school. Photo by Nick Yee

The Dodge Kid in his youth about 1976.

Copyright © 2015 ChallenYee.com TheDodgeKid.com BestBuckBuck.com  TeamBetterLiving.com All Rights Reserved.

.

Racing Fuel Blues?

I will float a recent experience out there about hard starting, feel free to comment.


Done. The test drive that day revealed NO popping out the carb. I thought I had fixed the problem. But as I push the engine harder, like I did the following weekend. It still backfires through the carb under harder acceleration. When this thing stops popping, it is going to accelerate like mad money. Notice the 340 decal - this air cleaner assembly was from my Challenger T/A when I first bought it. It was the wrong assembly for a small block, but correct for a big block. I sold the T/A a few years ago, it was completely restored with the correct small block T/A air cleaner. I may keep this decal on just as a remembrance of the old car and to mess with people's minds.

Sucks when you’re ready to jump in the Challenger and take it to work and then you can’t start it. By the way, there’s a story behind the “340 six pack” decal when it’s actually a 440. It’s off my old 340 T?A and I kept it for the memory.

A few weeks ago went to the local 76 Station that carries Racing Fuel and decided to put in a mix of Premium and Racing Gas.

After sitting for a few weeks and after some hot weather, not sure if that had anything to do with it, I tried starting the Challenger in the morning and could not start it. I got some starting fluid and nothing.

Sort of suspecting the engine was flooded, after I came back from work in the late afternoon and tried to start the car and, it started immediately.

A week later, still with the same mix of gas, the same thing happens. Exactly the same thing happens, down to the late afternoon immediate starting.

So the second time I drove out to the nearest gas station and put some regular low octane in the tank to neutralize the racing gas. Since then, knock wood, I haven’t had the problem and I’ve driven the Challenger several times this week.

(By the way, even in 90 degree weather in rush hour traffic, the engine runs cool as a cucumber).

I’m not sure if the racing gas, which burns more slowly than regular or premium, was the culprit, but I’m thinking it was.

I’m speculating with the particular setup in my engine, from the carb jets, compression, and type of ignition and timing, it is just not liking racing fuel.

I know that it’s best to run the lowest octane gas your engine can run safely on, without pinging, since lower octane gas actually contains more power and the additives commonly added to higher octane fuel have nothing to do with producing power, rather they are mainly to control preignition problems.


What do you think is going on?


..   If you enjoyed this post, please LIKE SHARE COMMENT

The Dodge Kid in his youth about 1976. I think I wore this hat everyday through my Freshman year in high school. Photo by Nick Yee

The Dodge Kid in his youth about 1976.

Copyright © 2015 ChallenYee.com TheDodgeKid.com BestBuckBuck.com All Rights Reserved.

Simmering over 440 Overheating Problems – Part 5 -FINAL

The long-awaited final part has finally arrived for the overheating issue.

I ran the Challenger without a thermostat for drives to get the maximum clearing effect to catch crud in the copper screen trap I installed in my upper radiator hose. I had also been draining my coolant after every extended drive to flush and dilute out as much old coolant and the green stuff as possible before I pour in the Water Wetter. 

I’ve read several accounts that Water Wetter mixed with normal anti-freeze/coolant will gum up your cooling system as well as not working or not working well. As I mentioned before, I used to run Water Wetter with distilled water in my old open track car. Spilling that on the track was less of  nuisance than dropping coolant. The best cooling is effected by using pure distilled water, but you need the anti-corrosive and lubricating properties of a product like Water Wetter added.


The thermostat gasket managed to last a few removals of the t-stat housing before it died so I replaced the gasket.

The drained coolant, after sitting for a day has what look like a powder sitting at the bottom of the plastic jugs I’ve been storing it in. I’m guessing its the remnants of Bar’s Stop Leak or something. With each draining, the amount is decreasing and is almost negligible now.

.

top side (radiator end) of hiflow thermostat. Removing it from system to flush engine block at high RPM.

top side (radiator end) of hiflow thermostat. Removing it from system to flush engine block at high RPM.

Better cooling performance with a thermostat

I’ve heard that cars can run cooler with a thermostat rather than without one. I think it depends on the design of your cooling system and the positions of the inlet and outlets. On a typical engine with the inlet and outlet on the front, there is a certain amount of inefficiency in regards to the coolant that is in the rear of the engine.

What I noticed was that not only did the engine run cooler, based on my temperature gauge reading, but the subsequent draining yielded more fluid that smelled more like coolant and less like plain water. I take this to mean that there is better mixing of fluid coming back from the radiator in through the engine passages than without a thermostat.

The temperature gauge without the thermostat read in the low “normal”range, but after the thermostat was installed the reading in slightly below the “normal range.”

.

Effect on water pump churning and installed thermostat

So, it appears, with the thermostat installed and resisting the flow of coolant back to the radiator, the water pump has time to churn the coolant inside the engine passages, allowing more mixing before the thermostat opens at the set temperature.


Some extra crud sitting in the upper hose. Clean it.

Some extra crud sitting in the upper hose. Clean it.

Here's the flakey cast iron crud, including some pieces of gasket seal. Also need to brush out crud from upper hose. Copper screen is reusable but check it before reinstalling.

Here’s the flakey cast iron crud, including some pieces of gasket seal. Also need to brush out crud from upper hose. Copper screen is reusable but check it before reinstalling.

rad_crud4

These are a few of the photos I took after before cleaning out the copper filter. I typically get a little less that what you see in this picture as of late.

rad_crud3rad_crud1rad_crud5

At first I was saving the crud from the filter, here is what was in the cooling passages (except for the washer).

At first I was saving the crud from the filter, here is what was in the cooling passages (except for the washer). I stopped collecting it.

.

Catching debris before and after thermostat installed

I’ve been running the copper mesh at the top inlet of the radiator, held in place by the upper hose. Before and after the thermostat was installed, a consistent amount of small debris are being caught. They look like small pebble-like cast iron flakes from the water passages in the engine. One piece of copper mesh lasts several cleanings. High RPM runs causes a better flushing action as indicated by the amount of crud being caught.

This process would be a lot more efficient if you could pop the freeze plugs and flush out the engine that way, but if you can’t…. well it takes several rounds to clear out. I ended up adding the Water Wetter finally after I managed to drain out the coolant with just a whiff of coolant smell. The heated water comes out with a brown tint from going through the 200+ degree iron passages.

Here's my running collection of drained coolant. Notice the progression from top to bottom from the traditional 50/50 coolant water mix to virtually pure distilled water.

Here’s my running collection of drained coolant. Notice the progression from top to bottom from the traditional 50/50 coolant water mix to virtually pure distilled water. About 2.5 gallons every drain. You do the math. Yes, I’ve called it quits when it comes to draining. Before I put the thermostat back in I managed to get a non-coolant scent in the drain, but after I put the thermostat back in, I get at least a small scent from the drained coolant. Poinsettias not included.


Miscellaneous tips

.

 fanbelt1

Lonesome Dove Fan Belt Tightening

How about it you are alone and need to tighten your fan belt. If you have a handy wooden-handled ax  like I have pictured, you can use that for leverage to extend your alternator after you loosen your holding screws.


.

.

rad_seal1

rad_seal2

Just in case you were interested in reading the small print on the bottle.

rad_seal3

Pesky coolant drip from the lower radiator hose?

The lower radiator hose had a slow drip, so I sanded the outlet pipe with #80 grit paper and felt for any imperfections in the pipe. Then I used Permatex Aviation Form-A-Gasket Sealer #3 with the intention that I don’t want to have to think about any more leaking there. I only coated the radiator pipe and let it set for the required time before sliding the new uncoated hose on and clamping it. I did that to eliminate any possible dripping of sealant into the hose.

I used the same Permatex product on the thermostat housing. It’s a little messier than using silicon but I gave it a go and it works. Again, no intention of removing the housing unless I expect to replace the gasket. The thermostat should be sitting inside a recess in the T-stat housing and should be not interfering with the gasket. Clean the surfaces first of old gasket and sealant before applying the new sealant.

.

.

Carb Backfiring

I’m not sure exactly what was causing my 440 to pop out the carbs, but the problem appears to have gone away except on rare occasion.

However, I have a few possible candidates for culprits.

After several high RPM runs (over 5000) I could have blown the combustion chambers cleaner or it could be the number 7 plug wire touch a header tube and had a couple inches of insulation burned away, cause for some arcing. I adjusted the routing of the wire away from the header.

I plan on replacing the plug wires later.

I would imagine any multiple carb set up could use some more tuning. Have to keep that for later. Also toying with the idea of replacing the old MP electronic ignition with a multiple spark discharge type.

.


*

If you enjoyed this post, please LIKE SHARE COMMENT

The Dodge Kid in his youth about 1976. I think I wore this hat everyday through my Freshman year in high school. Photo by Nick Yee

The Dodge Kid in his youth about 1976.

Copyright © 2014 ChallenYee.com. TheDodgeKid.com  All Rights Reserved.

Highway Entry with Kids in Car

Out for a Sunday drive with the kids and testing a new video mount that I have attached to my dome lamp ring.

Click on image below to access a SHORT 15-second You-Tube video


Click for video

CLICK ON IMAGE TO ACCESS A SHORT 15-second YOU-TUBE VIDEO


video link you-tube:     http://youtu.be/-dnyiuaI9Ow
*


An update about the cooling system

The car runs cool as a cucumber now after the radiator was hot tanked an reversed-flushed.

I’m still running the old coolant out of the engine as I have drained the coolant several times and have almost reaching the point where I’m running pure distilled water. I’ll write the last “Simmering of 440 Overheating Issues” later, but you may be interested to know the engine runs cooler with a thermostat. The reason is (based on my observations of the drained fluid) the thermostat allows the fluid to churn more effectively throughout the cooling passages in the engine. In other words, without the thermostat, coolant coming from the radiator tends to go directly back out the upper hose rather than being forced rearward into the engine to exchange more thoroughly with heated fluid. I’ll share my observation why I think this later.

Here is my collection of drained coolant from my 440. Notice the progression from left to right. I empty about 2.5 gallons per draining. I'm almost at a pure enough state I'm willing to add the Water Wetter. I have some observations about before and after installing the thermostat which I will share in a later article.

Here is my collection of drained coolant from my 440. Notice the progression from left to right. I empty about 2.5 gallons per draining. I’m almost at a pure enough state I’m willing to add the Water Wetter. I have some observations about before and after installing the thermostat which I will share in a later article.


**


If you enjoyed this post, please LIKE SHARE COMMENT

The Dodge Kid in his youth about 1976. I think I wore this hat everyday through my Freshman year in high school. Photo by Nick Yee

The Dodge Kid in his youth about 1976.

Copyright © 2014 ChallenYee.com. TheDodgeKid.com  All Rights Reserved.

Simmering over 440 Overheating Issues – Part 4

Dealing with the potential roots of my overheating problem Saturday morning I started the relatively simple process of installing my tuned-up radiator but simple as it was, I had plenty of opportunities to slow down and make sure my installation was not going to create more problems. The first thing is to make sure the proper washers are installed to prevent damaging the radiator mounts on the rad and the 22 inch yoke which had been custom drilled for a 26 inch radiator. Once I had the radiator securely in place, my thoughts went to the lower radiator hose.

The old and new hose. New one does not have inside coils.

The old and new hose. New one does not have inside coils- which caused me to start thinking.

TO SPRING OR NOT TO SPRING? I bought a new hose and it doesn’t come with the spring like the old one. I’ve read many points of view on the lower hose spring and some people swear by it and others understand it was a necessary add in to prevent the hose from collapsing during the factory installation of the coolant which was done with a vacuum device to speed up the assembly process. Let me explain why I DID NOT install the old spring, which by the way had become three section, presumably because it had rotted. What I was confronted with was the amount of corrosion build up on the intake to the water pump.

The corrosion residue on the water pump end of the lower hose. The growth is matched on the water pump side. The coils are from the hose, in three pieces.

The corrosion residue on the water pump end of the lower hose. The growth is matched on the water pump side. The coils are from the hose, in three pieces.

Here's the same old hose on the rad end. Clean because I suspect there are no  electrochemical reactions occurring on this end.

Here’s the same old hose on the rad end. Clean because I suspect there are no electrochemical reactions occurring on this end.

YES, OPPOSITES ATTRACT – THEY ATTRACT CRUD For you plumbers out there, or sexual relationship experts, you know if you put two joints together that are dissimilar electrically, you will end up with a corrosive and ultimately a leaking joint. While my lower hose to water pump connection wasn’t leaking before, I believe the hose coil forced up against the water pump caused some electro-chemical reaction that creates this nasty crud (see the photos). The corrosion build up can be easily cleaned off with a wire brush. When you do this DO  NOT BREATHE THIS CRAP as it comes off like dust (I suggest wet it down first to reduce the dust) and wear gloves to protect your hands. It doesn’t take too much imagination that the corrosion from this joint, this little corrosion farm, like atherosclerosis, could have contributed to the crud in my radiator and my entire cooling system. This is basically a reason for your cooling system to have a stroke. So if you are going to use a coil inside your hose, it needs to be electrically neutral and able to handle the hot coolant environment.

Here's the nasty crud build up on the water pump inlet. before I wire brushed it.

Here’s the nasty crud build up on the water pump inlet. before I wire brushed it.

Here's how the coil and the water pump make contact and produce a prodigious amount of crud. Didn't think about this until I started the installation process.

Here’s how the coil and the water pump make contact and produce a prodigious amount of crud. Didn’t think about this until I started the installation process. The new hose, by the way, installed perfectly and was easy to slip on.

COPPER SCREEN – CRUD CATCHER OTF (on the fly) Instructions   The next job was to figure out how to install the copper screen on the upper rad connection. Basically poke the material so it is concave into the input and then use a scissors to trim enough material to fold over the edge of the input pipe so that the hose can hold it in place – but not too much that it interferes with where the clamp cinches down.

Here's how I roughly fit some copper screen into and around the lip of the upper rad inflow pipe. Then trim to size with a scissors.

Here’s how I roughly fit some copper screen into and around the lip of the upper rad inflow pipe. Then trim to size with a scissors.

Here is the copper screen fitted to the upper connection.

Here is the copper screen fitted to the upper connection.

Sliding the hose on and over the copper screen.

Sliding the hose on and over the copper screen.

And with the upper connection fully inserted into the upper hose. Copper screen should not interfere with the area involved with clamping to avoid leaks.

And with the upper connection fully inserted into the upper hose, I am ready to move clamp into position. Copper screen should not interfere with the area involved with clamping to avoid leaks. Ready to catch iron flakes and other debris that can clog the cooling system.

Here's a view of the upper tubes before I added distilled water into the hole.

Here’s a view of the upper tubes before I added distilled water into the filler hole. Compare that to my older photo (PART 2).

TEST DRIVE Preparing Next comes adding distilled water to fill up the radiator, then starting the engine. Adding more water as the level goes down getting sucked by the pump.. I ran the engine without the cap and waited until the thermostat opened up, and the old green coolant began running through the rad.   LET’S ROLL I took the car straight out to the highway and began some high RPM runs. Based on the temperature gauge, the engine was running noticeably cooler with the temperatures rising at a slower pace than before. I have a 5 speed (5th is 1:1) with 2.94 rear gearing so 4th and 3rd gear high speed runs got pretty exciting. The Mopar has a whole different life above 5000 RPM like it can go a lot faster. I still get this weird carb pop, but oddly enough it usually only happens once when I take the car out when I accelerated harder under load, or in a higher gear (depending on car’s the speed)- that’s another problem I need to work on later. Taking the Challenger back home, there were no weird burning smells. I idled the car on the driveway and took some temperature checks with my FLUKE laser thermometer.

After a couple of high RPM stretches on the highway, this is the maximum reading on my rally temp gauge. THe last shop visit including fixing this gauge which wasn't working. For the moment, my life centers around what this gauge does.

After a couple of high RPM stretches on the highway, this is the maximum reading on my rally temp gauge during the test drive and at idle in the driveway on my return. The last shop visit including fixing this gauge which wasn’t working- before fixing (replacing) the gauge, it barely reached the lower normal mark. For the moment, my life centers around what this gauge does.

This is the corresponding laser temp readout from around the thermostat housing with the temp gauge seen in previous photo. (about 218 F) after several high RPM blasts on the highway.

This is the corresponding laser temp readout from around the thermostat housing to the rally temp gauge seen in previous photo. (about 218 F) after several high RPM blasts on the highway.

Corresponding Upper tank temp - about 212F

Corresponding Upper tank temp – about 212F

Corresponding lower tank temp, about 165 F (almost 50 degree difference). But the undeterminable factor is flow potential which is what is improved by the hot tanking and back flushing.

Corresponding lower tank temp, about 165 F (almost 50 degree difference). But the key factor is flow potential which is what is improved by the hot-tanking and back flushing.

THEN the final test….. I turned off the engine.  AND I did not the massive full bottle regurgitation to the overflow unit.  Before, with the problem, the whole thing would fill up because of the overheating, but no longer! What I plan to do now, is drain out the coolant and then after it cools, pull the thermostat, fill up with distilled water again, run the car again then check the copper screen after the next cool down and draining. * * If you enjoyed this post, please LIKE SHARE COMMENT

The Dodge Kid in his youth about 1976. I think I wore this hat everyday through my Freshman year in high school. Photo by Nick Yee

The Dodge Kid in his youth about 1976.

Copyright © 2014 ChallenYee.com. TheDodgeKid.com  All Rights Reserved.

Simmering over 440 Overheating issues – part 3

FIGHTING THE WAR AGAINST CRUD
.
 .
After soaking and rinsing my radiator with 100% distilled white vinegar at least 5 times letting it soak for at least a 1/2 day at a time,  I observed some demineralization but not enough. I could look down into some tubes and see that they were still clogged. I could still see crud at the tops of the tubes as I looked further down the upper tank in either direction from the cap hole.
 .
 So I considered whether I should get a new radiator or take mine to the shop to get it hot tanked or rodded.
 .
It’s tempting to shop for a new radiator especially since there are some much more efficient designs out there that are still stock looking, but sometimes you need to hold back from spending cash.
A local shop in nearby San Carlos recommended by my exhaust system guy.  Photo by Challen

A local shop in nearby San Carlos recommended by my exhaust system guy. Photo by Challen

For financial reasons as well as taking a step by step approach, I took my 3 row 26 inch radiator to a radiator shop called “Howard Ave.” in San Carlos, California, an easy drive in the morning before going to work.
.
Turns out to be the kind of place I would patronize especially when they understand muscle cars and Vanishing Point, the 1971 movie. They frequently perform work on antique and rare pieces as well as run of the mill daily drivers. Plus, they are easily understandable over the phone.
 .
For $88 dollars they hot tanked the radiator, made some minor repairs, put a new coat of paint and provided me some copper screen to use as an upper hose filter.
 .
Talking to the guys about what could be giving me woes made me glad I did not buy a new radiator (at least until I need to rebuild the engine).
 .
.
CAST IRON DISEASE
.
The guys, Rick and Bill, told me a couple of things about the engine blocks cast in the 60’s and early 70’s that I wasn’t aware of.  One, the casting material tended to release metal flakes which build up into crud and; two,  the water pump is positioned high in relation to the engine cooling passages which promote crud build up in the block that is not easy to flush out, that is, unless you pop the freeze plugs and blow out the crud from there.
 .
They said that the crud in my radiator is the residue from the cooling passages in the engine that made it to the radiator and it was likely a long term process. After the hot tanking, they said the radiator flowed much better even though it may seem okay before hot tanking. They managed  to get about 50% better flow after tanking and back flushing.
.
They run a flow test by standing the radiator upright and filling the radiator from the bottom, waiting until the water comes out the input then releasing the bottom to let the water flow out. The distance the water shoots out forms the benchmark and is measurable.
.
I’ve read some people suggest that the water flowing fully (taking up the whole orifice) is an indication that the flow is good, but my radiator, even with the clogged passages was able to do this. So I’m theorizing that that indication in itself is not an adequate indication for a performance engine.
Here's we're filling the rad from the bottom to do a flow test. When the water spews out the top for a second, let go and see how far the water jets from the bottom.  Photo by Challen

Here we’re filling the rad from the bottom to do a flow test. When the water spews out the top for a second, let go and see how far the water jets from the bottom. Photo by Challen

For a fragile radiator, heating up the upper tank to do rodding is not as desirable as it could damage the core, and fragile or thinned tubes could be damaged by rodding. This wasn’t the case for my radiator as it had plenty of strength for rodding but if good results can be had by hot tanking, it is much less risky and easier.
.
Considering that I most likely have some weird leprosy-like condition in the engine block waiting for an engine rebuild to solve, I was glad I didn’t buy a 500-700 dollar radiator just to get clogged up by the fallout. (I sure would like to get one of those 4 row high efficiency radiators though – some other time). Also, I just became aware that my radiator yoke, the crossmember is for a 22 unch radiator and someone drilled wide to fit a 26 radiator. It’s cool, I’m not trying to create a show car.
 .
It’s still possible that crud in the block could still cause overheating problems even with a clear radiator.
.
What they suggested to clear out the block without popping the freeze plugs, is what one did with his old Mustang that had cooling system leprosy: he made some high speed runs (150 mph) with an upper hose filter plus no thermostat and flushed his cooling system after each run to resolve his overheating problem. Whether he actually did 150mph or not, well… I get the idea.
Copper screen to be used as a crud catcher before the crud goes into the radiator (at least the big chunks). Photo by Challen

Copper screen to be used as a crud catcher before the crud goes into the upper radiator (at least the big chunks). Photo by Challen

This little education highlights a very important and unheralded aspect of engine rebuilding, renovation and  resolving cooling problems especially since we’re often dealing with over 40 year old technology or old blocks. Some additional attention can be given to your old muscle car’s long term maintenance if its stuck in a shop for a while, especially if the freeze plugs are ever easily accessible and you suspect a cooling problem or not, you pop them off and flush out your block of crud that is likely building up on your old Mopar.
 .
For the next engine rebuild, I’ll be giving careful attention to the cooling passages and any new technology that can offset the flaking of the old cast iron. Is that one reason they used more nickel in some blocks now and before?
 .
Anyway, I hope the hot-tanked radiator will get the engine to run cooler.
 .
In the meantime, if you see me driving around town at 5000 rpm or more, you’ll know why –  “Yes sir, officer, I’m treating leprosy.”

*

If you enjoyed this post, please LIKE SHARE COMMENT

The Dodge Kid in his youth about 1976. I think I wore this hat everyday through my Freshman year in high school. Photo by Nick Yee

The Dodge Kid in his youth about 1976.

Copyright © 2014 ChallenYee.com. TheDodgeKid.com  All Rights Reserved.

Simmering over 440 Overheating Issues – Part 2

SIMMERING and OVERHEATING Issues PART II

A progressive update on my working on my overheating problems.

I decided to to troubleshoot this problem one step at a time.

hiflowstat

Here a new Milodon hi flow thermostat, similar to the look of a hiperf Mopar piece I saw on Ebay.

CHANGING THE THERMOSTAT IS EASY

The first thing I did was change the thermostat. First I drained the coolant into a new 4 gallon oil drain container so that I can reuse the coolant if needed.

In preparation to replace the thermostat, I ordered a new gasket and some gasket sealant from Jegs, but I will continue to use the current gasket until it breaks or no longer seals. There’s sealant on both sides of the gasket, but I am able to remove the coupling without damaging the gasket. If you know you’re going to be disconnecting this joint several times, I’m not sure if I could have used a technique I used on my Mustang valve cover gaskets to allow reuse and ease of removal of the valve covers to adjust the mechanical lifters. If you do this trick on your valve covers, apply sealant to the valve cover and tack on the gasket to the valve cover. In the thermostat’s case, the gasket is tacked to the block side.

Parts I ordered that I didn't need.

Parts I ordered that I didn’t need. Save for next time.

BUSY TEACHING A LESSON

I forgot to take pictures of replacing the thermostat because I was busy explaining to my 10 year old son the idea of the Scientific Method in trouble shooting, changing one variable at a time to be able to isolate the effects on any given change.

Here' s the one that was in there, a no frills unit.

Here’ s the one that was in there, a no frills unit.

SIGHTING INSIDE THE UPPER TANK

With the coolant drained from the radiator, I could see I have a 3 core/row radiator and gunk covering or partially covering every down tube I can see from the opening.

Not good, though a probable indication where the problem is. The last time I sighted the upper tank channels I didn’t see this crud. After an experience like this, that coolant (what ever I am going to use) is going to be changed more often.

Yuk! This looks like chit.

Sighting into my rad after draining the coolant. Yuk! This looks like crud.

I took a small pick to check the consistency of the crud stuck in the upper channels and it breaks apart like mineral sediments despite the gooey looking appearance. Geez, that looks nasty.

.

440 IS STILL LOSING ITS COOL

I took the car out for a drive around town and out on the highway and  I could sense even around town the temperature was slowly rising. By the time I made a high speed pass on the highway, the temperatures went high out of the “normal” temperature zone.

With the temp needle out of range and getting hotter as I approached my driveway, I started smelling what reminds me of overheated electrical or burnt electrical motor windings. Not sure what the source is but I’ve noticed the smell a couple times now when the engine gets too hot, hot enough to fill up my overflow unit to maximum capacity.

.

SIMPLE TO REMOVE MANUAL TRANNY RADIATOR in your E-BODY

So I proceeded to take my radiator out to clean it. Removing the radiator on an old Ebody especially with a manual transmission (no tranny lines) is pretty simple. Removing the battery and washer bottle allows easy access to the four screws that mount the radiator tot he frame and then you can remove the four clips that hold the shroud to the radiator.

Removing the lower hose (after draining coolant) is easier if you remove the attachment to the water pump first, then using a blunt pointed object, push the lower hose connection off the lower radiator outlet as the coolant lubricates the operation.

Before lifting radiator out of car disconnect fan shroud and place protection like a fender cover over fan to avoid accidentally damaging radiator fins on fan blades.

Disconnect the fan shroud from the radiator and you do not need to remove the fan. Protect the radiator during lift out by placing a protective material (fender cover) to prevent gouging your radiator with the fan blades. Remove lower hose before lifting radiator out.

Disconnect the fan shroud from the radiator and you do not need to remove the fan. Protect the radiator during lift out by placing a protective material (fender cover) to prevent gouging your radiator with the fan blades. Remove lower hose before lifting radiator out.

I flushed out the residual coolant in preparation for cleaning.

I flushed out the small amount of residual coolant in preparation for cleaning.

 IS RODDING RADIATORS A THING OF THE PAST?

Well…. it depends who you talk to when you pickup the phone.

I made a couple of calls this morning to get a recommendation to get the radiator rodded out, but have not found one yet. One guy said this isn’t done much any more due to toxic materials. Not sure about that.

I spoke with another guy I’ve worked with and having some experience with restored cars was able to recommend a couple of radiator shops which I will keep in mind if I want to recondition my radiator. It certainly ought to be cheaper that buying a new radiator and the fit will be without question.

A sight at the lower tank and the bottom of the channels shows no indication of crud build up, so I am going to try loosening the crud at the top with distilled white vinegar (as suggested by my friend Jeff Marcey who lives in a hard water paradise).

.

NON-TOXIC CLEANING TECHNIQUE -DISTILLED VINEGAR and DISTILLED WATER

instead to taking my radiator to get rodded out,  I went to the local grocery store and got what I needed to try the poor man’s approach to dislodging the mineral/crud buildup at the top go the radiator channels by using distilled water and distilled white vinegar. I’ve read using anything from full strength to 1 part vinegar to 4 parts water mixture. I suppose it depends how long you want to leave your parts soaking.

rad_cleaners

High Tech Materials from the local mexican grocery store

I’m trying laying the radiator flat and using boiling hot distilled vinegar water and soaking overnight, then draining (careful to notice any sediment or debris)  flushing out with the water hose and then rinsing out with distilled water. Inspect the upper channel crud level and repeat if necessary.

.

WHAT COULD BE NEXT?

I would be nice if this works. BUT If there isn’t a dramatic improvement, I’ll have to think about what is next. Do I find a shop to rod out the radiator or go a for 4 core radiator for insurance and upgrade?

rad_hotH20

Using kitchen appliances for quick boiling of NON-TOXIC radiator cleaning solutions.

I just needed something to plug the overflow hole so my vinegar solution didn't drain on the ground.

Other use for overflow unit. I just needed something to plug the overflow hole so my vinegar solution didn’t drain on the ground. Looks like an IV.

BAKING SODA versus WASHING SODA

I’ve read people using an aftermarket flush or Arm and Hammer WASHING SODA (NOT baking soda) to neutralize the vinegar acidity. I suspect the rinsing qualities of Washing Soda is better. Maybe it’s finer, I don’t know. I’ll look for some the next time I’m at the store. I like these non-toxic ideas.

.

BONUS – TALK

MUSING ABOUT GANO FILTERS

A word about GANO filters. GANO filters are a novel product that you install in the upper radiator hose. You need to cut a hose and  clamp the cut ends on the ends of a this clear plastic device with a wire mesh screen that traps crud coming from the engine before  it gets trapped in your radiator. It’s a great idea but let me suggest an idea way to use it based on my experience.

I ran one of these on my open track Mustang but it cracked at the track and I had to take a spare hose from a fellow tracker and replace my upper hose. What I may do later is buy a new cheap radiator hose and put a GANO filter on it and then run it long enough to catch any crud in a period after flushing the system after putting a new or cleaned out radiator in.

For long term reliability, I would install the regular Mopar upper hose. The last thing I need is getting stranded on a highway with a busted GANO filter.

I did look at the GANO website and they offer strong non-plastic versions but naturally, you will need to disconnect your radiator hose to see what the crud condition is.

*

If you enjoyed this post, please LIKE SHARE COMMENT

The Dodge Kid in his youth about 1976. I think I wore this hat everyday through my Freshman year in high school. Photo by Nick Yee

The Dodge Kid in his youth about 1976.

Copyright © 2014 ChallenYee.com. TheDodgeKid.com  All Rights Reserved.