Exhaust Hanger Hangover

What happens when your only commuter car is your classic and when you’re about to get in the car to go to work you notice that one of your exhaust tips/pipes looks like it has lost its mojo? It’s hanging down almost dragging on the ground. This is what happened a few weeks ago.

That’s one thing about driving the 45 year old car daily, it’s like taking it on a shakedown cruise. If something is weak it will let you know.

I’ve got to drive the machine to work but I do not want the car to look bad… what to do?

Take it to the muffler shop as soon as possible! There is no honor in letting your classic car run around with a goofy looking tail pipe (aside from the fact you’d hate to have it drag on the ground, should that happen!).

I take my cars to one of the local Meineke Muffler shops, the one in Redwood City, run by a muscle car guy named Lupe Garcia. He has been helping me since around 1990 when I used to take my GT-350 clone there. A fellow open track racing member of the Nor-Cal Shelby American Club, I can always trust him to make the right corrections of repairs to my exhaust. Sometimes they’ve done some specialty welding for me, including on my white Challenger.

pipe2

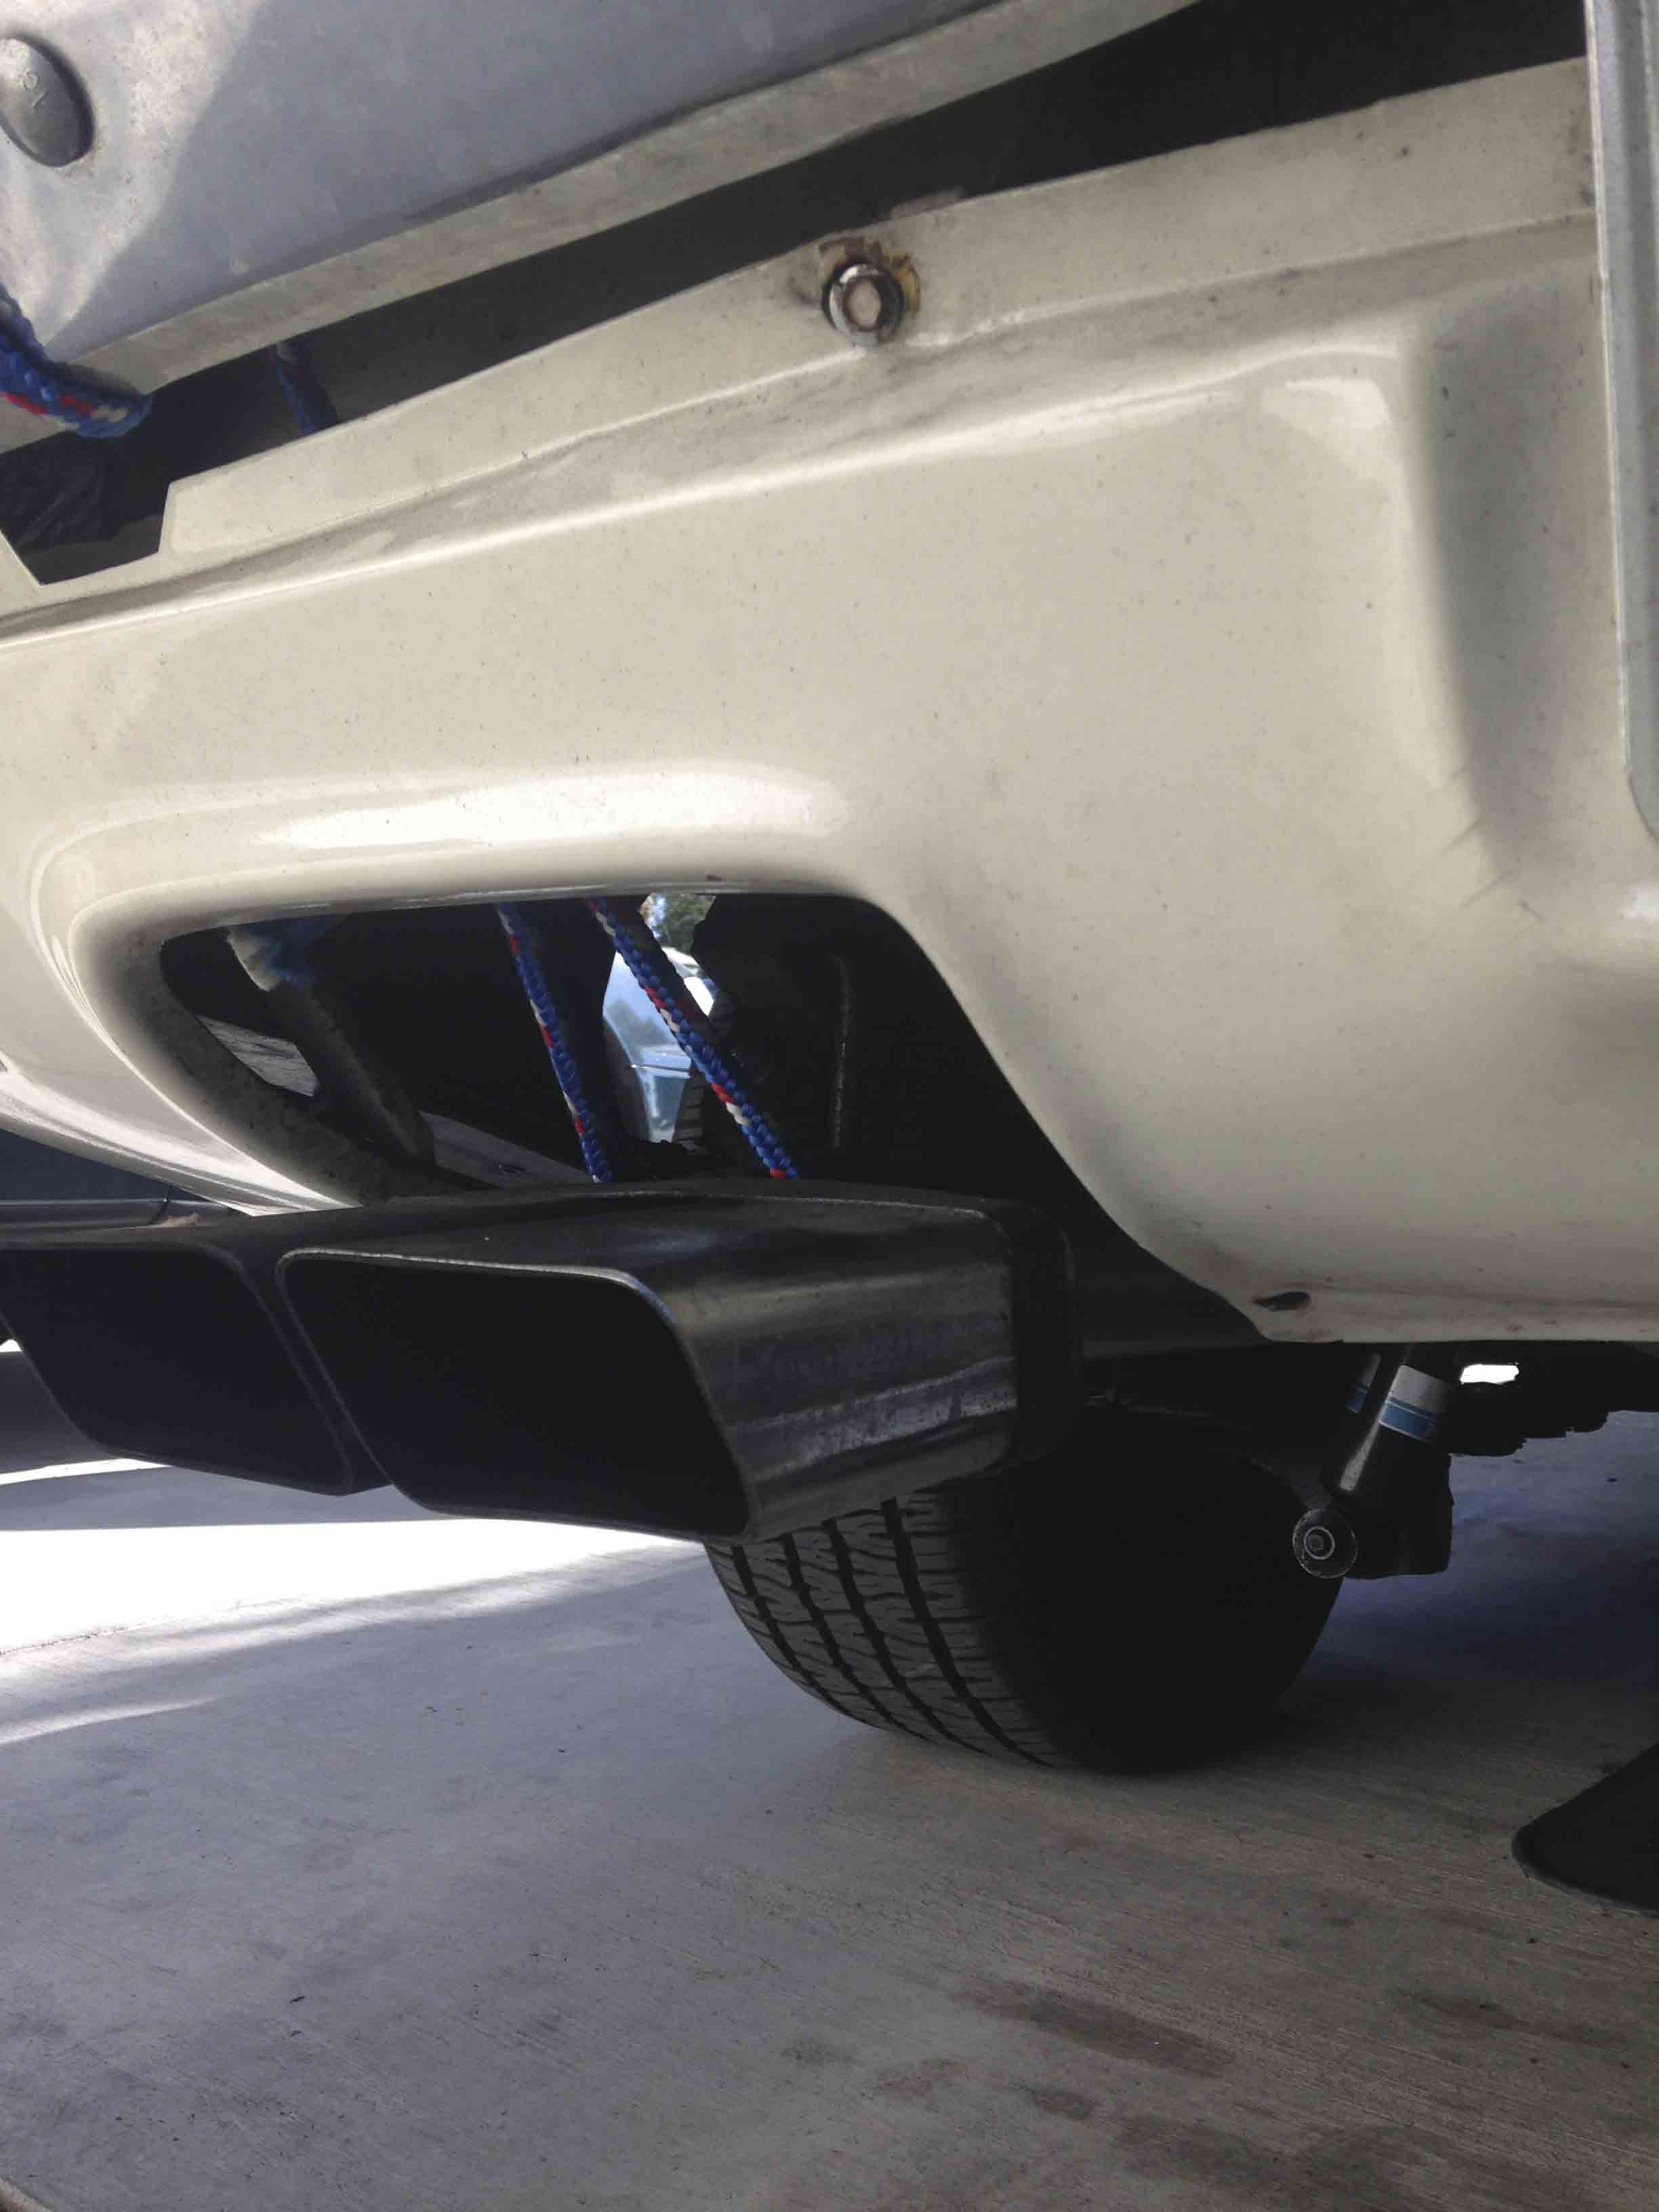
You think this looks bad? It was way worse, hanging down about twice as much that is shown before I hauled it up with a strand of rope. It was looking pretty UN-high performance, a bit like it suffered from a stroke.

pipe3

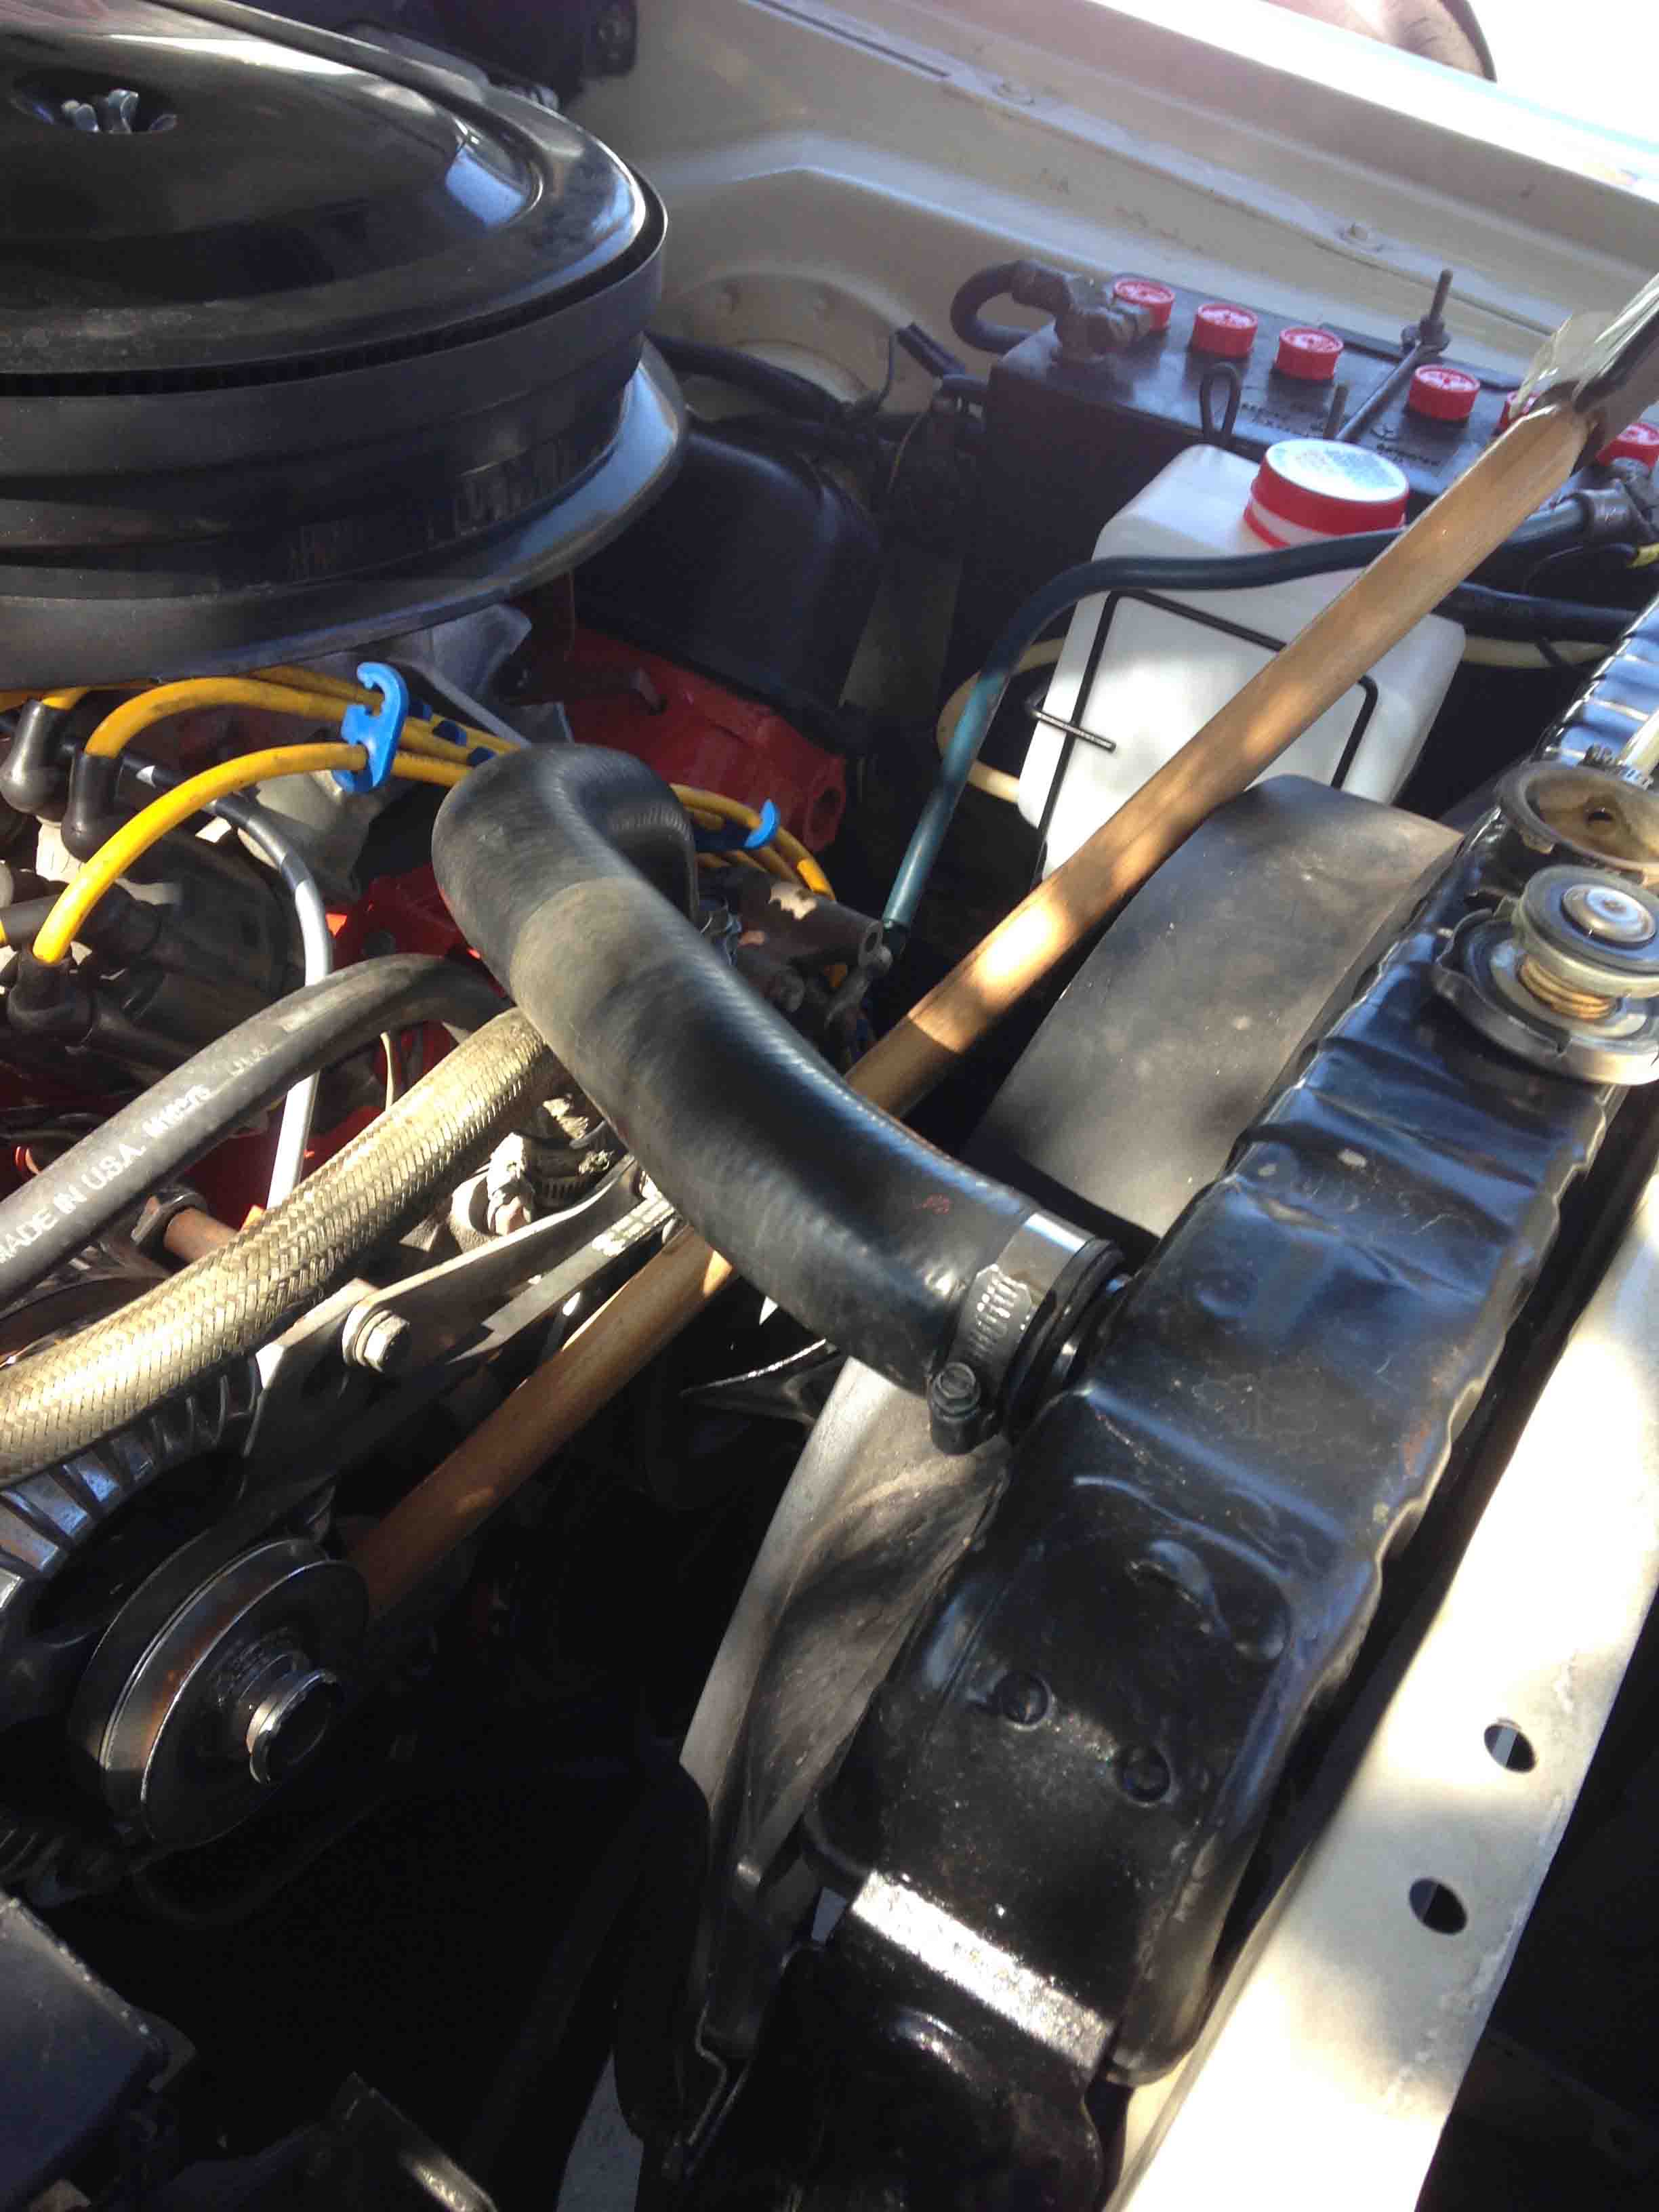
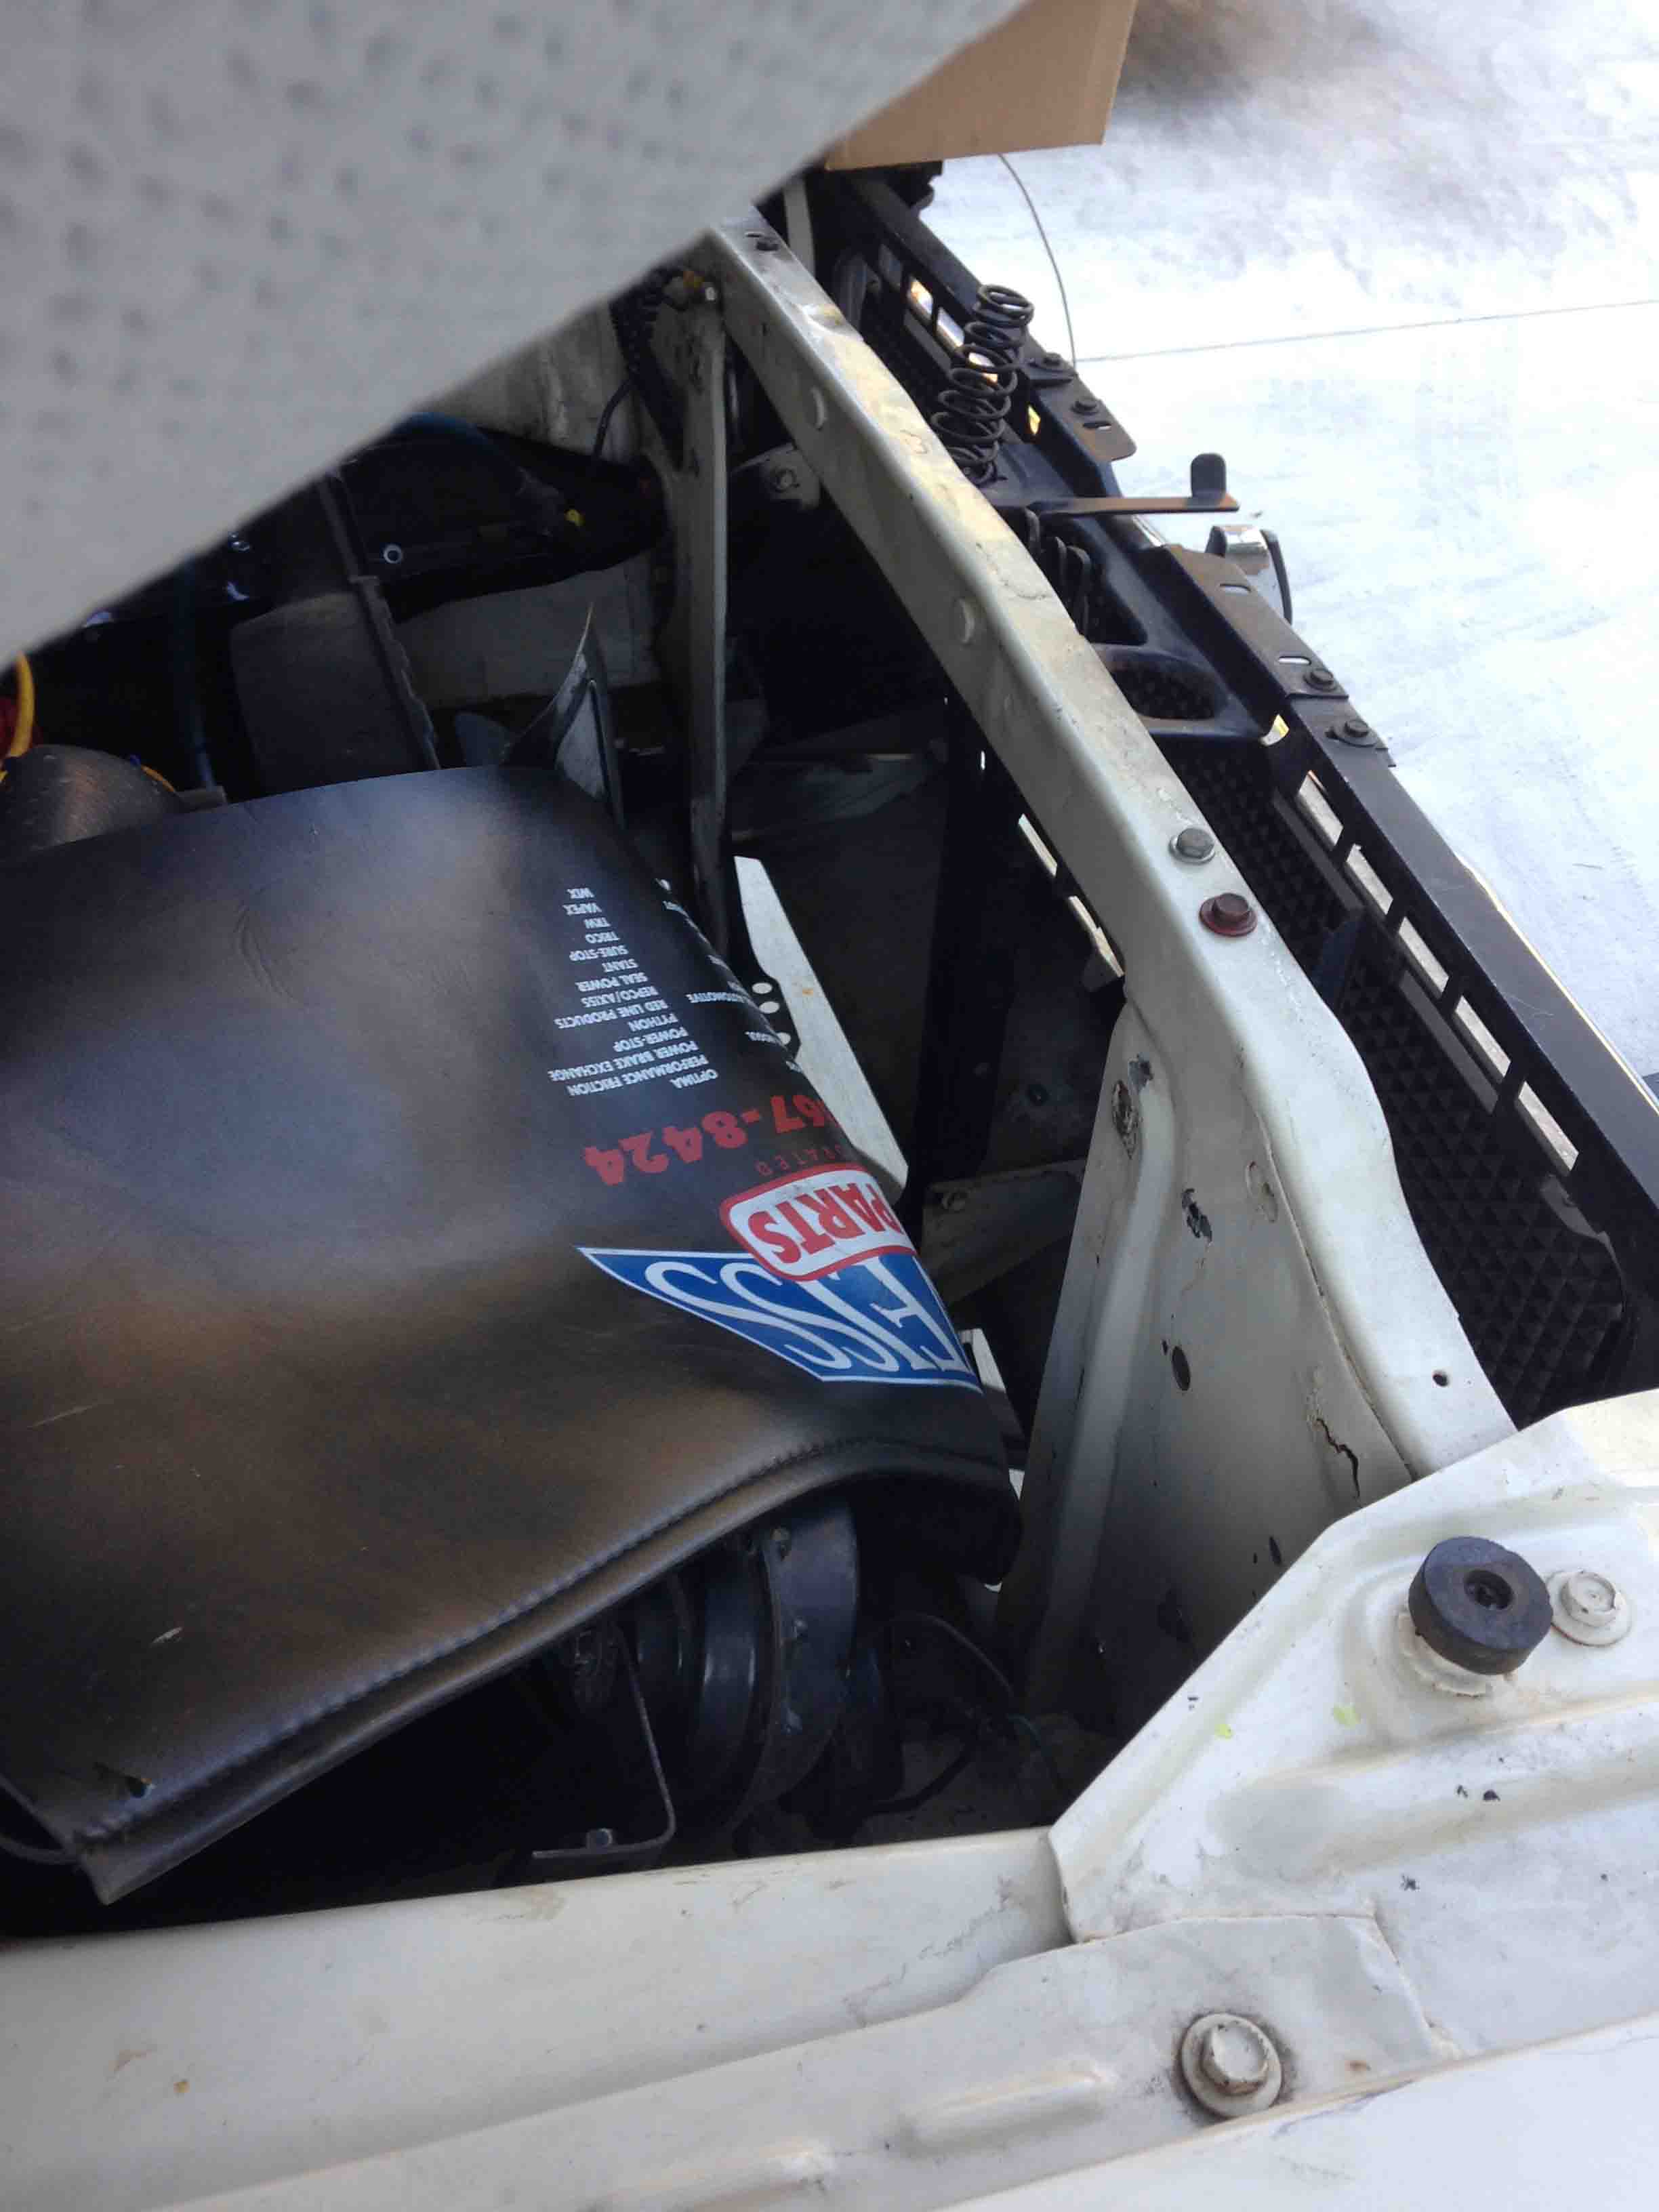
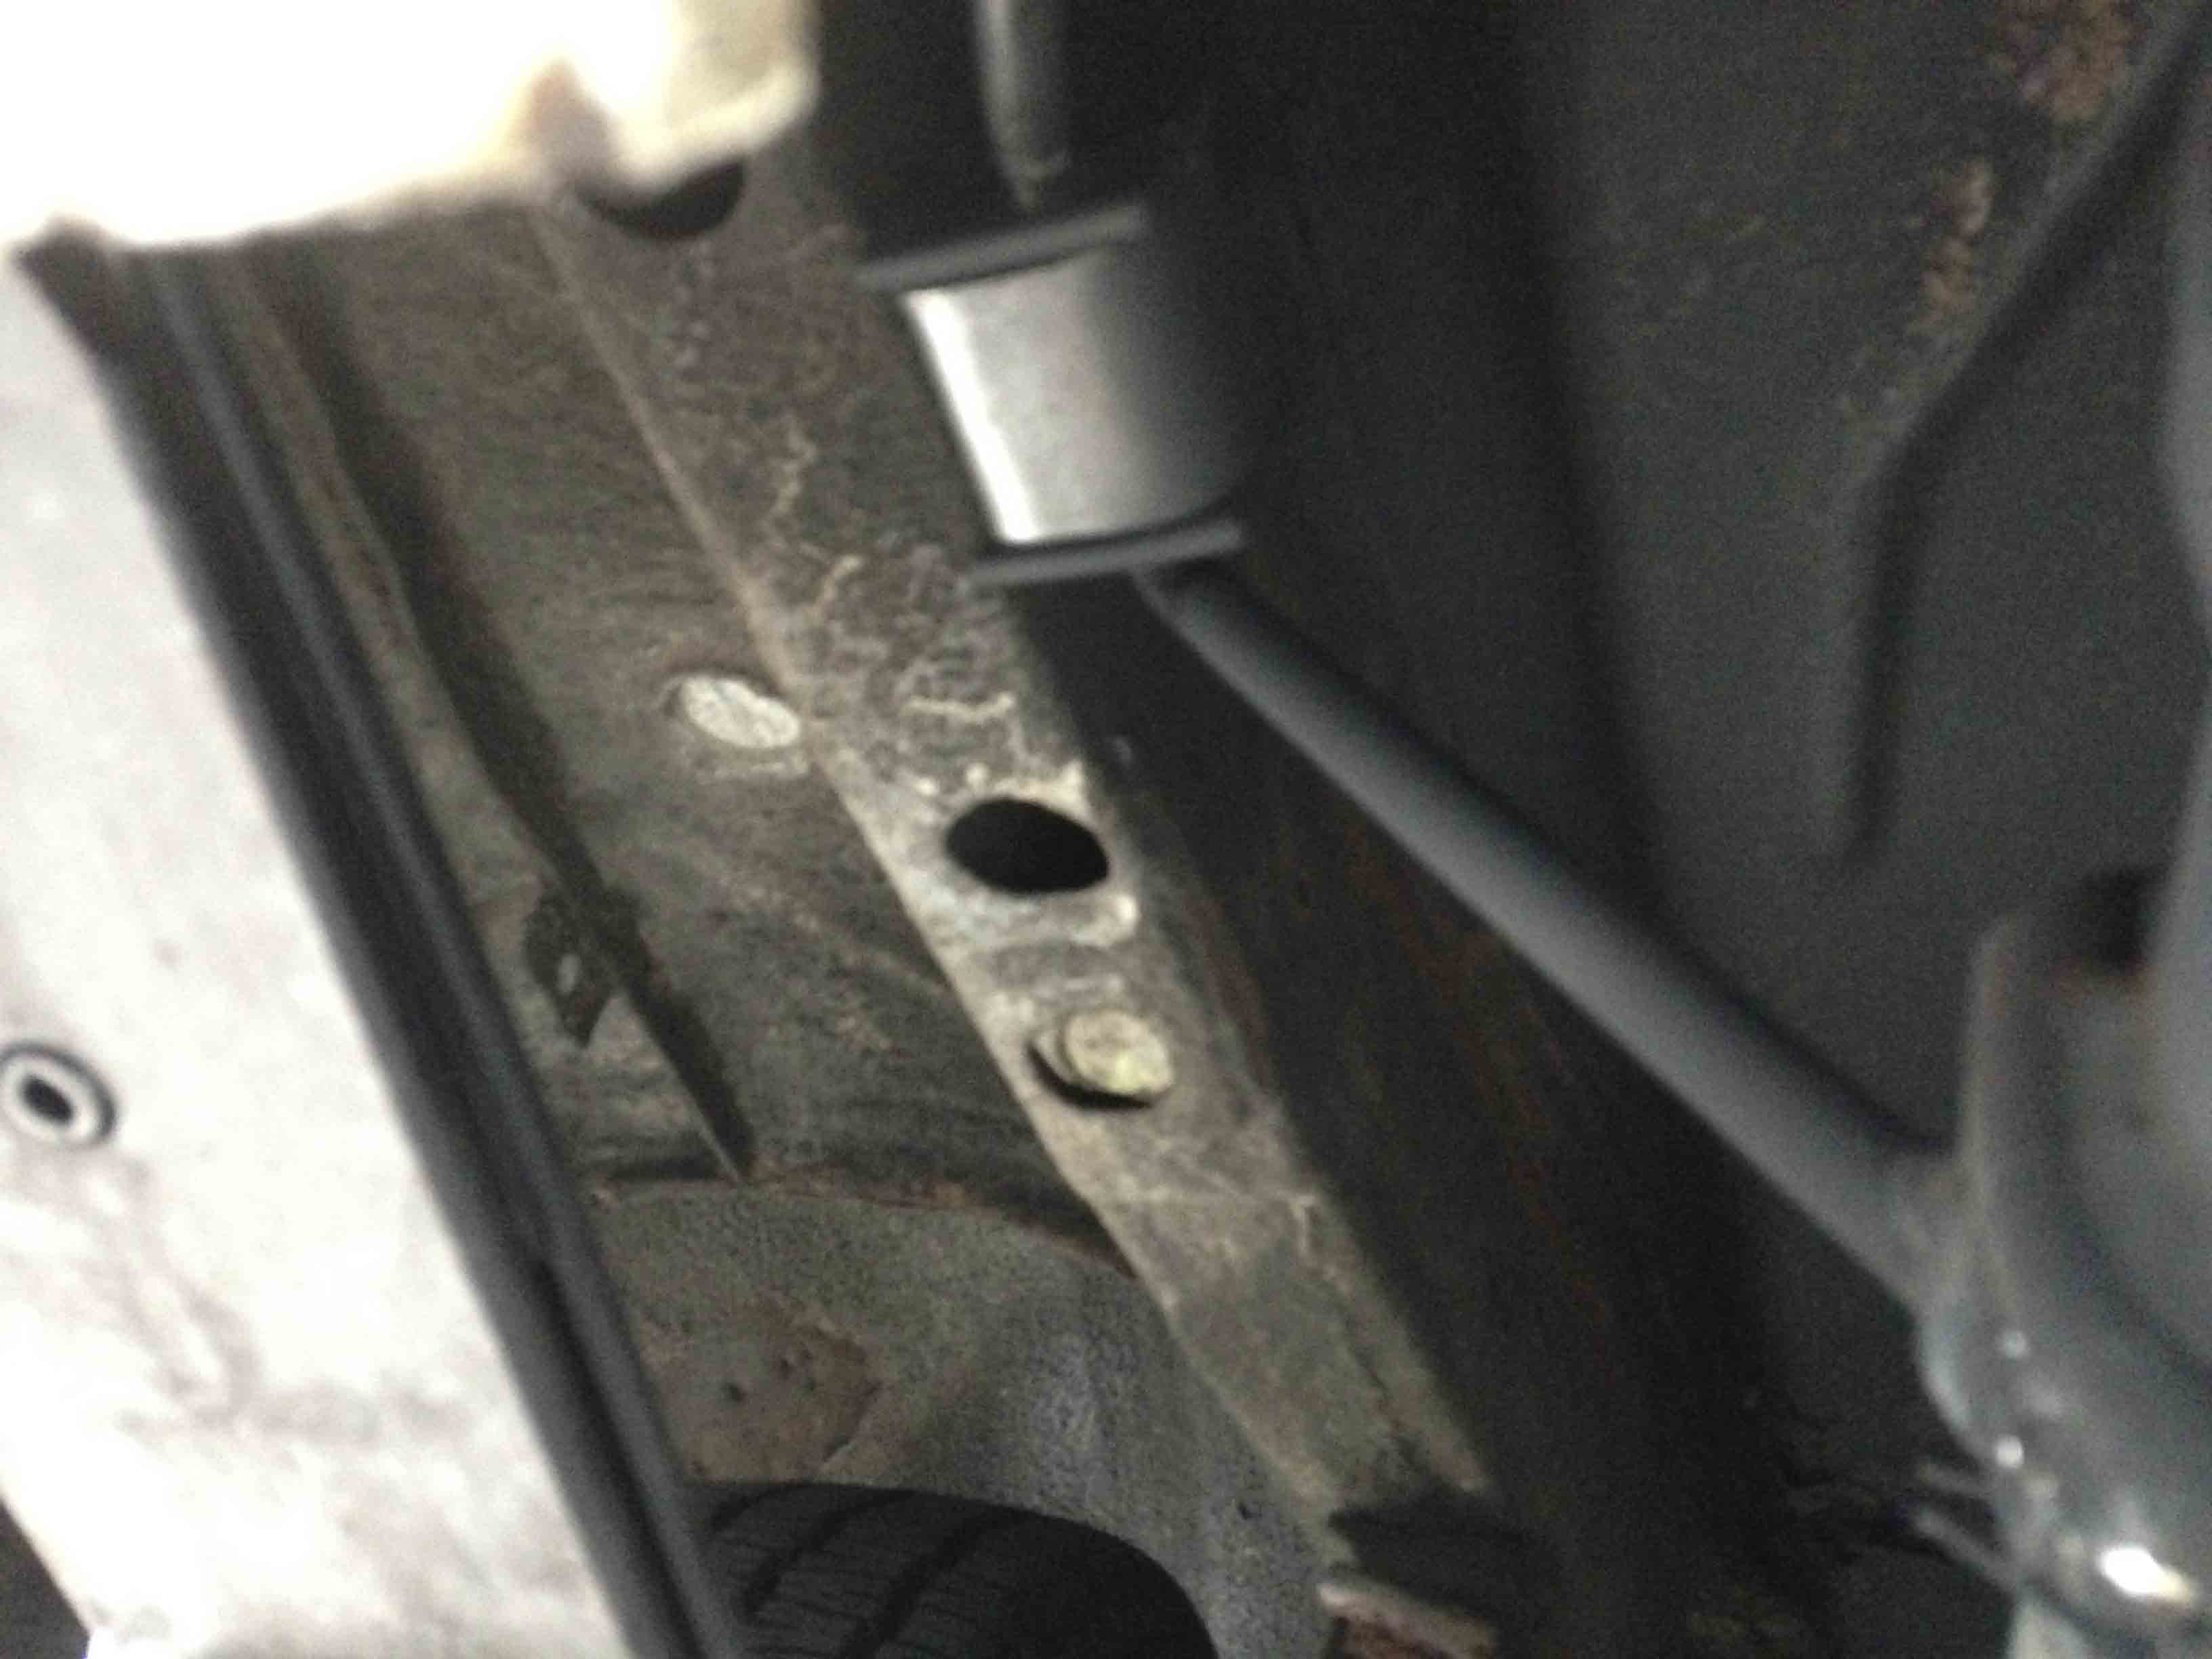
Notice how the original hangar broke away from the under trunk 45 year old sheet metal that is rotted. The detachment process was accelerated because the muffler hangar screw came loose, so everything from the header tip on back was resting on the tailpipe hangar which eventually tore away. There’s not much rot in the car that I can tell, but there are some spots in the “under side” trunk pan that has some weak spots.


pipe1

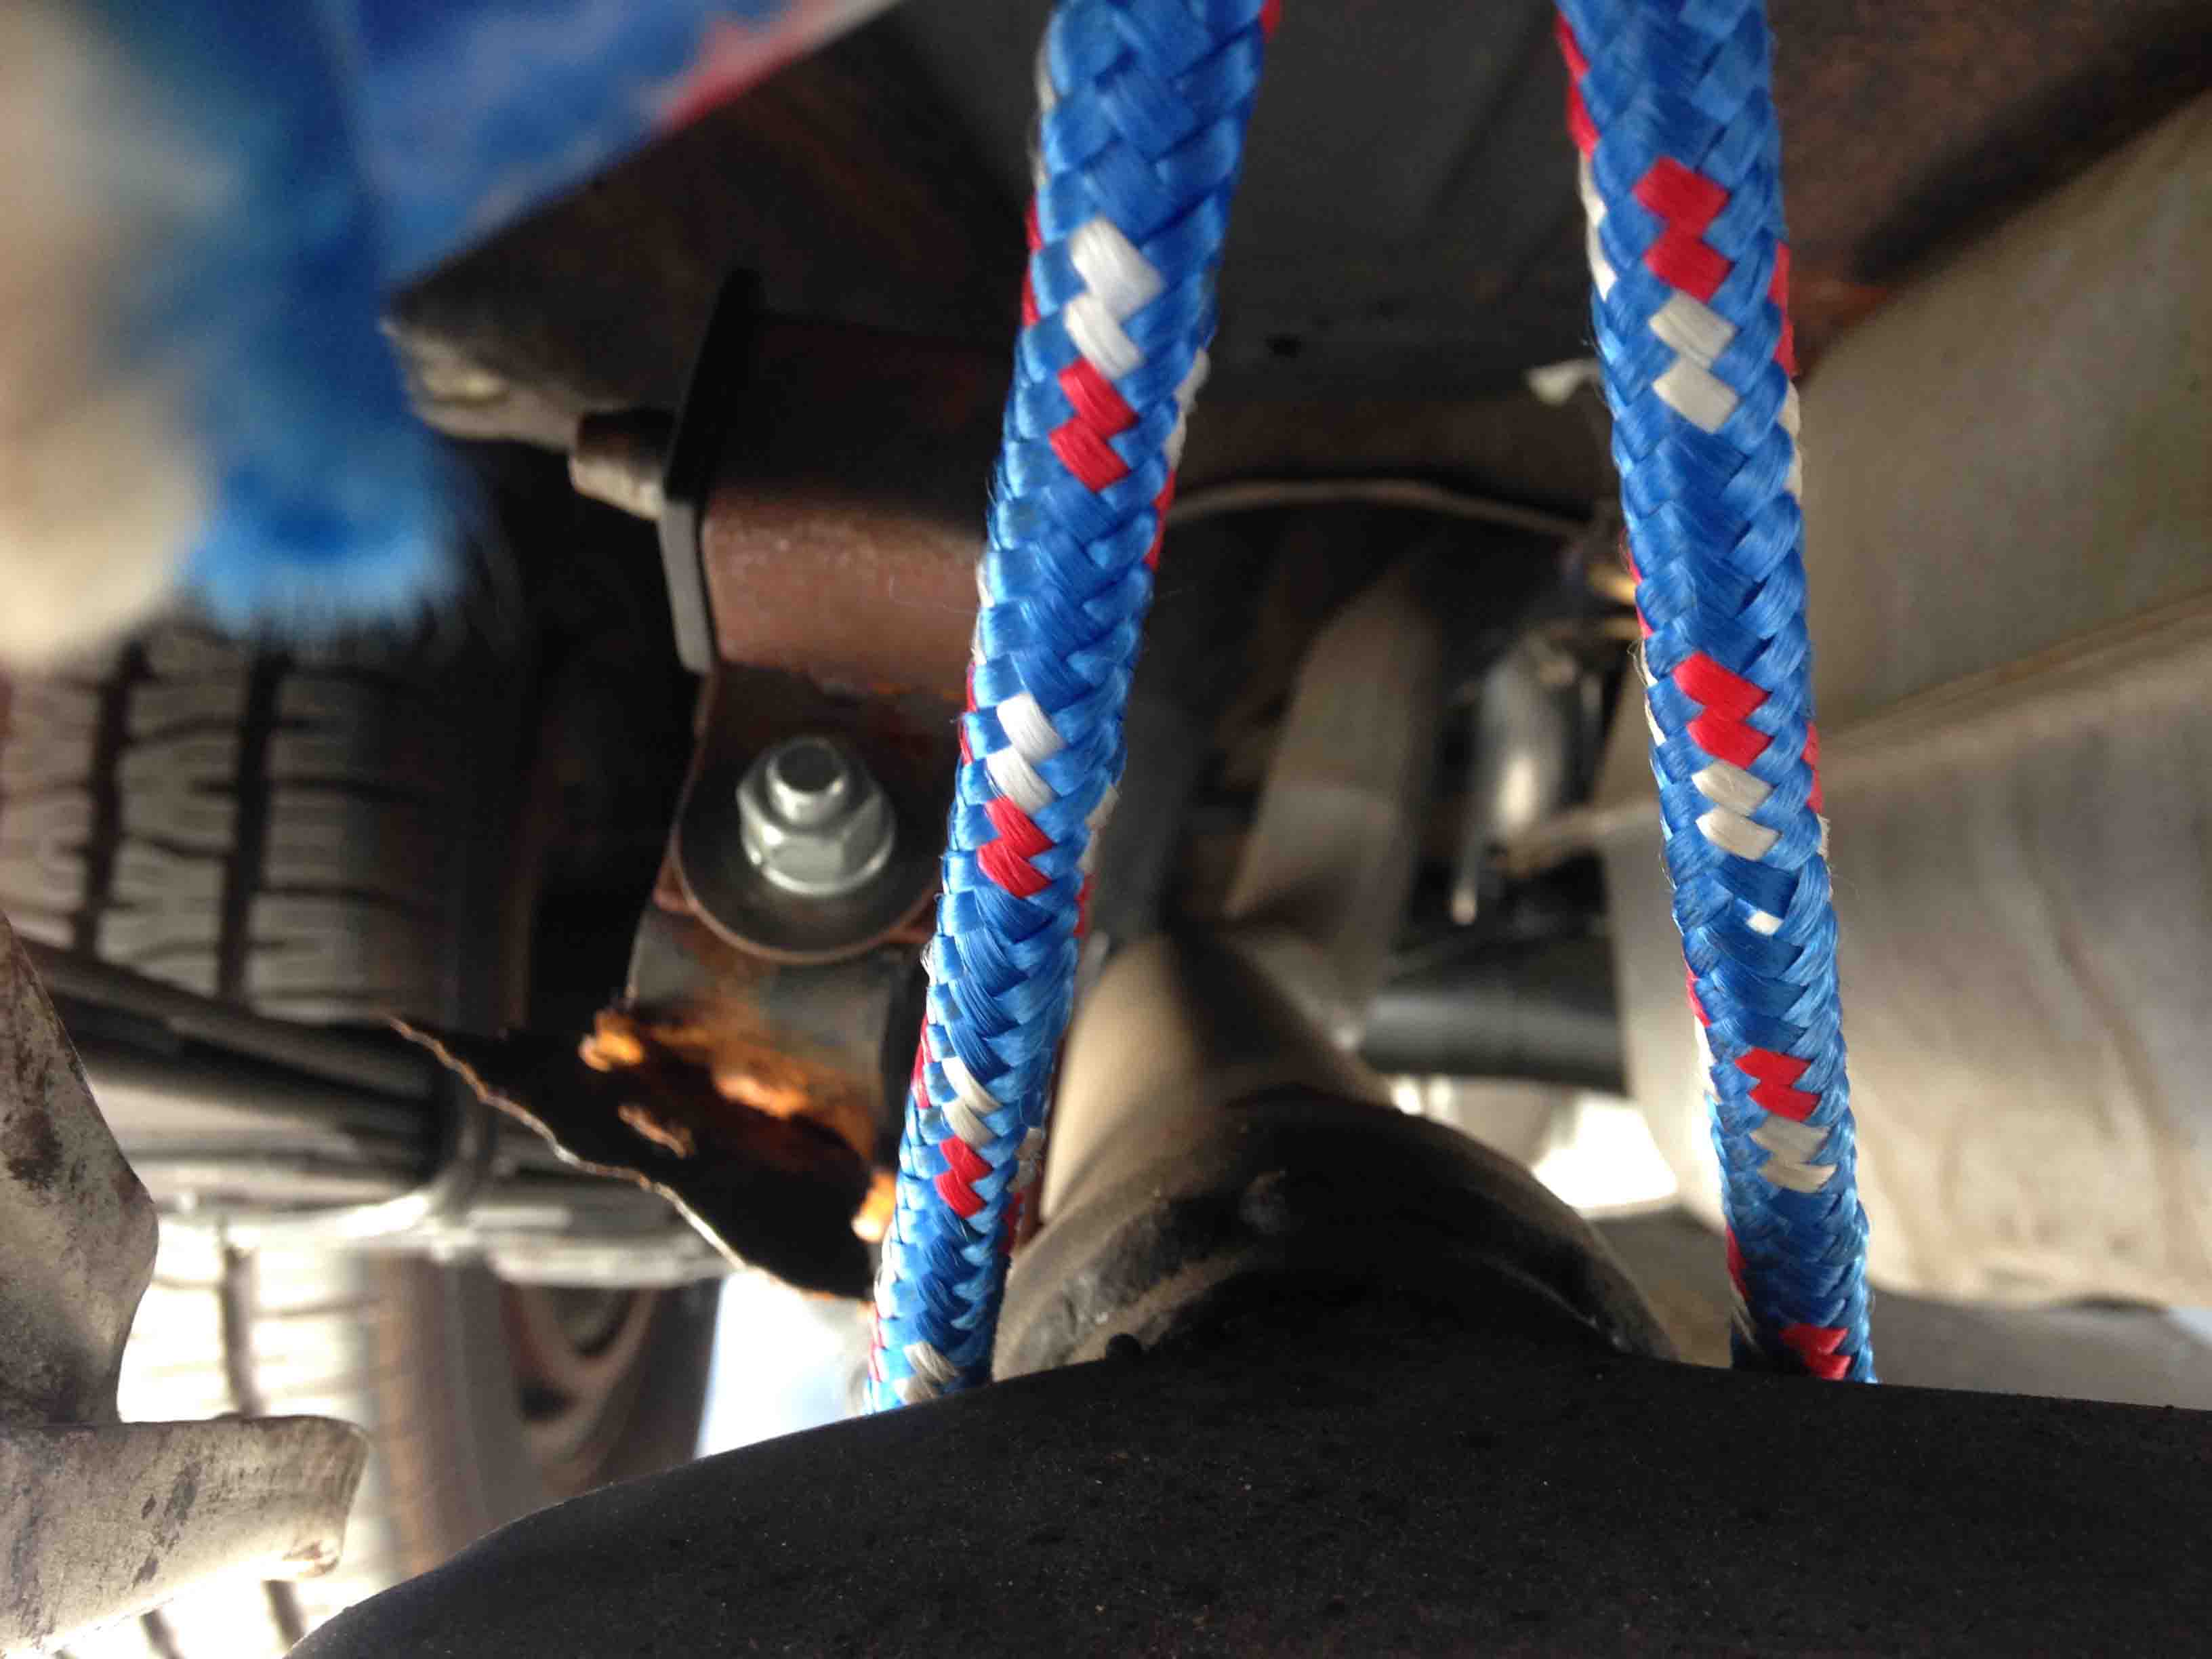
Here’s where I tied the pipe up to the bumper. Pretty secure, enough to get me to work and then to a late afternoon trip to the muffler shop.

pipe5

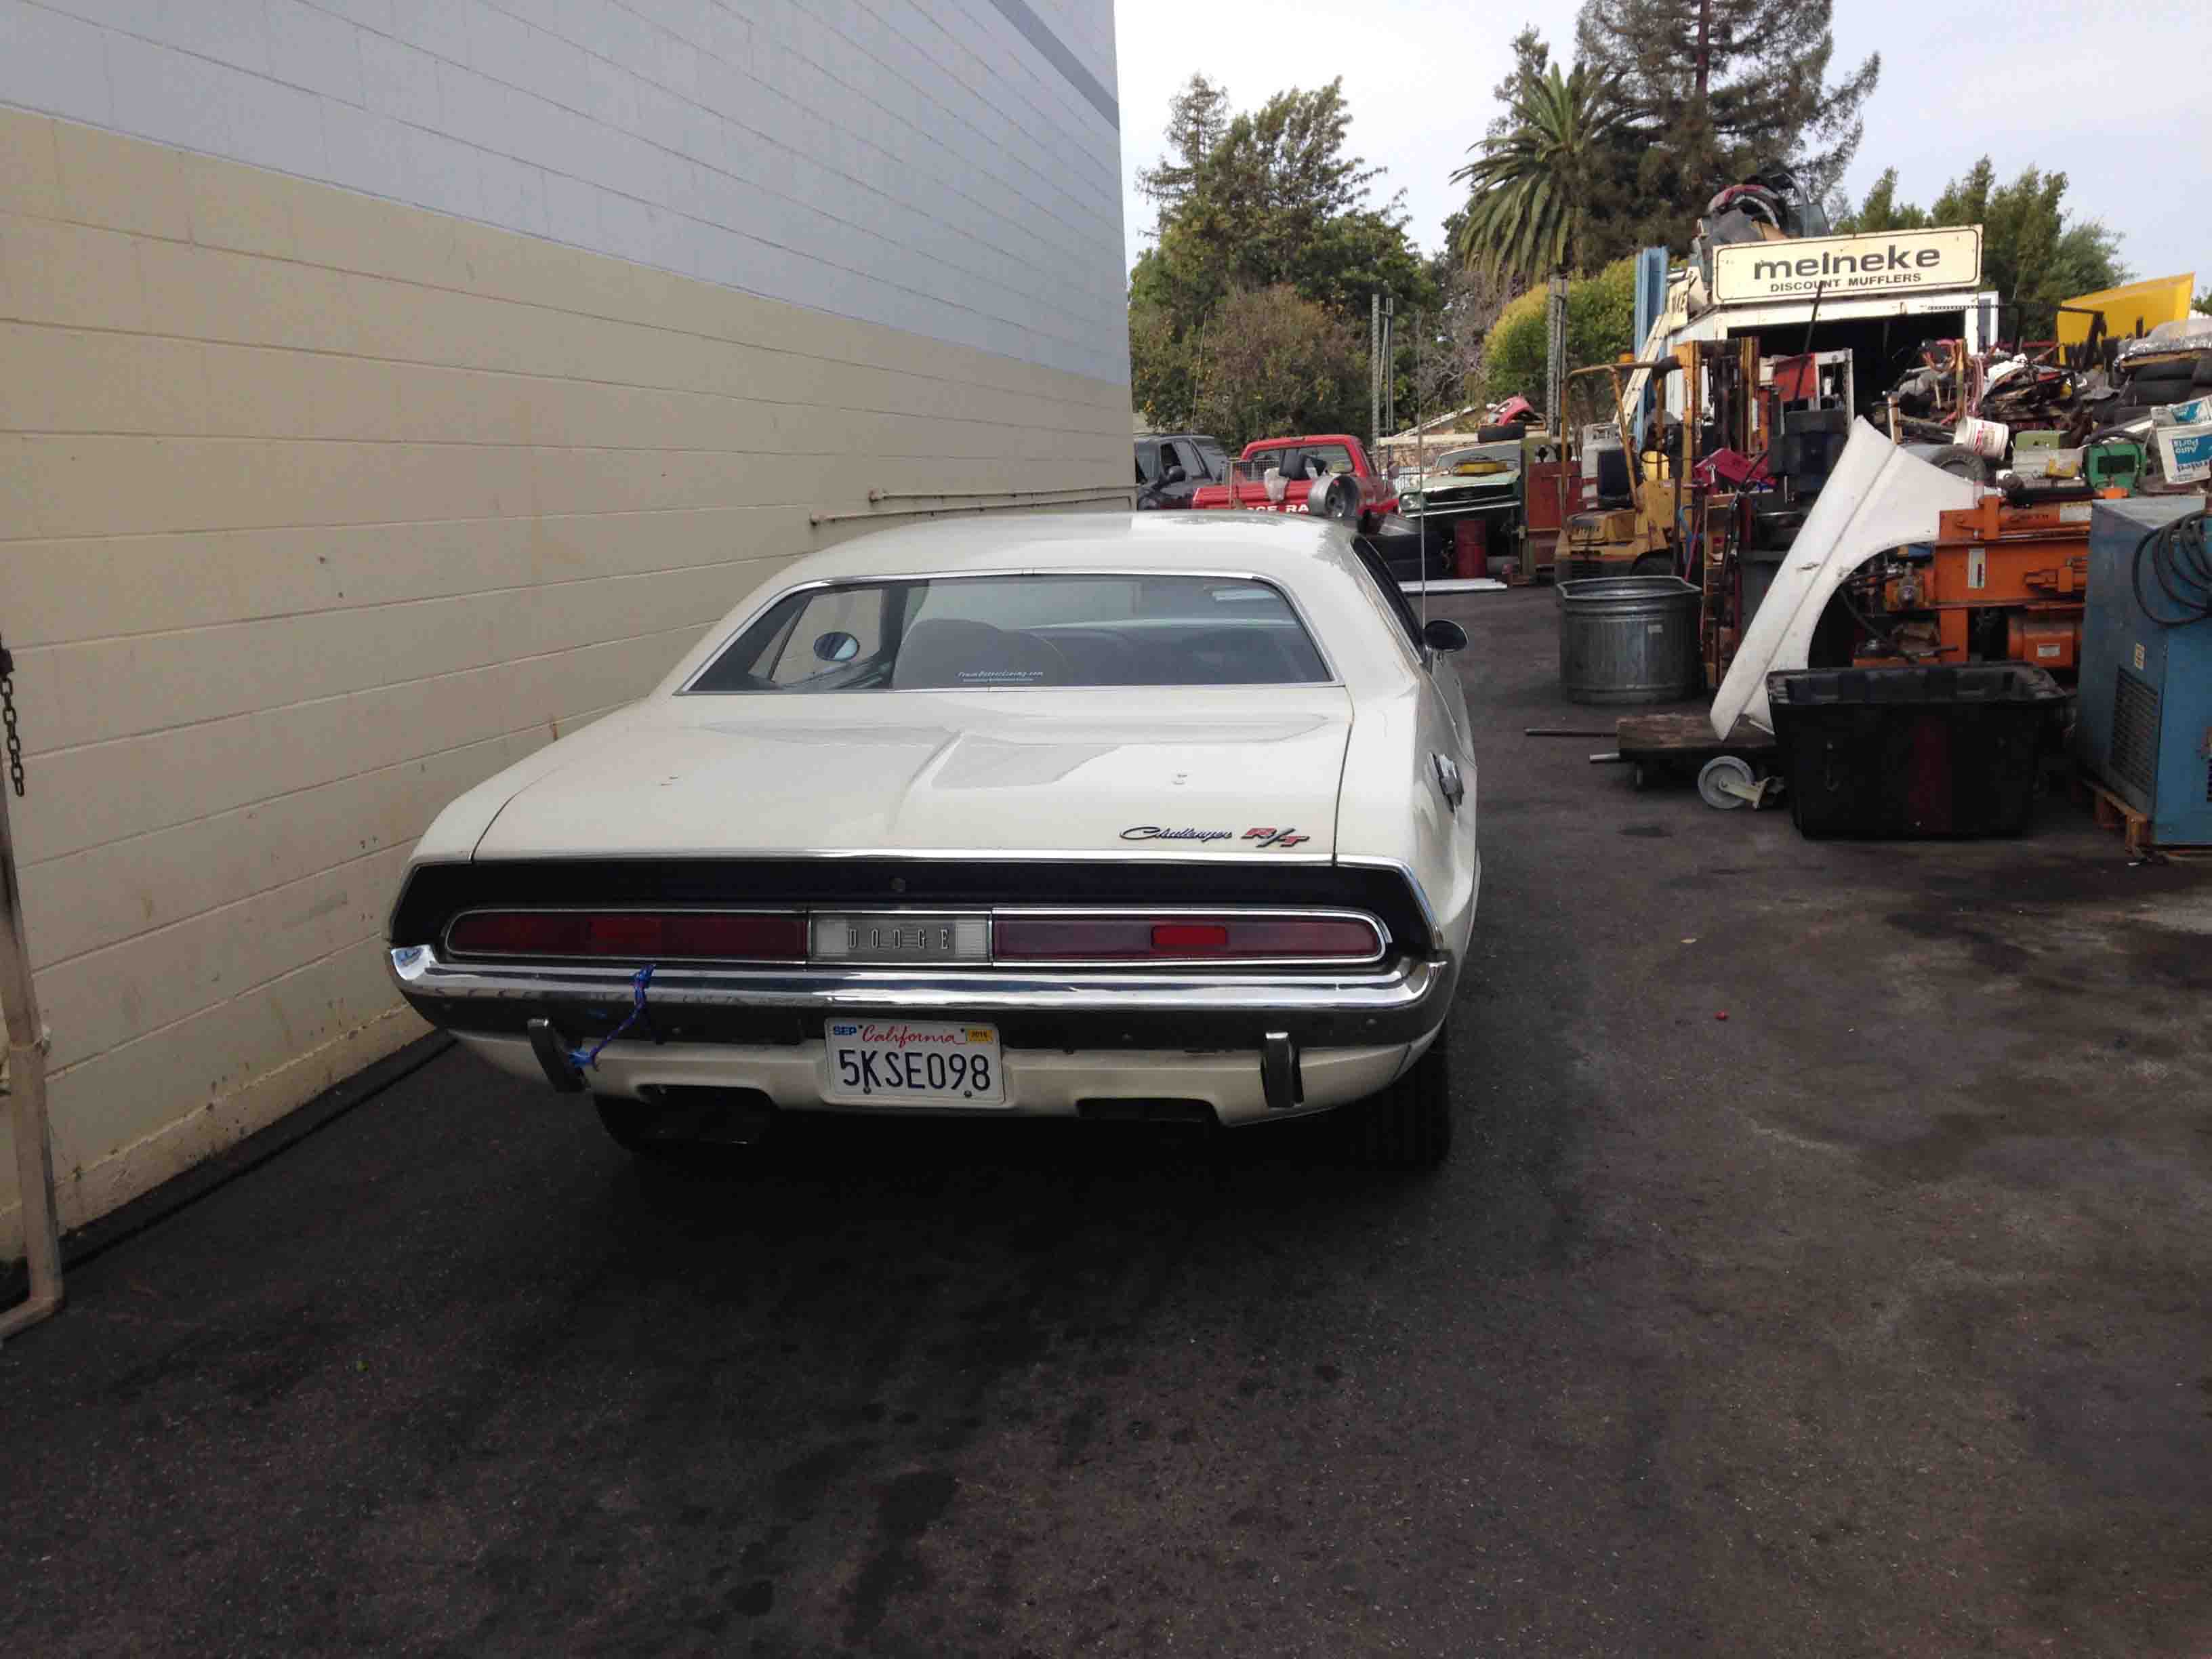
Here’s the Challenger waiting at the muffler shop.

pipe6

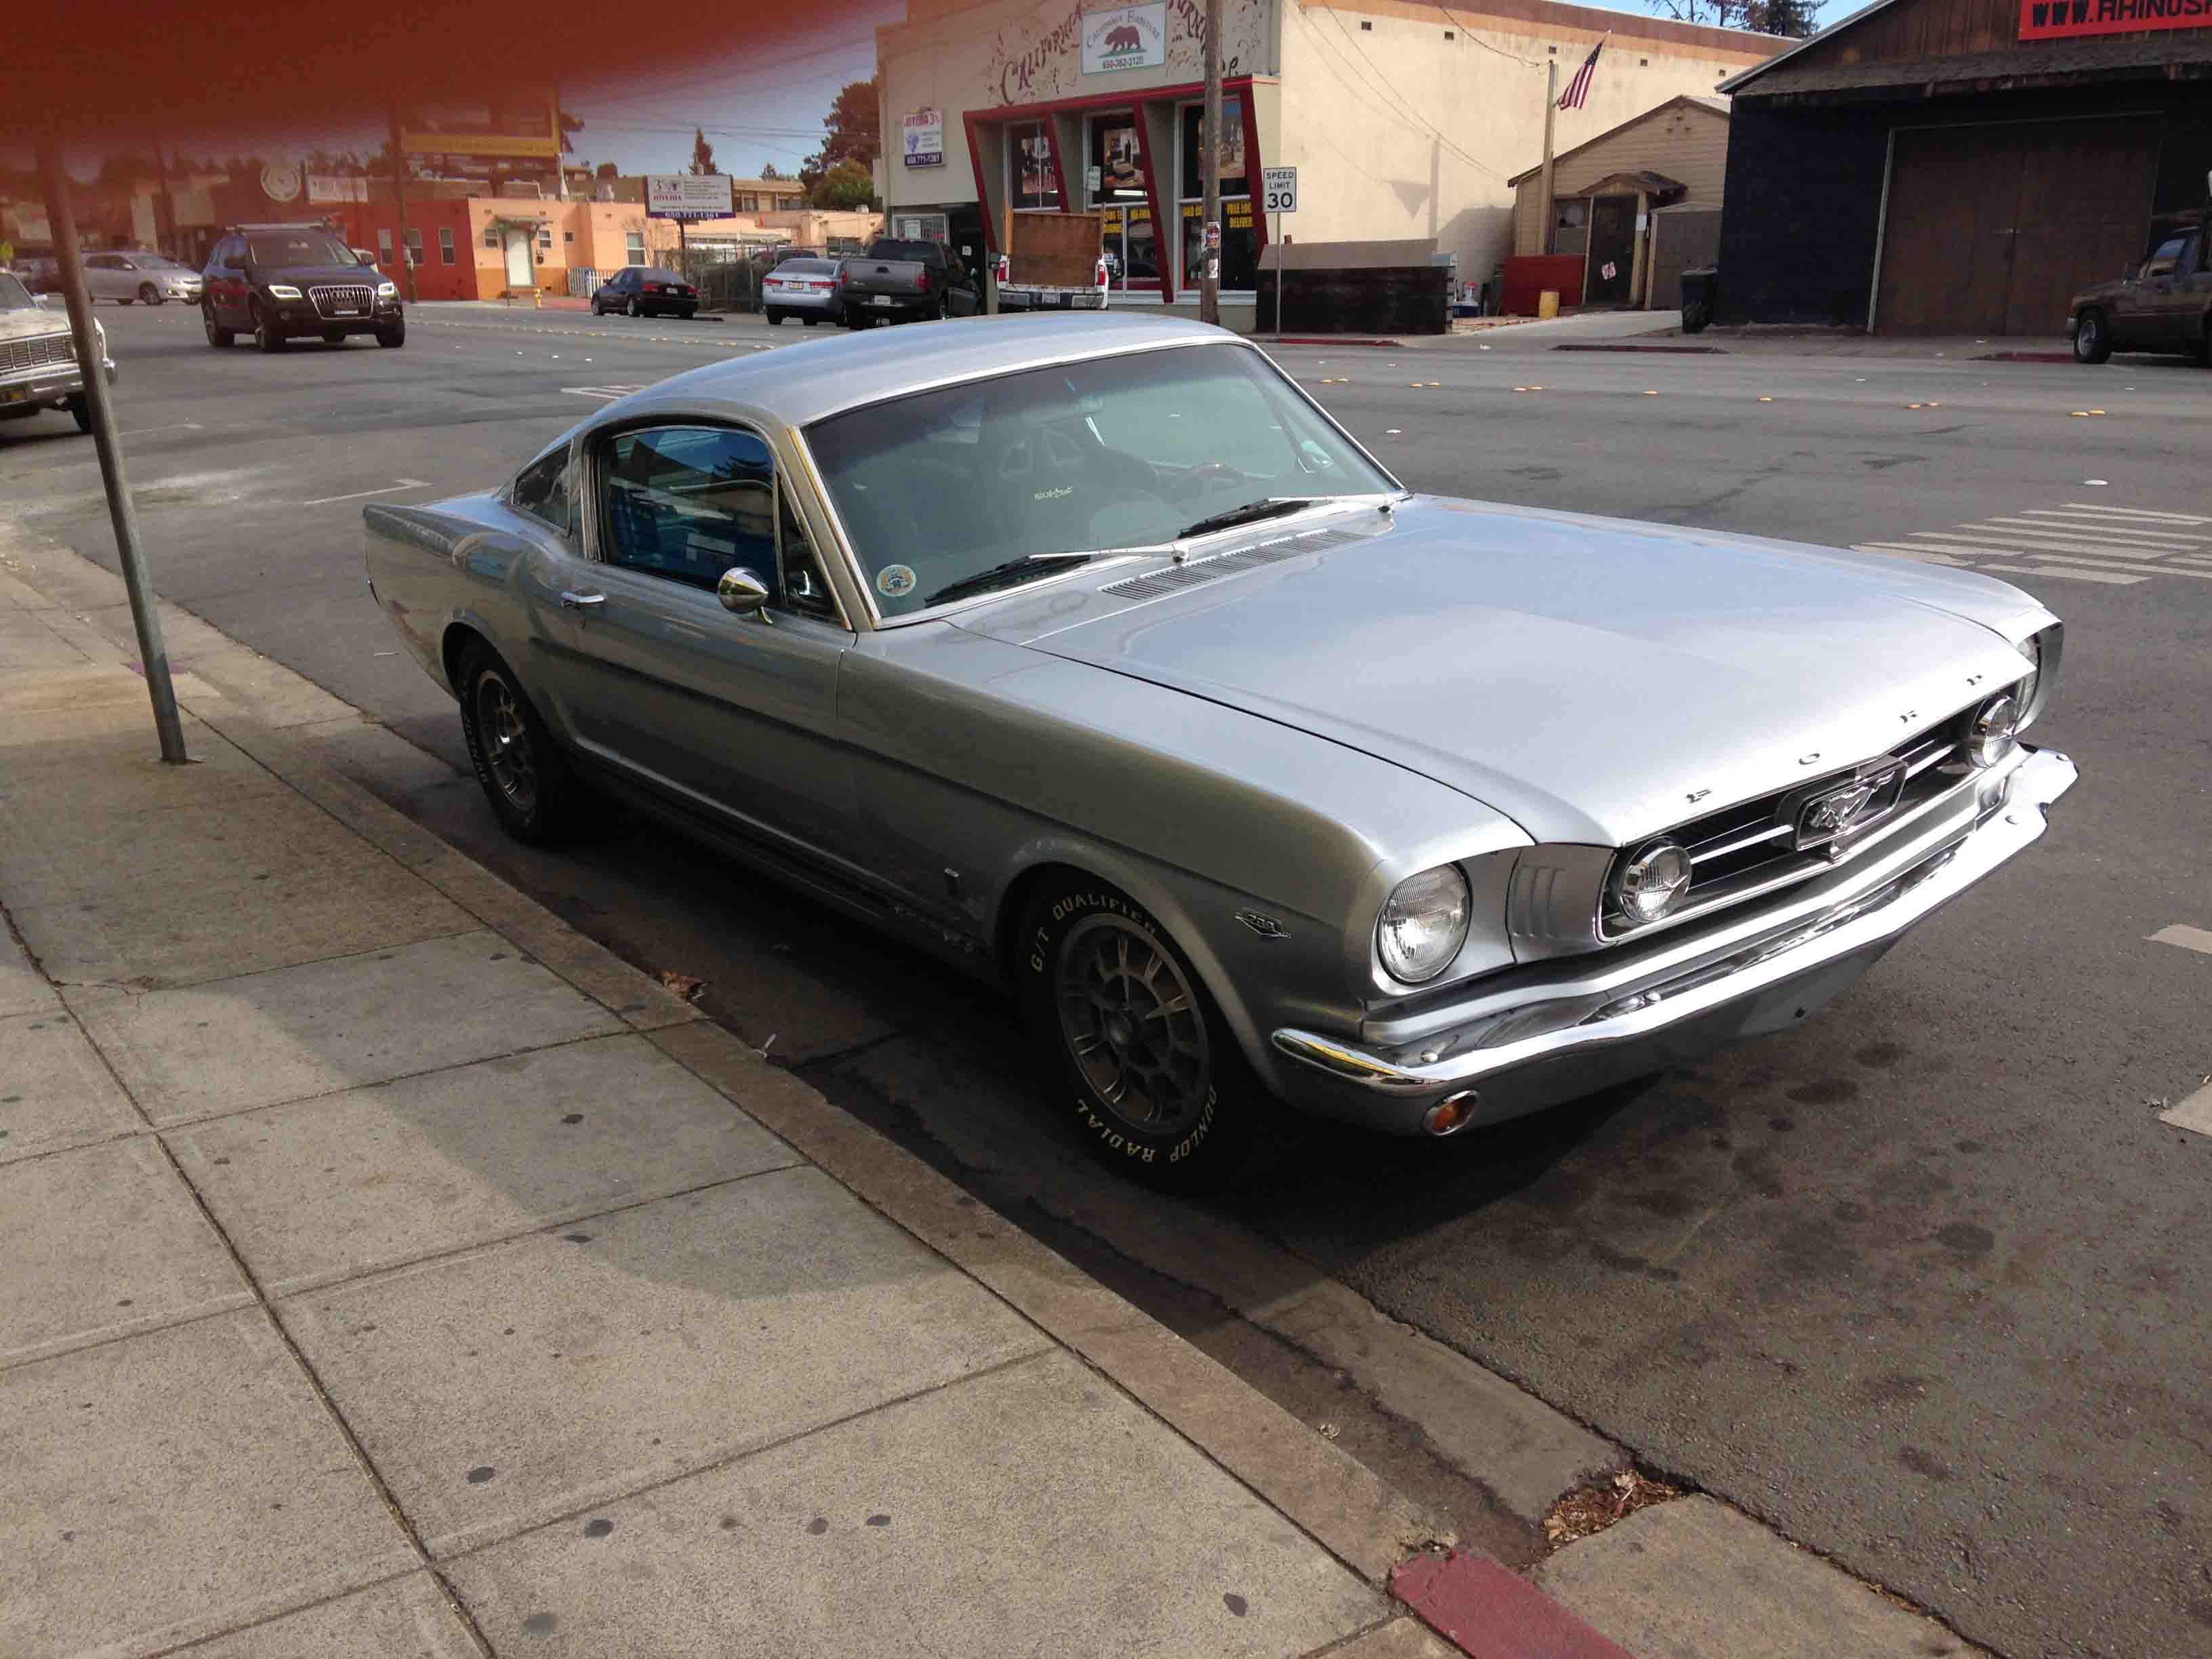
This is the shop owner’s Mustang Fastback GT which he still uses for open track. Nice clean car with the 1966 Shelby 10 spoke wheels. One of my favorite wheels.

pipe7

Bad photo but here’s the interior of Lupe’s Mustang, the glove compartment is signed by Carroll Shelby.

pipe8

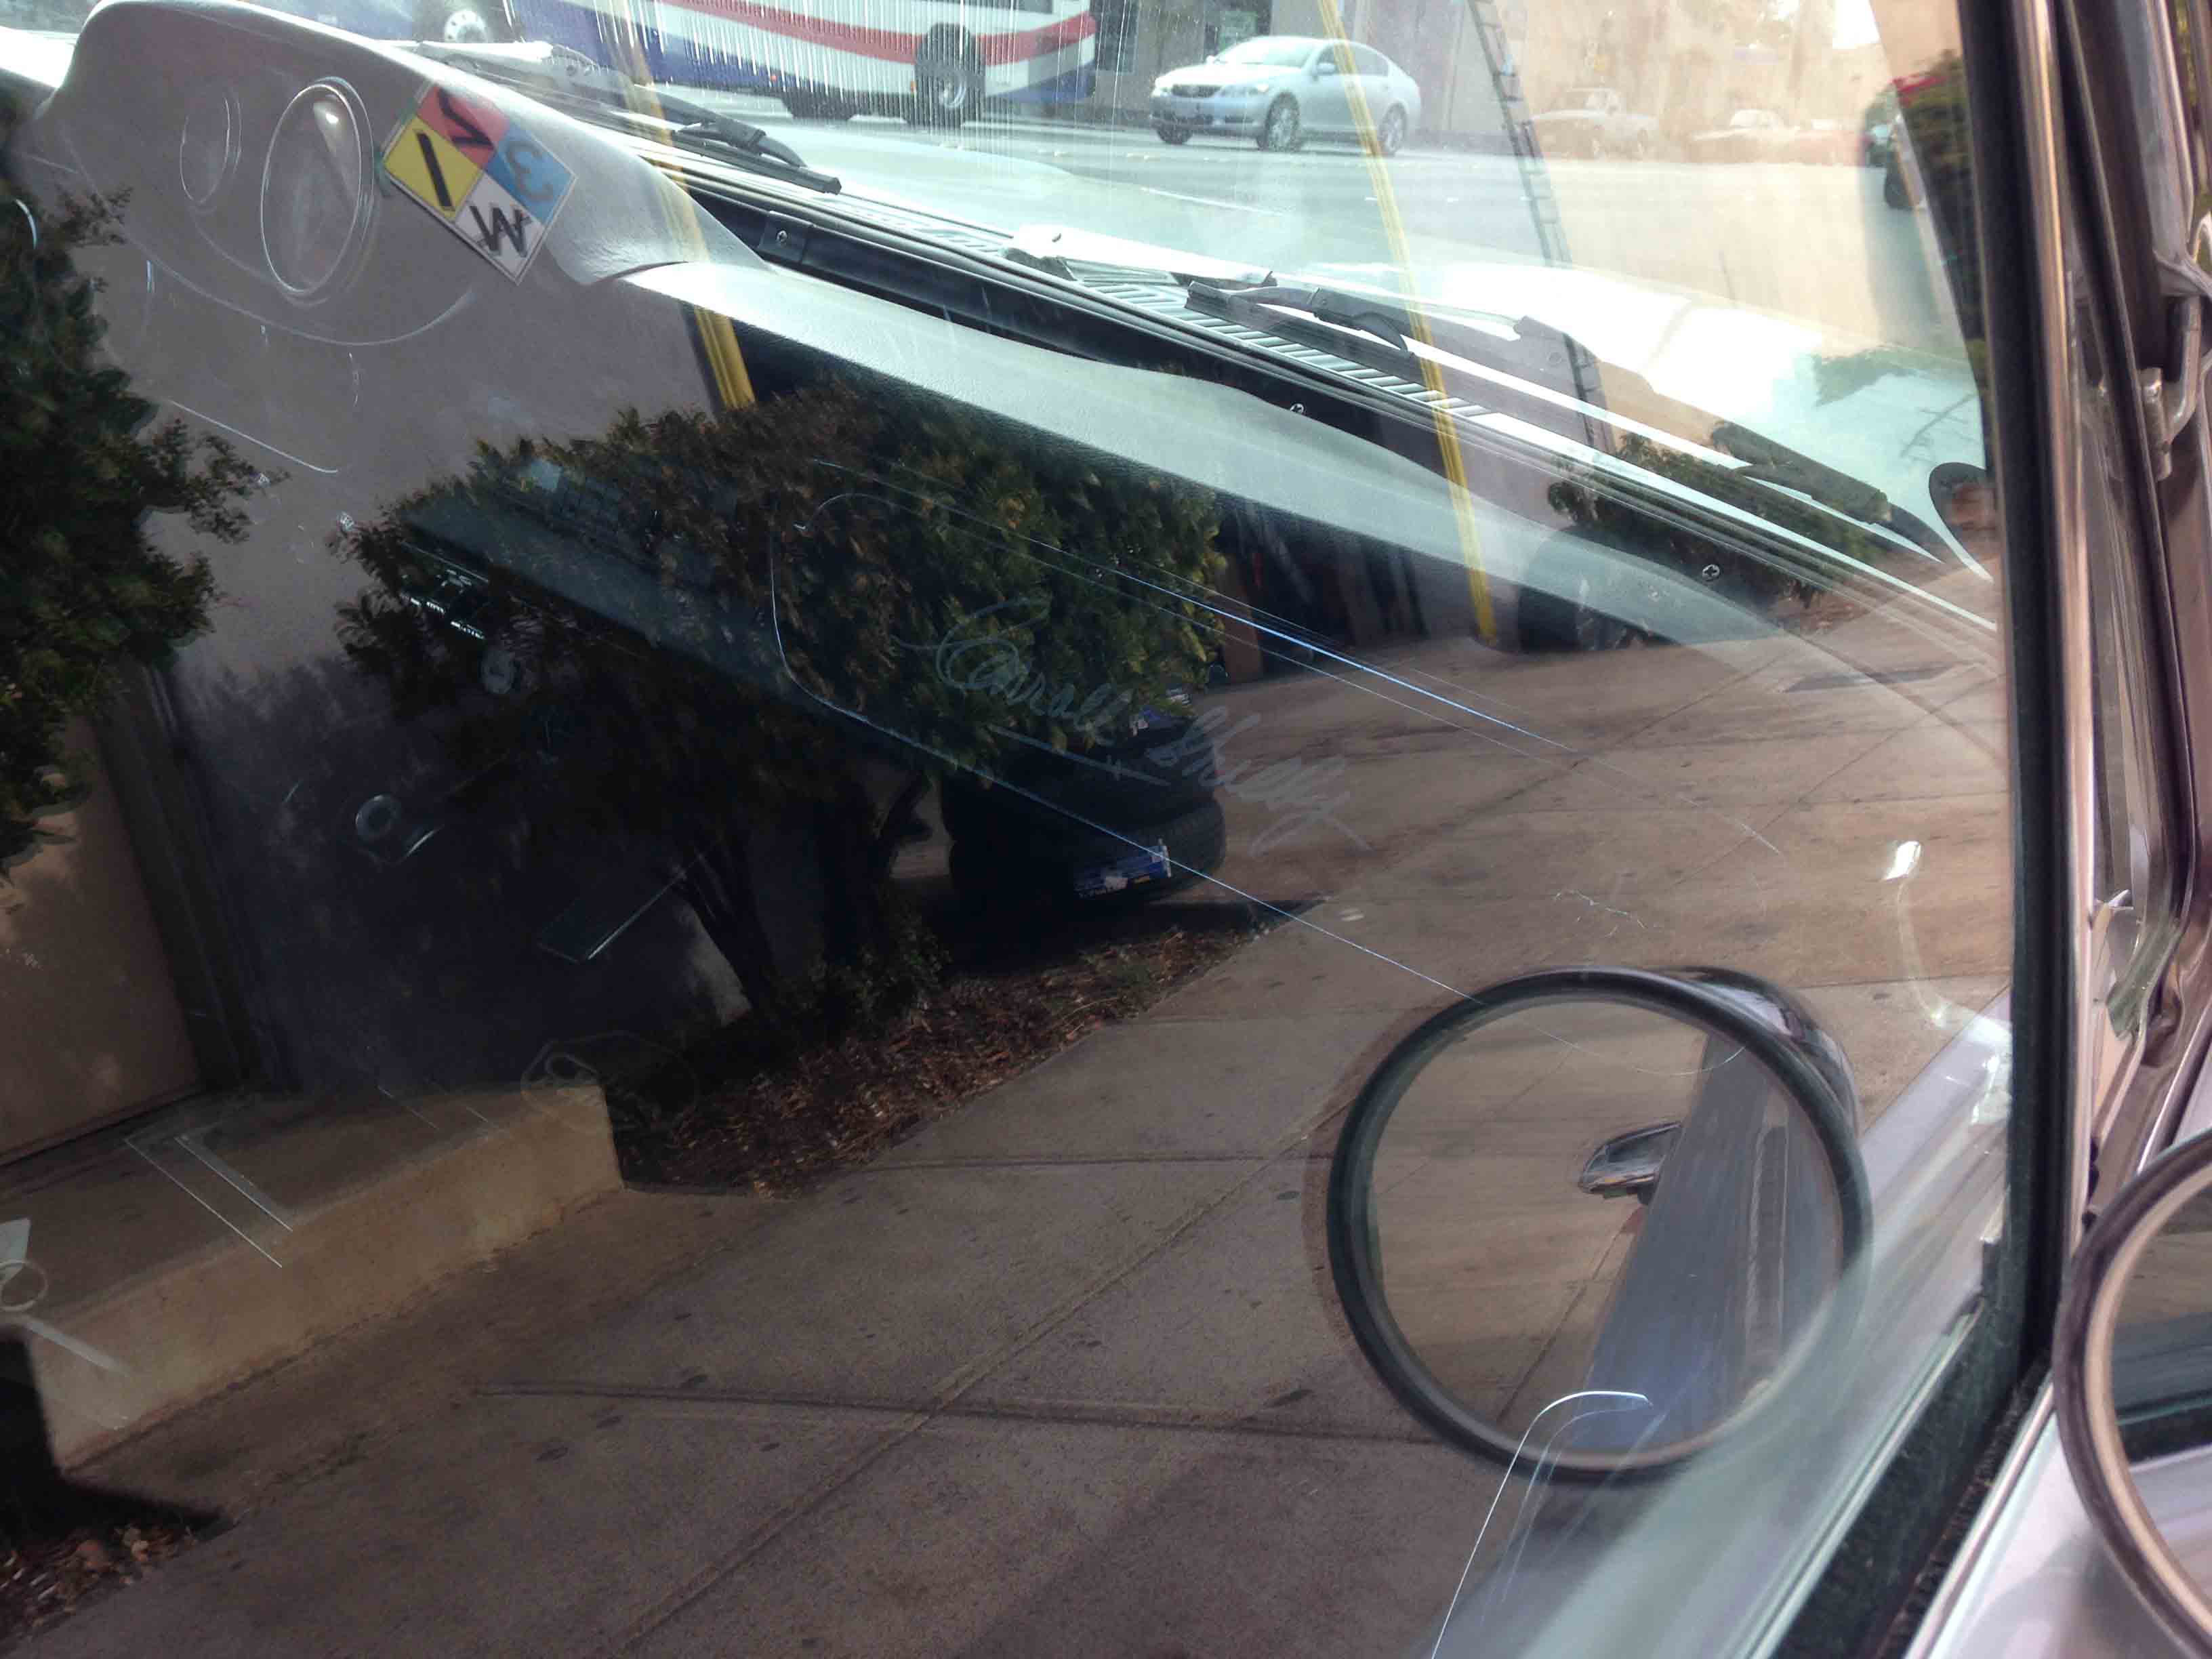
Look close… See? “Carroll Shelby”

pipe13

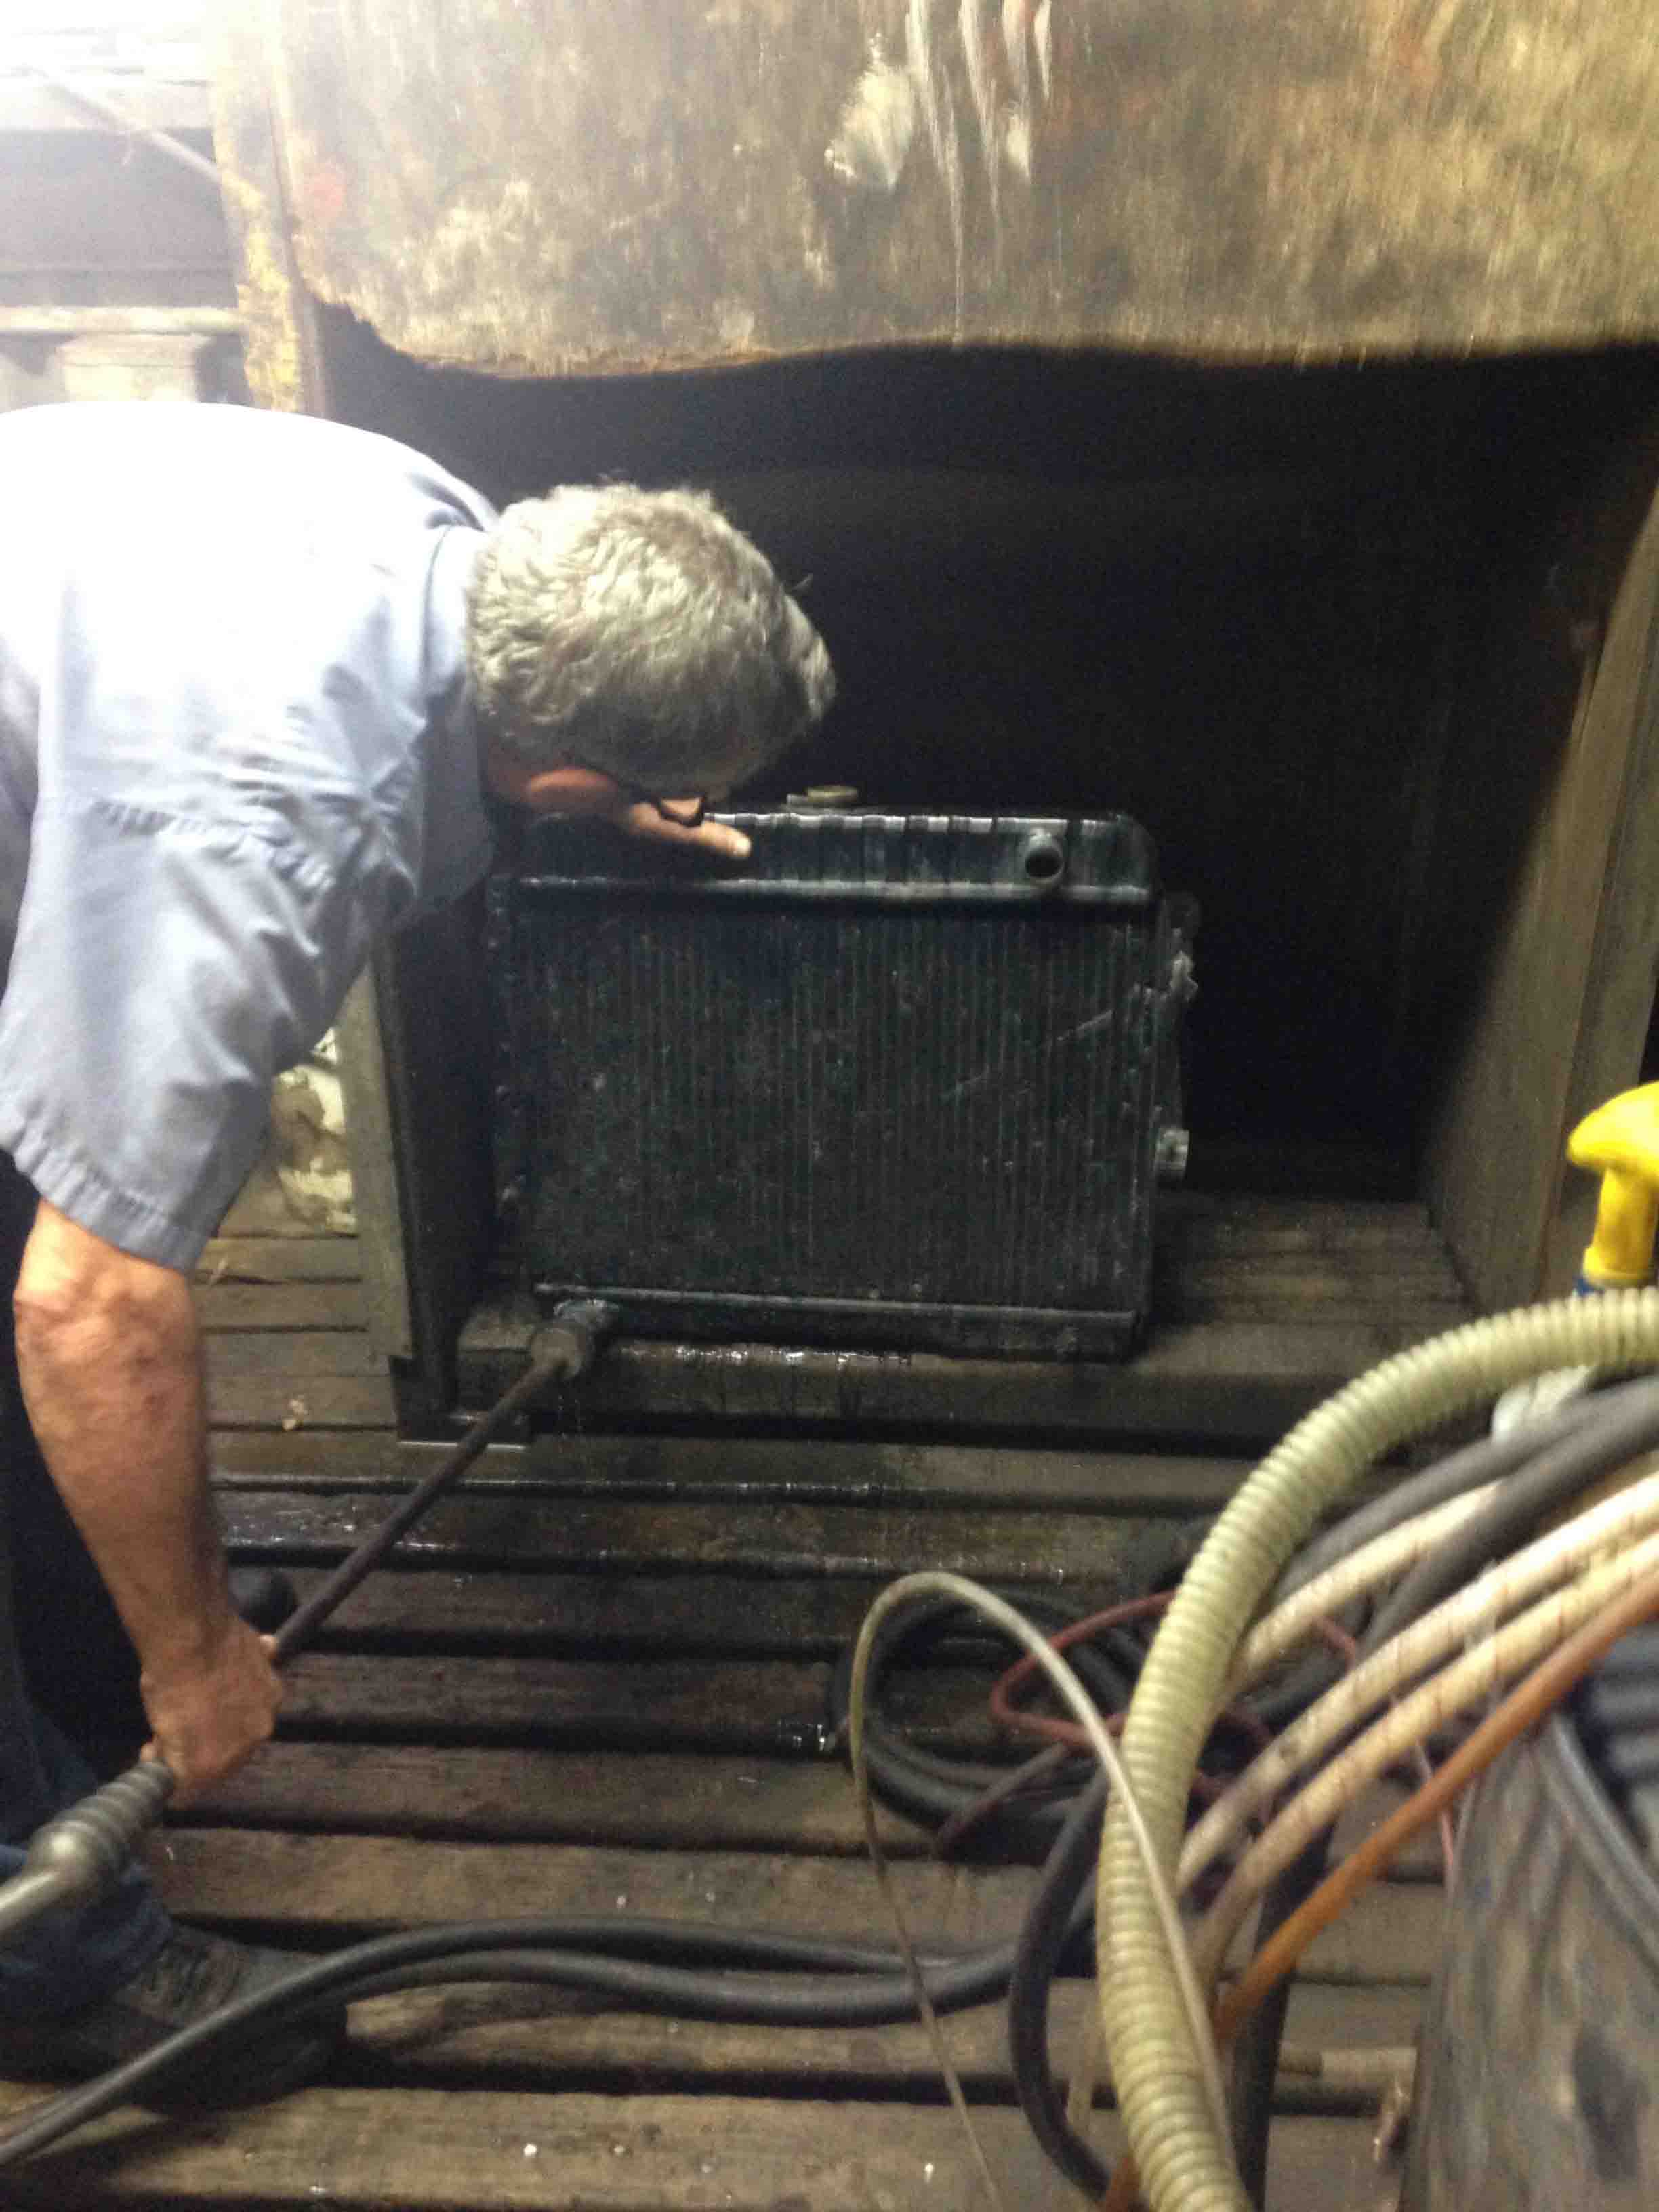
On the rack again. It’s good to be back up on the rack again…

pipe12

pipe14

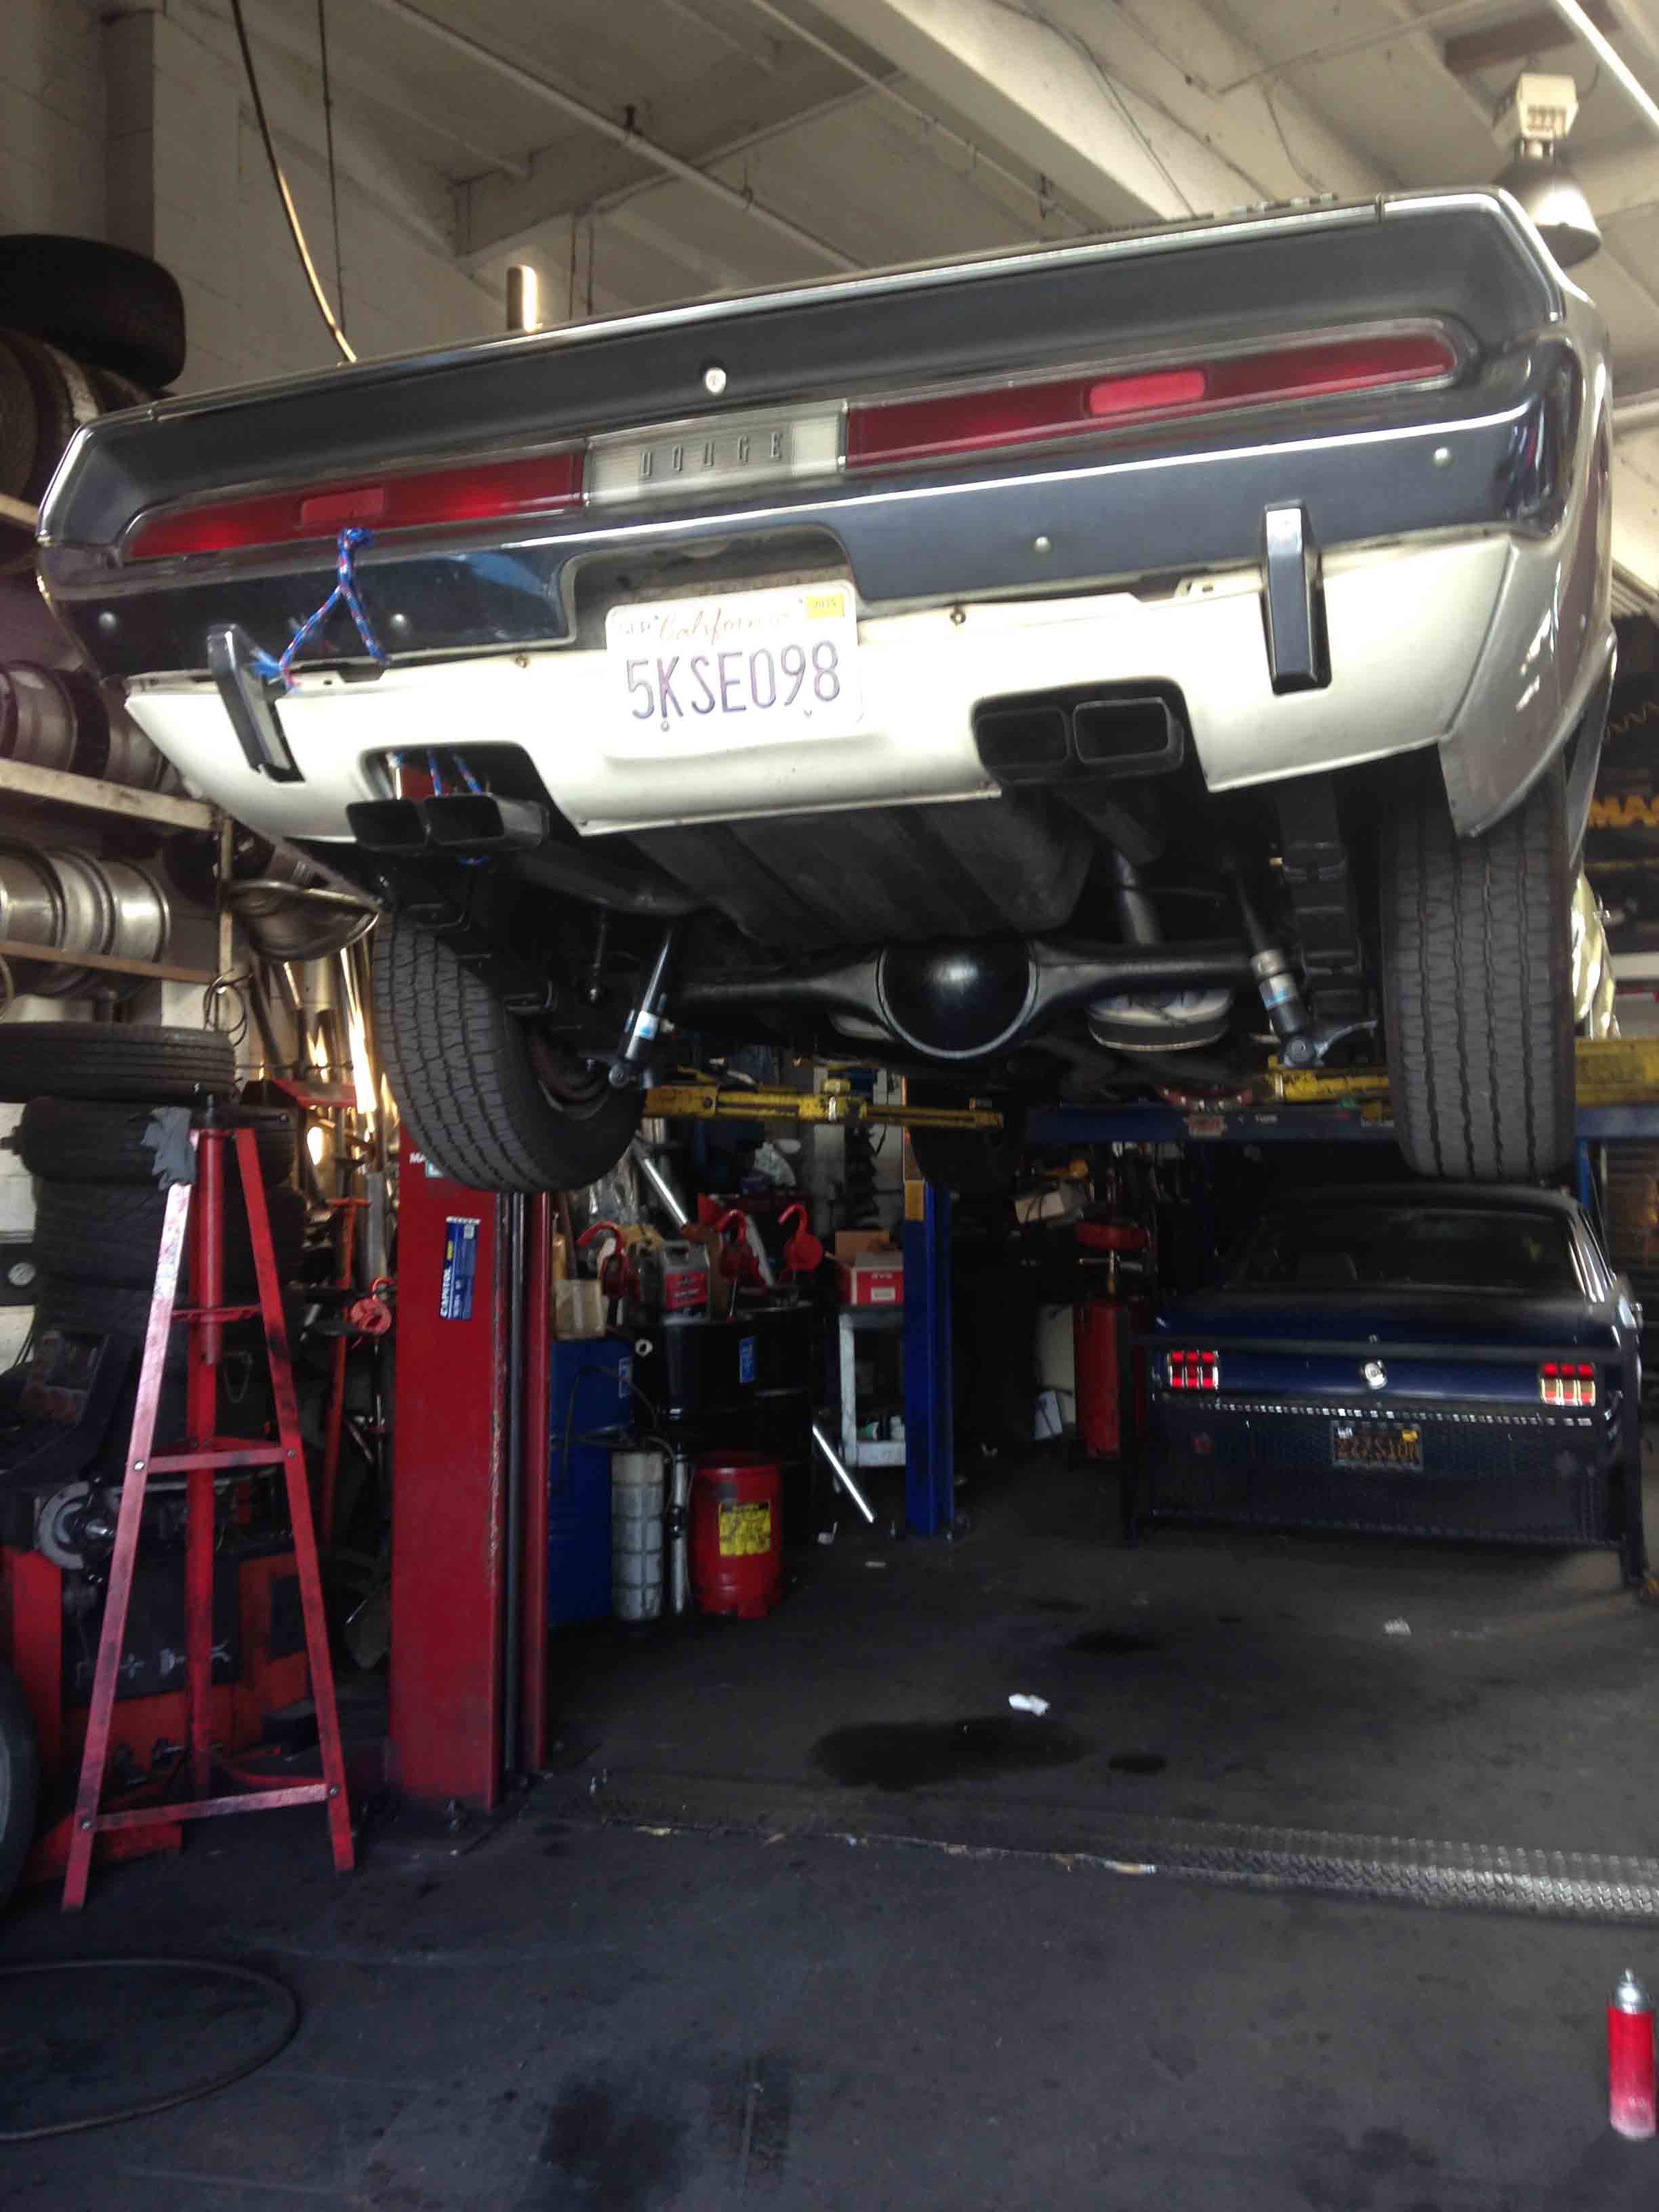
Lupe doing his magic using tool for delicate work… not

pipe15

We’re not worried about making it concours correct, just solid, fix it so I can get back to driving again. We can take some liberties with pipe hangars.

….

The Return of the Camry

I just got the 1994 Camry repaired (replaced the transmission with a good 1999 version) and picked it up this last weekend, putting and end to this chapter of daily driving of the Challenger. I was getting pretty use to it and rarely missed a shift after I figured out the little nuances of the Richmond/Long Shifter combination my car has.

Driving in rush hour traffic jams Monday through Friday was getting me more sensitive to people tailgating me  while looking down at their handheld devices. I want to have an neon sign light up on the back of my car that says, “KEEP YOUR EYES ON ROAD” or “BIG FINE FOR TEXTING”. Might not do any good however, since I need the message translated into 15 different languages out here in California.

There’s a days when I’m perfectly happy to drive the car without abusing it, I feel like I’ve actually accomplished something noble. And then there’s times when redline tire smoking launches at the highway metering light is just too natural.


ROADKILL

By the way, do any of you guys know about “Roadkill”? (www.roadkill.com). I happened to stumble upon it when I was looking at Youtube. It’s a Motor Trend Channel show featuring two experienced and comedic hot rodders who do some amazingly wild and crazy stuff with cars, almost always beating machines to the outer reaches of the human experience.. It’s become one of my favorite “TV” shows. Very entertaining. Watching it certainly makes me feel pretty sane.


..   If you enjoyed this post, please LIKE SHARE COMMENT

The Dodge Kid in his youth about 1976. I think I wore this hat everyday through my Freshman year in high school. Photo by Nick Yee

The Dodge Kid in his youth about 1976.

Copyright © 2015 ChallenYee.com TheDodgeKid.com BestBuckBuck.com  TeamBetterLiving.com All Rights Reserved.

Driving Impressions 440 Six Pack 1970 Dodge Challenger R/T

CLICK ON PHOTO TO GO TO VIDEO OF MOMENTS IN THE DAILY COMMUTE USING A 440 SIX PACK 1970 DODGE CHALLENGER. Make sure you have a good ear bud or a decent sound on your computer and listen you the MoPar V-8 Big block music. There’s no radio playing since I discovered You-Tube automatically screens music playing for some kind of licensing infringements… so I turn the radio off while I’m shooting videos and do what I can to stay within the limits of the law…  sort of like the Duke Brothers on the way to to entering the Gumball Rally. 😉


commutingphoto

I am still short a non-classic-muscle car daily driver, but driving the Challenger almost every day for the last few weeks has worked some bugs out of the car and out of my driving technique.

It actually takes some practice to drive this machine well, so having been forced to drive it daily has helped. There’s a saying that “cars like this like to be driven.” Well, it’s true, cars in general like to be driven. Old fuel, stagnant liquids, and dried up seals never did any good for any car and the Challenger is no exception.

Aside from  the fact it’s drinking fuel like an elephant drinks water (no one has told it that gas is no longer 50 cents per gallon) and the clutch pedal return spring squeaks a bit, it’s very much a blast.

The more I drive it, the more rubber gets left on the roads around here. However, the main thing is, compared to 40 years ago when I was a teenager, is I’m a lot more aware of how not to put other people at risk and, moreover, despite the increasing number of burnouts, I really do have a mindset of not to thrash the car… it is my daily driver (for now) nevertheless!


Left my lights on and killed my battery yesterday and had to call for a jump…

commuterjump

In case you’re wondering, “yes” it is a real R/T but  “no” it is not a V-code Challenger. I figure, I might be just a little too crazy to drive a real V-Code to work in traffic jams every day, but… I think if I actually had one and it wasn’t a garage queen… I think I would. Like Junior Brown sings, it is a “Freedom Machine.”

For those of you who are not versed in Mopar-linguistics, a “V-code” is a manufacturer’s code based on the VIN (Vehicle) number. “V” denotes an originally equipped 440 six pack Challenger or Cuda and those still with the originally “matching” serial number engine and transmission in great condition are fetching $75-100K. Maybe more in conjunction with other very rare option combinations. Not bad for an old muscle car.

And, I got a new ignition in the mail! (more to come).

..   If you enjoyed this post, please LIKE SHARE COMMENT

The Dodge Kid in his youth about 1976. I think I wore this hat everyday through my Freshman year in high school. Photo by Nick Yee

The Dodge Kid in his youth about 1976.

Copyright © 2015 ChallenYee.com TheDodgeKid.com BestBuckBuck.com  TeamBetterLiving.com All Rights Reserved.

.

Simmering over 440 Overheating Problems – Part 5 -FINAL

The long-awaited final part has finally arrived for the overheating issue.

I ran the Challenger without a thermostat for drives to get the maximum clearing effect to catch crud in the copper screen trap I installed in my upper radiator hose. I had also been draining my coolant after every extended drive to flush and dilute out as much old coolant and the green stuff as possible before I pour in the Water Wetter. 

I’ve read several accounts that Water Wetter mixed with normal anti-freeze/coolant will gum up your cooling system as well as not working or not working well. As I mentioned before, I used to run Water Wetter with distilled water in my old open track car. Spilling that on the track was less of  nuisance than dropping coolant. The best cooling is effected by using pure distilled water, but you need the anti-corrosive and lubricating properties of a product like Water Wetter added.


The thermostat gasket managed to last a few removals of the t-stat housing before it died so I replaced the gasket.

The drained coolant, after sitting for a day has what look like a powder sitting at the bottom of the plastic jugs I’ve been storing it in. I’m guessing its the remnants of Bar’s Stop Leak or something. With each draining, the amount is decreasing and is almost negligible now.

.

top side (radiator end) of hiflow thermostat. Removing it from system to flush engine block at high RPM.

top side (radiator end) of hiflow thermostat. Removing it from system to flush engine block at high RPM.

Better cooling performance with a thermostat

I’ve heard that cars can run cooler with a thermostat rather than without one. I think it depends on the design of your cooling system and the positions of the inlet and outlets. On a typical engine with the inlet and outlet on the front, there is a certain amount of inefficiency in regards to the coolant that is in the rear of the engine.

What I noticed was that not only did the engine run cooler, based on my temperature gauge reading, but the subsequent draining yielded more fluid that smelled more like coolant and less like plain water. I take this to mean that there is better mixing of fluid coming back from the radiator in through the engine passages than without a thermostat.

The temperature gauge without the thermostat read in the low “normal”range, but after the thermostat was installed the reading in slightly below the “normal range.”

.

Effect on water pump churning and installed thermostat

So, it appears, with the thermostat installed and resisting the flow of coolant back to the radiator, the water pump has time to churn the coolant inside the engine passages, allowing more mixing before the thermostat opens at the set temperature.


Some extra crud sitting in the upper hose. Clean it.

Some extra crud sitting in the upper hose. Clean it.

Here's the flakey cast iron crud, including some pieces of gasket seal. Also need to brush out crud from upper hose. Copper screen is reusable but check it before reinstalling.

Here’s the flakey cast iron crud, including some pieces of gasket seal. Also need to brush out crud from upper hose. Copper screen is reusable but check it before reinstalling.

rad_crud4

These are a few of the photos I took after before cleaning out the copper filter. I typically get a little less that what you see in this picture as of late.

rad_crud3rad_crud1rad_crud5

At first I was saving the crud from the filter, here is what was in the cooling passages (except for the washer).

At first I was saving the crud from the filter, here is what was in the cooling passages (except for the washer). I stopped collecting it.

.

Catching debris before and after thermostat installed

I’ve been running the copper mesh at the top inlet of the radiator, held in place by the upper hose. Before and after the thermostat was installed, a consistent amount of small debris are being caught. They look like small pebble-like cast iron flakes from the water passages in the engine. One piece of copper mesh lasts several cleanings. High RPM runs causes a better flushing action as indicated by the amount of crud being caught.

This process would be a lot more efficient if you could pop the freeze plugs and flush out the engine that way, but if you can’t…. well it takes several rounds to clear out. I ended up adding the Water Wetter finally after I managed to drain out the coolant with just a whiff of coolant smell. The heated water comes out with a brown tint from going through the 200+ degree iron passages.

Here's my running collection of drained coolant. Notice the progression from top to bottom from the traditional 50/50 coolant water mix to virtually pure distilled water.

Here’s my running collection of drained coolant. Notice the progression from top to bottom from the traditional 50/50 coolant water mix to virtually pure distilled water. About 2.5 gallons every drain. You do the math. Yes, I’ve called it quits when it comes to draining. Before I put the thermostat back in I managed to get a non-coolant scent in the drain, but after I put the thermostat back in, I get at least a small scent from the drained coolant. Poinsettias not included.


Miscellaneous tips

.

 fanbelt1

Lonesome Dove Fan Belt Tightening

How about it you are alone and need to tighten your fan belt. If you have a handy wooden-handled ax  like I have pictured, you can use that for leverage to extend your alternator after you loosen your holding screws.


.

.

rad_seal1

rad_seal2

Just in case you were interested in reading the small print on the bottle.

rad_seal3

Pesky coolant drip from the lower radiator hose?

The lower radiator hose had a slow drip, so I sanded the outlet pipe with #80 grit paper and felt for any imperfections in the pipe. Then I used Permatex Aviation Form-A-Gasket Sealer #3 with the intention that I don’t want to have to think about any more leaking there. I only coated the radiator pipe and let it set for the required time before sliding the new uncoated hose on and clamping it. I did that to eliminate any possible dripping of sealant into the hose.

I used the same Permatex product on the thermostat housing. It’s a little messier than using silicon but I gave it a go and it works. Again, no intention of removing the housing unless I expect to replace the gasket. The thermostat should be sitting inside a recess in the T-stat housing and should be not interfering with the gasket. Clean the surfaces first of old gasket and sealant before applying the new sealant.

.

.

Carb Backfiring

I’m not sure exactly what was causing my 440 to pop out the carbs, but the problem appears to have gone away except on rare occasion.

However, I have a few possible candidates for culprits.

After several high RPM runs (over 5000) I could have blown the combustion chambers cleaner or it could be the number 7 plug wire touch a header tube and had a couple inches of insulation burned away, cause for some arcing. I adjusted the routing of the wire away from the header.

I plan on replacing the plug wires later.

I would imagine any multiple carb set up could use some more tuning. Have to keep that for later. Also toying with the idea of replacing the old MP electronic ignition with a multiple spark discharge type.

.


*

If you enjoyed this post, please LIKE SHARE COMMENT

The Dodge Kid in his youth about 1976. I think I wore this hat everyday through my Freshman year in high school. Photo by Nick Yee

The Dodge Kid in his youth about 1976.

Copyright © 2014 ChallenYee.com. TheDodgeKid.com  All Rights Reserved.

Highway Entry with Kids in Car

Out for a Sunday drive with the kids and testing a new video mount that I have attached to my dome lamp ring.

Click on image below to access a SHORT 15-second You-Tube video


Click for video

CLICK ON IMAGE TO ACCESS A SHORT 15-second YOU-TUBE VIDEO


video link you-tube:     http://youtu.be/-dnyiuaI9Ow
*


An update about the cooling system

The car runs cool as a cucumber now after the radiator was hot tanked an reversed-flushed.

I’m still running the old coolant out of the engine as I have drained the coolant several times and have almost reaching the point where I’m running pure distilled water. I’ll write the last “Simmering of 440 Overheating Issues” later, but you may be interested to know the engine runs cooler with a thermostat. The reason is (based on my observations of the drained fluid) the thermostat allows the fluid to churn more effectively throughout the cooling passages in the engine. In other words, without the thermostat, coolant coming from the radiator tends to go directly back out the upper hose rather than being forced rearward into the engine to exchange more thoroughly with heated fluid. I’ll share my observation why I think this later.

Here is my collection of drained coolant from my 440. Notice the progression from left to right. I empty about 2.5 gallons per draining. I'm almost at a pure enough state I'm willing to add the Water Wetter. I have some observations about before and after installing the thermostat which I will share in a later article.

Here is my collection of drained coolant from my 440. Notice the progression from left to right. I empty about 2.5 gallons per draining. I’m almost at a pure enough state I’m willing to add the Water Wetter. I have some observations about before and after installing the thermostat which I will share in a later article.


**


If you enjoyed this post, please LIKE SHARE COMMENT

The Dodge Kid in his youth about 1976. I think I wore this hat everyday through my Freshman year in high school. Photo by Nick Yee

The Dodge Kid in his youth about 1976.

Copyright © 2014 ChallenYee.com. TheDodgeKid.com  All Rights Reserved.

Simmering over 440 Overheating issues – part 3

FIGHTING THE WAR AGAINST CRUD
.
 .
After soaking and rinsing my radiator with 100% distilled white vinegar at least 5 times letting it soak for at least a 1/2 day at a time,  I observed some demineralization but not enough. I could look down into some tubes and see that they were still clogged. I could still see crud at the tops of the tubes as I looked further down the upper tank in either direction from the cap hole.
 .
 So I considered whether I should get a new radiator or take mine to the shop to get it hot tanked or rodded.
 .
It’s tempting to shop for a new radiator especially since there are some much more efficient designs out there that are still stock looking, but sometimes you need to hold back from spending cash.
A local shop in nearby San Carlos recommended by my exhaust system guy.  Photo by Challen

A local shop in nearby San Carlos recommended by my exhaust system guy. Photo by Challen

For financial reasons as well as taking a step by step approach, I took my 3 row 26 inch radiator to a radiator shop called “Howard Ave.” in San Carlos, California, an easy drive in the morning before going to work.
.
Turns out to be the kind of place I would patronize especially when they understand muscle cars and Vanishing Point, the 1971 movie. They frequently perform work on antique and rare pieces as well as run of the mill daily drivers. Plus, they are easily understandable over the phone.
 .
For $88 dollars they hot tanked the radiator, made some minor repairs, put a new coat of paint and provided me some copper screen to use as an upper hose filter.
 .
Talking to the guys about what could be giving me woes made me glad I did not buy a new radiator (at least until I need to rebuild the engine).
 .
.
CAST IRON DISEASE
.
The guys, Rick and Bill, told me a couple of things about the engine blocks cast in the 60’s and early 70’s that I wasn’t aware of.  One, the casting material tended to release metal flakes which build up into crud and; two,  the water pump is positioned high in relation to the engine cooling passages which promote crud build up in the block that is not easy to flush out, that is, unless you pop the freeze plugs and blow out the crud from there.
 .
They said that the crud in my radiator is the residue from the cooling passages in the engine that made it to the radiator and it was likely a long term process. After the hot tanking, they said the radiator flowed much better even though it may seem okay before hot tanking. They managed  to get about 50% better flow after tanking and back flushing.
.
They run a flow test by standing the radiator upright and filling the radiator from the bottom, waiting until the water comes out the input then releasing the bottom to let the water flow out. The distance the water shoots out forms the benchmark and is measurable.
.
I’ve read some people suggest that the water flowing fully (taking up the whole orifice) is an indication that the flow is good, but my radiator, even with the clogged passages was able to do this. So I’m theorizing that that indication in itself is not an adequate indication for a performance engine.
Here's we're filling the rad from the bottom to do a flow test. When the water spews out the top for a second, let go and see how far the water jets from the bottom.  Photo by Challen

Here we’re filling the rad from the bottom to do a flow test. When the water spews out the top for a second, let go and see how far the water jets from the bottom. Photo by Challen

For a fragile radiator, heating up the upper tank to do rodding is not as desirable as it could damage the core, and fragile or thinned tubes could be damaged by rodding. This wasn’t the case for my radiator as it had plenty of strength for rodding but if good results can be had by hot tanking, it is much less risky and easier.
.
Considering that I most likely have some weird leprosy-like condition in the engine block waiting for an engine rebuild to solve, I was glad I didn’t buy a 500-700 dollar radiator just to get clogged up by the fallout. (I sure would like to get one of those 4 row high efficiency radiators though – some other time). Also, I just became aware that my radiator yoke, the crossmember is for a 22 unch radiator and someone drilled wide to fit a 26 radiator. It’s cool, I’m not trying to create a show car.
 .
It’s still possible that crud in the block could still cause overheating problems even with a clear radiator.
.
What they suggested to clear out the block without popping the freeze plugs, is what one did with his old Mustang that had cooling system leprosy: he made some high speed runs (150 mph) with an upper hose filter plus no thermostat and flushed his cooling system after each run to resolve his overheating problem. Whether he actually did 150mph or not, well… I get the idea.
Copper screen to be used as a crud catcher before the crud goes into the radiator (at least the big chunks). Photo by Challen

Copper screen to be used as a crud catcher before the crud goes into the upper radiator (at least the big chunks). Photo by Challen

This little education highlights a very important and unheralded aspect of engine rebuilding, renovation and  resolving cooling problems especially since we’re often dealing with over 40 year old technology or old blocks. Some additional attention can be given to your old muscle car’s long term maintenance if its stuck in a shop for a while, especially if the freeze plugs are ever easily accessible and you suspect a cooling problem or not, you pop them off and flush out your block of crud that is likely building up on your old Mopar.
 .
For the next engine rebuild, I’ll be giving careful attention to the cooling passages and any new technology that can offset the flaking of the old cast iron. Is that one reason they used more nickel in some blocks now and before?
 .
Anyway, I hope the hot-tanked radiator will get the engine to run cooler.
 .
In the meantime, if you see me driving around town at 5000 rpm or more, you’ll know why –  “Yes sir, officer, I’m treating leprosy.”

*

If you enjoyed this post, please LIKE SHARE COMMENT

The Dodge Kid in his youth about 1976. I think I wore this hat everyday through my Freshman year in high school. Photo by Nick Yee

The Dodge Kid in his youth about 1976.

Copyright © 2014 ChallenYee.com. TheDodgeKid.com  All Rights Reserved.

Simmering over 440 Overheating Issues – Part 2

SIMMERING and OVERHEATING Issues PART II

A progressive update on my working on my overheating problems.

I decided to to troubleshoot this problem one step at a time.

hiflowstat

Here a new Milodon hi flow thermostat, similar to the look of a hiperf Mopar piece I saw on Ebay.

CHANGING THE THERMOSTAT IS EASY

The first thing I did was change the thermostat. First I drained the coolant into a new 4 gallon oil drain container so that I can reuse the coolant if needed.

In preparation to replace the thermostat, I ordered a new gasket and some gasket sealant from Jegs, but I will continue to use the current gasket until it breaks or no longer seals. There’s sealant on both sides of the gasket, but I am able to remove the coupling without damaging the gasket. If you know you’re going to be disconnecting this joint several times, I’m not sure if I could have used a technique I used on my Mustang valve cover gaskets to allow reuse and ease of removal of the valve covers to adjust the mechanical lifters. If you do this trick on your valve covers, apply sealant to the valve cover and tack on the gasket to the valve cover. In the thermostat’s case, the gasket is tacked to the block side.

Parts I ordered that I didn't need.

Parts I ordered that I didn’t need. Save for next time.

BUSY TEACHING A LESSON

I forgot to take pictures of replacing the thermostat because I was busy explaining to my 10 year old son the idea of the Scientific Method in trouble shooting, changing one variable at a time to be able to isolate the effects on any given change.

Here' s the one that was in there, a no frills unit.

Here’ s the one that was in there, a no frills unit.

SIGHTING INSIDE THE UPPER TANK

With the coolant drained from the radiator, I could see I have a 3 core/row radiator and gunk covering or partially covering every down tube I can see from the opening.

Not good, though a probable indication where the problem is. The last time I sighted the upper tank channels I didn’t see this crud. After an experience like this, that coolant (what ever I am going to use) is going to be changed more often.

Yuk! This looks like chit.

Sighting into my rad after draining the coolant. Yuk! This looks like crud.

I took a small pick to check the consistency of the crud stuck in the upper channels and it breaks apart like mineral sediments despite the gooey looking appearance. Geez, that looks nasty.

.

440 IS STILL LOSING ITS COOL

I took the car out for a drive around town and out on the highway and  I could sense even around town the temperature was slowly rising. By the time I made a high speed pass on the highway, the temperatures went high out of the “normal” temperature zone.

With the temp needle out of range and getting hotter as I approached my driveway, I started smelling what reminds me of overheated electrical or burnt electrical motor windings. Not sure what the source is but I’ve noticed the smell a couple times now when the engine gets too hot, hot enough to fill up my overflow unit to maximum capacity.

.

SIMPLE TO REMOVE MANUAL TRANNY RADIATOR in your E-BODY

So I proceeded to take my radiator out to clean it. Removing the radiator on an old Ebody especially with a manual transmission (no tranny lines) is pretty simple. Removing the battery and washer bottle allows easy access to the four screws that mount the radiator tot he frame and then you can remove the four clips that hold the shroud to the radiator.

Removing the lower hose (after draining coolant) is easier if you remove the attachment to the water pump first, then using a blunt pointed object, push the lower hose connection off the lower radiator outlet as the coolant lubricates the operation.

Before lifting radiator out of car disconnect fan shroud and place protection like a fender cover over fan to avoid accidentally damaging radiator fins on fan blades.

Disconnect the fan shroud from the radiator and you do not need to remove the fan. Protect the radiator during lift out by placing a protective material (fender cover) to prevent gouging your radiator with the fan blades. Remove lower hose before lifting radiator out.

Disconnect the fan shroud from the radiator and you do not need to remove the fan. Protect the radiator during lift out by placing a protective material (fender cover) to prevent gouging your radiator with the fan blades. Remove lower hose before lifting radiator out.

I flushed out the residual coolant in preparation for cleaning.

I flushed out the small amount of residual coolant in preparation for cleaning.

 IS RODDING RADIATORS A THING OF THE PAST?

Well…. it depends who you talk to when you pickup the phone.

I made a couple of calls this morning to get a recommendation to get the radiator rodded out, but have not found one yet. One guy said this isn’t done much any more due to toxic materials. Not sure about that.

I spoke with another guy I’ve worked with and having some experience with restored cars was able to recommend a couple of radiator shops which I will keep in mind if I want to recondition my radiator. It certainly ought to be cheaper that buying a new radiator and the fit will be without question.

A sight at the lower tank and the bottom of the channels shows no indication of crud build up, so I am going to try loosening the crud at the top with distilled white vinegar (as suggested by my friend Jeff Marcey who lives in a hard water paradise).

.

NON-TOXIC CLEANING TECHNIQUE -DISTILLED VINEGAR and DISTILLED WATER

instead to taking my radiator to get rodded out,  I went to the local grocery store and got what I needed to try the poor man’s approach to dislodging the mineral/crud buildup at the top go the radiator channels by using distilled water and distilled white vinegar. I’ve read using anything from full strength to 1 part vinegar to 4 parts water mixture. I suppose it depends how long you want to leave your parts soaking.

rad_cleaners

High Tech Materials from the local mexican grocery store

I’m trying laying the radiator flat and using boiling hot distilled vinegar water and soaking overnight, then draining (careful to notice any sediment or debris)  flushing out with the water hose and then rinsing out with distilled water. Inspect the upper channel crud level and repeat if necessary.

.

WHAT COULD BE NEXT?

I would be nice if this works. BUT If there isn’t a dramatic improvement, I’ll have to think about what is next. Do I find a shop to rod out the radiator or go a for 4 core radiator for insurance and upgrade?

rad_hotH20

Using kitchen appliances for quick boiling of NON-TOXIC radiator cleaning solutions.

I just needed something to plug the overflow hole so my vinegar solution didn't drain on the ground.

Other use for overflow unit. I just needed something to plug the overflow hole so my vinegar solution didn’t drain on the ground. Looks like an IV.

BAKING SODA versus WASHING SODA

I’ve read people using an aftermarket flush or Arm and Hammer WASHING SODA (NOT baking soda) to neutralize the vinegar acidity. I suspect the rinsing qualities of Washing Soda is better. Maybe it’s finer, I don’t know. I’ll look for some the next time I’m at the store. I like these non-toxic ideas.

.

BONUS – TALK

MUSING ABOUT GANO FILTERS

A word about GANO filters. GANO filters are a novel product that you install in the upper radiator hose. You need to cut a hose and  clamp the cut ends on the ends of a this clear plastic device with a wire mesh screen that traps crud coming from the engine before  it gets trapped in your radiator. It’s a great idea but let me suggest an idea way to use it based on my experience.

I ran one of these on my open track Mustang but it cracked at the track and I had to take a spare hose from a fellow tracker and replace my upper hose. What I may do later is buy a new cheap radiator hose and put a GANO filter on it and then run it long enough to catch any crud in a period after flushing the system after putting a new or cleaned out radiator in.

For long term reliability, I would install the regular Mopar upper hose. The last thing I need is getting stranded on a highway with a busted GANO filter.

I did look at the GANO website and they offer strong non-plastic versions but naturally, you will need to disconnect your radiator hose to see what the crud condition is.

*

If you enjoyed this post, please LIKE SHARE COMMENT

The Dodge Kid in his youth about 1976. I think I wore this hat everyday through my Freshman year in high school. Photo by Nick Yee

The Dodge Kid in his youth about 1976.

Copyright © 2014 ChallenYee.com. TheDodgeKid.com  All Rights Reserved.

Simmering over 440 overheating issues

Mo-Ideas about heated issues – part 1


Some random thoughts in no specific order related to high speed overheating of my Challenger since I got it back from the shop.

There’s two things I wish they didn’t mess with, one is change my old thermostat in the process of detailing my engine and the other was change my ignition timing when they were trying to get it to idle (what was needed was  to adjust/richen the outboard idle mixture screws). Messing with only one system at a time helps troubleshooting. Oh well, make the best of it. Before I had no overheating problems and I didn’t back fire through the carb at all.

Through tweaking the carbs and timing, I’ve been able to drive the car harder with almost no popping out the carb, but accelerating under load can still cause a pop or multiple pops, oddly enough, about once per drive, if I jump on it.

The cooling problem only occurs if I get into high RPM’s for a couple of sustained runs (usually hard acceleration) – then I watch the temp gauge drift higher out of the normal range which does not cool off until i park the car. The car runs well (doesn’t start high temp knocking), but I take the Challenger back home not tempting fate with it boiling over on the road.

.


BULGE HOODS NON-FUNCTIONAL or FUNCTIONAL? 

Getting more air flow – Every little bit helps.

Just incase you were wondering, the bulge hoods as they come of the showroom floor are non-functional. However, with a phillips screwdriver, you can remove the outer sheet metal covers and allow air to stream into the dual scoops.

Behind the scoops under the hood are plastic diverters that allow air to slip over and into the engine compartment, but will catch water and route it off laterally to drip rails on the inside of the bulge.

For a cooler look, you can get some black touch up paint and help blackout the screw tabs if they are the same color as your body to make them less conspicuous.

In this close up of the R/T hood scoop, you can see how the Factory set them as "non-functional" bulge hood.

In this close up of the R/T hood scoop, you can see how the Factory set them as “non-functional” bulge hood.

With the flip of your Phillips Screwdriver, you can remove the metal plates that block the opening that keep the low flying birds from getting sucked in and have a functioning ram air bulge hood.

With the flip of your Phillips Screwdriver, you can remove the metal plates that block the opening that keep the low flying birds from getting sucked in and have a functioning ram air bulge hood.

Here is the under hood look at what is behind the hood scoop. You see a water deflector which allows air to pass over and directs water (and air) laterally to a hood rail.

Here is the under hood look at what is behind the hood scoop. You see a water deflector which allows air to pass over and directs water (and air) laterally to a hood rail.

If I were to cut a perfectly good piece of sheet metal (which I will not), the back o fthe bulge would be a nice customization spot to vent a hot engine compartment.

If I were to cut a perfectly good piece of sheet metal (which I will not), the back of the bulge would be a nice customization spot to vent a hot engine compartment.

.

BULGE HOODS (continued)…

The reason I started looking at simple ways to get the under hood temps cooler is ever since I got my car back from the shop it’s been running hot after high speed runs (at least above 4000-4500 RPM). The guys at the shop replaced the thermostat in the process of detailing the engine. At low and moderate speeds the engine runs at a reasonable temp (according to my dash temp gauge) where coolant does not overflow when I stop the engine.

.

MILODON HI FLOW THERMOSTAT ON ORDER

We used a 180 deg thermostat, which is okay, but I’ve ordered Milodon Hi Flow unit along with FLUKE 62 MAX laser thermometer to see what the actual temps are on the engine and radiator (and on our kitchen frying pan!). I plan to replace the thermometer as well as check for any surprise objects that might be under or interfering the thermostat operation.

.

WHAT ABOUT REDLINE WATER WETTER?

I also plan on draining all the coolant and run 100% distilled water plus RedLine Water Wetter, which you must run if you run only water in order to lubricate the water pump and also help bring the coolant temps down more.

I ran this coolant setup on my 1965 Mustang that I used for open track. The other cool benefit from running only water for coolant is if you spew water, it doesn’t become a green toxic track mess. Open track coolant spills are a pain requiring special cleanup procedures, but if you’re just running a water and Water Wetter… no problem, it just needs to evaporate! It’s important that you change the coolant every year, because I’ve heard that old Water Wetter can begin gumming up your cooling system.

Changing coolant becomes less of an issue since draining water (with a little Water Wetter) is more ecologically safe compared to GREEN coolant. (At least I think so!).

.

THOUGHTS ON CARB JETTING

If the above ideas don’t help cool down the engine enough, I’ll need to check the plugs and see if the engine is running too lean. I retarded the timing from 36 to 34 degrees Total advance and I still have a problem. Running richer jets, will have some effect on engine temp also. I believe the stock jets on the primary carb are #62’s and I have a spare set of #64s and #66s.

Actually, I’ve run variations of jet sizes in my Mustang and have run timing off, and I don’t remember having to worry about overheating, but every little idea helps (and will make the engine run stronger).

For right now, it’s easier to check the thermostat, change the coolant and look for obstructions.

.

Here's a close up of my steel fan and clutch and fan shroud connected to a 4 core steel radiator.

Here’s a close up of my steel fan and clutch and fan shroud connected to a 4 core steel radiator.

My O'Reilly Auto Parts Special. Before I put this in, my engine would spew coolant, now even with the engine getting excessively hot after high speed driving, the large can size is just large enough to catch the whole burp. Good thing I decided to by the larger overflow "can"

My O’Reilly Auto Parts Special. Before I put this in, my engine would spew coolant, now even with the engine getting excessively hot after high speed driving, the large can size is just large enough to catch the whole burp. Good thing I decided to by the larger overflow “can”

.

RANDOM ODDs and ENDs

My car has a 3 core-copper radiator, offset-bladed fan with a clutch and fan shroud. No, I’d rather just keep the factory stuff and not have to run an aluminum radiator if I don’t have to (although as fellow Linkedin member Erik Kenny notes, these symptoms are hot for a clogged radiator).

I had added the coolant overflow kit  (the largest size available at your typical auto supply store) before this cooling problem and it’s a good thing, otherwise I’d have a driveway full of coolant every time I stop after a high speed highway drive. Right now it’s a self contained system that keeps all the overflow and sucks it back in when it cools down.


LASER CHECK YOUR BUTTERED EGGS, BEER and YOUR B-BLOCK MOPAR

I’ll give you guys an update after I  check the thermostat and laser check the cooling system and my fried eggs in butter. By the way, you shouldn’t heat butter over 350-400 degrees when cooking. The next time you come over for a beer you can borrow my laser thermometer to make sure you’re not over-nuc’ing your eggs or your MoPar.

*

If you enjoyed this post, please LIKE SHARE COMMENT

The Dodge Kid in his youth about 1976. I think I wore this hat everyday through my Freshman year in high school. Photo by Nick Yee

The Dodge Kid in his youth about 1976.


Copyright © 2014 ChallenYee.com. TheDodgeKid.com  All Rights Reserved.