Simmering over 440 overheating issues

Mo-Ideas about heated issues – part 1


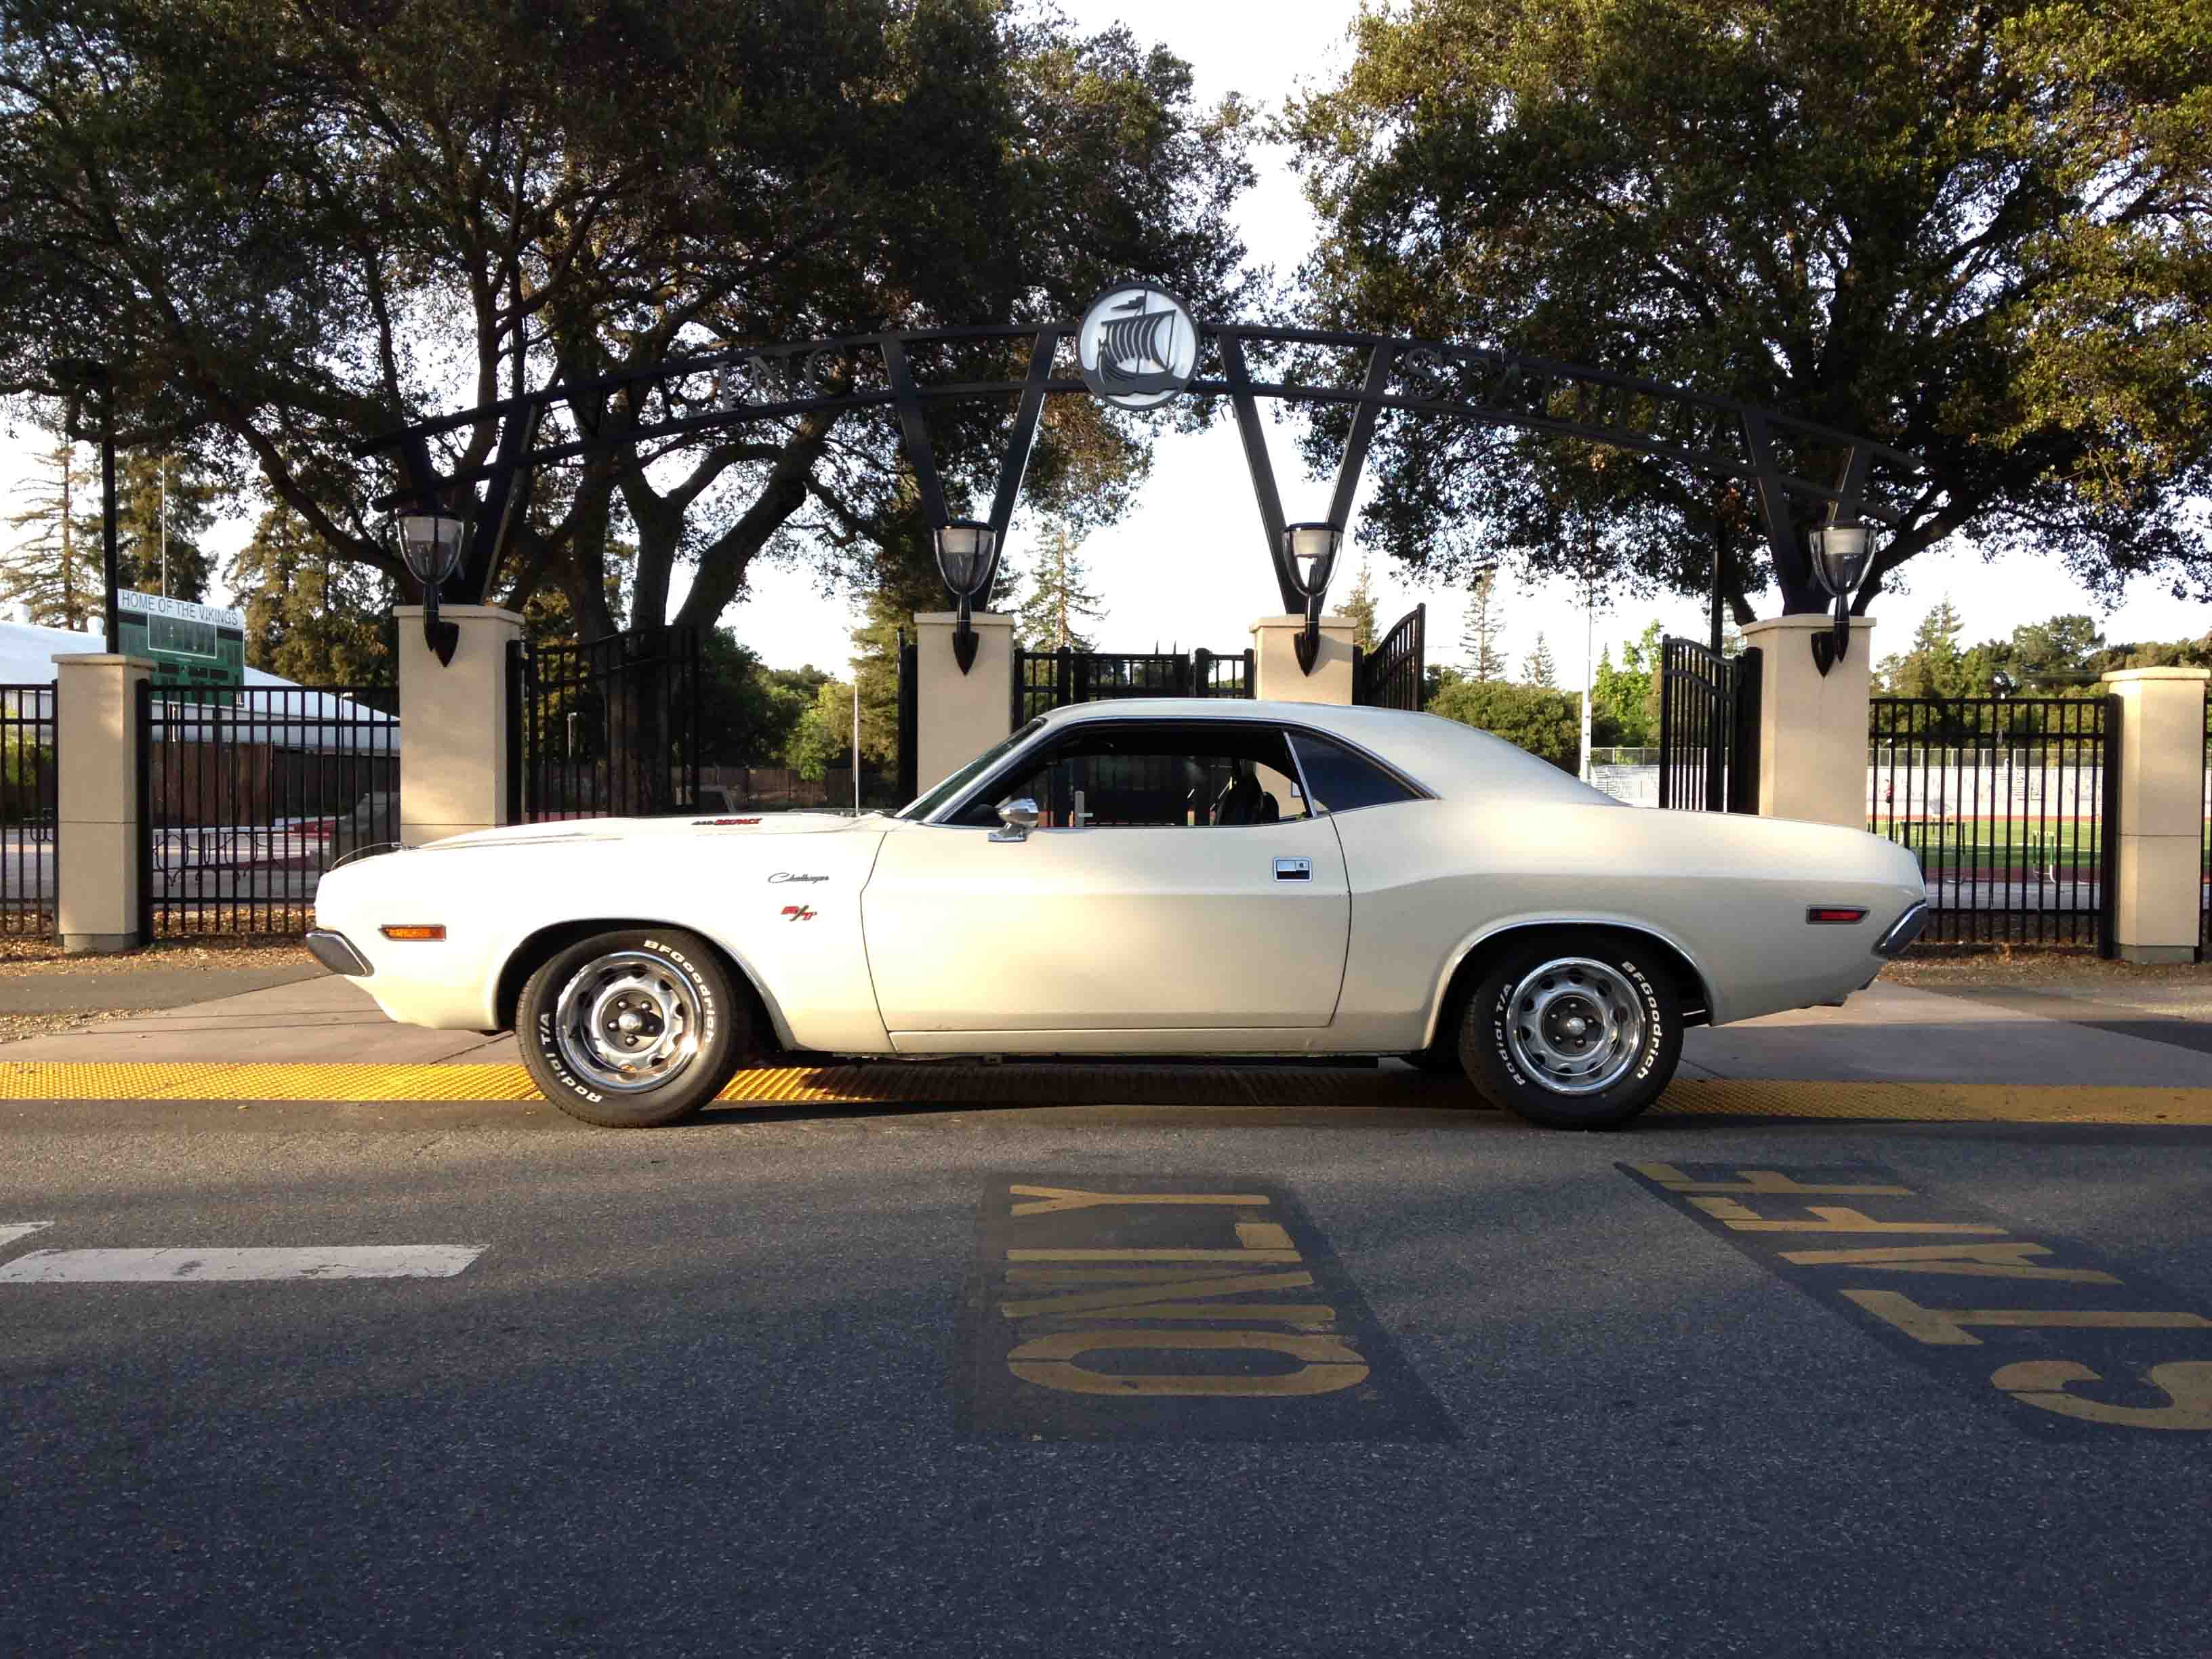
Some random thoughts in no specific order related to high speed overheating of my Challenger since I got it back from the shop.

There’s two things I wish they didn’t mess with, one is change my old thermostat in the process of detailing my engine and the other was change my ignition timing when they were trying to get it to idle (what was needed was  to adjust/richen the outboard idle mixture screws). Messing with only one system at a time helps troubleshooting. Oh well, make the best of it. Before I had no overheating problems and I didn’t back fire through the carb at all.

Through tweaking the carbs and timing, I’ve been able to drive the car harder with almost no popping out the carb, but accelerating under load can still cause a pop or multiple pops, oddly enough, about once per drive, if I jump on it.

The cooling problem only occurs if I get into high RPM’s for a couple of sustained runs (usually hard acceleration) – then I watch the temp gauge drift higher out of the normal range which does not cool off until i park the car. The car runs well (doesn’t start high temp knocking), but I take the Challenger back home not tempting fate with it boiling over on the road.

.


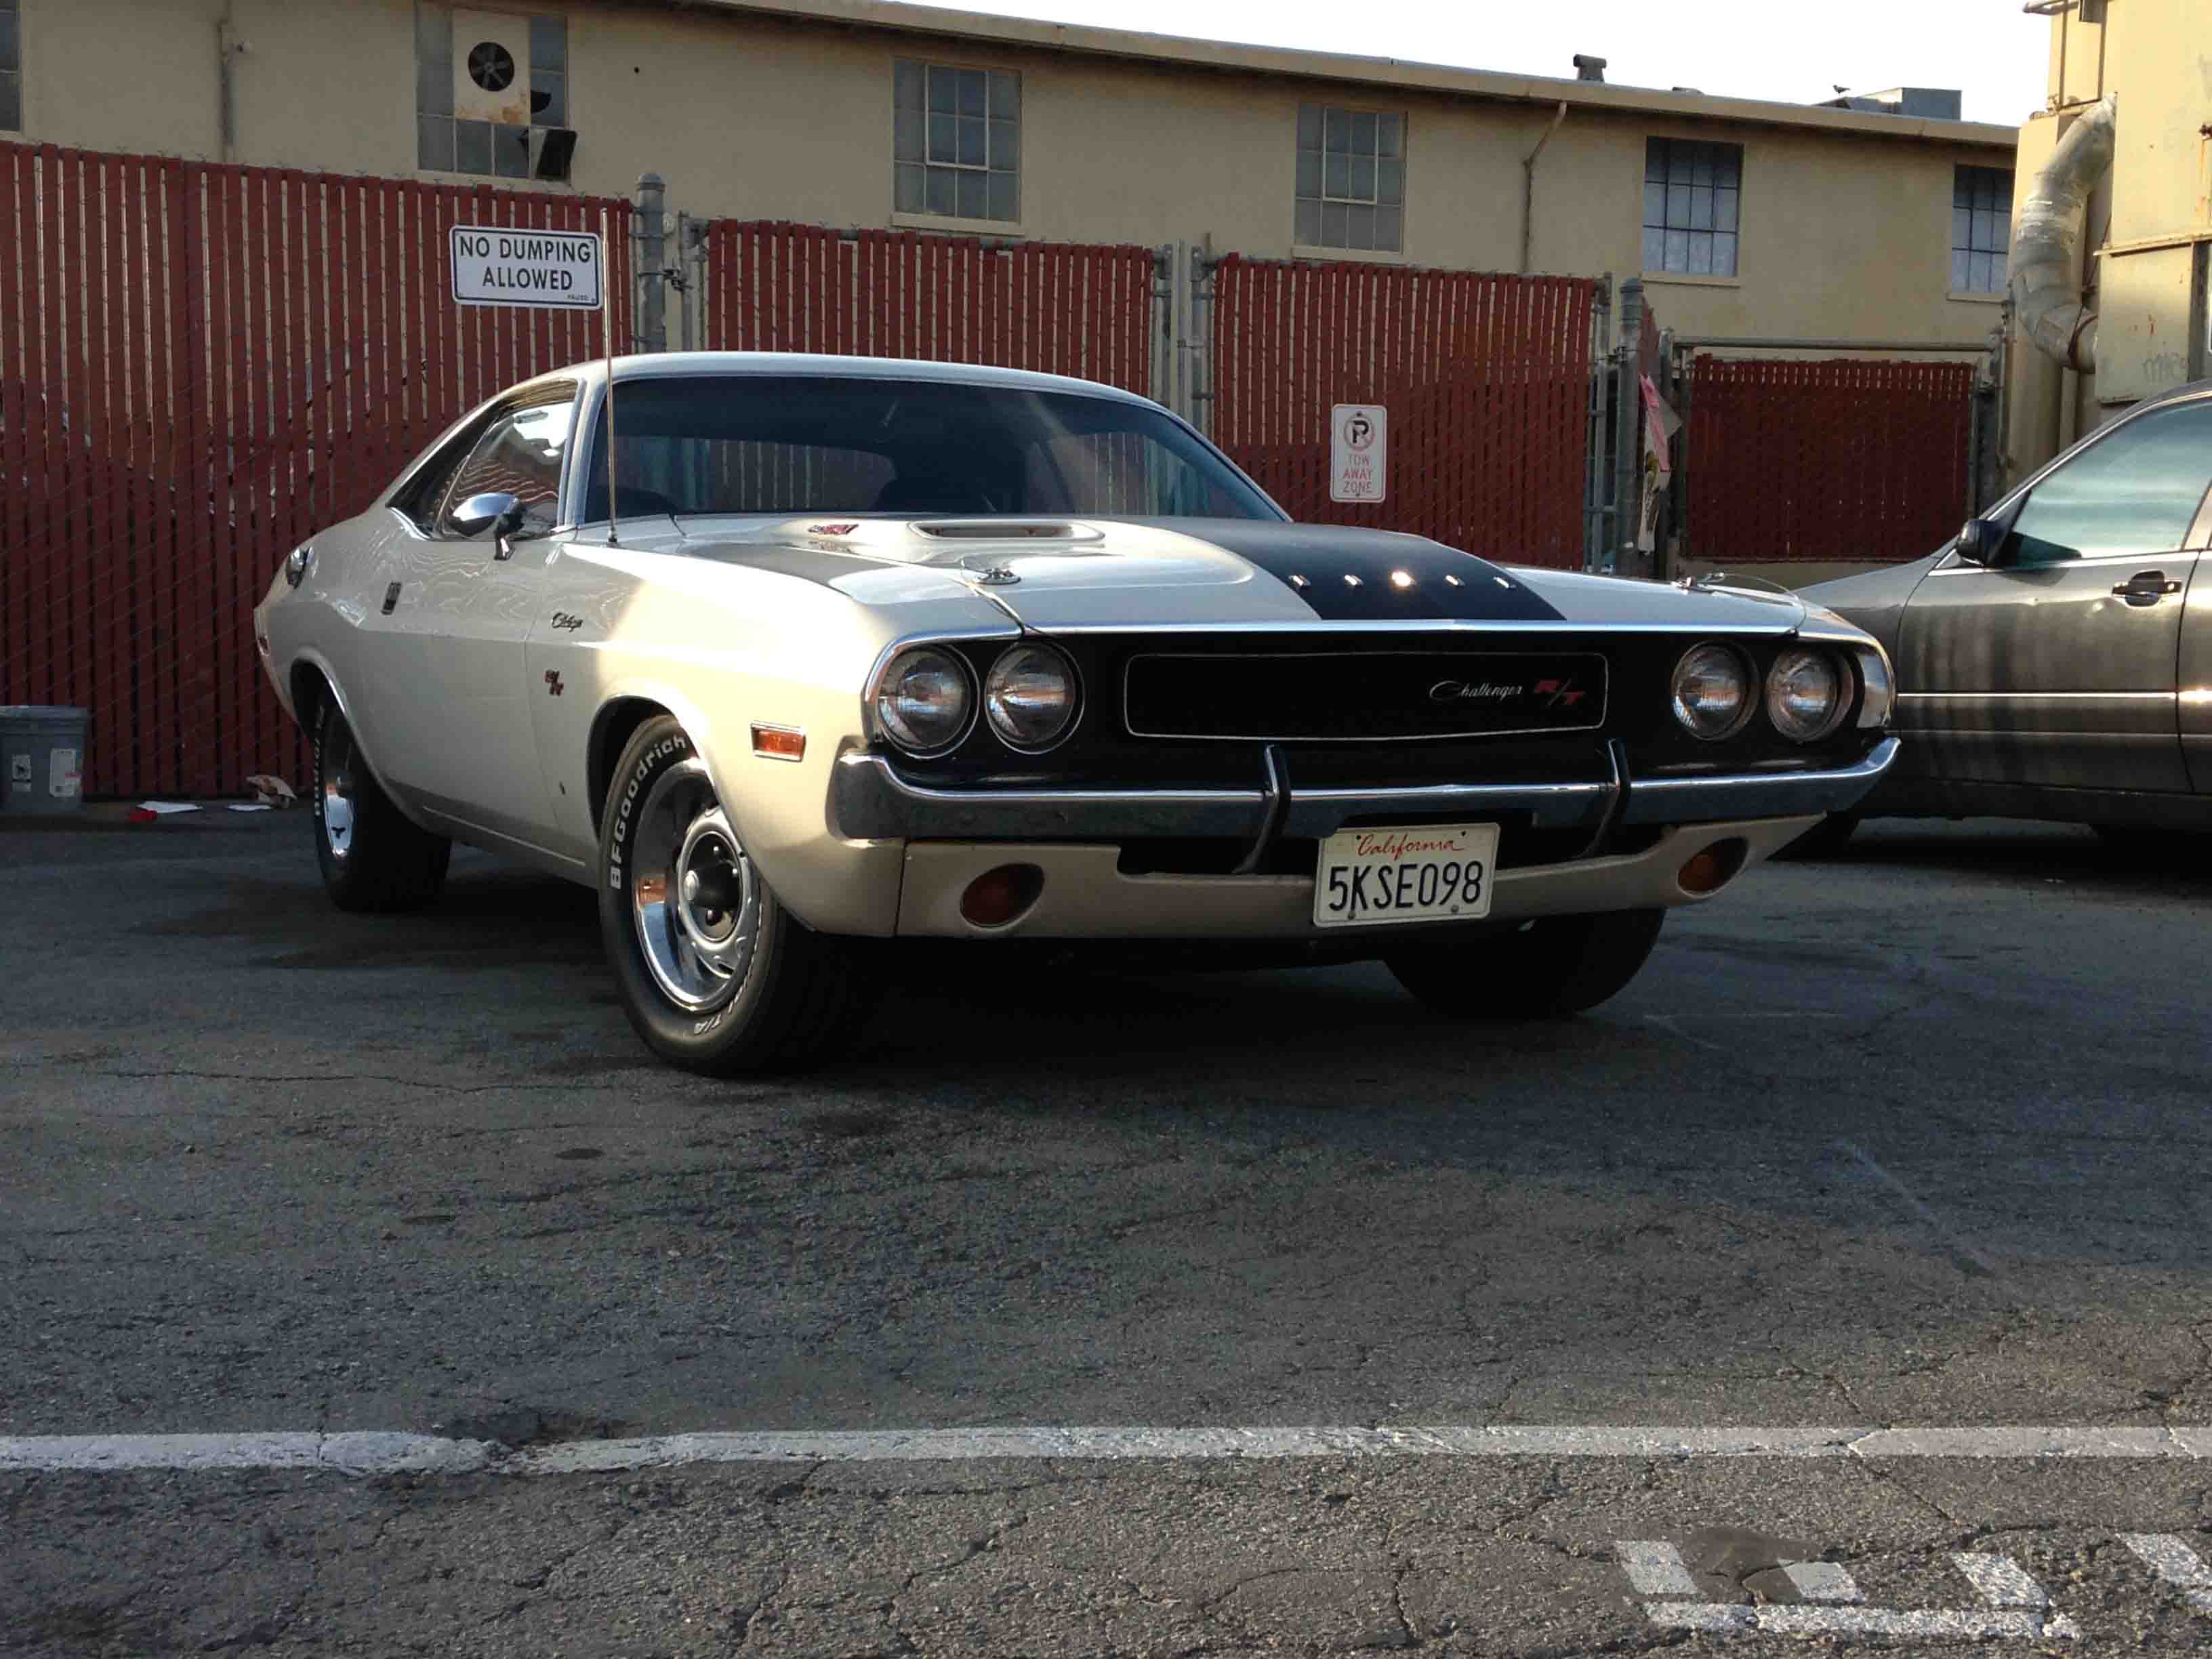
BULGE HOODS NON-FUNCTIONAL or FUNCTIONAL? 

Getting more air flow – Every little bit helps.

Just incase you were wondering, the bulge hoods as they come of the showroom floor are non-functional. However, with a phillips screwdriver, you can remove the outer sheet metal covers and allow air to stream into the dual scoops.

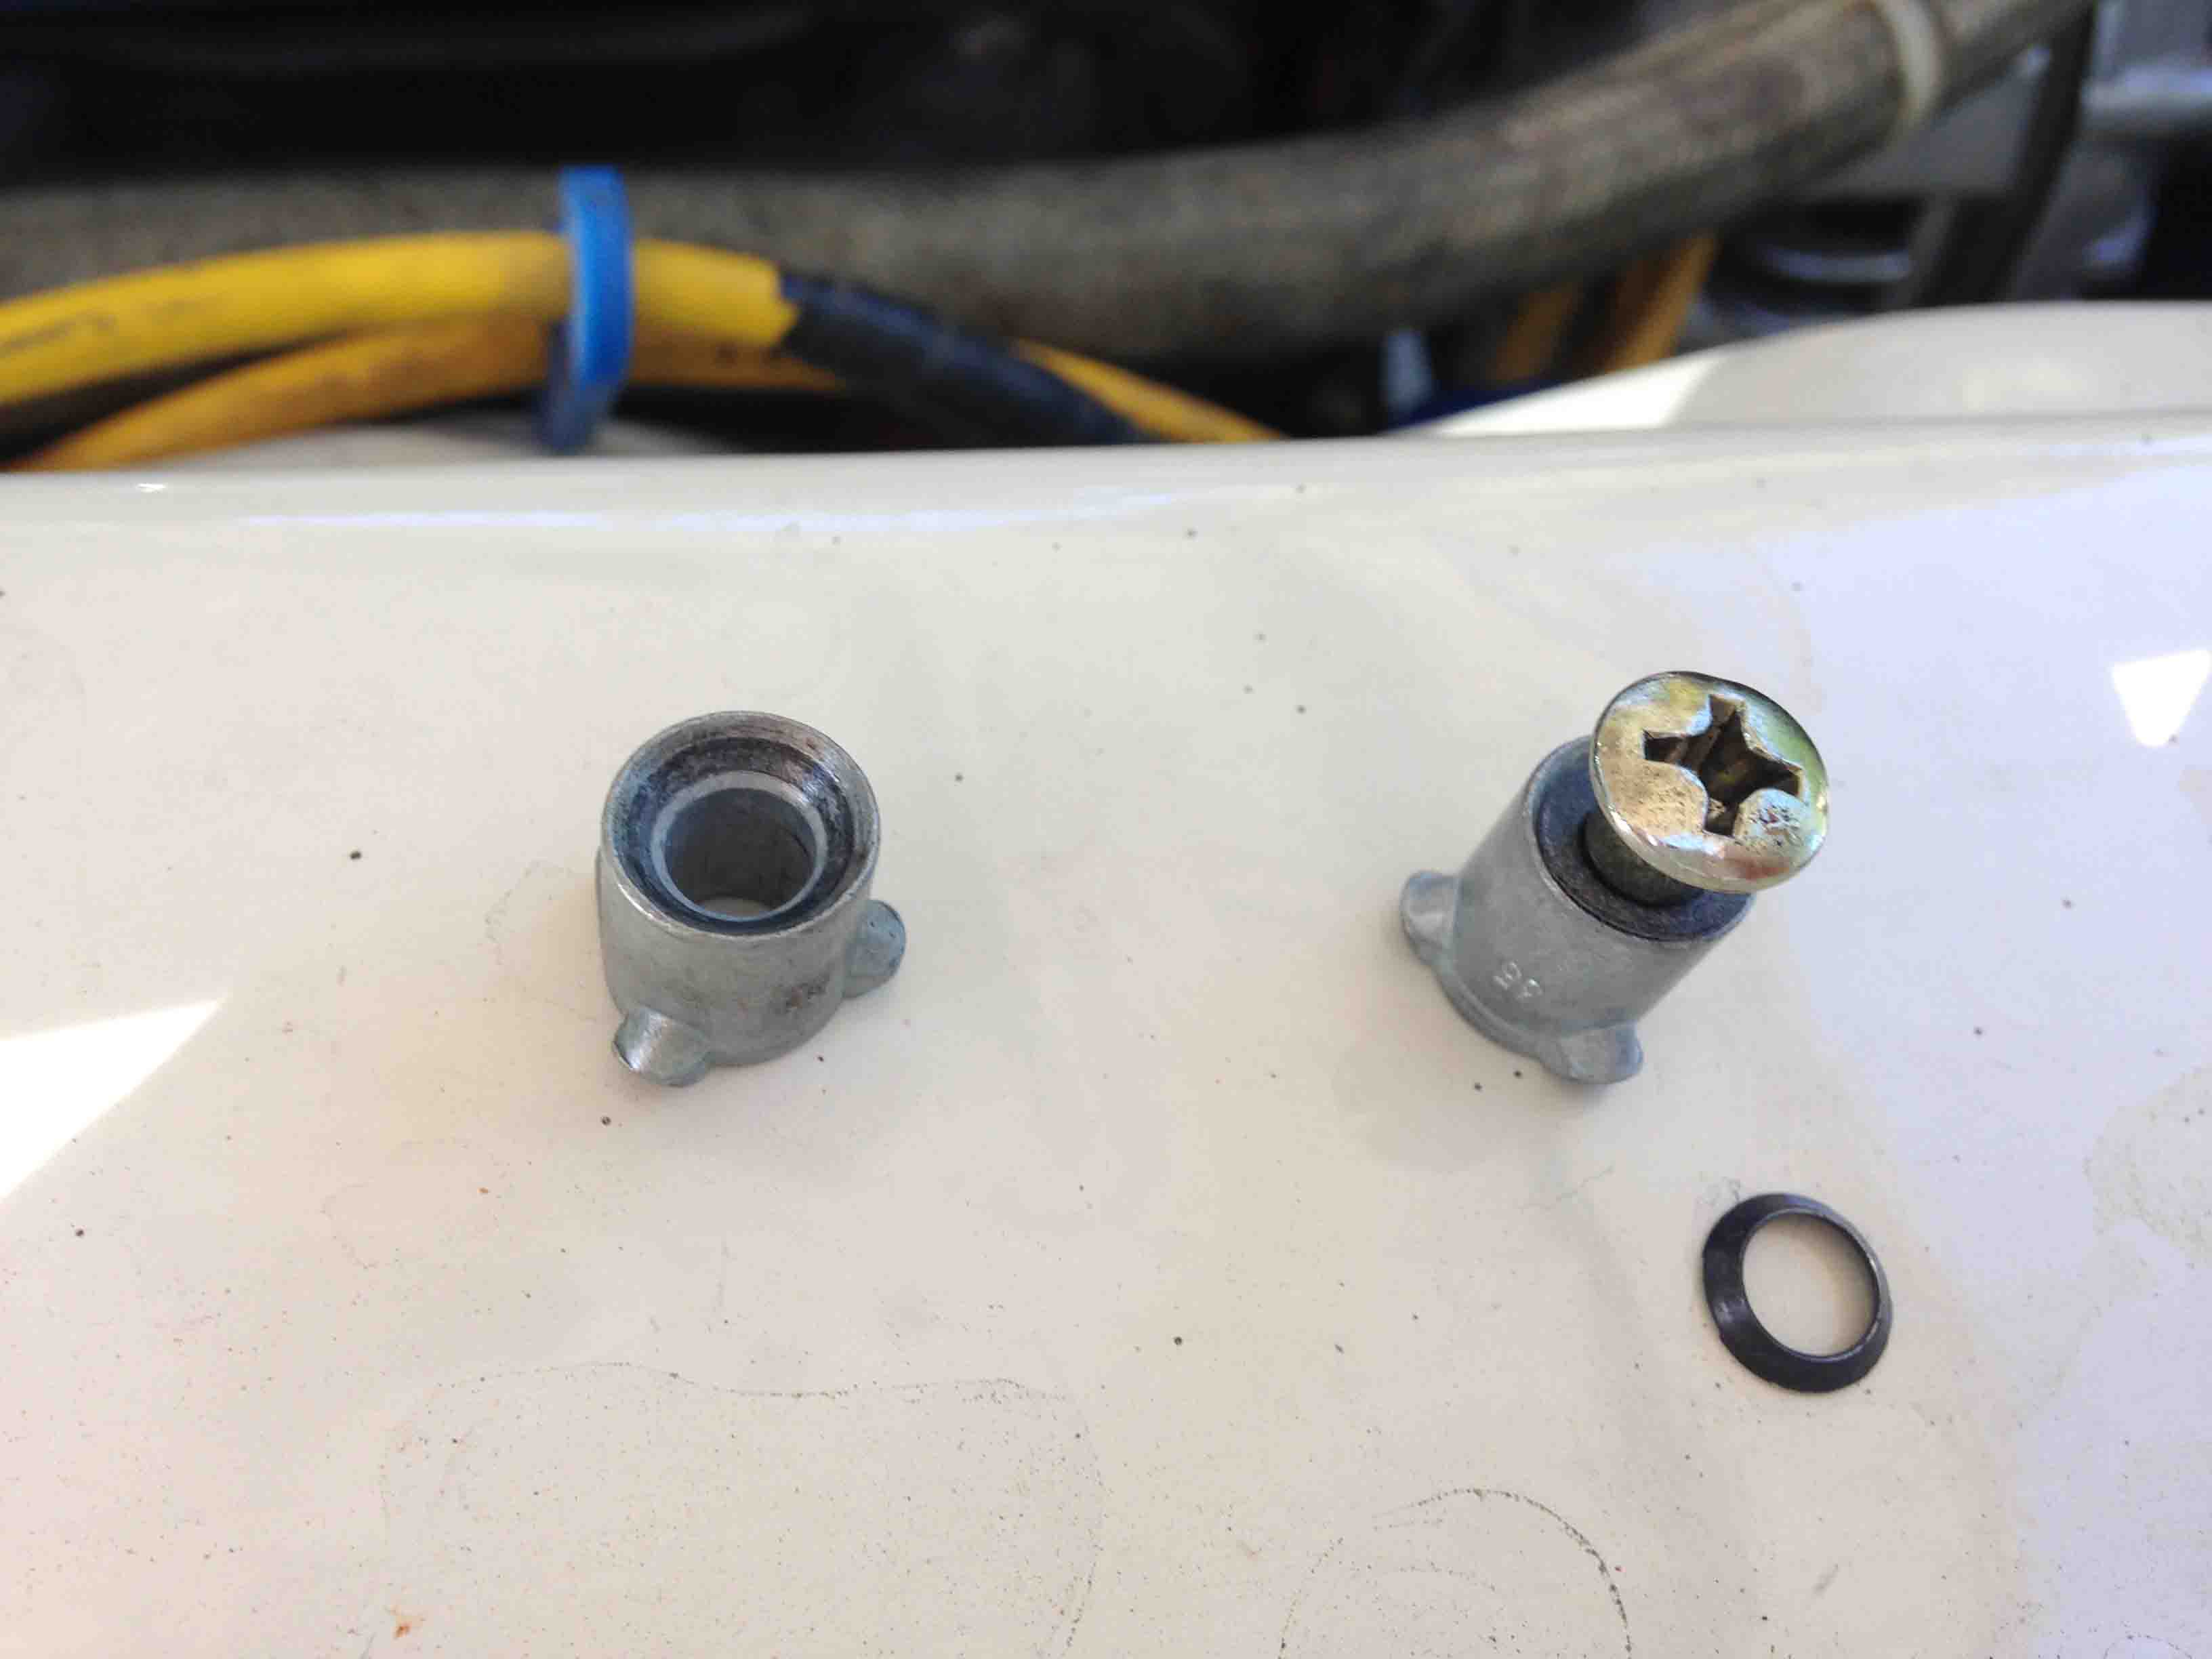
Behind the scoops under the hood are plastic diverters that allow air to slip over and into the engine compartment, but will catch water and route it off laterally to drip rails on the inside of the bulge.

For a cooler look, you can get some black touch up paint and help blackout the screw tabs if they are the same color as your body to make them less conspicuous.

In this close up of the R/T hood scoop, you can see how the Factory set them as "non-functional" bulge hood.

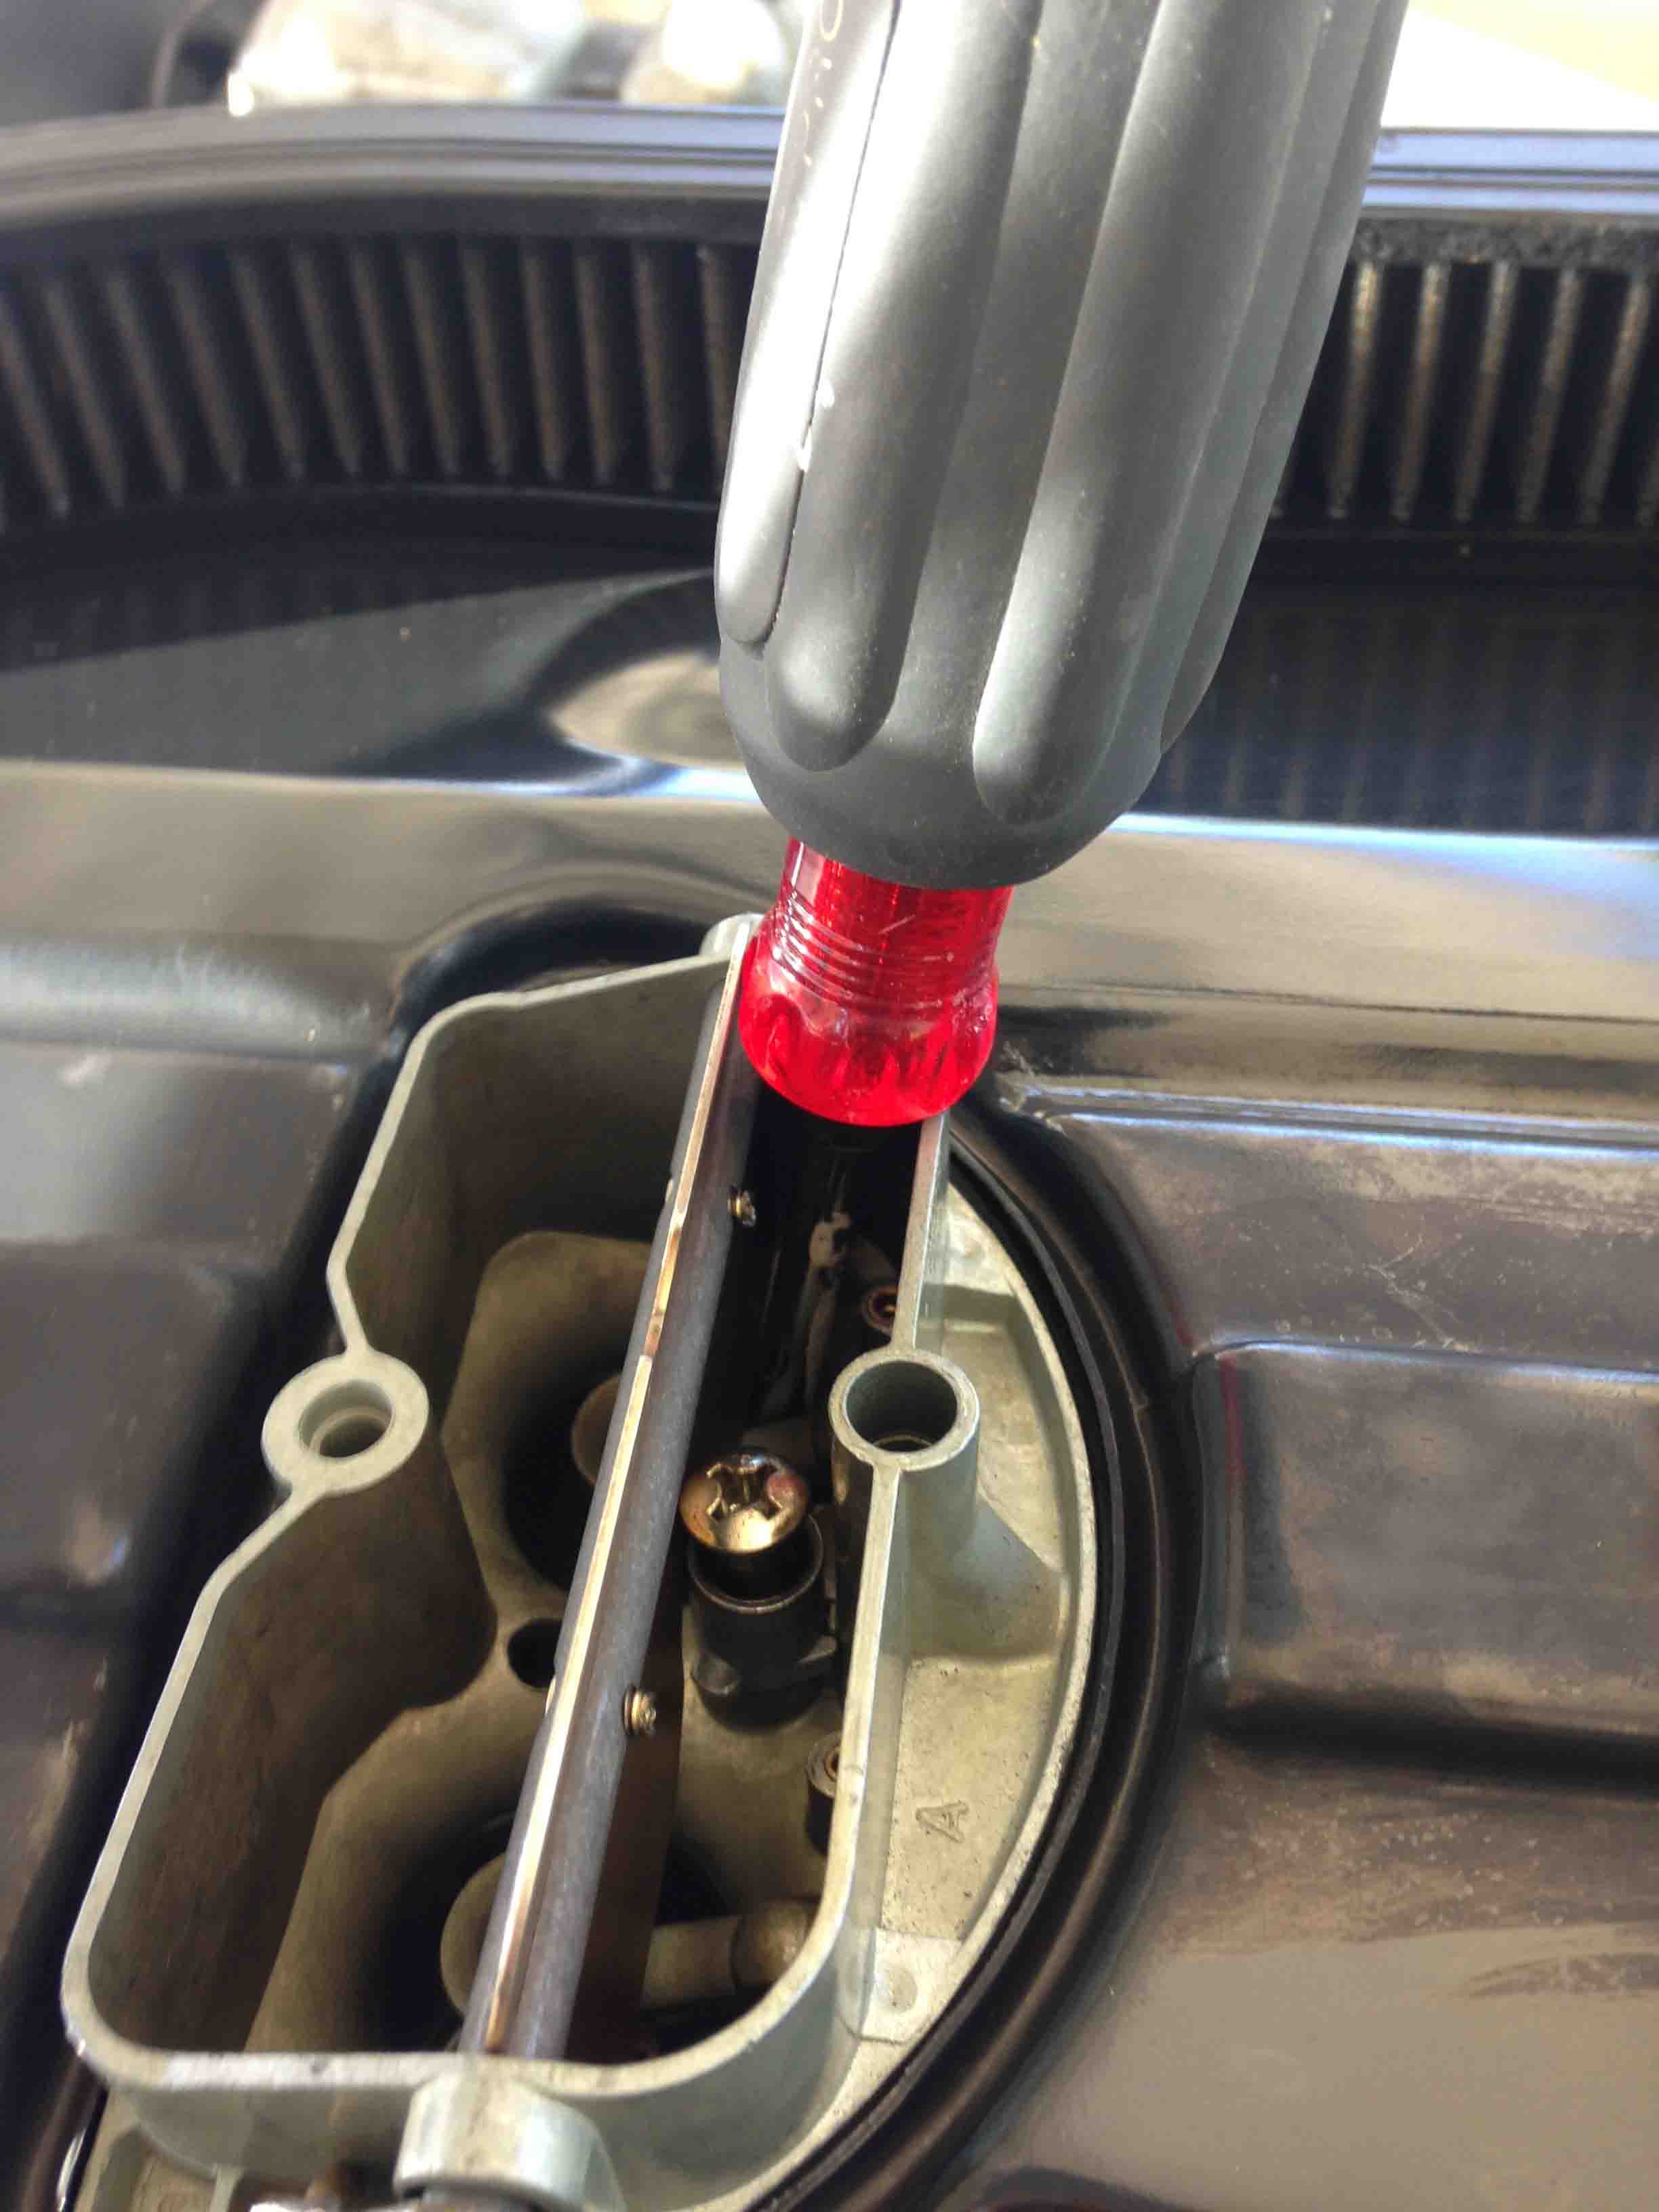
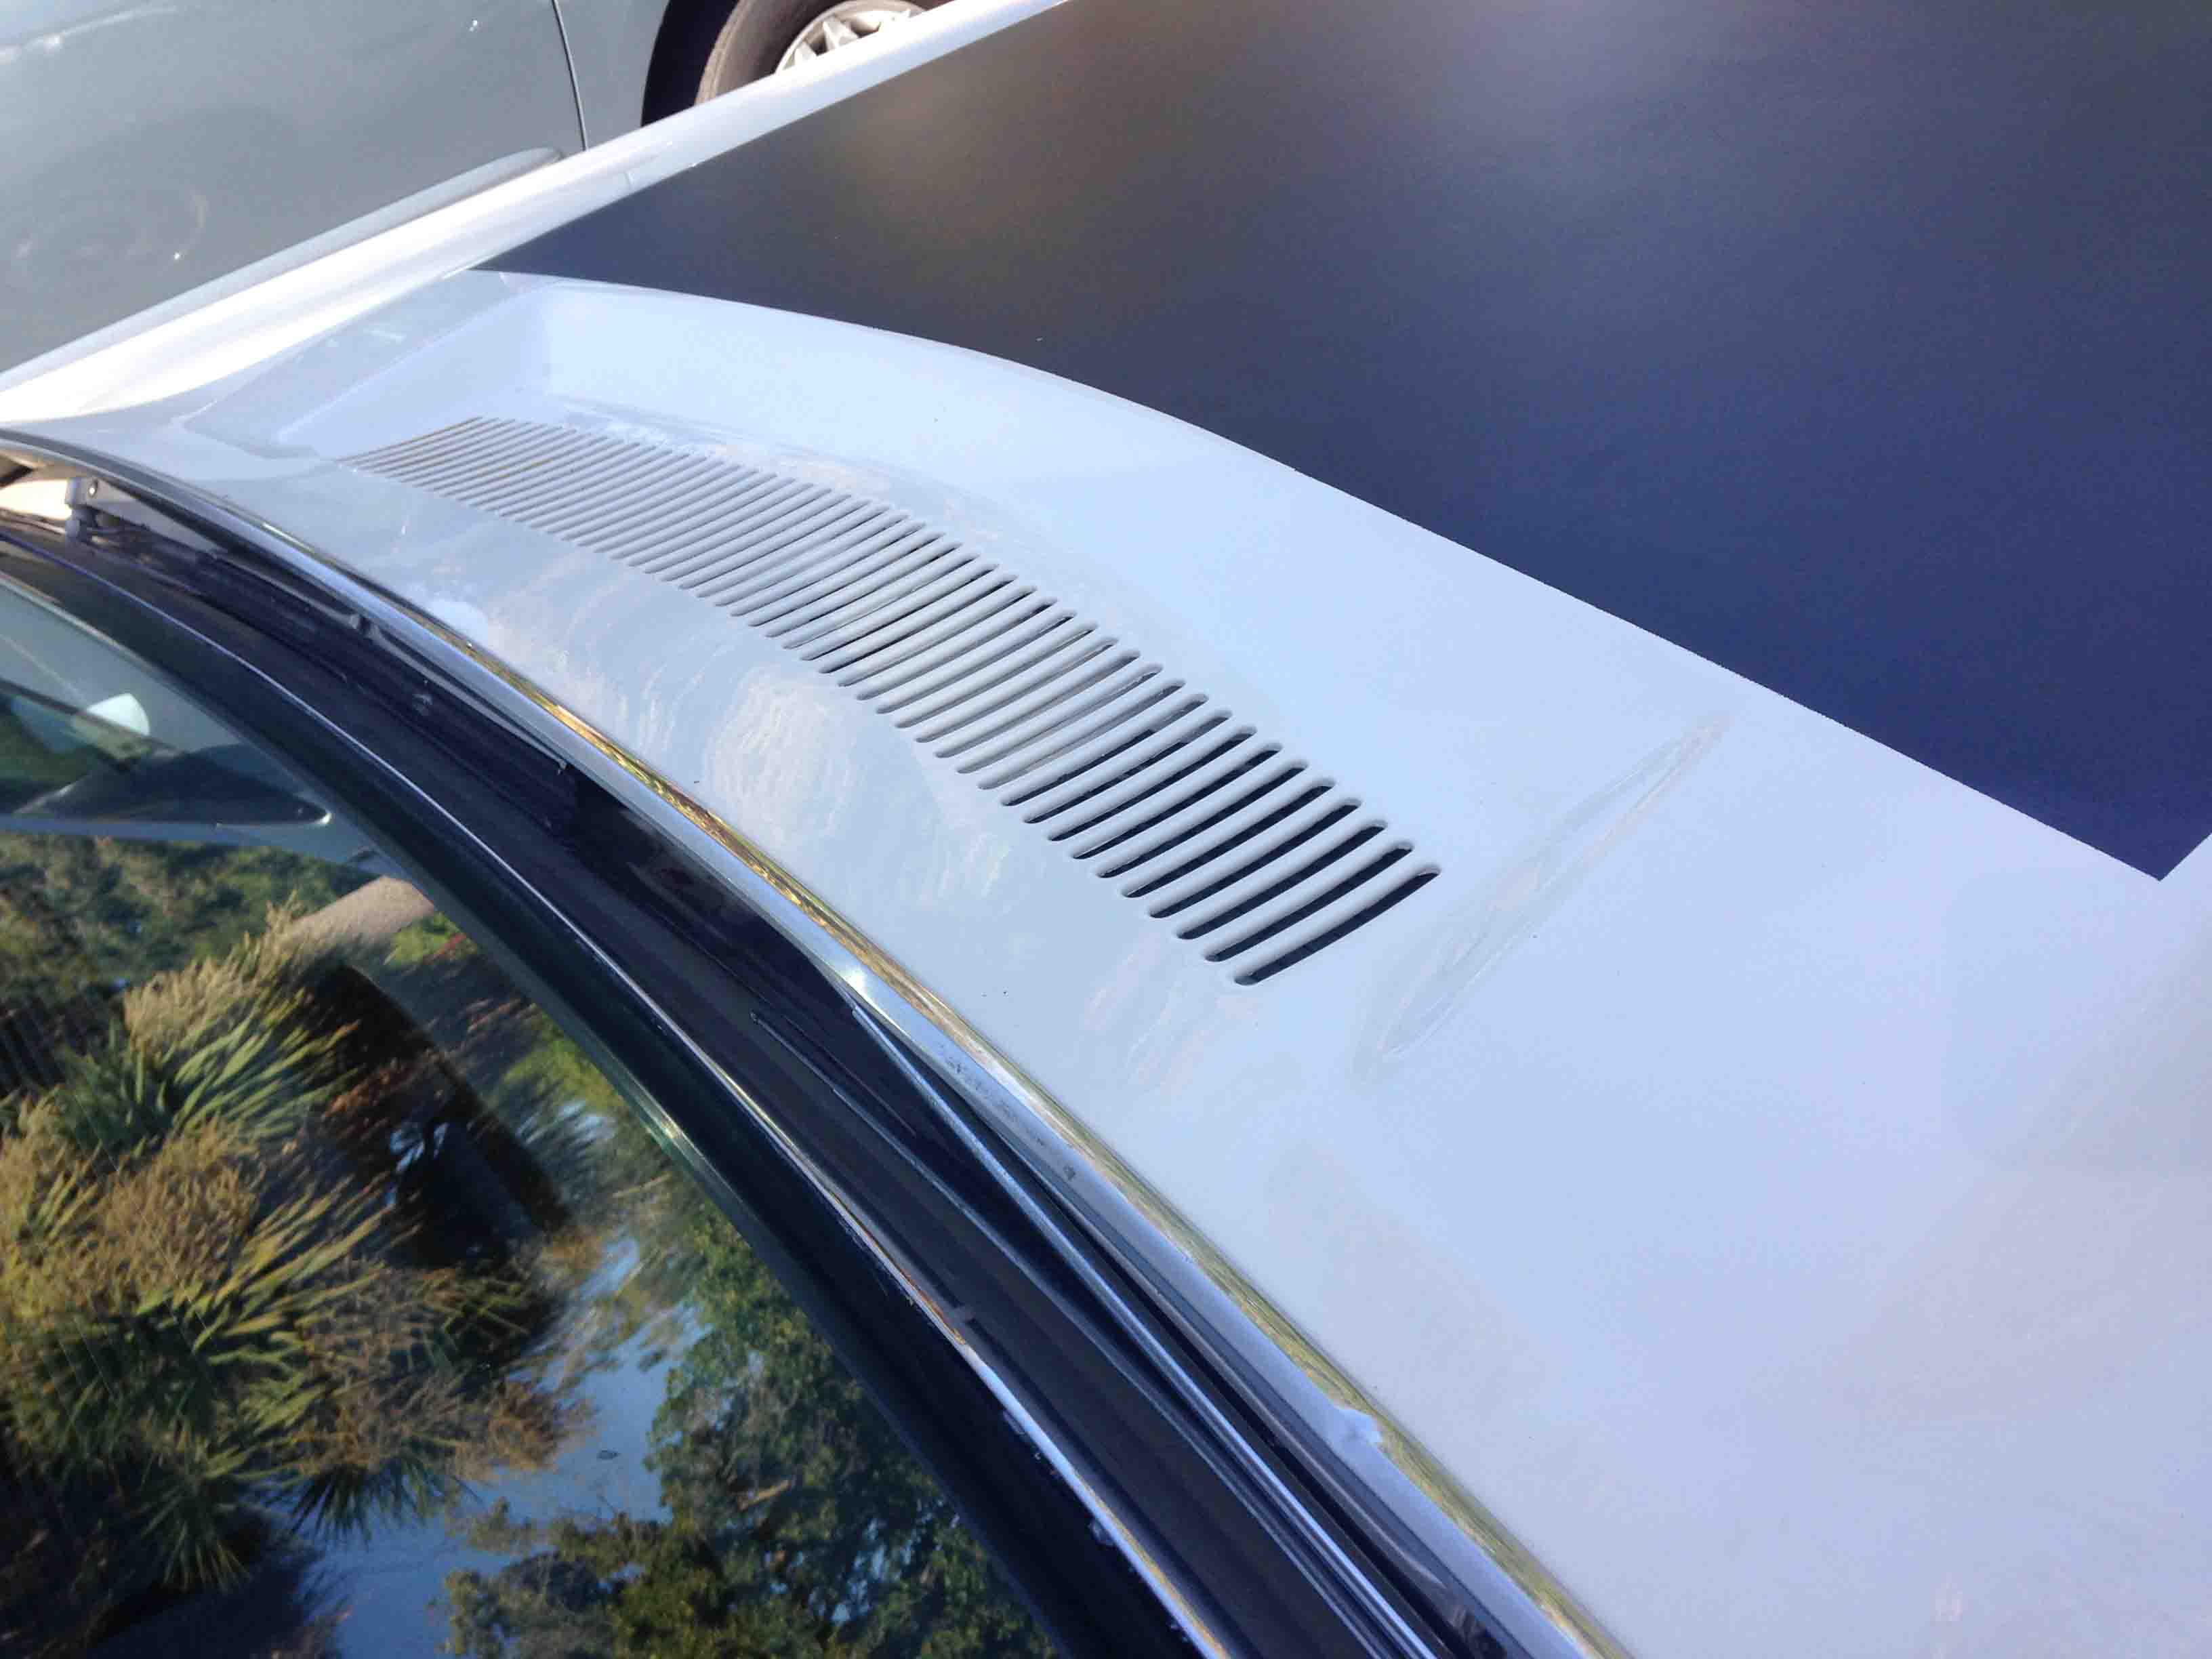
In this close up of the R/T hood scoop, you can see how the Factory set them as “non-functional” bulge hood.

With the flip of your Phillips Screwdriver, you can remove the metal plates that block the opening that keep the low flying birds from getting sucked in and have a functioning ram air bulge hood.

With the flip of your Phillips Screwdriver, you can remove the metal plates that block the opening that keep the low flying birds from getting sucked in and have a functioning ram air bulge hood.

Here is the under hood look at what is behind the hood scoop. You see a water deflector which allows air to pass over and directs water (and air) laterally to a hood rail.

Here is the under hood look at what is behind the hood scoop. You see a water deflector which allows air to pass over and directs water (and air) laterally to a hood rail.

If I were to cut a perfectly good piece of sheet metal (which I will not), the back o fthe bulge would be a nice customization spot to vent a hot engine compartment.

If I were to cut a perfectly good piece of sheet metal (which I will not), the back of the bulge would be a nice customization spot to vent a hot engine compartment.

.

BULGE HOODS (continued)…

The reason I started looking at simple ways to get the under hood temps cooler is ever since I got my car back from the shop it’s been running hot after high speed runs (at least above 4000-4500 RPM). The guys at the shop replaced the thermostat in the process of detailing the engine. At low and moderate speeds the engine runs at a reasonable temp (according to my dash temp gauge) where coolant does not overflow when I stop the engine.

.

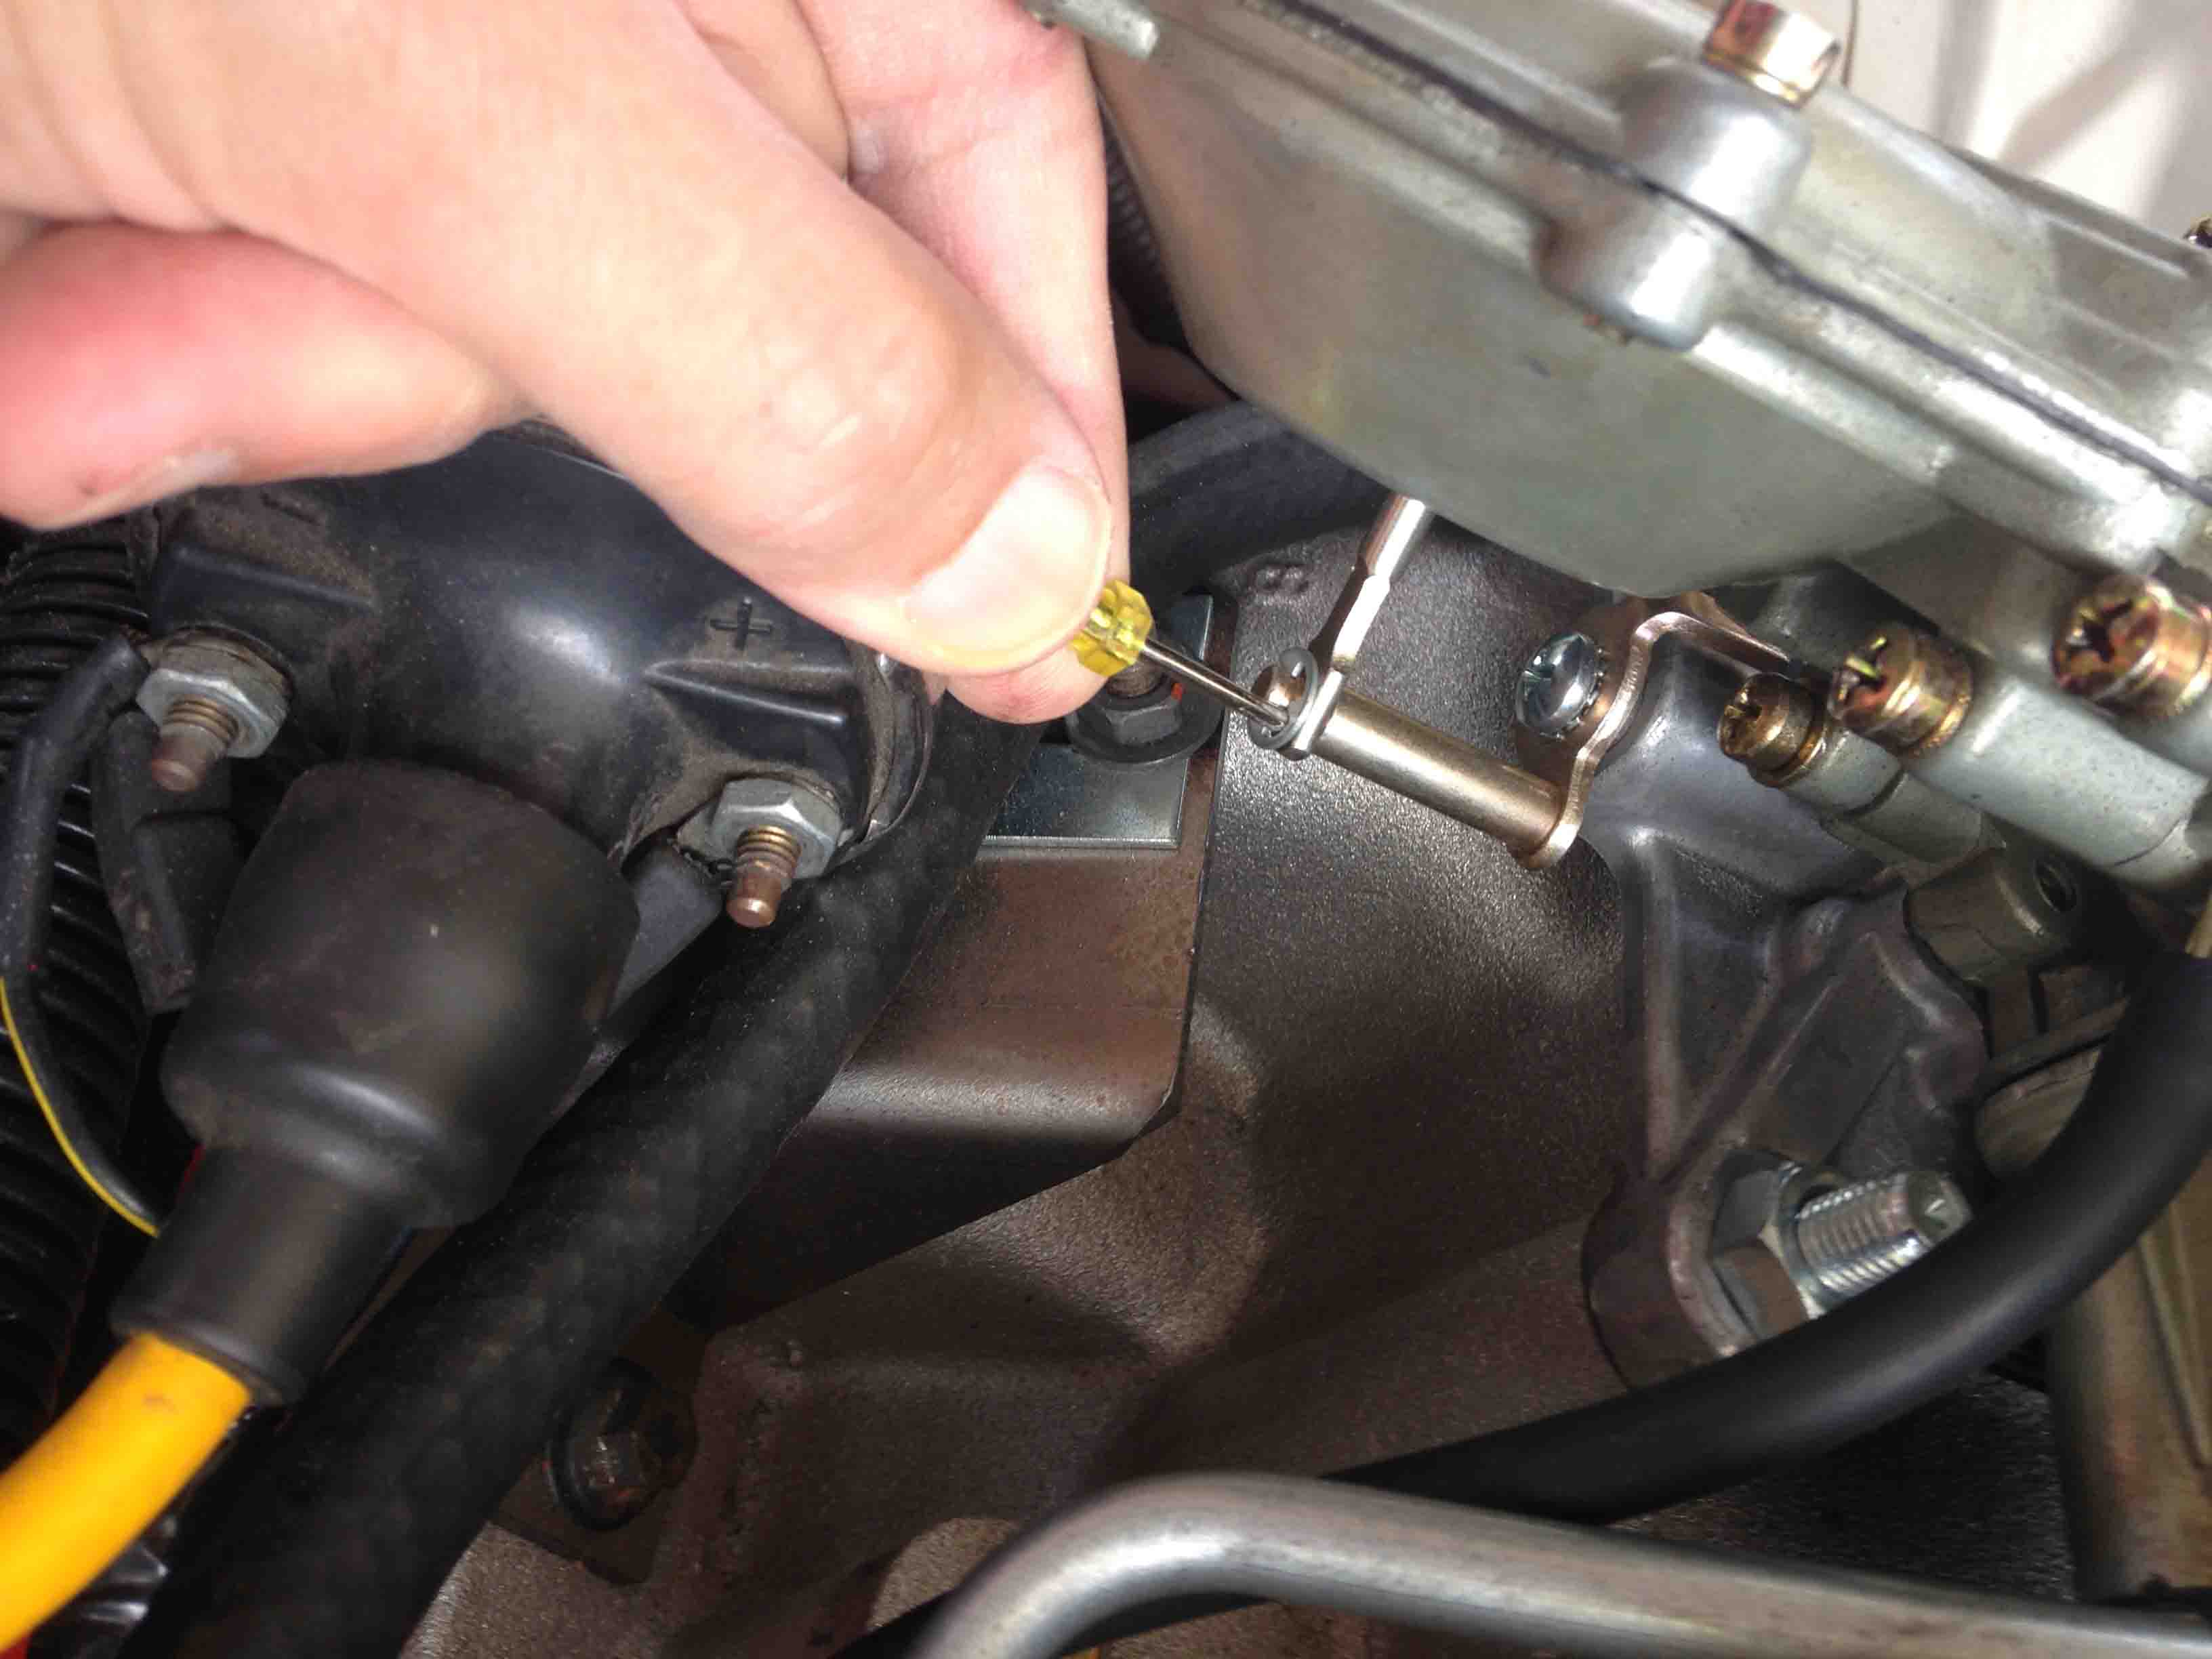
MILODON HI FLOW THERMOSTAT ON ORDER

We used a 180 deg thermostat, which is okay, but I’ve ordered Milodon Hi Flow unit along with FLUKE 62 MAX laser thermometer to see what the actual temps are on the engine and radiator (and on our kitchen frying pan!). I plan to replace the thermometer as well as check for any surprise objects that might be under or interfering the thermostat operation.

.

WHAT ABOUT REDLINE WATER WETTER?

I also plan on draining all the coolant and run 100% distilled water plus RedLine Water Wetter, which you must run if you run only water in order to lubricate the water pump and also help bring the coolant temps down more.

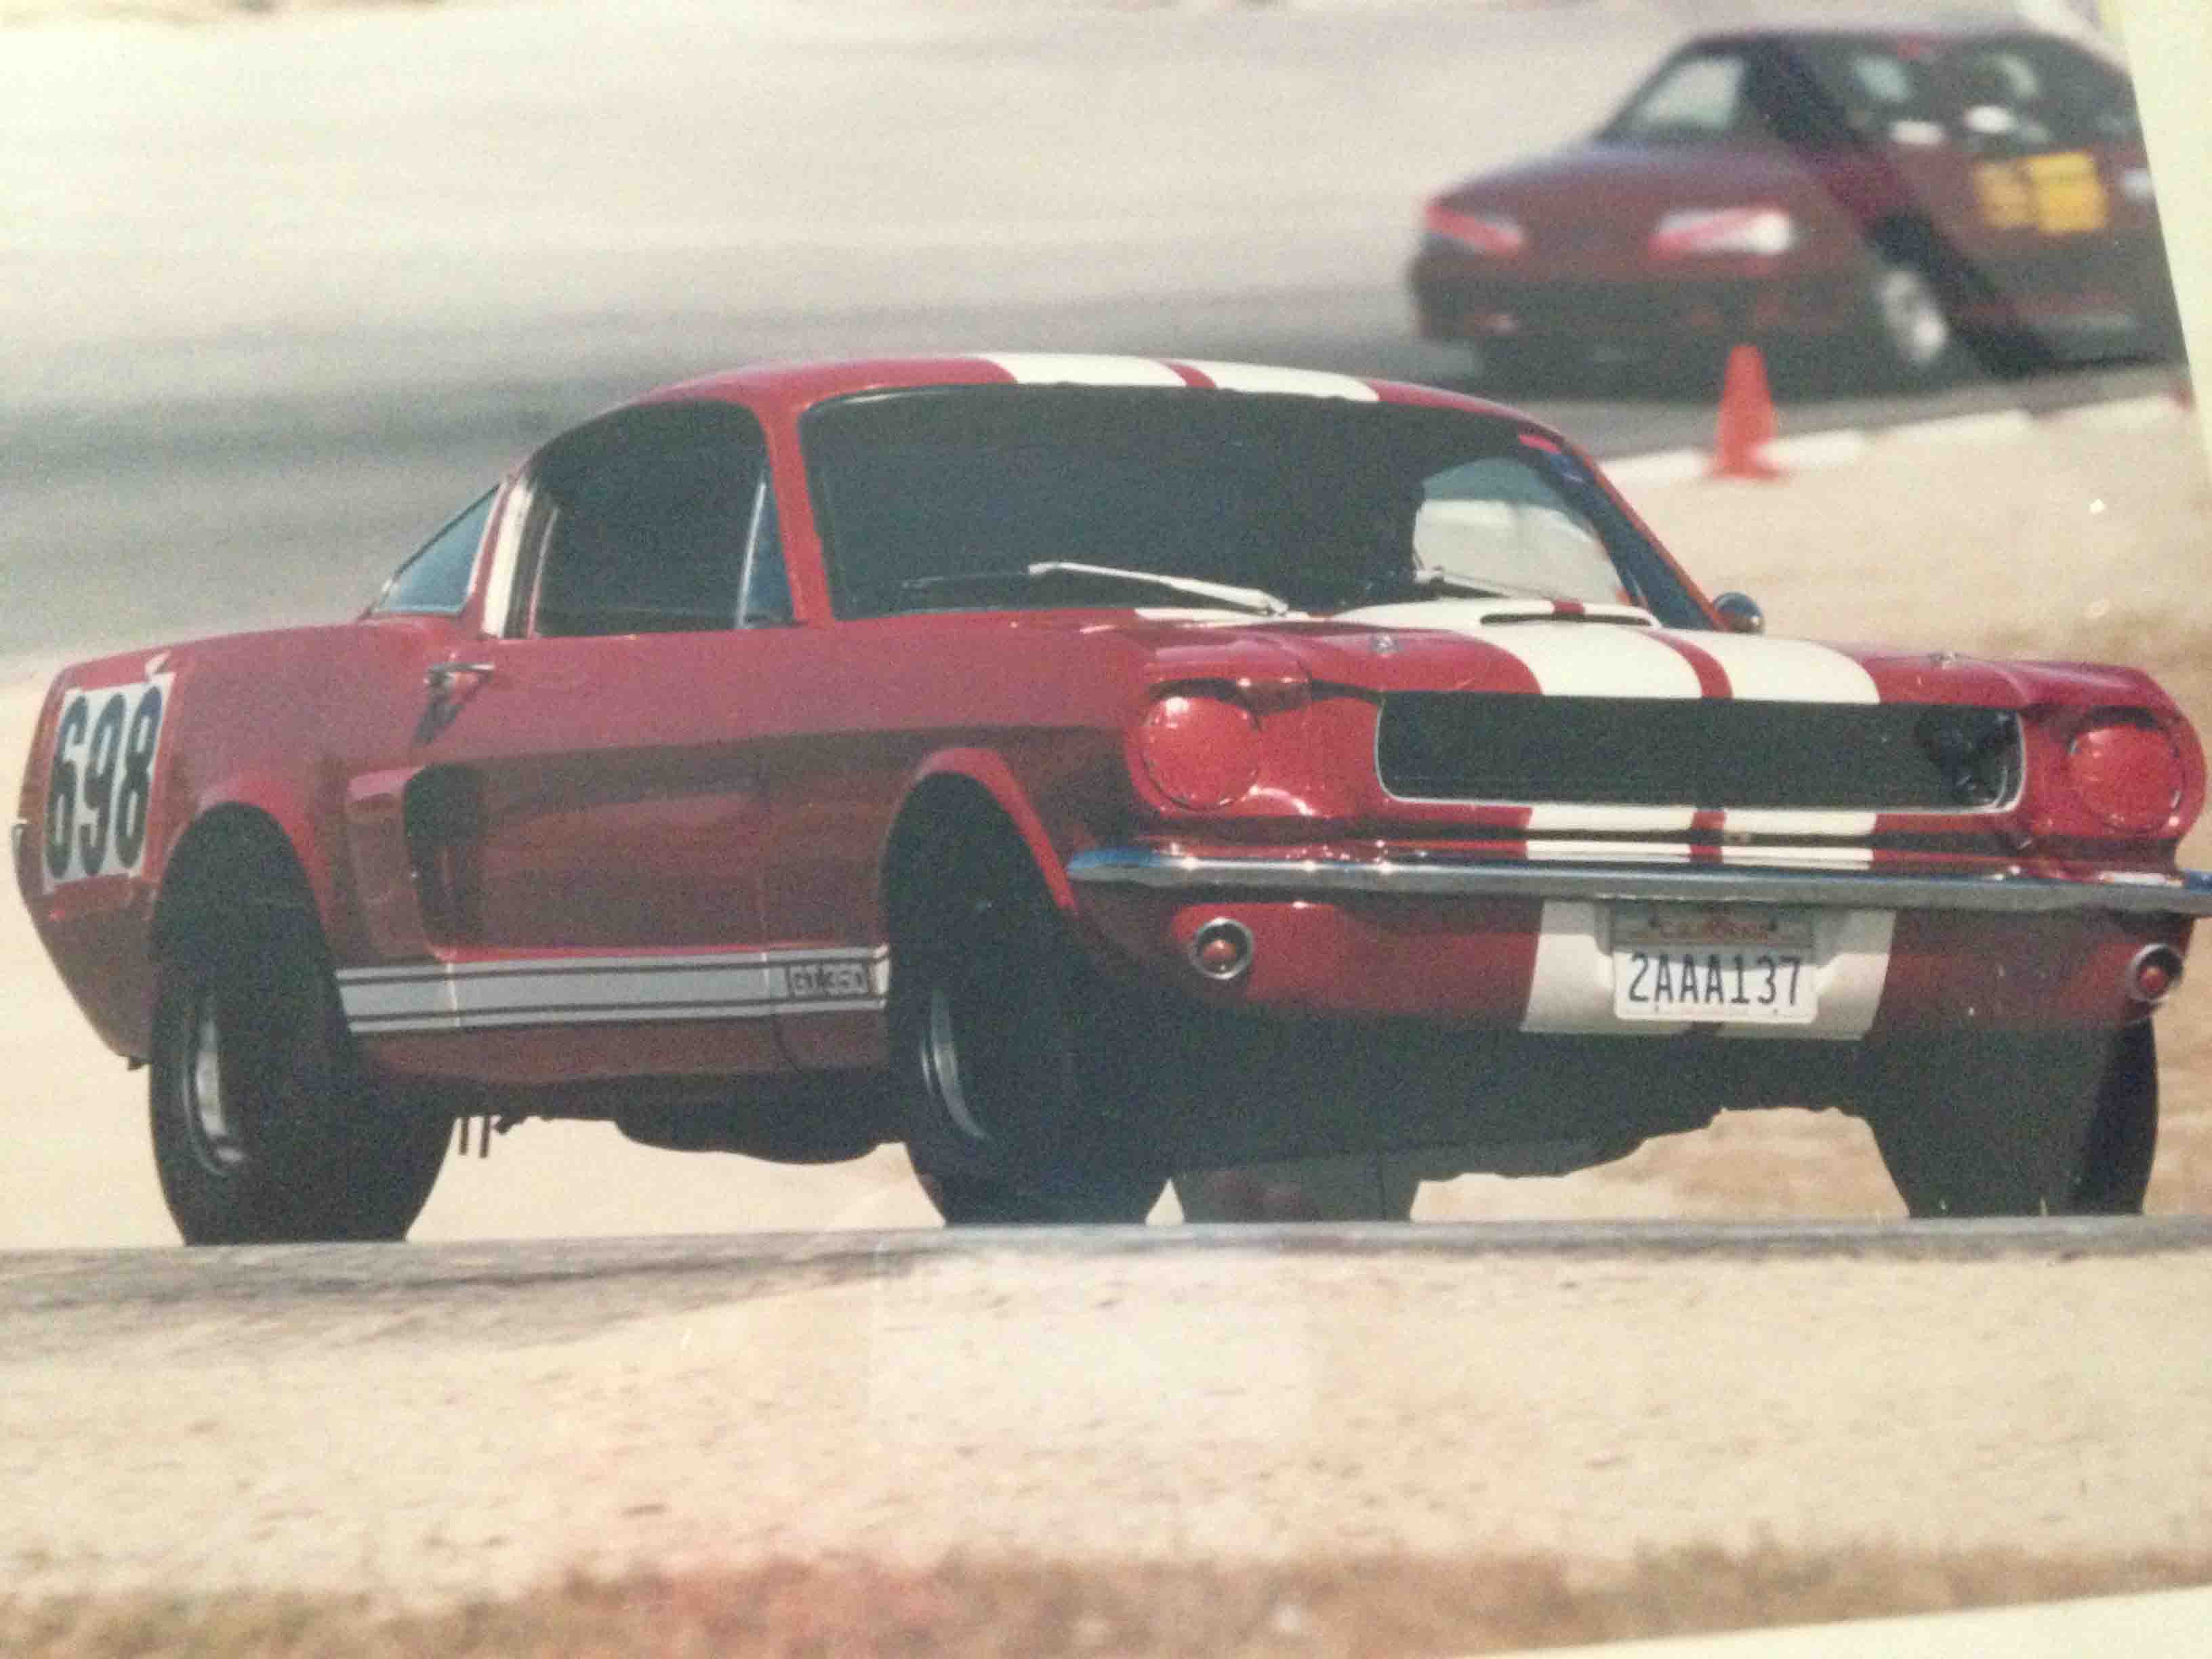
I ran this coolant setup on my 1965 Mustang that I used for open track. The other cool benefit from running only water for coolant is if you spew water, it doesn’t become a green toxic track mess. Open track coolant spills are a pain requiring special cleanup procedures, but if you’re just running a water and Water Wetter… no problem, it just needs to evaporate! It’s important that you change the coolant every year, because I’ve heard that old Water Wetter can begin gumming up your cooling system.

Changing coolant becomes less of an issue since draining water (with a little Water Wetter) is more ecologically safe compared to GREEN coolant. (At least I think so!).

.

THOUGHTS ON CARB JETTING

If the above ideas don’t help cool down the engine enough, I’ll need to check the plugs and see if the engine is running too lean. I retarded the timing from 36 to 34 degrees Total advance and I still have a problem. Running richer jets, will have some effect on engine temp also. I believe the stock jets on the primary carb are #62’s and I have a spare set of #64s and #66s.

Actually, I’ve run variations of jet sizes in my Mustang and have run timing off, and I don’t remember having to worry about overheating, but every little idea helps (and will make the engine run stronger).

For right now, it’s easier to check the thermostat, change the coolant and look for obstructions.

.

Here's a close up of my steel fan and clutch and fan shroud connected to a 4 core steel radiator.

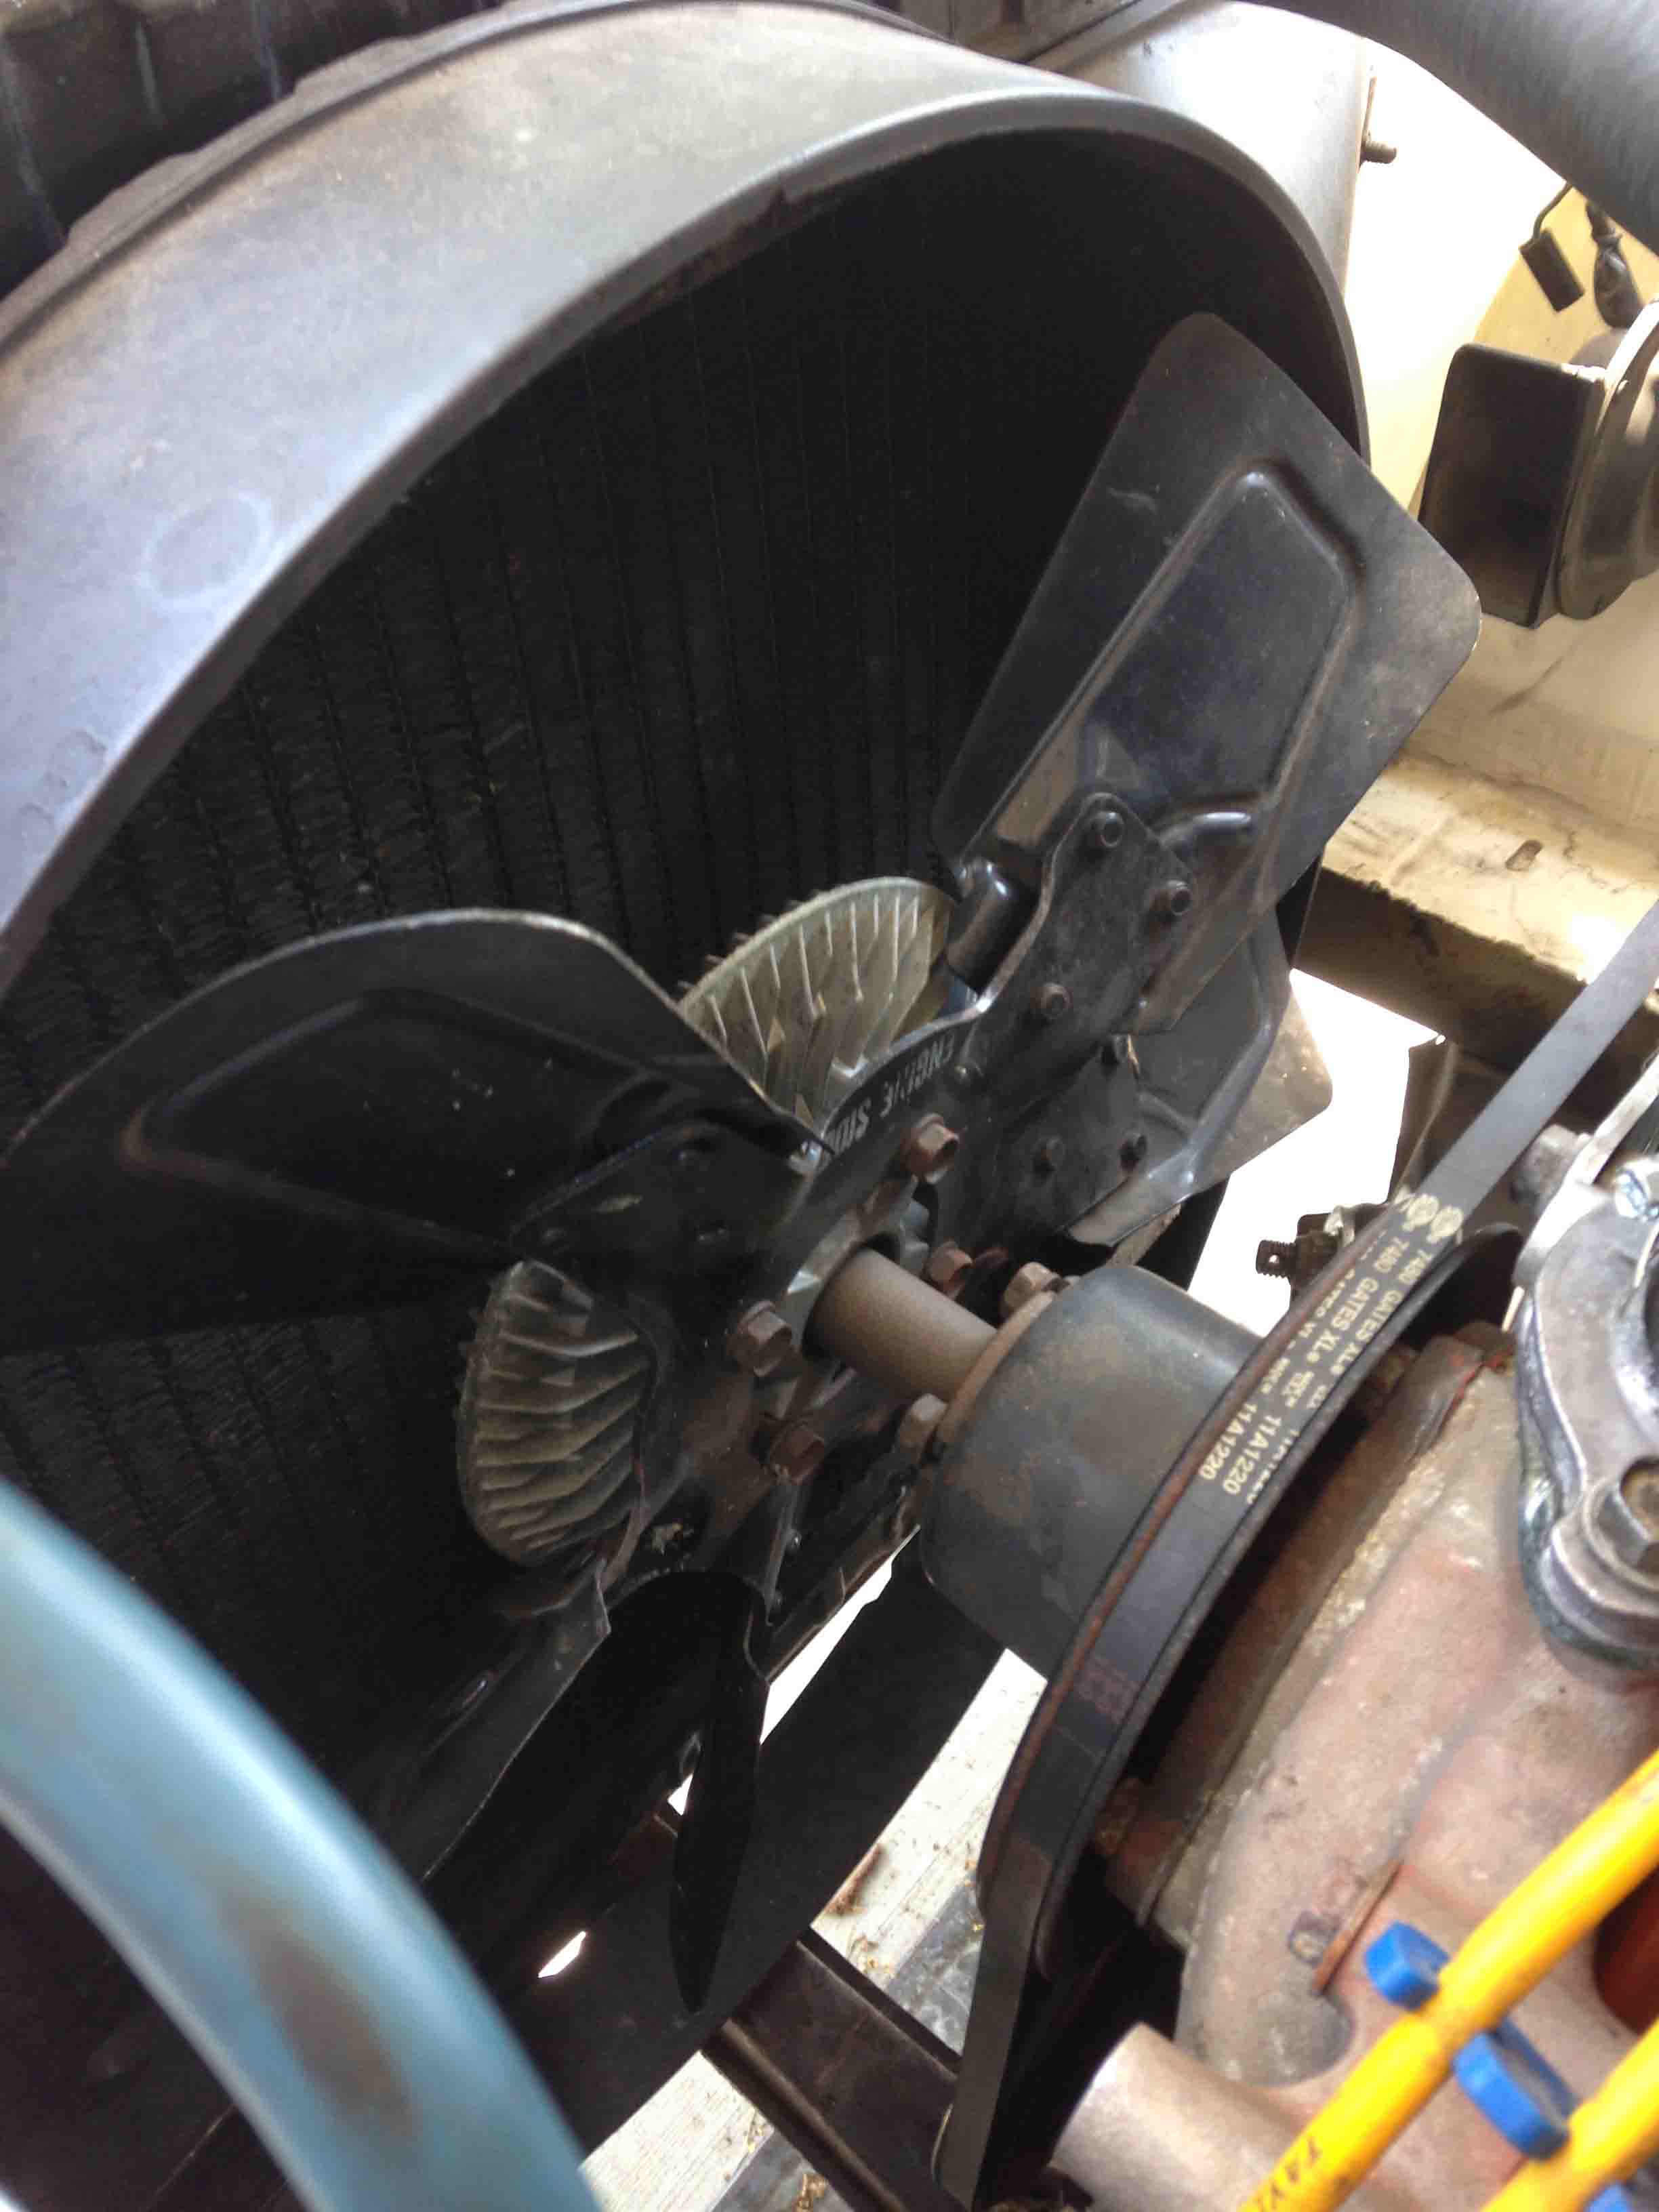
Here’s a close up of my steel fan and clutch and fan shroud connected to a 4 core steel radiator.

My O'Reilly Auto Parts Special. Before I put this in, my engine would spew coolant, now even with the engine getting excessively hot after high speed driving, the large can size is just large enough to catch the whole burp. Good thing I decided to by the larger overflow "can"

My O’Reilly Auto Parts Special. Before I put this in, my engine would spew coolant, now even with the engine getting excessively hot after high speed driving, the large can size is just large enough to catch the whole burp. Good thing I decided to by the larger overflow “can”

.

RANDOM ODDs and ENDs

My car has a 3 core-copper radiator, offset-bladed fan with a clutch and fan shroud. No, I’d rather just keep the factory stuff and not have to run an aluminum radiator if I don’t have to (although as fellow Linkedin member Erik Kenny notes, these symptoms are hot for a clogged radiator).

I had added the coolant overflow kit  (the largest size available at your typical auto supply store) before this cooling problem and it’s a good thing, otherwise I’d have a driveway full of coolant every time I stop after a high speed highway drive. Right now it’s a self contained system that keeps all the overflow and sucks it back in when it cools down.


LASER CHECK YOUR BUTTERED EGGS, BEER and YOUR B-BLOCK MOPAR

I’ll give you guys an update after I  check the thermostat and laser check the cooling system and my fried eggs in butter. By the way, you shouldn’t heat butter over 350-400 degrees when cooking. The next time you come over for a beer you can borrow my laser thermometer to make sure you’re not over-nuc’ing your eggs or your MoPar.

*

If you enjoyed this post, please LIKE SHARE COMMENT

The Dodge Kid in his youth about 1976. I think I wore this hat everyday through my Freshman year in high school. Photo by Nick Yee

The Dodge Kid in his youth about 1976.


Copyright © 2014 ChallenYee.com. TheDodgeKid.com  All Rights Reserved.

Six Pack Accelerator Pump Nozzle Change

It is not recommended to change the accelerator pump nozzle on a choked carb without removing it from the car, but if you are very very careful, you can see what I did.

Please read entire article before considering attempting this operation.


Problem: How can you safely change an accelerator pump nozzle with a choke plate in the way… answer, you have to be extremely careful. It can be done but the no one is going to recommend you do it without taking the carb off the car. This is how I did it (see next photos). Gently feel the torque on the screw before removing for your "feel" reference.

Problem: How can you safely change an accelerator pump nozzle with a choke plate in the way… answer, you have to be extremely careful. It can be done but no one is going to officially recommend you do it without taking the carb off the car. This is how I did it (see next photos). Gently feel the torque on the screw before removing for your “feel” reference. In this photo, I’ve already loosened the retaining screw and am ready to pull the assembly out with a needle nose pliers.


In order to stabilize the choke plate, use a device like this screwdriver, to hold the choke open the max amount. It frees up your hands and allows you to concentrate completely on the removal and replacement of the nozzle.

In order to stabilize the choke plate, use a device like this screwdriver, to hold the choke open the max amount. It frees up your hands and allows you to concentrate completely on the removal and replacement of the nozzle.


I loosened the retaining screw and used a needle nose pliers to very carefully pull the assembly out. I was worried about two things: 1. dropping the nozzle; 2) losing the flat gasket you see still laying in the proper position on the carb. I decided not to move that as I considered it too risky. The carb is almost new, so I presumed the gasket is still in okay shape to seal.

I loosened the retaining screw and used a needle nose pliers to very carefully pull the assembly (nozzle and screw) out. I was worried about two things: 1. dropping the nozzle; 2) losing the flat gasket you see still laying in the proper position on the carb. I decided not to move that as I considered it too risky. The carb is almost new, so I presumed the gasket is still in okay shape to seal.


Here's a shot at the two nozzles. Left is a #31 and the right is a #35, two sizes larger. Bottom view.

Here’s a shot at the two nozzles. Left is a #31 and the right is a #35, two sizes larger. Bottom view.


Here's a top view. and the new top washer/seal that I chose to replace since the is little or no risk in replacing that one. I've read somewhere on the Net that you don;t need to go larger than a #35 on the street. I've also heard from Julius Steuer that he usually goes two sizes up. Which would be a #35.

Here’s a top view. and the new top washer/seal that I chose to replace since the is little or no risk in replacing that one. I’ve read somewhere on the Net that you don’t need to go larger than a #35 on the street. I’ve also heard from Julius Steuer that he usually goes two sizes up. Which would be a #35.


noz_6


I'm taking this picture with my free hand so it's not in focus. This action you need to be rid of all distractions, you do not want to drop tis sucker into your carb throat. You need to guide this into the open hole like your life (in the near term) depends on it!

I’m taking this picture with my free hand so it’s not in focus. This action you need to be rid of all distractions, you do not want to drop this sucker into your carb throat. You need to guide this into the open hole like your life (in the near term) depends on it!


Ahhh… made it. Carefulyl and gently tightened the screw to slightly tighter than I felt before and pulled the screwdriver out to see the choke plate in its non-op position.

Ahhh… made it. You do need to carefully maneuver the assembly into place as it didn’t just go straight in. You have to work around the curved part of the carb vent due to the limited space….  Carefully and gently tightened the screw to slightly tighter than I felt before and pulled the screwdriver out to see the choke plate in its non-op position.


Done. The test drive that day revealed NO popping out the carb. I thought I had fixed the problem. But as I push the engine harder, like I did the following weekend. It still backfires through the carb under harder acceleration. When this thing stops popping, it is going to accelerate like mad money.  Notice the 340 decal - this air cleaner assembly was from my Challenger T/A when I first bought it. It was the wrong assembly for a small block, but correct for a big block. I sold the T/A a few years ago, it was completely restored with the correct small block T/A air cleaner. I may keep this decal on just as a remembrance of the old car and to mess with people's minds.

Done. The test drive that day revealed NO popping out the carb. I thought I had fixed the problem. But as I push the engine harder, like I did the following weekend. It still backfires through the carb under harder acceleration. When this thing stops popping, it is going to accelerate like mad money. Notice the 340 decal – this air cleaner assembly was from my Challenger T/A when I first bought it. It was the wrong assembly for a small block, but correct for a big block. I sold the T/A a few years ago, it was completely restored with the correct small block T/A air cleaner. I may keep this decal on just as a remembrance of the old car and to mess with people’s minds.


BONUS VIDEO

Vid_noz


If you enjoyed this post, please LIKE SHARE COMMENT

The Dodge Kid in his youth about 1976. I think I wore this hat everyday through my Freshman year in high school. Photo by Nick Yee

The Dodge Kid in his youth about 1976.


Copyright © 2014 ChallenYee.com. TheDodgeKid.com  All Rights Reserved.

440 Six Pack: Changing Secondary Springs

Changing Secondary Springs plus bonus VIDEO at bottom of post to visit a popular local tourist attraction!

FIRST THINGS FIRST:  If you were considering buying a Holley Quick Change Kit for your secondary springs on your Six Pack setup, based on my experience, do not do it for two good reasons:

1) Save your money, it won’t fit (as the photos below will indicate)
2) It’s easy to change springs without any quick change kit

springs_kit_nofit

The Vacuum housings on the Holley 4365 are larger than the usual Holley Secondary housings that the Quick Change Kits are designed for. I asked a Holley tech if it would work before I bought it, but unfortunately, he was wrong. Anyone want to buy two kits? LOL


I decided to change to the Purple springs, which was recommended by Julius Steuer in Chatsworth, CA and although I’ve also seen a suggestion of using the Black Springs in an internet article, I decided to go with what Julius recommended. It seems like, every time I use a part that’s different than what he recommends, I lose money.

spring_colors

Hey, Purple is a cool color. As you can tell by looking at the pointy ends of the springs. Fortunately no one recommended Yellow Springs, because it seems like there are two springs that come in the kit that have Yellow ends. Basically, the heavy E-body needs the secondaries to open more slowly so, Purple and I believe , Black will both do this. If the car was lighter or stiffer (more racing type) gearing, the secondaries will do better opening earlier.


USING YOUR PHILIPS HEAD SCREWDRIVER

Anyway, for a novice or someone who hasn’t touched a screw driver on an engine part in awhile, first use the correct sized phillips head so you do not damage your parts and you get a correct feel for torque. I suggest to gently check the torque on the screws before you remove them. I used that feel as a reference. Interesting to note, however, when I reinstalled them I felt the torque needed to be very slightly tighter (if anyone wants to argue that point , please do). I think you’re supposed to trust that the lock washer puts enough tension to hold the screw even though it feels slightly loose. I guess I don’t fully trust lock washers (LOL).


All the screws on your Holley for this job will have lock washers and I usually use a two-finger and one thumb tightness. Don’t gorilla tighten these parts otherwise you might end up with a leaky diaphragm or a broken housing.

Also try using a star torque pattern when tightening to evenly distribute the tension on the rubber edge which should line up on the holes without binding on the screws.

Make sure when installing your new spring, the pointy end snaps fully into place, on the circular seat on your metal cover. I did this by using my finger to press down through the open end of coils of the spring without compressing it (to avoid damaging the spring). Imagine sticking your index finger down through the picture below and tagging the small end like hitting a bullseye without doing something stupid to your spring.

spring_set_in_place

Also when putting the cover and spring back on, make sure the big point of the spring is seated on the metal disc (see below) and not on the rubber part of the diaphragm, otherwise it will damage and not work right.

spring_oncarb_install

You don’t have to remove the whole housing, but I did, just to make sure that the air passage is free by gently depressing the vacuum rod and feeling the air on your cheek (see photo). AND if you do take off the housing, make sure the little cork gasket is okay where the air passage mates to the carb body.

spring_cheek


REMOVING AND INSTALLING the SPRING CLIP (see below). The easy way to remove the spring clips on the rod is just use a tiny screw driver to lever pull them off the round shaft by sticking the tip of the screwdriver into the gap in the clip and then expanding the gap until the clip can be removed with your fingers.

To reinstall those clips,  just use your fingers to snap them back into place making sure it is riding in the groove of the shaft.

springs_clip_removal

The other reason you might remove the housing is that reinstalling the spring cover is a little easier if you don’t have to lean over your fender to do it. There are four screws that attach the vacuum housing to the carb body, there are a short pair and a longer pair. If you take a close look at your housing, you can tell which ones go where.


spring_corkseal


DRIVING IMPRESSION

Driving the Challenger, I experienced a smoother power band and that’s what I was looking for. I am unlikely to mess with it again unless I get it on a dyno. I still want to change the stock primary #62 jets to #66. I’m pretty sure that will make a positive difference and I want to find out if that will affect how hot my engine runs, but I should get a laser thermometer to check the temps for sure.

My engine is still popping as various speeds at the beginning of punching the gas peddle so I’ll address that on the next article.
I had adjusted the timing last month at 36 deg BTDC at 1500 RPM (based on Hemi George’s suggestion with my Mopar performance distributor) and I thought I fixed that, but still had some pop at low speeds, but now I get pops at low and highway speeds. I did check that the distributor clamp was tight.  I’ll cover this popping problem on the  next post… whenever I get to it.


spring_carbs

See ya’all!  You know, I am so busy I hardly have time to make these posts, but I just cram it into my schedule as I have time.


But hey!… I have got a

BONUS VIDEO for you, The DodgeKid goes to FACEBOOK... CLICK ON PHOTO TO GO TO VIDEO


FBSite

Sorry to disappoint you but I did not spin a few donuts or wet down the parking lot with bleach for any wild burnouts.
Wouldn’t want anyone to get their hoody wadded up. I do love how George Bush calls it Facebooks.

When I left driving my Challenger, I did feel like somehow I was masquerading as one of the lucky gurus who made a killing on Facebook stock.


If you enjoyed this post, please LIKE SHARE COMMENT

The Dodge Kid in his youth about 1976. I think I wore this hat everyday through my Freshman year in high school. Photo by Nick Yee

The Dodge Kid in his youth about 1976.


Copyright © 2014 ChallenYee.com. TheDodgeKid.com  All Rights Reserved.

When the rubber meets the Road

Observations on the suspension, tires and handling

With the updated suspension, the Challenger drives straight while staying pretty level and even around turns.

I’m running the standard arc Firm Feel Industries (FFI) HD leaf springs, 1.00 FFI torsion bars and Bilstein shocks. FFI 1.25 front sway bar with lower control arm braces, FFI factory style 0.75 rear sway bar, factory manual steering, and Mopar Performance frame connectors. If I had to characterize the new suspension in just a few words, I would say it feels like the car “acts as one unit” and not the front end feeling like it’s in one city and the rear end is in another.

The straight line road feel is good and reasonably comfortable. The suspension feels tight and a lot quieter with the new leaf springs. After having taken the car out for a few drives, the one thing that I found uncomfortable was the sort of bumpiness feeling of the tires when driving pulling some G’s around a constant radius turn.


tire

One thing about my BF Goodrich Tires are they are NEW. Which is terrible for best traction. So I want to put some wear on them before I fully judge them. Yet this weird feeling with the tires jogged my memory from a past experience.

I remember from open-tracking my old 1965 Mustang was the tire pressure can have this effect.

When I first started open-tracking, I was under the wrong notion that having a higher PSI is better for racing or track driving, and some fear of tires coming off rims. On my Mustang (a red GT350 clone with white stripes) I ran 225/50×15 BF Goodrich Comp T/A’s and ran 40 psi in front an 38 PSI in the back. The result was the car felt a little bit like a sidestepping hobbyhorse going around turns. Instead of a nice smooth controlled slide/drifting around turns, the car seemed to be be stupidly bouncing sideways. It felt terrible. It felt like being in Bozo the Clown’s car at Sears Point Raceway.


A Ford Interlude

MoPar fans, please excuse the Ford photos ;), but that is what I had to do in the 1980’s, when my brother and I picked a Mustang for a platform, a car that had lots of available parts at the time to do what I wanted at reasonable cost.  I still had my first Challenger up until about the mid 80’s, but sold it when it was idle in storage – I was serving in the Navy overseas at the time. My brother drove the Mustang while I was away.  Also I want to give thanks to the influence of a good friend, Scott Douglas, who was one of my original car fanatic buddies in junior high school. He grew up becoming an expert on Mustangs and Shelbys and was always willing to lend a helping hand when I was home on leave.

Photo at left is my first open track at Laguna Seca, using 235x60x15 Goodyear Eagles on steel magnum 500’s, and photo right is with the 225x50x15 BFG Comp T/A’s on Torq-Thrust D wheels plus side exit exhaust.

lagunasecaOLYMPUS DIGITAL CAMERA

When I lowered the tire pressure to 35#(F)-32#(R) everything completely smoothed out and I had complete confidence in the ability to feel the car drift very smoothly around turns. Absolute control.


Okay, okay… and back to the Challenger!

Anyway, back to my Challenger. I checked the pressure on all 4 tires cold, and they were all at 36 PSI. I immediately lowered all of them to 33#. I’ll see what happens the next time I’m out. The max recommended pressure in 35#.

[one day later]
Okay, took the car out for a spin with my son and we mildly terrorized the local highway and cloverleafs and what did I discover? Ahh… I got that loving feeling back between me and the road. I can tell the bumpy drifting is gone and the BF Goodrich, while not sticking as long as a lower profile tire with racier tread, was acting consistently and predictably. I was able to control the drifting with the accelerator pretty easily without feeling like Bozo the Clown.

The E-body was staying very level around constant radius turns and the tires feel like they’re drifting with just a little oversteer. The manual steering is giving me some decent feedback and feel. Definitely would like to take on turns where I can stab the front end into a tight corner and see how it handles going through and out of the turn. Overall, I’m pretty happy with the handling of this big E-body that’s packing a 440.

I’m watching my 10 year old son riding shotgun. He is more interested in Minecraft, watching TV and listening to the local rock station, so he’s not too much of a motorhead yet, but I can catch him out of the corner of my eye when I’m getting on to the highway and bringing the RPM’s high enough to engage the outboard carbs, the exhaust is roaring while our bodies are getting pressed back on the seats. It gives me some sort of weird fatherly pleasure as he’s bracing himself in the presence of horsepower.

.

If you enjoyed this post, please LIKE SHARE COMMENT

The Dodge Kid in his youth about 1976. I think I wore this hat everyday through my Freshman year in high school. Photo by Nick Yee

The Dodge Kid in his youth about 1976.


Copyright © 2014 ChallenYee.com. TheDodgeKid.com  All Rights Reserved.

Back to the Future

A trip back to my past
PALO ALTO HIGH SCHOOL – Palo Alto, California


The Back Parking Lot of Palo Alto High School, where most of the students parked their muscle cars.

Where the street machine craze went real- Palo Alto High School, the back parking lot where between1978-1980 we practiced the loosening of our youthful daring, restrained by a world of academics and motor vehicle law. It was in this part of the parking lot where many a street machine came screaming at high R's and high G's around the end of the lot with tires laying down prodigious amounts of rear and sometimes front tire rubber across the barren asphalt.

Where the street machine craze went real- Palo Alto High School, the back parking lot where between1978-1980 we practiced the loosening of our youthful daring, restrained by a world of academics and motor vehicle law. It was in this part of the parking lot where many a street machine came screaming at high R’s and high G’s around the end of the lot with tires laying down prodigious amounts of rear and sometimes front tire rubber across the barren asphalt.


Just look at the money they pumped into this high school football field. I guess, considering it is within a mile of Stanford Stadium where the Cardinal (once the "Indians") play, they needed to spruce things up. Belive it or not, my two kids are hiding with their heads out of view in my car.

Just look at the money they pumped into this high school football field. I guess, considering it is within a mile of Stanford Stadium where the Cardinal (once the “Indians”) play, they needed to spruce things up. Believe it or not, my two kids are hiding with their heads out of view in my car.


In the back parking lot os Palo Alto High School, the boys' gym in the background. Same building as in 1980 and many years before, but we didn't have the cool looking Viking Ship paint job back in then.

In the back parking lot of Palo Alto High School, the boys’ gym in the background. Same building as in 1980 and many years before, but we didn’t have the cool looking Viking Ship paint job back then.


Palo Alto High School and the current day entry gate to the football field. Man, they sure beautified this area since 1980. It looked like a dump with a cheap cyclone fence in 1980. Sure makes for a nice pick with my Challenger now.

Palo Alto High School and the current day entry gate to the football field. Man, they sure beautified this area. It looked like a dump with a cheap cyclone fence in 1980. Sure makes for a nice photo-op with my Challenger now.


Palo Alto HIgh School auto shop, where Mr. O.D. Mitchell awarded me twice as many units for taking Auto in my senior year because I did the work. I also won the Industrial Arts Award. Mr. Mitchell was one of most important mentors I had in my youth. He told me once, "Yee, most teenagers have one of three vices: sex, drugs and speed... Yours is speed."

Palo Alto HIgh School auto shop, where Mr. O.D. Mitchell awarded me twice as many units for taking Auto in my senior year because I did the work. I also won the Industrial Arts Award. Mr. Mitchell was one of most important mentors I had in my youth. He told me once, “Yee, most teenagers have one of three vices: sex, drugs or speed… yours is speed.” Apparently the beautification budget hasn’t got to this area of the school yet. It looks almost exactly the same as it did when I graduated in 1980.


If you enjoyed this post, please LIKE SHARE COMMENT

The Dodge Kid in his youth about 1976. I think I wore this hat everyday through my Freshman year in high school. Photo by Nick Yee

The Dodge Kid in his youth about 1976.


Copyright © 2014 ChallenYee.com. TheDodgeKid.com  All Rights Reserved.