Changing Secondary Springs plus bonus VIDEO at bottom of post to visit a popular local tourist attraction!
FIRST THINGS FIRST: If you were considering buying a Holley Quick Change Kit for your secondary springs on your Six Pack setup, based on my experience, do not do it for two good reasons:
1) Save your money, it won’t fit (as the photos below will indicate)
2) It’s easy to change springs without any quick change kit

The Vacuum housings on the Holley 4365 are larger than the usual Holley Secondary housings that the Quick Change Kits are designed for. I asked a Holley tech if it would work before I bought it, but unfortunately, he was wrong. Anyone want to buy two kits? LOL
I decided to change to the Purple springs, which was recommended by Julius Steuer in Chatsworth, CA and although I’ve also seen a suggestion of using the Black Springs in an internet article, I decided to go with what Julius recommended. It seems like, every time I use a part that’s different than what he recommends, I lose money.
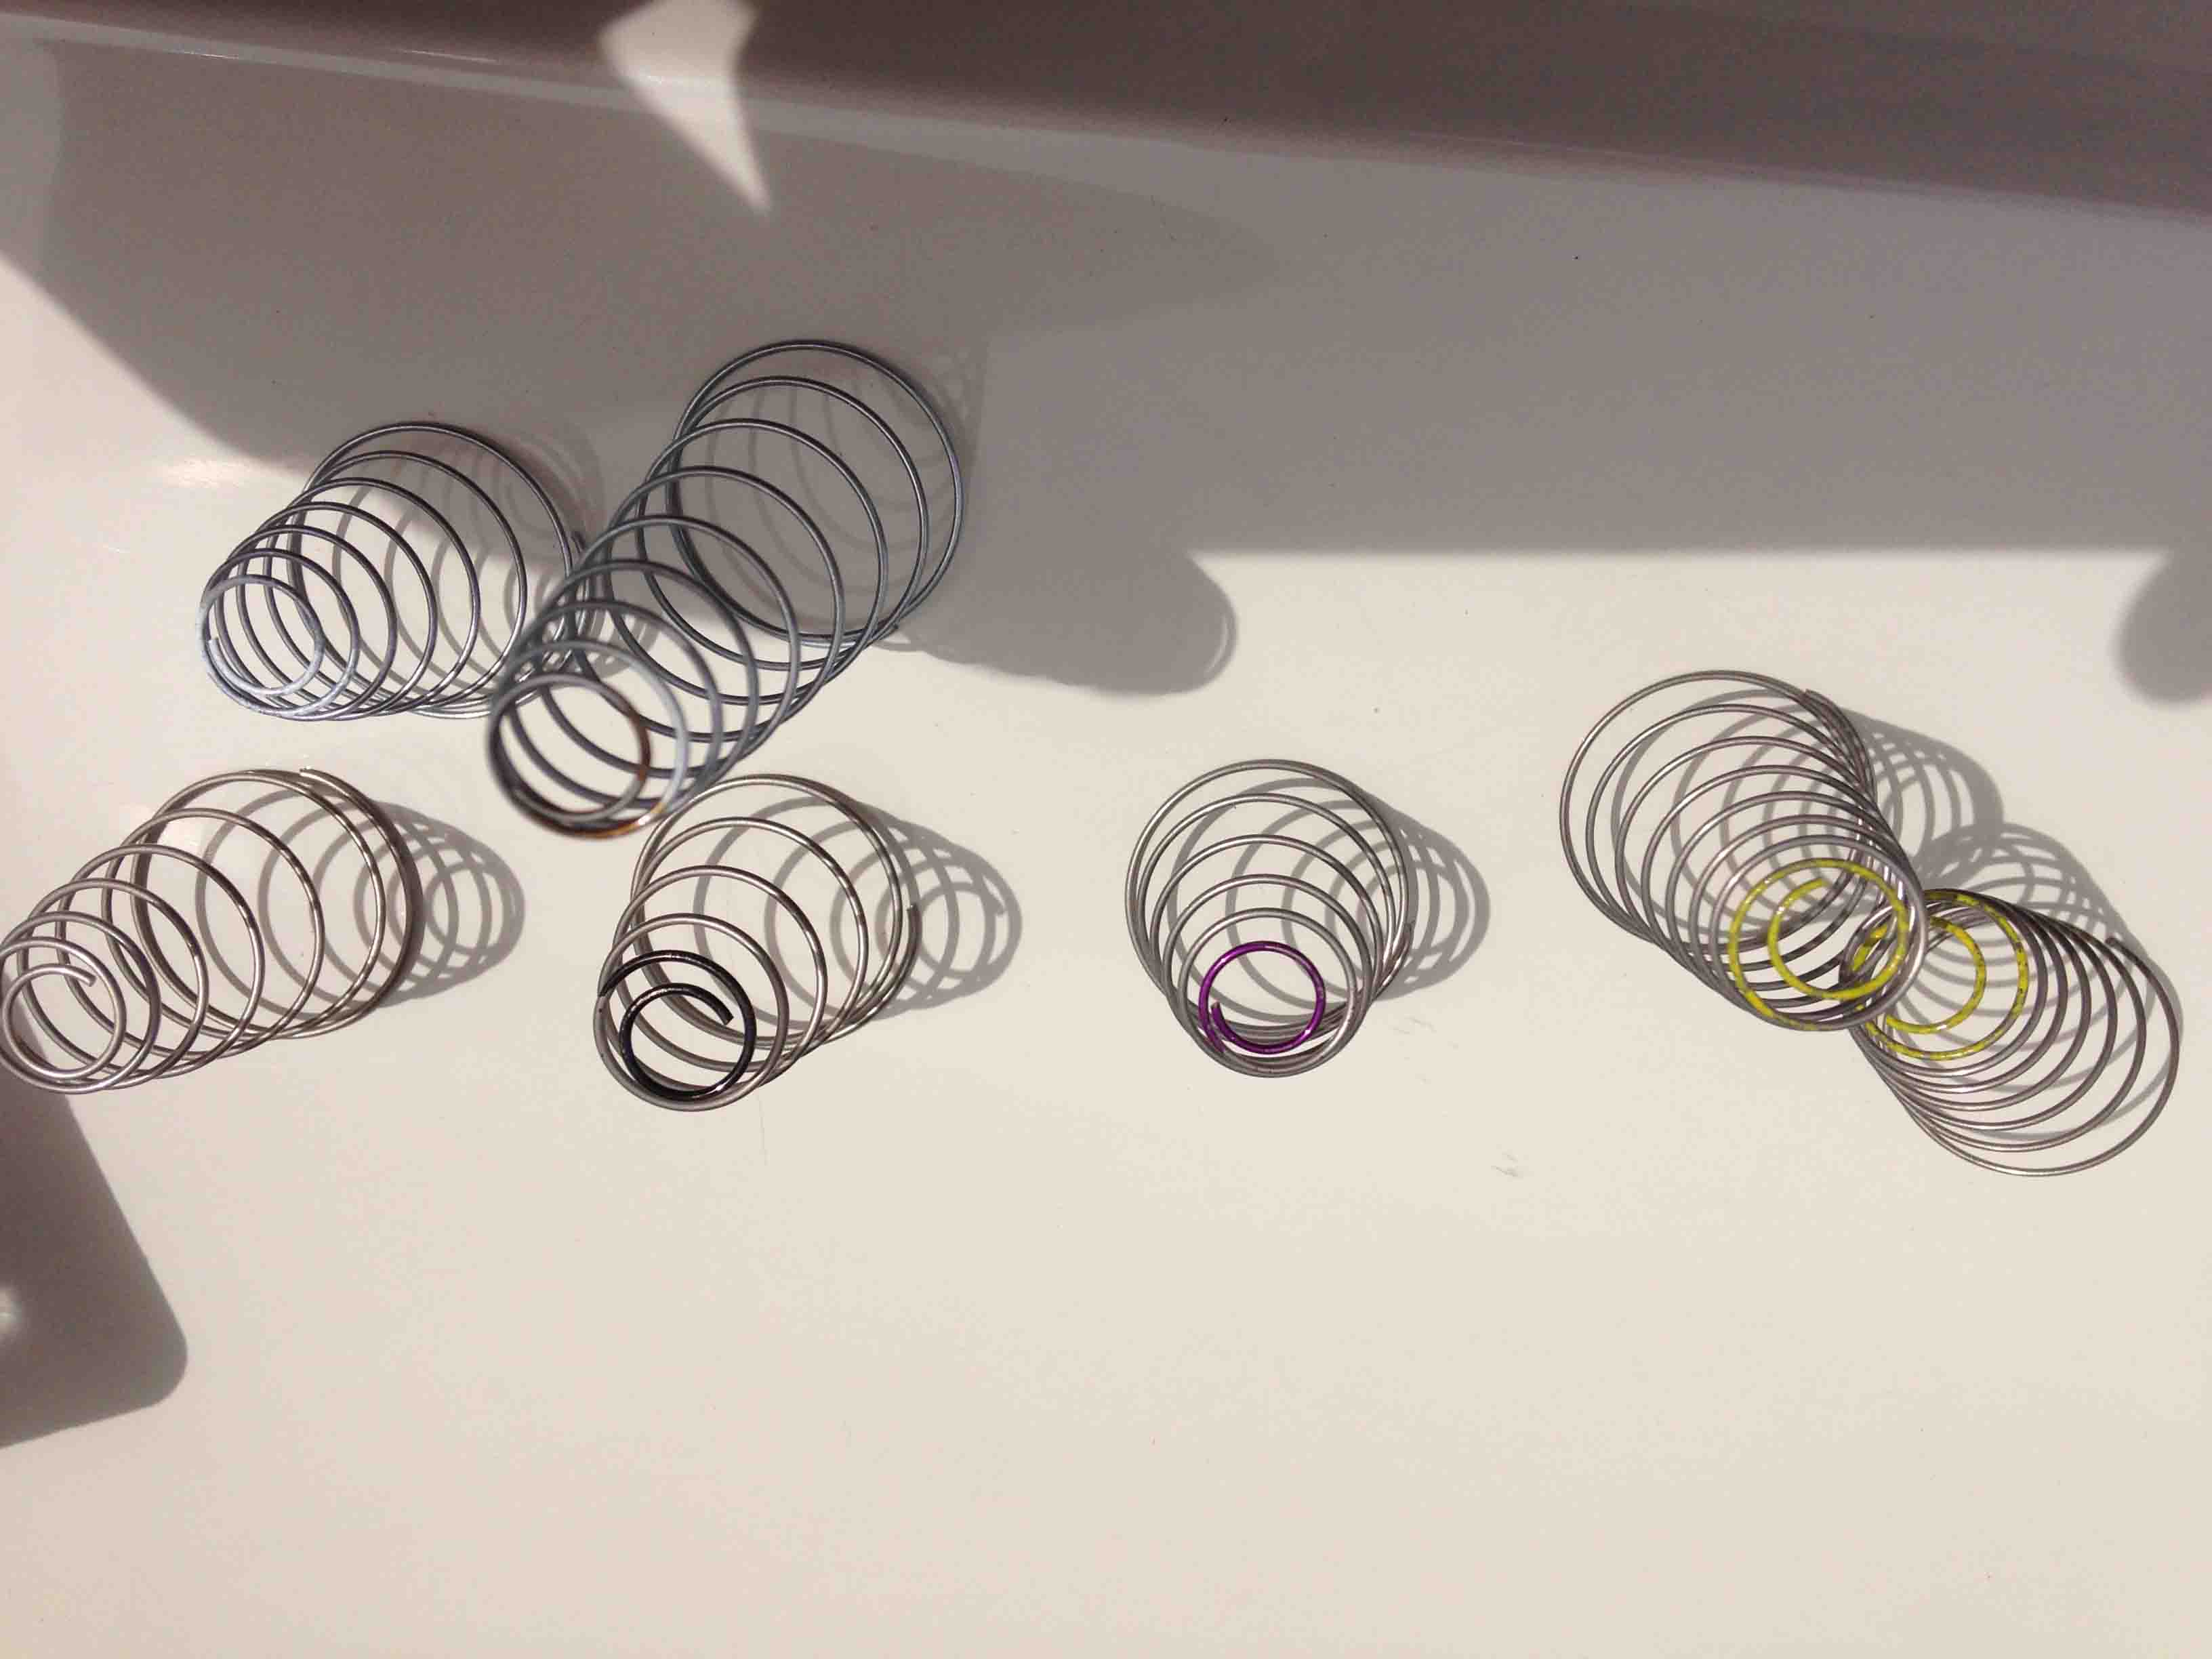
Hey, Purple is a cool color. As you can tell by looking at the pointy ends of the springs. Fortunately no one recommended Yellow Springs, because it seems like there are two springs that come in the kit that have Yellow ends. Basically, the heavy E-body needs the secondaries to open more slowly so, Purple and I believe , Black will both do this. If the car was lighter or stiffer (more racing type) gearing, the secondaries will do better opening earlier.
USING YOUR PHILIPS HEAD SCREWDRIVER
Anyway, for a novice or someone who hasn’t touched a screw driver on an engine part in awhile, first use the correct sized phillips head so you do not damage your parts and you get a correct feel for torque. I suggest to gently check the torque on the screws before you remove them. I used that feel as a reference. Interesting to note, however, when I reinstalled them I felt the torque needed to be very slightly tighter (if anyone wants to argue that point , please do). I think you’re supposed to trust that the lock washer puts enough tension to hold the screw even though it feels slightly loose. I guess I don’t fully trust lock washers (LOL).
All the screws on your Holley for this job will have lock washers and I usually use a two-finger and one thumb tightness. Don’t gorilla tighten these parts otherwise you might end up with a leaky diaphragm or a broken housing.
Also try using a star torque pattern when tightening to evenly distribute the tension on the rubber edge which should line up on the holes without binding on the screws.
Make sure when installing your new spring, the pointy end snaps fully into place, on the circular seat on your metal cover. I did this by using my finger to press down through the open end of coils of the spring without compressing it (to avoid damaging the spring). Imagine sticking your index finger down through the picture below and tagging the small end like hitting a bullseye without doing something stupid to your spring.
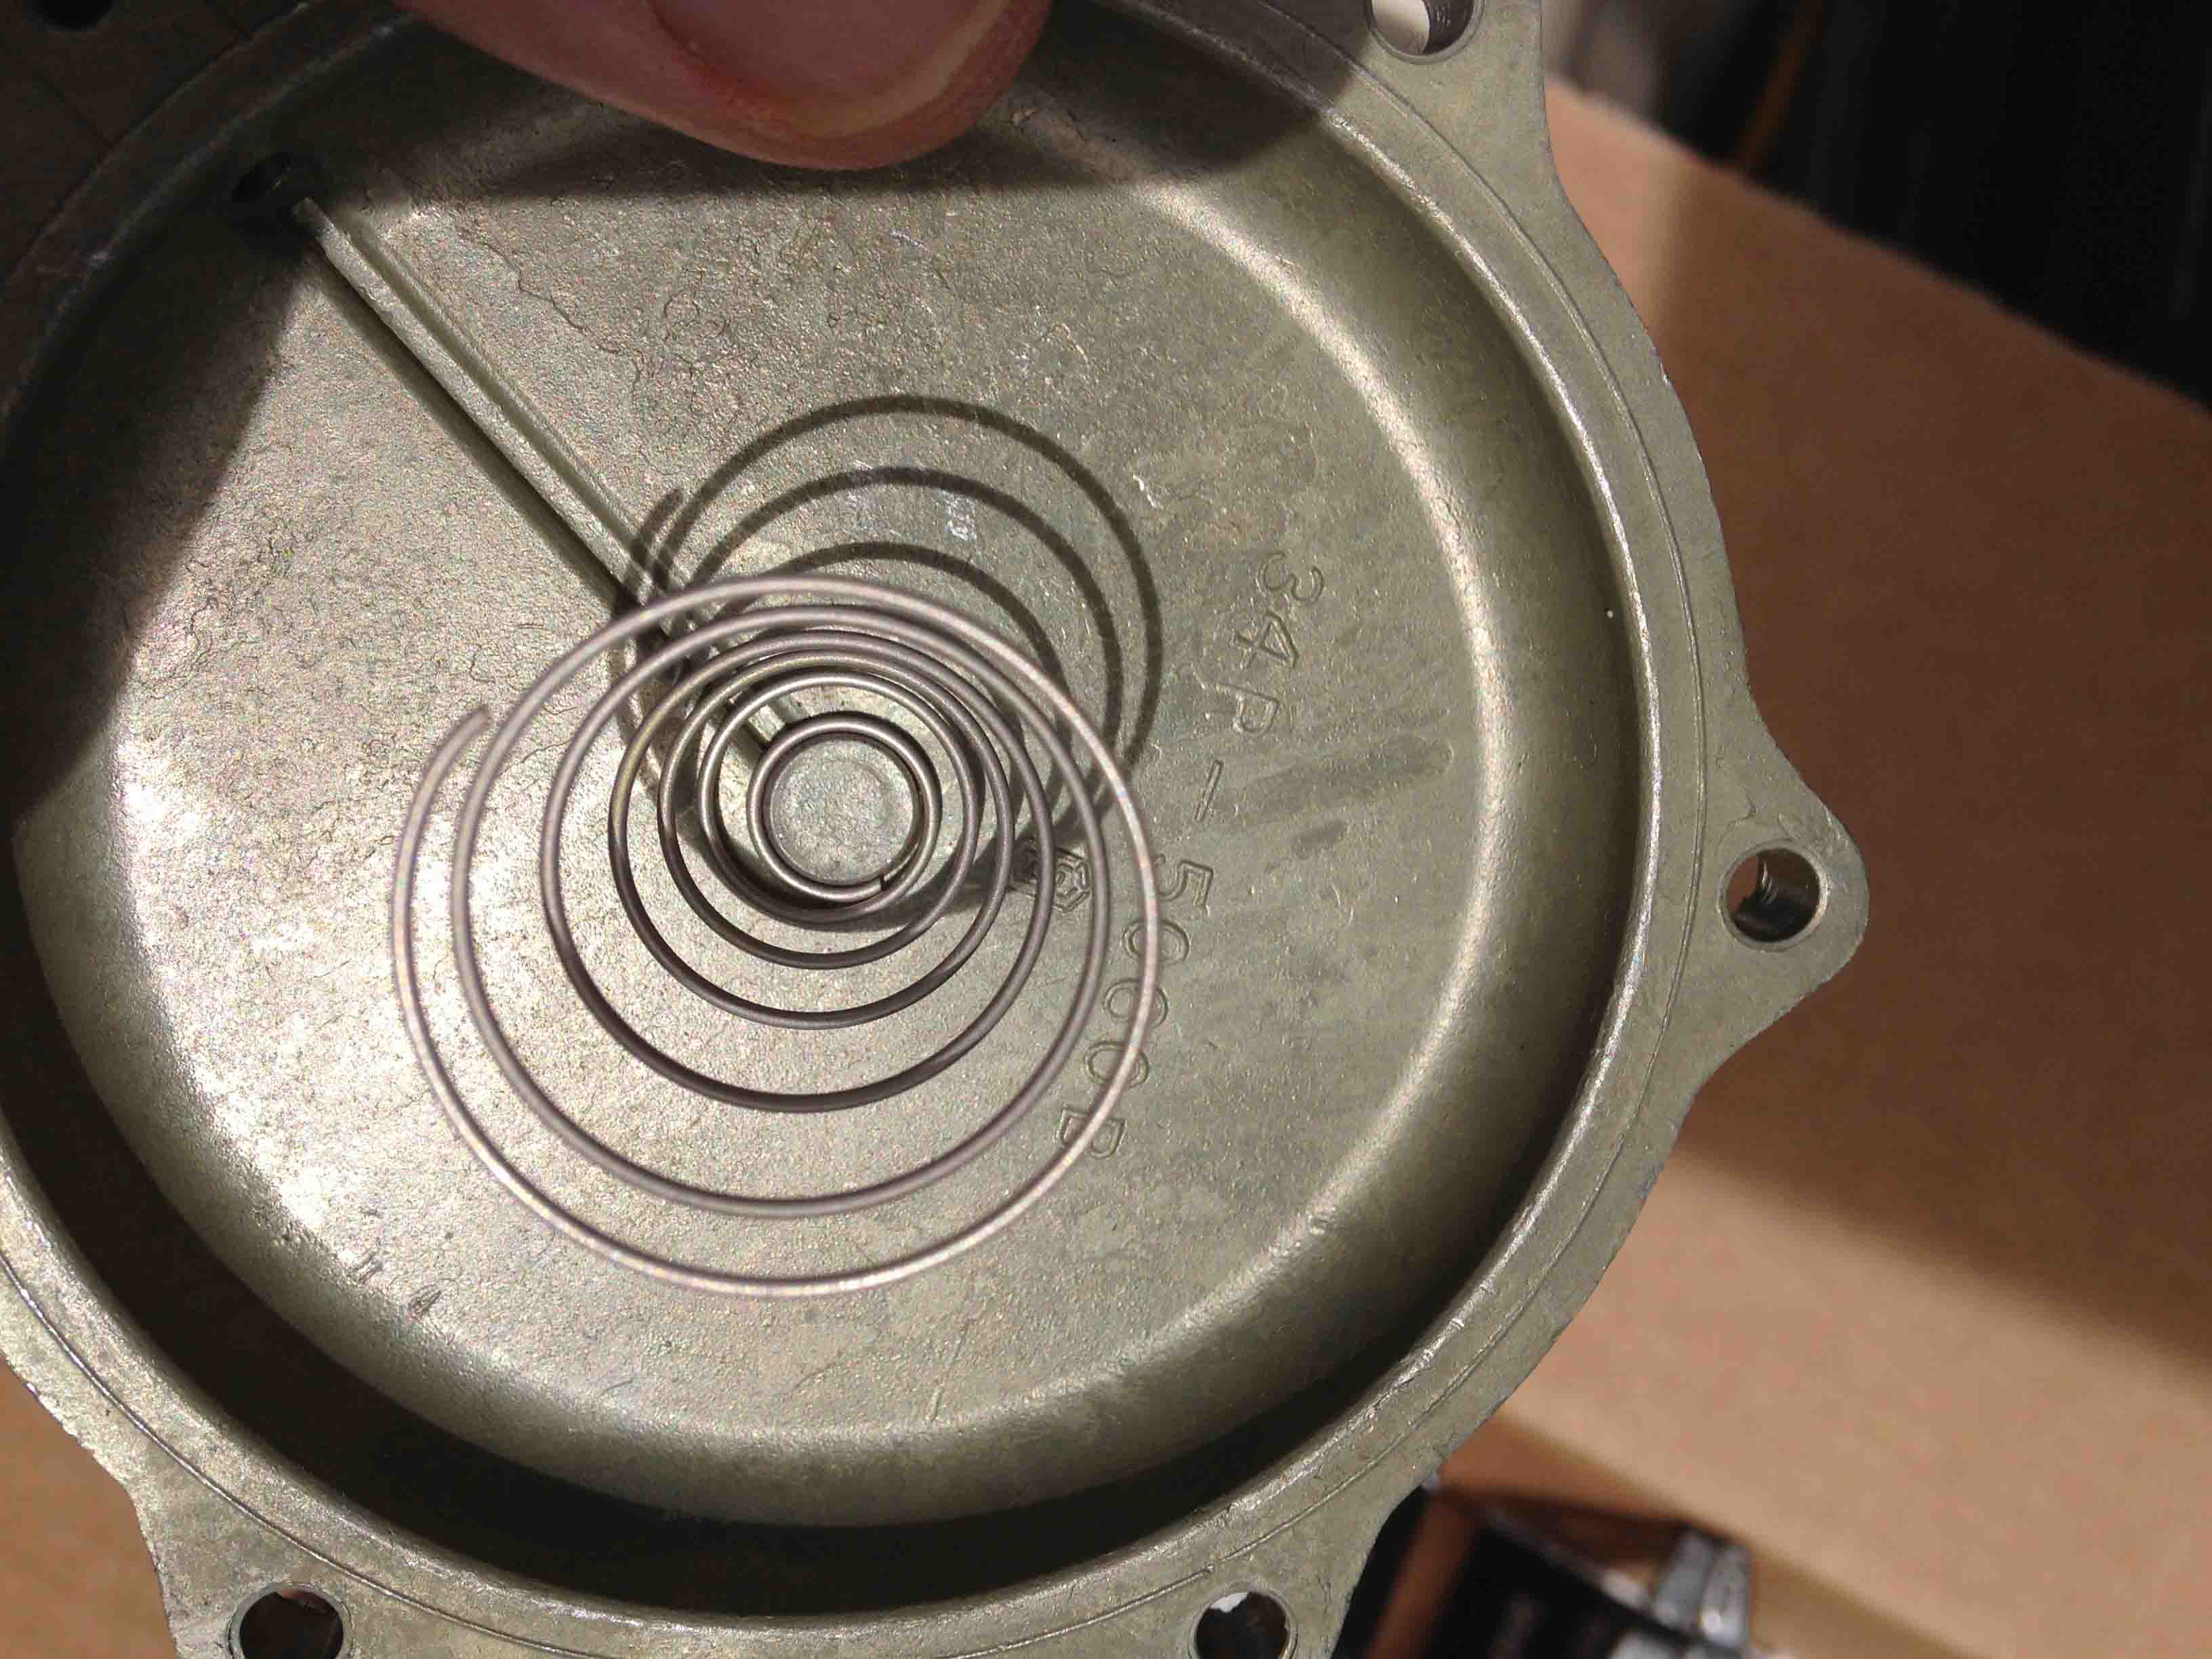
Also when putting the cover and spring back on, make sure the big point of the spring is seated on the metal disc (see below) and not on the rubber part of the diaphragm, otherwise it will damage and not work right.

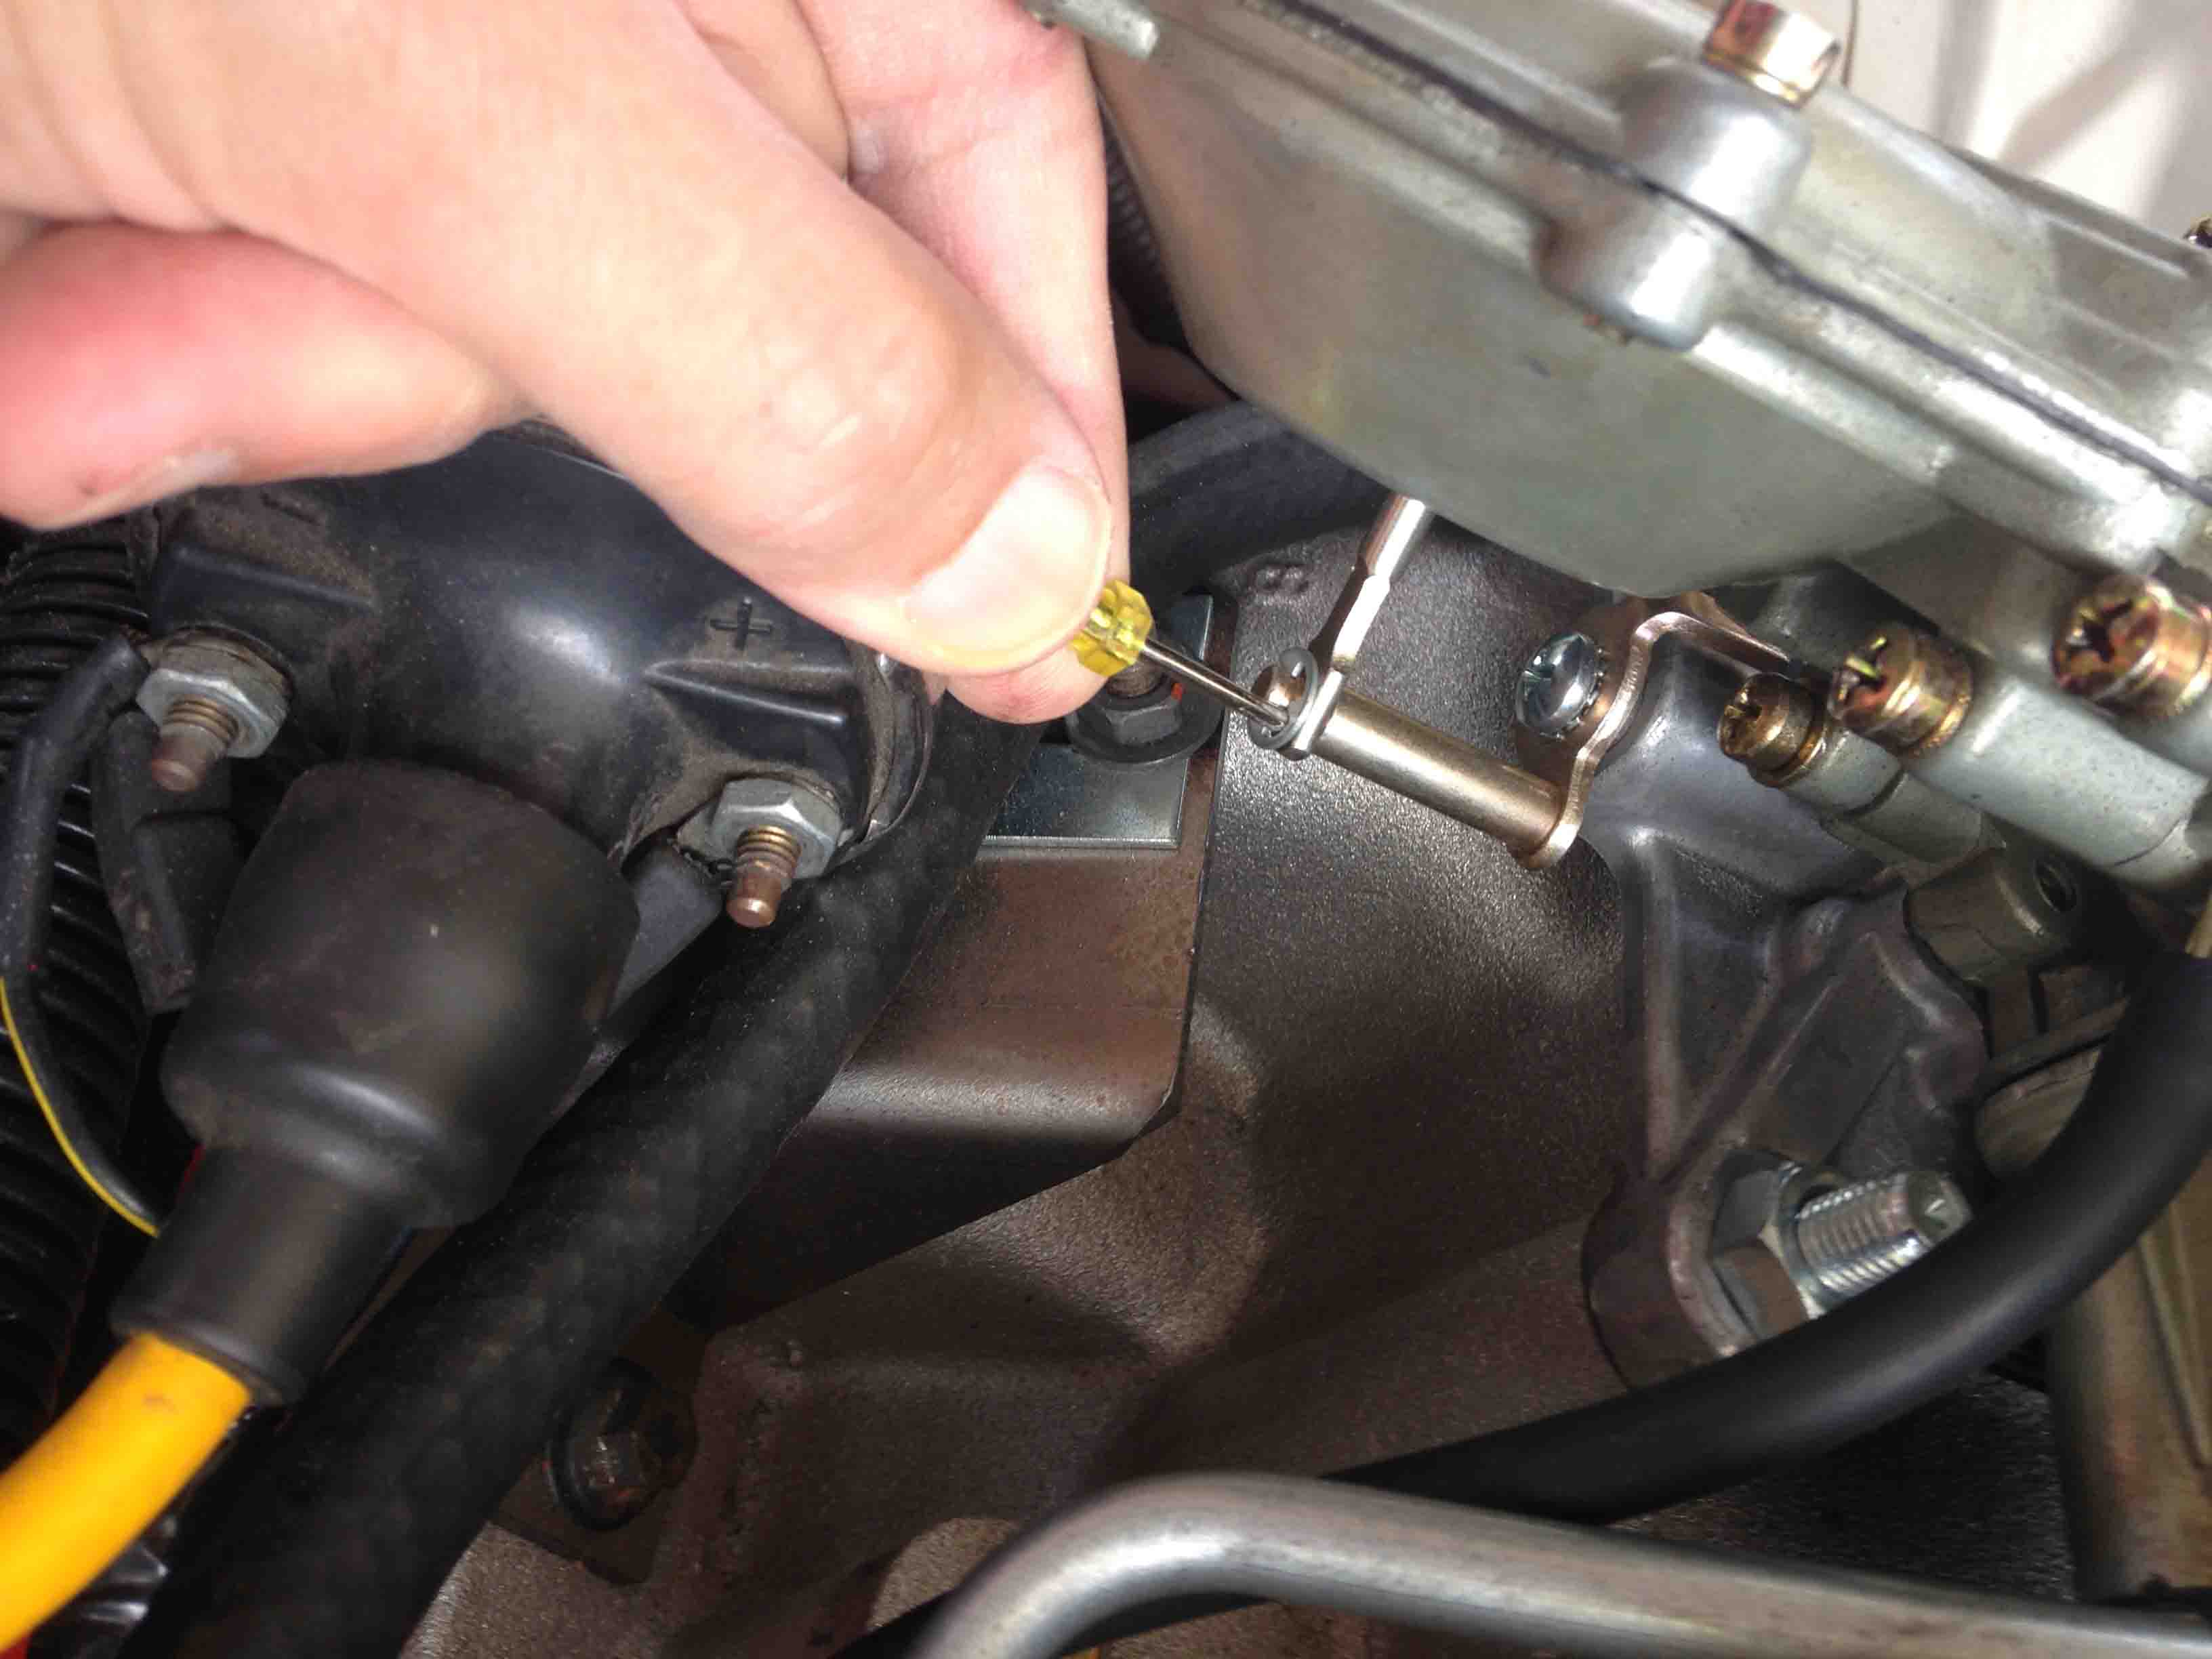
You don’t have to remove the whole housing, but I did, just to make sure that the air passage is free by gently depressing the vacuum rod and feeling the air on your cheek (see photo). AND if you do take off the housing, make sure the little cork gasket is okay where the air passage mates to the carb body.

REMOVING AND INSTALLING the SPRING CLIP (see below). The easy way to remove the spring clips on the rod is just use a tiny screw driver to lever pull them off the round shaft by sticking the tip of the screwdriver into the gap in the clip and then expanding the gap until the clip can be removed with your fingers.
To reinstall those clips, just use your fingers to snap them back into place making sure it is riding in the groove of the shaft.
The other reason you might remove the housing is that reinstalling the spring cover is a little easier if you don’t have to lean over your fender to do it. There are four screws that attach the vacuum housing to the carb body, there are a short pair and a longer pair. If you take a close look at your housing, you can tell which ones go where.

DRIVING IMPRESSION
Driving the Challenger, I experienced a smoother power band and that’s what I was looking for. I am unlikely to mess with it again unless I get it on a dyno. I still want to change the stock primary #62 jets to #66. I’m pretty sure that will make a positive difference and I want to find out if that will affect how hot my engine runs, but I should get a laser thermometer to check the temps for sure.
My engine is still popping as various speeds at the beginning of punching the gas peddle so I’ll address that on the next article.
I had adjusted the timing last month at 36 deg BTDC at 1500 RPM (based on Hemi George’s suggestion with my Mopar performance distributor) and I thought I fixed that, but still had some pop at low speeds, but now I get pops at low and highway speeds. I did check that the distributor clamp was tight. I’ll cover this popping problem on the next post… whenever I get to it.

See ya’all! You know, I am so busy I hardly have time to make these posts, but I just cram it into my schedule as I have time.
But hey!… I have got a
BONUS VIDEO for you, The DodgeKid goes to FACEBOOK... CLICK ON PHOTO TO GO TO VIDEO

Sorry to disappoint you but I did not spin a few donuts or wet down the parking lot with bleach for any wild burnouts.
Wouldn’t want anyone to get their hoody wadded up. I do love how George Bush calls it Facebooks.
When I left driving my Challenger, I did feel like somehow I was masquerading as one of the lucky gurus who made a killing on Facebook stock.
If you enjoyed this post, please LIKE SHARE COMMENT

The Dodge Kid in his youth about 1976.
Copyright © 2014 ChallenYee.com. TheDodgeKid.com All Rights Reserved.
